Oh So Eclectic Meets Thoughtful Banners

by Joanne James9. July 2017 20:00

Today I've a quick second post - you can see my earlier post for this week's new challenge over at The Paper Players here - with my card for this week's challenge over at The Challenge, which also happens to use the sketch I used for yesterday's card from the team over at The Global Design Project:

Image may contain: people sitting

I'm really enjoying playing along with the lovely ladies over at The Challenge again. I love those bright flowers and the striped arms of the chair worked perfectly with the sketch and inspired me to create something clean and modern - take a look:


I used my Oh So Eclectic stamp set and co-ordinating Eclectic Layers Thinlits Dies for my flowers, offsetting the layers, and combined with some stripes in black on my white card base, courtesy of the Thoughtful Banners set, which I used for my sentiment too. I added a trio of Berry Burst glittery enamel dots to finish - love these!

Here is the visual summary of the key products used on today's project for you to pin for easy reference:


You can see all of my 'How To' summaries on my 'How To - Tips and Techniques' Pinterest board in case you've missed any. 

I really like this card and prefer it to my first GDP attempt. Funny how sometimes an inspiration photo can make all the difference to your creative direction. I'll be back tomorrow with another project. Until then, happy stampin'!


Stampin' Up! Supplies Used:

Table built using Product Table Builder by The Crafty Owl - Independent Stampin' Up! Demonstrator.

Oh So Eclectic Washi Tape Card

by Joanne James8. July 2017 21:30

Today I've a quick post as I'm playing catch-up to share a quick card that I made using this week's sketch over at The Global Design Project:

I considered all those lines and came up with this card using the new Basics (Pack 3) washi tape:


Super simple, I inset my stripes and used my top mat to frame them, then added a layered flower and sentiment using the Oh So Eclectic stamp set and co-ordinating Eclectic Layers Thinlits Dies. Washi tape is so useful for easy cards and I love that the new ones come in shades of colour across one area of the colour spectrum and are of differing widths. 

I've been making lots of samples using this set in readiness for my technique class that features it next week so have lots more where this came from, including another one using the same sketch that I'll share tomorrow after my Paper Players post.

Here is the visual summary of the key products used on today's project for you to pin for easy reference:


You can see all of my 'How To' summaries on my 'How To - Tips and Techniques' Pinterest board in case you've missed any. 

I'll be back tomorrow with my card for this week's new challenge over at The Paper Players and another project. Until then, happy stampin'!


Stampin' Up! Supplies Used:

Table built using Product Table Builder by The Crafty Owl - Independent Stampin' Up! Demonstrator.

Sponged Star Of Light Christmas Card In July!

by Joanne James5. July 2017 20:40

I'm having a busy week as the youngest of the James Juniors is on the last week of the school year this week so blogging is having to take something of a back seat whilst I get other work things in order and prepare for the long summer break! I did find time yesterday to make a card for a couple of challenges that I wanted to share with you today. Yes, another scorcher here in the UK today and I'm sharing a Christmas card! My original inspiration was this rather perplexing sketch over at CAS(E) This Sketch:


It's been swirling around in my creative subconscious for days and I was keen to play along as I love their sketches but when combined with this week's challenge over at Stamp Ink Paper I finally found my answer  - take a look:


My 'Star of Light' stamp set to the rescue! This stamp set has to me one of my most-used Christmas sets last year and worth it for that fabulous swirl of trailing sparkle alone in my opinion. Some background sponging and a white glimmer star, cut using my Starlight Thinlits Dies, completes the picture. I even remembered to take a photograph of the inside to show you, so that you can see how the greeting follows on:

A card that took longer to execute than to explain, but I guess that's the beauty of the creative process! If you don't have this set, I can definitely recommend it; buy both the stamp set and co-ordinating thinlits this month and you will not only be able to get a head start on your Christmas cards, you'll get a £5 voucher to spend next month too!

Here is the visual summary of the key products used on today's project for you to pin for easy reference:


You can see all of my 'How To' summaries on my 'How To - Tips and Techniques' Pinterest board in case you've missed any. 

I've a busy couple of days ahead but promise I'll be back soon with another project. Until then, happy stampin'!


Stampin' Up! Supplies Used:

Table built using Product Table Builder by The Crafty Owl - Independent Stampin' Up! Demonstrator.

Bonus Days Are Back And News Of A Great New Recruit Offer For July

by Joanne James3. July 2017 19:00

Today I'm here with a post that should have gone live on Saturday but appears to have had some scheduling issues - but it's news that's too good not to share! First things first: BONUS DAYS ARE BACK! Do you remember this promotion from last year? It was so successful, Stampin' Up! have decided to repeat it this year.

For every £45.00 you spend between 1 July and 31 July (before delivery), you’ll get a £4.50 Bonus Days coupon that you can use between 1 and 31 August . Since our new annual catalogue has only been out a month ago, you will probably still have some items on your wish list and this is a great opportunity to shop from it and make savings when you shop again in August with your coupons!

There are some details in terms of small print that you need to take note of, as follows: 

  • Promotion period: 1–31 July 2017
  • Redemption period: 1–31 August 2017
  • An email address is required to participate in this promotion; Bonus Days coupon codes can only be delivered via email.
  • It is strongly recommended that you both save emails containing their Bonus Days coupon codes AND write down the coupon codes in a safe place. Codes cannot be resent if the email is lost, and lost codes cannot be recovered.
  • Bonus Days coupon codes can be redeemed for any product, excluding Starter Kits.
  • There is no limit to the number of coupons you can receive per order or throughout the duration of the promotion.
  • There is no limit on the number of coupons you can use on an order during redemption.

This is such a great promotion - I get to buy even more from my wishlist, then as a demonstrator I can use my coupons in August against my pre-order from the new Autumn-Winter catalogue - woohoo!  For customers there is also going to be the early release of a new exclusive Christmas bundle called 'Carols Of Christmas' for sale from 1 August, so you could get started early with some  and use your coupons to get a great deal!

Don't forget if you are placing an order online to also include this month's hostess code JG7PHQKR to receive a free thank you gift from me too!

Here is a sneak peak of the exclusive bundle available from 1st August - you can choose to spend your coupon on this bundle or any other items of your choice!

 L2_Carols_Xmas_Demo_Jul0117_ENG

Can't wait until 1st August to get your hands on this great new stamp set? Well, there's more! All of us at Stampin' Up! miss Christmas so much that we decided to have another one right now with a fantastic offer for anyone out there who would like to join my team this month! 


Between 1 and 31 July, every new recruit gets an Essentials Gift Pack (worth 63,50 € / £47) plus the Carols of Christmas Stamp Set (worth 24 € / £18) from the upcoming autumn/winter catalogue added to their starter kit for free! This means that new recruits will get products and business supplies worth a whopping 262,50 € / £195 for just 129 € / £99 with free shipping!

Here's what's included in the Essentials Gift Pack:


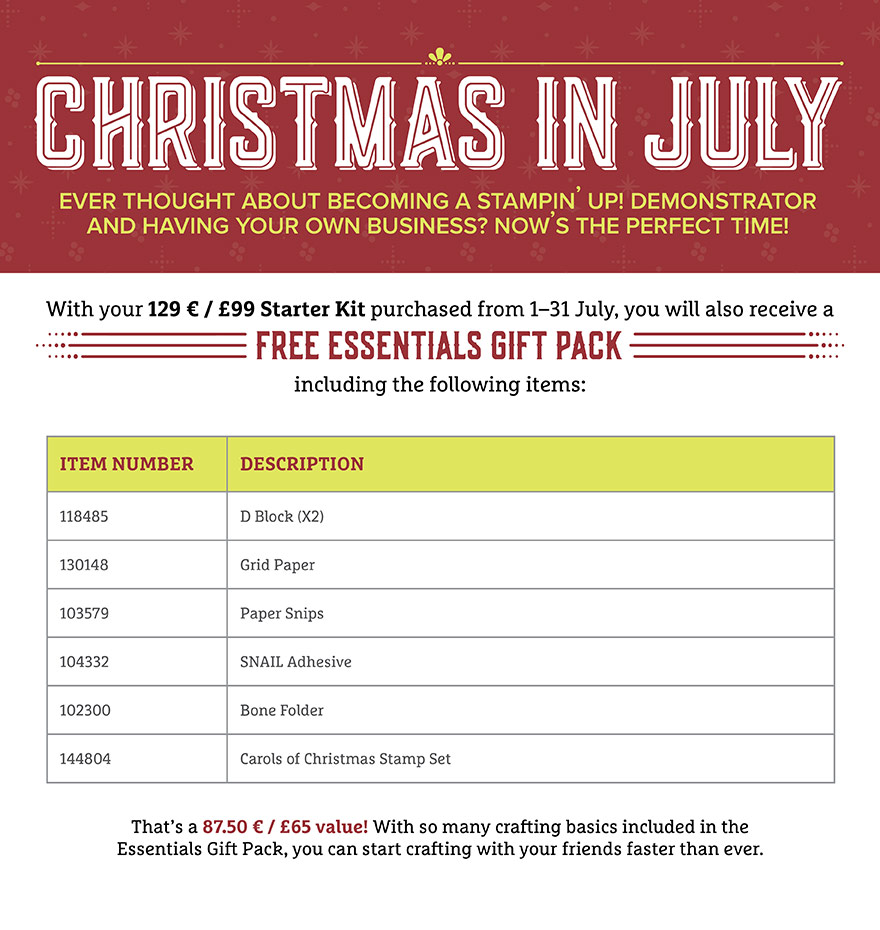
This is a great collection of basic items that along with your starter kit will enable you to hit the ground running and easily run your first event and share your love of stamping with a friend or two. 

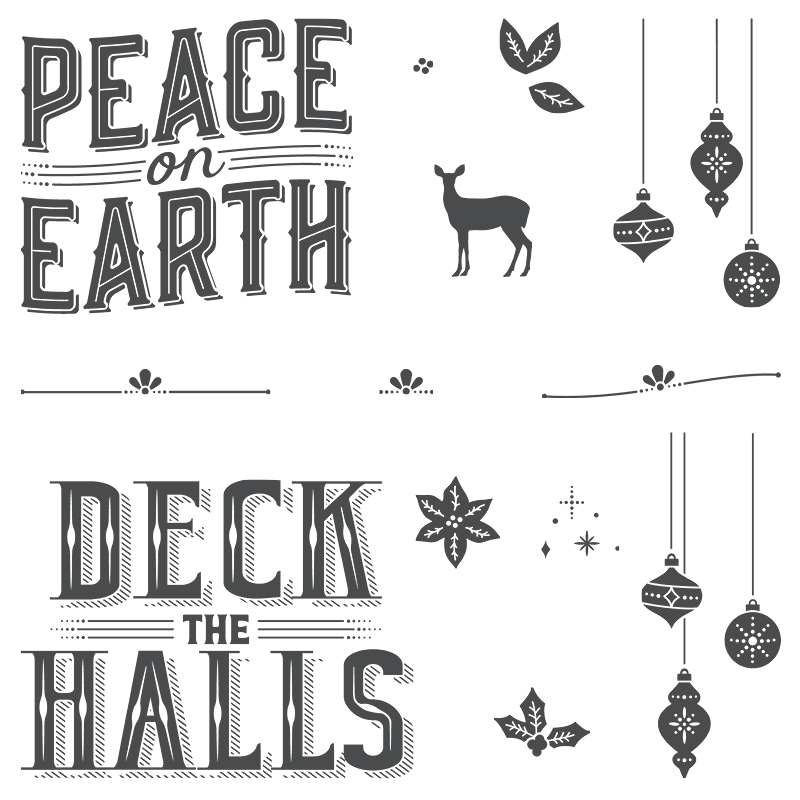
Here's a close-up of the Carols of Christmas stamp set:


There has never been a better time to join Stampin' Up!: we are at the beginning of a new quarter, so you will have a full 6 months before you need to meet your first quarterly minimum, and the run up to Christmas is a great time to build a business if you're looking to earn or boost your income doing something that you love. I am always keen to hear from people thinking about joining my team - why not give me a call to discuss what it could mean for you?

That's all from me today; happy shopping, knowing that you get a spending spree next month too!


Lovely Words Thinlits Dip Embossed Friend Card

by Joanne James30. June 2017 07:00

Before I share today's project, I just want to give you a reminder that today is the final day for the 'We <3 Hosts' promotion where you can earn an extra £30 of rewards with an order of £300 or more. If you would like to refresh your memory on the details, you can find them here. You can place your order online or alternatively feel free to call me if you'd like to place your order over the phone. It's also the final day for this month's hostess code - if you are placing an order online for between £25 and £150, don't forget to add the code B3C3DUB6 to receive an extra thank you in the post from me.

Today I'm sharing another of the cards I designed for one of my recent team training meetings - you can see one of our other makes hereThis one features probably my favourite of the new in-colours, lemon lime twist:


Here's the low-down on today's card:

Lovely Words For A Friend - I used the Lovely Words Thinlits for the 'friend' diecut on my card, snipping it away from the oval so that I could use it standalone. These are such great thinlits with so many ways they can be used to create interest on your cards. 

CASE The Kit - The design of my card was inspired by one of the cards in the new 'Hello Friend' heat embossing product kit on page 16 of the new annual catalogue. One of the business topics we discussed at team training was how Stampin' Up!'s kits can benefit your business and our make and takes all included opportunities to practice the techniques and skills required to demonstrate with this kit effectively. There's nothing like being prepared and I'm sure my team would agree that team training is great for this kind of thing. Check out this video from the home office team that shows you the Hello Friend Kit in more detail:

Stampin' Up!'s kits are great for a crafty get-together with friends; if you're reading this and would like to arrange one with me to guide you through the fun techniques, then do get in touch. 

Copper Trim - To tie in with the dip-embossed copper of my diecut sentiment, I finished my card with a length of the new copper trim. This is a really versatile trim option for cards, home decor and gifts; silky smooth, you can use it like ribbon as it ties beautiful bows, but you can also split it and unravel it and use it like net, or even stretch it and use it as a cover for small items such as chocolates (a little like a sock!) 

Here is the visual summary of the key products used on today's project for you to pin for easy reference:


You can see all of my 'How To' summaries on my 'How To - Tips and Techniques' Pinterest board in case you've missed any. 

Enjoy your day and I'll be back tomorrow with another project. Until then, happy stampin'!


Stampin' Up! Supplies Used:

Table built using Product Table Builder by The Crafty Owl - Independent Stampin' Up! Demonstrator.

Happy Birthday Gorgeous Catalogue CASE Surprise Pop-Up Card

by Joanne James29. June 2017 07:00


Today I'm sharing another of the cards from my recent technique class featuring the Happy Birthday Gorgeous bundle. The outside is a CASE (copy and share everything) of the card on page 76 of the annual catalogue:


Here's the low-down on today's card:

Hip Hip Hooray - Today's card again features the 'Happy Birthday Gorgeous' stamp set, this time focusing on the balloons rather than the flowers for decoration, and also highlights the Happy Birthday Thinlit. These items are available as a bundle and whilst the thinlit is proving popular as a standalone item with many of my customers, the stamp set really is worth a look: flowers and balloons that have universal appeal and lots of great birthday sentiments, some of which also co-ordinate with the classic label punch, that I've used for the 'hip hip hooray' on my card front today. Besides, with a 10% discount when you buy both items, you are also getting even more value from your purchases - just sayin' :-)

A Happy Birthday Surprise - So you might be thinking I've lost the plot, as I mentioned above I was featuring both items in the bundle and the Happy Birthday Thinlit is no-where to be seen. Well, look what awaits when you open the card:


There it is! I made an easy pop-up mechanism so that as the recipient opens the card, they get a big, bold birthday message - how fun is that? This is so easy to do: you just need to make a couple of slits a few centimetres in from each side along the central fold and add a couple of additional scorelines in between them, then adhere the base of your diecut to the pop-out section. 

A Hint Of Fancy Foil - Lastly, for a little pizzazz I added a few strips of the super-shiny Foil Frenzy cardstock with the Tangerine Tango pattern to both the outside and inside of my card. I will be using most of mine for boxes and packaging as it is super sturdy, although it's worth keeping any offcuts to use on cards as a little goes a long way.

Here is the visual summary of the key products used on today's project for you to pin for easy reference:


You can see all of my 'How To' summaries on my 'How To - Tips and Techniques' Pinterest board in case you've missed any. 

Enjoy your day and I'll be back tomorrow with another project. Until then, happy stampin'!


Stampin' Up! Supplies Used:

Table built using Product Table Builder by The Crafty Owl - Independent Stampin' Up! Demonstrator.

Happy Birthday Gorgeous Square Double Z Joy Fold Floral Wreath Card

by Joanne James28. June 2017 07:00

Today I'm sharing one of the cards that I made with the ladies in my technique class last week featuring the Happy Birthday Gorgeous stamp set that is perfect for the current keyword theme over at The Challenge and features 4 out of 5 of the keywords:


Can you identify which four feature on today's card? Here it is:


Here's the low-down on today's card:

Happy Birthday Gorgeous Floral Wreath - The minute I saw the 'Happy Birthday Gorgeous' stamp set, I knew that the combinations of flowers, leaves and seed heads would lend themselves to a floral wreath. I stamped a basic wreath shape with the leaf stem, then fussy cut a variety of individual leaves, flowers and seed heads to embellish my wreath. This took a little while, but I hope you'll agree it was so worth it - I just love this card! 

A Fancy Fold - The card base itself is a square double z joy fold card, measuring  5 1/2" square when folded. A fancy fold is a great way to add interest to a square card and is really easy to make. The card base measures 11" x 5 1/2", scored at 2 3/4" and 5 1/2" on the long side. The smaller z fold panel measures 9 1/4" x 3 3/4" and is also scored at 2 3/4" and 5 1/2". It also allows for a fancy ribbon bow - here I've used the lovely Fresh Fig finely woven ribbon.

Petal Garden - My colour scheme was inspired by my paper choice for the rear panel of my card, which I took from the Petal Garden designer series paper stack. There are some gorgeous patterns in this pack, along with an alternative Calypso Coral colourway too. Here the rambling roses of my chosen pattern provided the perfect backdrop to my floral wreath. 

Here is the visual summary of the key products used on today's project for you to pin for easy reference:


You can see all of my 'How To' summaries on my 'How To - Tips and Techniques' Pinterest board in case you've missed any. 

So - flowers, bright, birthday and square were my four - check out the design team cards over at The Challenge to see how they were inspired by the keywords.

Enjoy your day and I'll be back tomorrow with another project. Until then, happy stampin'!


Stampin' Up! Supplies Used:

Table built using Product Table Builder by The Crafty Owl - Independent Stampin' Up! Demonstrator.

Banners For You Embossed Stars and Stripes

by Joanne James27. June 2017 14:00

Today I'm sharing a card with a patriotic vibe which is perfect for the current challenges over at Fusion and SUO Challenges:


Ben needed a card for one of his school friends who is about to leave the UK and go to live in America, so a little stars and stripes were the order of the day:


Here's the low-down on today's card:

Textured Stars and Stripes - I got my textured embossing paste out again for this card and using two retired stencils, in turn created my stars and stripes design. I love the depth the embossing paste gives to the overall finish and is really different to any of my previous patriotic designs. This is the third card featuring embossing paste I've shared in recent days and I'm having lots of fun with it. If you would like to learn more and get 'hands on' with this fun new product, it will be featuring in my upcoming technique class featuring the Oh So Eclectic Suite on 11th July - read more about it here and get in touch by the weekend if you'd like to book a place. The lovely people at Stampin' Up! have also made a short video to show easy embossing paste is to use - check it out here:

Get Glossy - I wanted a shine to contrast with the texture of my stars and stripes, so used glossy cardstock for my background and simply swiped my Real Red and Night of Navy ink pads in turn diagonally across my card base and waited for this to dry before adding the embossing paste. I love the shine this adds to the colour, although must confess it did cause the red to bleed through my embossing paste more than I would have liked, even with a second application, I think maybe because it is less absorbent than regular cardstock. 

A Banner For You - I finished my card with a two-tone double banner created with the 'Banners For You' stamp set and cut it out with the co-ordinating Bunch of Banners framelit and reversed the colours to contrast with my flag-inspired background.

Here is the visual summary of the key products used on today's project for you to pin for easy reference:


You can see all of my 'How To' summaries on my 'How To - Tips and Techniques' Pinterest board in case you've missed any. 

I'll be back tomorrow with another project. Until then, happy stampin'!


Stampin' Up! Supplies Used:

Table built using Product Table Builder by The Crafty Owl - Independent Stampin' Up! Demonstrator.

Feathered Friends For Stampin' Up! We Love Our Hosts Blog Tour

by Joanne James25. June 2017 23:00


Welcome to my second post of the day! You can read my earlier regular Paper Players post here. I was invited by the lovely Janet Wakeland of Remarkably Created to participate in her We Love Hosts Blog Tour and jumped at the chance. This month's 'We <3 Hosts' promotion, where you can earn an additional £30 in Stampin' Rewards when you place an individual order for or reach qualifying party sales of £300 or more during the month of June, is a great opportunity to make a dent on your wishlist and pick up extra host rewards into the bargain. You can use these rewards to buy anything you like, including exclusive hostess-only stamp sets. There are six fabulous new sets just for hosts in the new annual Stampin' Up! catalogue: Background Bits, Dare To Dream, Feathery Friends, In The City, Tranquil Tulips and You're Delightful. You can see each of them below:

Table built using Product Table Builder by The Crafty Owl - Independent Stampin' Up! Demonstrator.

Today's blog hop features these exclusive hostess sets and contains a ton of creative inspiration and ideas of how they can be used on your papercrafting projects. I am using the Feathery Friends set today, a delightful combination of line drawn folk-art inspired birds and flowers. This set is perfect for colouring, so I decided to use it to create a little kit for 'colouring on the go', similar to one shared with us at Onstage Live in Amsterdam back in April - take a look:

I took a full-size wood mount stamp case and firstly created a custom cover insert, using a piece of Whisper White cardstock measuring 11 1/4" by 7 1/2" and scored on the landscape side 5" in from each side:


I stamped a whole bunch of Stampin' Up! notelets in varying designs using the Feathery Friends stamps and Archival black ink, then simply put them in the box with a pack of Stampin' Up! Watercolour Pencils and a blender pen to complete my kit:


This is just perfect to keep in my handbag or the car, so that I have something creative to do in those precious free minutes when I'm sat in the school carpark at pickup time or when I'm sat in the waiting room at the doctors or dentists. I find colouring so relaxing and having pre-stamped all my cards, I can both enjoy the time out and do something productive at the same time. The sentiment in this set is great for little notes to send to my team and the cards I left sentiment-free will work for all kinds of occasions.

The blender pen is a must-have to give a smooth finish to your colouring - I took a quick picture of one of the cards that I coloured already just to show you what a lovely finish you get when you use it with the watercolour pencils:


I hope you like my project showing just one of the ways you can use the Feathery Friends hostess set. There is still time to host a party or place a qualifying order to take advantage of this promotion - either place your order online via the product links below or alternatively call me or drop me a line - I would be happy to help. In addition, remember you also have the option to use hostess rewards earned towards the purchase of a Stampin' Up! starter kit; if this is something you'd like to know more about, I'd love to have a no-obligation chat with you about joining my team and the benefits of becoming a demonstrator.


To see more great projects using Stampin' Up's exclusive host reward sets, you can click forward to go to the next post in the hop, Stacy Lane, or if you missed it you can click backward to visit the previous blog, belonging to Laura Milligan:


If you lose your place, the complete list of participants can be found below: 

Exclusive Host Rewards Stamp Set Blog Tour

1. Nancy Gauthier   
2. Stamp-Patty's - Patty Chenail   
3. Debbie Henderson   
4. janet wakeland   
5. Alison Solven   
6. Laura Milligan   
7. Joanne James   
8. Stacey Lane   
9. Jenn Gulch   
10. Susan Timchack   
11. BJ Peters   
12. Carol Payne   
13. Amy Koenders   
14. Liz Holloway   
15. Katina Martinez   
16. Ginger Rabesa   
17. Jen Tribue   
18. Annette Sullivan   
19. Helen Read   
20. Miranda Mols   
21. Katrina Wolfe   
22. Karen Hurley   
23. Carole Anne Patterson   
24. Libby Dyson   
25. Chris Slogar   
26. Sherry Roth   
27. Fiona Stanton   
28. Kristina Rees   
29. Mary Dredge   
30. Georgia Giguere  

I'll be back tomorrow with another project; until then, happy hopping!


Stampin' Up! Supplies Used:


Table built using Product Table Builder by The Crafty Owl - Independent Stampin' Up! Demonstrator.

Pattern Party Copper Embossed Medallion

by Joanne James24. June 2017 10:44

It's the weekend and an activity-filled one here in the James household! Today I'm sharing a card for this week's challenge over at Freshly Made Sketches where the lovely Karren has an interesting sketch to work with:

I'm on a bit of a roll with my FMS cards lately -thank you Kim for choosing me as your Princess of Clean last week (if you missed it, you can see that card here) so thought I'd try my hand with Karren's sketch. I've been playing with embossing paste this week and this sketch was perfect for something I wanted to try - take a look:


Here's the low-down on today's card:

Pattern Party - The sweeping arch on the right-hand side of Karren's sketch was perfect for creating a textured design using my embossing paste and this medallion-inspired design with one of the Pattern Party Decorative Masks. The decorative design of the mask was such that I could use it to make my textured panel a real feature of my card.

Metallic Medallion - There is lots you can do with embossing paste: you can use it 'neat', colour it with re-inkers and also add colour using sponge daubers or Stampin' Spritzers. Here though I decided to see what it would look like if I sprinkled my wet embossing paste with copper embossing powder and heat set it to give a shiny metallic finish. This was really easy to do and whilst it doesn't give a perfect finish, it's easy to get pretty even coverage and it adds additional texture and interest as well as shine to the card. Along with the copper foil mat, this card has a real luxurious feel - I love it!

Dapper Denim Ombre - I used a piece of Dapper Denim ombre paper from the Color Theory designer series paper stack for the background to my textured medallion. It adds just enough additional interest without detracting from the star of the show. I added a circular sentiment from the Eastern Beauty stamp set to finish - it's in broadly the right place when compared to Karren's sketch, but I have used a little artistic licence here as it worked for my card.

Here is the visual summary of the key products used on today's project for you to pin for easy reference:


You can see all of my 'How To' summaries on my 'How To - Tips and Techniques' Pinterest board in case you've missed any. 

If you liked this card do pop back over the next few days, as I have additional examples of cards I've made using embossing paste and a variety of different techniques. Enjoy your day; I'm off to spend the rest of mine at the swimming pool (spectating rather than swimming!) and I'll be back tomorrow with another project for this week's new challenge over at The Paper Players. Until then, happy stampin'!


Stampin' Up! Supplies Used:

Table built using Product Table Builder by The Crafty Owl - Independent Stampin' Up! Demonstrator.

Mini Catalogue

BROWSE THE CATALOGUE

The mini catalogue is now live! Read and download your copy here.

Shop Online

Access my online shop 24 x 7, 365 days of the year:

Current April hostess code:

VDKNV7BH

Shop Online

Join My Team

It's always a great time to join Stampin’ Up! New team members can get £130 worth of products for only £99 + free business supplies + free shipping + all the fun being a part of Stampin’ Up! Stampin' Up! has something for everyone: join my growing team and benefit from my support to enjoy Stampin' Up! however you choose.

If you're interested, call me for a chat to understand how I can help you realise your goals. Alternatively, if you have already decided to sign up and you just can't wait, please click here for the link to the online form where you can sign up and order your starter kit right away! 

Latest Kit!

Stampin Cut and Emboss

The Rock Legend Kit has all you need to make 8 cards with coordinating envelopes. Along with the new Panda Friends Kit, both are available from January 4th for just £14 each - get yours here!

2023-24 Annual Catalogue

BROWSE THE CATALOGUE

Click on the catalogue for a full list of current SU! supplies - if you would like to order any of the items featured, please drop me a line at [email protected] or give me a call on 07773 421446 - I'd be happy to help.

New Online Exclusives

There are new products available exclusively in the online store from 5 March - check them out here.

About Me

Hi I'm Joanne and live in Northampton and when I'm not looking after my husband and two beautiful children, am an avid crafter with a passion for all things Stampin' Up!

I must confess that I have never been a big rubber stamper - until I discovered Stampin' Up! that is. I love the fact that I can get such great results with co-ordinating stamps, inks, papers and punches - the possibilities are endless! Join me on my stamping journey as I share the things I love and be inspired to create amazing things yourself!

Follow Me

Monthly Newsletter

Box Builder

Click the button above to use Box Buster to create your custom box design using the Envelope Punch Board!

Kits Collection Now Available!

Stampin Cut and Emboss

The new Kits Collection from Stampin' Up! is now available!

Click here to see the current kits available and order yours online today.

I Design For


Stampin' Up Stuff

This is my personal blog and is not endorsed by Stampin’ Up! I hope you find it a plentiful source of ideas and personal inspiration but please don't copy my designs for contest submission or use for classes, publication or sale without express permission.