Heartfelt Wishes in Shades of Green

by Joanne James15. March 2021 14:00

Happy Monday everyone - another Monday, another week! This week includes St Patrick's Day, so there are naturally lots of challenges that feature either the colour green, the theme of luck, shamrocks and generally all things Irish around at the moment! So today I'm sharing a card inspired by a few of them:


I was inspired by the sketch and photo over at Inspired By this week, and the lovely ladies over at Just Add Ink are asked us to create with shades of green. At The Card Concept the theme is the 'Luck of the Irish'. Whilst I don't know anyone who celebrates St Patrick's Day card and would appreciate a card, it's always a good opportunity to create a good luck card or something in green - such a soothing colour. I decided to make a clean and simple card that has a play on the word 'luck' that is perfect to send to a friend - take a look:


Here's the low-down on today's card:

Shades of Green - I masked off my Basic White cardstock panel and used my chosen shades of green - Soft Sea Foam, Granny Apple Green, Call Me Clover and Shaded Spruce - with my blending brushes to create a trio of columns of blended ombre greens, deepening in colour towards my sentiment and lucky clover/shamrock at the base. There is something so calming about shades of green used in such a simple way I think - don't you agree? 

Heartfelt Wishes - The sentiment I used on my card today comes from the 'Heartfelt' stamp set and is the perfect play on the word 'luck' to show appreciation for someone's friendship and seemed to fit the theme perfectly, with a card that I could actually send to someone! 

Pierced Blooms Lucky Clover - I created my shamrock or lucky four-leaf clover from a five-petal floral die from the Pierced Blooms Dies. I simply snipped away part of one of the petals to leave me with 4 leaves and a stem:


I finished my clover with a gold faceted gem to add an extra detail to my focal embellishment (from my collection rather than the pot at the end of the rainbow I hasten to add!)


Here is the visual summary of the key products used on today's project for you to pin for easy reference:


You can see all of my 'How To' summaries on my 'How To - Tips and Techniques' Pinterest board in case you've missed any. 

Enjoy your day; I have just received a '911' from one of the James Juniors imploring me to bring a snack at school pickup - clearly lunch was lacking today and I think my growing 13 year old son has hollow legs at the moment! Whatever did we do before Whats App??! So off to sort before I head out on the school run! I'll be back tomorrow with my card for this week's new challenge over at CAS Colours & Sketches. Until then, happy stampin'!


Stampin' Up! Supplies Used:

Table built using Product Table Builder by The Crafty Owl - Independent Stampin' Up! Demonstrator.


Woodland Wonder Concertina Birthday Card TTT104

by Joanne James11. March 2021 18:00

It's Thursday and time for a new challenge over at TicTacToe! It's the turn of Team X to host this week and I have the honour of being the featured designer this week. This is the fun board that we are playing along with: 


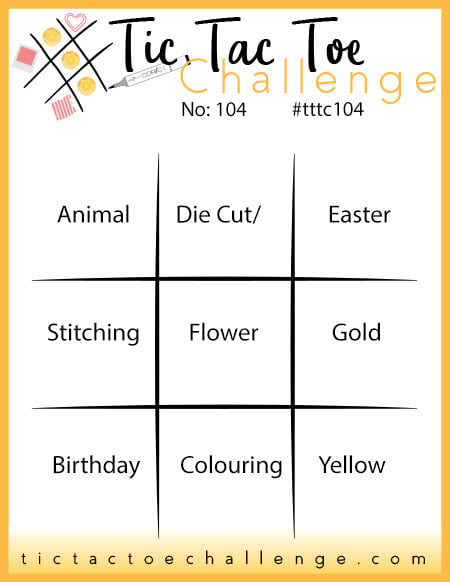
Lots of options for you to create with this one! I went down the first column with animal, stitching and birthday for a fun card with a difference today - take a look:


Here's the low-down on today's card:

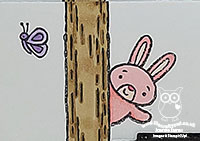
Woodland Wonder - I don't have any really little people in my life, however I couldn't resist the Woodland Wonder stamp set! In addition to birthday cards, it's also great if you need to make a card from lots of people or even if you use elements of the set for a different purpose - that pink bunny could totally be going on an Easter egg hunt, right?! 

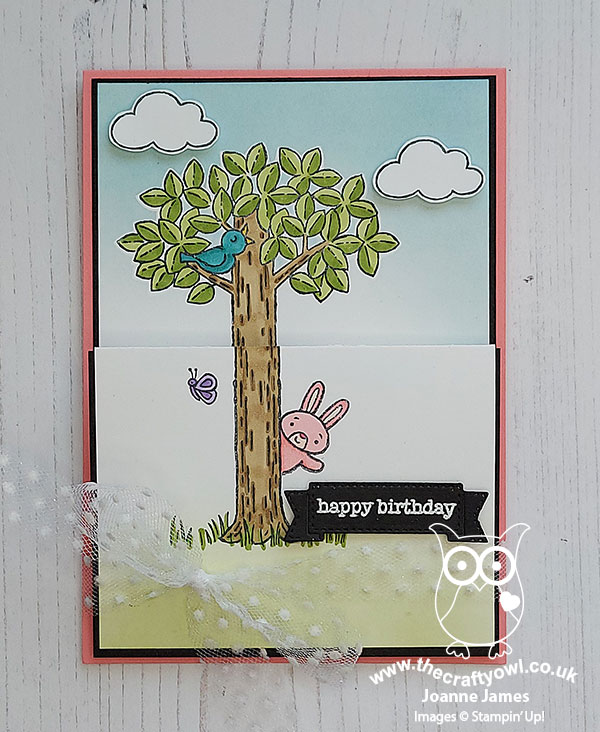
A Fun Fold - Whilst my card looks pretty standard at first glance, you may have noticed the fold across the centre - that's because it's a concertina fun fold. I loved the sample on page 53 of the January-June mini catalogue, so thought I'd have a go at making one myself. Once you slide the tulle ribbon bow off the cardfront, the card opens up to reveal the remainder of the bunny's friends:


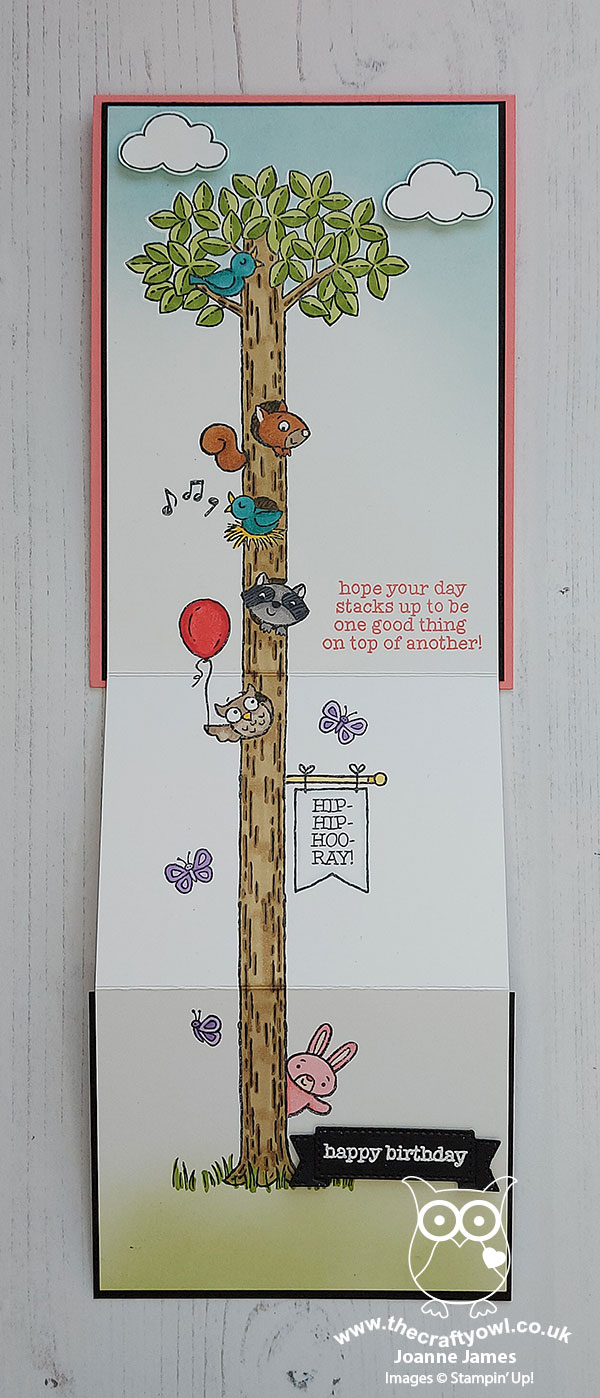
I had a lot of fun stamping and colouring the various elements of this card, which folds up to a standard card size. The stamps are really easy to align; my one top tip for you is that you make sure you know where the front fold will sit on your back panel when closed, so that you don't have any elements that end up being partially visible when it's closed up, such as a cloud or part of an animal (ask me how I know!!)

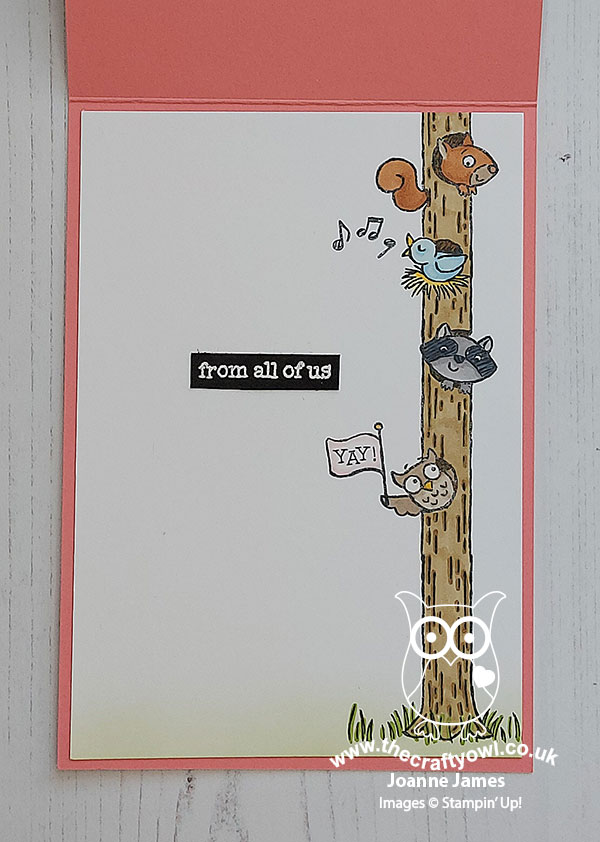
Behind the concertina fold the card also opens up in the conventional way, for you to write a message. I couldn't resist adding another trunk full of cute critters waving their respective birthday wishes:

Isn't that just the cutest?! This is what the card looks like when it stands up in its concertina design:


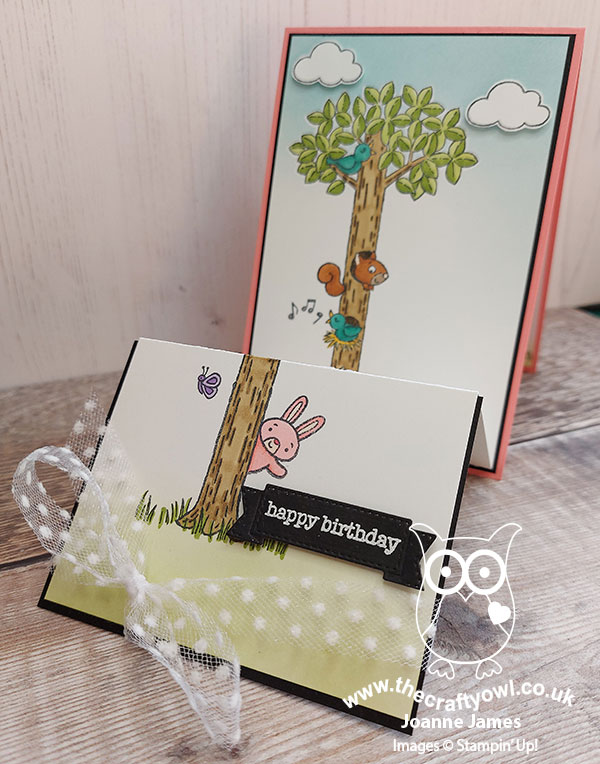
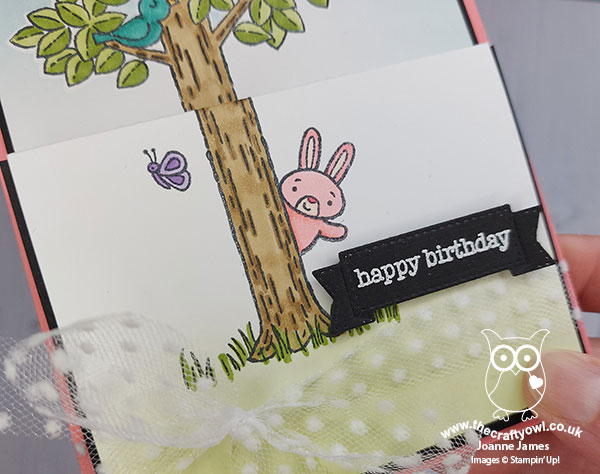
It's In The Details - There are only two other main elements to my card besides my fun fold and stamped design: the lovely soft polka dot tulle ribbon that holds the card closed for mailing, and the stitched banner diecut I used for my happy birthday sentiment, that is from the Smooth Sailing Die set - such a useful little die:


I think this card could be adapted for lots of other uses too, such as welcome to the team, farewell and good luck cards and more besides!  

Here is the visual summary of the key products used on today's project for you to pin for easy reference:


You can see all of my Product and 'How To' summaries on my 'How To - Tips and Techniques' Pinterest board in case you've missed any. 

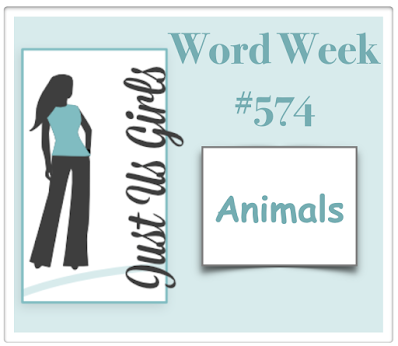
I'm also linking today's card up over at Just Us Girls where the theme is 'animals' and at SUO Challenges for a second entry in the 'things that fly' - today's card has birds, butterflies an owl - and at a stretch, a balloon too!

A tictactoe board offers so many creative possibilities - how does this week's board inspire you? Why not have a go? We would love to see you in the gallery and who knows - you might be selected for Designer's Choice and be eligible to be a guest designer on a future challenge. 

Enjoy your evening; I'll be back tomorrow with another project. Until then, happy stampin'!


Stampin' Up! Supplies Used: 

Table built using Product Table Builder by The Crafty Owl - Independent Stampin' Up! Demonstrator.

Pampered Pets CAS Sympathy Card CCS 410

by Joanne James9. March 2021 13:00

It's Tuesday and time for a new challenge over at CAS Colours & Sketches. This week's challenge is a sketch challenge and YoonYoung has asked that we create something with a crescent shape as the main feature on our card:


Feel free to flip or rotate the sketch when making your card.  

For my card today I was tempted to go with a spray of florals or even dig out a retired baby stamp that would be perfect for this card (in fact, if you'd like to check out this old post you will see two cards that I made for this very challenge using the exact set that I had in mind!), but in the end decided to go with something a little more obtuse that ended up ultra-CAS - take a look:


Here's the low-down on today's card:

I decided to go with the dog from 'Pampered Pets' for today's card - you can see the distinct curved shape of my pooch, right?!

I heat embossed my dog in white onto Basic Black cardstock for a change and used the Pets Dies to diecut out the shape with ease. The angle of the dog fitted around the sentiment perfectly and all I needed to do was add a red resin heart for a pop of colour on my otherwise monochromatic pet sympathy card. I actually started with a card that had a lot more going on (I actually turned that card into something else so will share another time) but for a variety of different reasons evolved beyond the sketch, so I decided to pare things right back and go ultra CAS. I debated with adding twine or even some sponging behind my pooch, but decided to go with the 'less is more' look after the positive comments I received on the one layer floral I created for last week's challenge. Besides, when it comes to the loss of a beloved pet, I'm not sure that any amount of frills or card details take away from the sense of loss that an owner feels. 

I am also linking today's card up over at Addicted to CAS where their codeword is 'Animal' and I'm hoping they will appreciate my CAS efforts. The simplicity of today's card rely does not reflect the thought and effort that went into it - I find that's often the way where 'clean and simple' is concerned!

Here is the visual summary of the key products used on today's project for you to pin for easy reference:


You can see all of my 'How To' summaries on my 'How To - Tips and Techniques' Pinterest board in case you've missed any. 

I am 'home alone' today for the first time in months as both James Juniors are now officially Covid-free and back at school. So I shall be playing the radio at full blast and making tea whenever I like, without fear of remonstration! Sometimes one must delight in the simple pleasures of life!! Enjoy your day and I'll be back tomorrow with another project. Until then, happy stampin'!


Stampin' Up! Supplies Used:

Table built using Product Table Builder by The Crafty Owl - Independent Stampin' Up! Demonstrator.

Grandad's Treasures of Life AYSI 245

by Joanne James5. March 2021 13:00

Today I'm sharing my design team card for our new challenge over at As you See It where it's time for a recipe challenge:


The often-dreaded masculine card! I decided to go with one of my current favourites from the January-June mini catalogue as I wanted to give this set another outing and create something a little different to my previous card with this set (you can see that card here if you missed it). Here's my card for today:


 Here's the low-down on today's card:

Treasures of Life - I decided to use the Grandad and Grandson image from the 'Treasures of Life' stamp set as the main feature of my masculine card today. This is such a beautiful set to celebrate the joys of being a grandparent. I stamped my image in Early Espresso and gave it a rough watercolou in earthy tones, picking out some of the details of the little boy in Night of Navy. I stamped my image on some retired Naturals White card for added texture and added another sentiment to the inside of my card from the set:


I left it otherwise fairly blank as I haven't yet decided what occasion I'm going to use this card for and I may add a birthday greeting too in due course.

All About Texture - I used lots of textural elements on today's card: a piece of Early Espresso embossed with the Tasteful Textile 3D embossing folder, a piece of the In Good Taste designer series paper. along with the texture added by the navy twine and my naturals white cardstock. I think the combination of elements along with the earthy brown tones give my card a homely, cosy feel. What do you think?


Tasteful Labels and an Old Faithful - The final element to complete this week's recipe challenge was to use a diecut: I used one of the Tasteful Labels dies for my sentiment, along with one of my old faithful Stitched Rectangle Dies to frame my watercoloured image.

Here is the visual summary of the key products used on today's project for you to pin for easy reference:


You can see all of my 'How To' summaries on my 'How To - Tips and Techniques' Pinterest board in case you've missed any. 

So how will you use this week's recipe?

Here's a summary of our challenge rules:

  • Create any card, scrapbooking page, 3D project or packaging project that fits the challenge.
  • Please include the challenge graphic and link back to the challenge in your blog post. Turn off word verification so we can leave you lots of lovely comments. Make sure you link the post not the whole blog to the Linky. Use #AYSIXXX when uploading to a public gallery.
  • If you’re unsure about ‘the rules’, check the details under the Challenge Guidelines tab on the As You See It Challenge homepage.
We look forward to seeing your creations in the AYSI gallery.

Enjoy your day and I'll be back tomorrow with another project. Until then, happy stampin'!


Stampin' Up! Supplies Used:

Table built using Product Table Builder by The Crafty Owl - Independent Stampin' Up! Demonstrator.

HB2U Hey Birthday Chicks Card

by Joanne James3. March 2021 22:16

Today was one of those days that did not go to plan - do you ever have days like that?! So I'm late squeezing in a quick post for this week's Inspired By Challenge and another entry for the birthday celebrations over at Time Out:


I used both the sketch layout and number inspiration over at Inspired By for my fun birthday card today - take a look:


Here's the low-down on today's card:

I created a custom sentiment using my Playful Alphabet Dies, flanked by some happy-go-lucky party chicks from the Hey Birthday Chicks bundle. I used some of the Ice Cream Corner designer paper for my background base and carried through the colours of the stripes for the other elements of my card:


Some quick stamping to the inside completes my card:


Here is the visual summary of the key products used on today's project for you to pin for easy reference:


You can see all of my 'How To' summaries on my 'How To - Tips and Techniques' Pinterest board in case you've missed any. 

Enjoy your evening and I'll be back tomorrow with another project. Until then, happy stampin'!


Stampin' Up! Supplies Used:

Table built using Product Table Builder by The Crafty Owl - Independent Stampin' Up! Demonstrator.

#SimpleStamping Art Gallery One Layer Floral Birthday Card CCS409

by Joanne James2. March 2021 13:00

It's Tuesday and time for a new challenge over at CAS Colours & Sketches. YoonYoung is hosting this month and our first challenge of March is a colour challenge: 


Feel free to flip or rotate the sketch when making your card. For my card today I thought I would take the opportunity to use these colours for an oh-so-simple CAS card and embrace this week's Less Is More ongoing celebrations too with a one layer floral - take a look:


Here's the low-down on today's card:

Today's card uses just 5 items: the Art Gallery stamp set, 3 ink pads and some Basic White thick cardstock - #SimpleStamping at its best. The Art Gallery stamp set is perfect for beginners and experienced crafters alike; the double-layered florals are very forgiving in terms of needing to be stamped accurately and the two-step stamping adds interest and the illusion of texture.  Having recently re-inked my Calypso Coral ink pad, it was stamping quite dark but you can see the contrast between it and the Terracotta Tile overlay more clearly below:


Whilst I was making this card, I also experimented with adding in some gold leaf; I stamped an identical card and added some gold leaf detail to the Terracotta Tile layer and I added a trio of gold gilded gems:


I discounted it as my main card today as it obscured too much of the Teracotta Tile colour, even though I tried to add a little more in with some stamens:


I thought I would share it with you as it shows a quick way to step up my original card. Here are both cards together:


Which one do you prefer? After much playing around, I think actaully 'less is more' and the most basic card is my favourite. 

Here is the visual summary of the key products used on today's project for you to pin for easy reference:


You can see all of my 'How To' summaries on my 'How To - Tips and Techniques' Pinterest board in case you've missed any. 

As a reminder, for our colour challenges, you must use all of the stated challenge colours. You may also use neutral colours; however, the challenge colours should be the most noticeable ones featured on your card. We use Stampin' Up! color names for reference, but you are welcome to use any other companies' products as long as you match the challenge colours as closely as possible.

Enjoy your day and I'll be back tomorrow with another project. Until then, happy stampin'!


Stampin' Up! Supplies Used:

Table built using Product Table Builder by The Crafty Owl - Independent Stampin' Up! Demonstrator.


Butterfly Brilliance Collection Pre-Release Available From Today

by Joanne James2. March 2021 11:00

Sale-A-Bration may be over for another year, but that's no reason for the excitement to end! From today you can get blooming with an exclusive early release from our new annual catalogue that is due to launch at the beginning of May - the Butterfly Brilliance Suite. Bring in the beauty of nature with the artistic designs of the Butterfly Brilliance Bundle and coordinating designer series paper, along with textured specialty paper that will put a pop of brilliance on every project. 

The suite consists of the following products: 

Prepare yourself for a burst of butterflies with the Butterfly Brilliance Background Stamp. Use this stamp to create projects for Mother's Day, weddings, and more. Pair this stamp with greetings of your choice to customize it for the season or occasion. Stamp the line-art image and add color with your choice of coloring technique, or apply different colors of ink to the stamp before stamping to create a unique look. Whatever you do with it, the results will be glorious.  Create beautifully detailed butterflies for all of your paper crafting projects with the Brilliant Wings Dies. Once you've cut out a swarm of butterflies, you can create a background, make a focal point, or use them as accents. There's so much you can do with these dies - and there's a saving when you but stamps and dies as a bundle - bonus!

Add lovely texture to your creations with the Natural Touch Specialty Paper. The pale woodgrain is versatile enough for any project and any time of year. You can stamp on it, emboss it, and use it with dies. Use large pieces of it as a background or cut out pieces to use as accents. 

This is an exclusive specialty paper that will only be available during the Butterfly Bouquet promotion and while supplies last.

Some people call a group of butterflies a kaleidoscope, and that's what you'll get with the Butterfly Bijou 6" x 6" (15.2 x 15.2 cm) Designer Series Paper. Choose from glorious butterfly patterns in shades of aqua, pink, and yellow or watercolored patterns that coordinate beautifully. You can't go wrong with these unforgettable patterns.   

This is also an exclusive Designer Series Paper that will be available only during the Butterfly Bouquet promotion and while supplies last.

Love it all? Why not treat yourself to the Butterfly Brilliance Collection and get butterflies galore! This is also only available for the duration of the current promotion and won't carry over into the annual catalogue when it launches.

So what do you think? Have these butterflies got your heart all a-flutter today? If you can't wait to get your hands on yours, click on the links below to order from my online store:

Table built using Product Table Builder by The Crafty Owl - Independent Stampin' Up! Demonstrator.

I'll be back shortly with today's post for our new challenge over at CAS Colours & Sketches. In the meantime, happy shopping! 


Hey Birthday Chick Meets So Much Happy

by Joanne James1. March 2021 18:47

Today I'm squeezing a card for the current challenge over at Freshly Made Sketches and Color Dare (bottom row):


I procrastinated somewhat with Judy's sketch this week (too many ideas!) In the end I took a couple of liberties and went with a floating birthday chicken - take a look:


Here's the low-down on today's card:

Hey Birthday Chick - I  kept the basic layout of Judy's sketch but used a landscape rather than portrait orientiation, in order that I could accommodate my 'happy' diecut into the horizontal stripe. I thought the floating chicken was the perfect shape to cross the horizontal element - and so easy to cut out with my Birthday Chick Dies too.

 So Much Happy - I used my 'Happy' die to create the horizontal element of the sketch and paired it with one of the stamped sentiments from the bundled 'So Much Happy' stamp set (my second sketch liberty, as I need to position it below rather than above the horizontal strip). I used another sentiment from this set on the inside of my card, along with another chicken to decorate:


Blended Clouds - I decided to make my floating chicken part of a simple scene, so used the cloud-shaped die from the Happy Dies set to create a stencil and with my blending brush, created a simple pattern with some Pool Party ink so that it looked as if my chicken was floating up, up and away:

I so love these new blending brushes! My skyscape was so easy to create and the ink blends so beautifully and evenly with them.

Here is the visual summary of the key products used on today's project for you to pin for easy reference:


You can see all of my 'How To' summaries on my 'How To - Tips and Techniques' Pinterest board in case you've missed any. 

I've had a busy day, with a few errands and online Parents' Evening earlier, hence me being later than I hoped with this post. Enjoy your evening and I'll be back tomorrow with another project. Until then, happy stampin'!


Stampin' Up! Supplies Used:

Table built using Product Table Builder by The Crafty Owl - Independent Stampin' Up! Demonstrator.
 

Who Is A Foxy Lady?

by Joanne James28. February 2021 21:32

Today I'm here with an extra card that I made yesterday just for fun for a few challenges:


The challenge over at CASology closes tomorrow but I had been musing over an idea that I wanted to try for a few days, so paired it with the Color Throwdown colours which had a lovely rust colour included, perfect for a fox, and made the following card:


I used a whole host of retired product on this one, most notably my Foxy Friends stamp set and Fox Builder Punch, to create a Foxy face in lieu of the 'o' in my 'FOXY' word created using the Playful Alphabet Dies and paired it with the word 'Lady' from part of a sentiment in the retired 'Little LadyBug' stamp set to create my custom wording. I used the Color Throwdown colours in a quartet of stripes for my diecut letters and carried them across my card base to unify my layers. I added an additional stamped fox to the inside of my card:


Lastly, no foxy lady is complete without a sassy magenta flower in her fur, right?! So I added a punched flower for an added touch of femininity: 


I love this clean and simple card - it turned out just as I imagined. The big question is, who would you send a card like this to? I'd be really interested in your thoughts!

I'm also linking today's card up over at Addicted to CAS where the code word for the next fortnight is 'animal'.

Here is the visual summary of the key products used on today's project for you to pin for easy reference:


You can see all of my 'How To' summaries on my 'How To - Tips and Techniques' Pinterest board in case you've missed any. 

Enjoy your evening and I'll be back tomorrow with another project and news of an early prrelease from teh forthcoming annual catalogue. Until then, happy stampin'!


Stampin' Up! Supplies Used (current supplies only):

Table built using Product Table Builder by The Crafty Owl - Independent Stampin' Up! Demonstrator.

Flower and Field Happy Thoughts TTT 102

by Joanne James25. February 2021 15:00

It's Thursday and time for a new challenge over at TicTacToe! It's the turn of Team X to host this week and the lovely Betty is our featured designer this week. This is the fun board that we are playing along with: 


I went down the first column with thinking of you/stitching/flowers for my card today, that also makes the most of one of the Sale-A-Bration freebies that can still be yours for a few more days so is perfect to play along with the team over at TGIF Challenges too - take a look:


Here's the low-down on today's card:

Flower and Field - Although I didn't eventually choose it, I was considering 'shades of green' as one of my board options and I immediately thought of this paper in the Flower and Field Sale-A-Bration DSP pack as it makes such a beautiful use of Just Jade as its background colour. I decided to use this paper anyway as it's so pretty and the green, pink and yellow combo give me three colours to play with the peeps over at Paper Craft Crew this week too! It's also a great reminder that there are just 3 days to go until the end of the current Sale-A-Bration promotion. If you are a regular Stampin' Up! customer, don't be caught out - the current promotion ends a whole month earlier than it has in previous years. That's no bad thing, as it means we will get a second Sale-A-Bration promotion later in the year, but if you still have things on your current SAB wishlist, you need to earn them whilst you still can!

Thinking of You - The sentiment I chose for my card today comes from the 'Happy Thoughts' stamp set, inspired by the Million Sales Achiever Jackie Bolhuis. This is a sentiment-only set, designed with beginner crafters in mind. It has great basic sentiments for every occasion, along with some longer ones that work perfectly as a feature or on the insdie of a card. What's more, this set was designed to co-ordinate with a number of our basic punches, so is really versatile and a great way to build on a beginner's collection of basic items. 

Pierced Blooms - I added a few Pierced Blooms to decorate my card - another long-awaited addition to my collection - although as I went to finishe my card with some black enamel dots on those itty bitty pink flowers I realised ... yes, I've run out! So use your imagination as I go off to order more of these craft room staples!

Here is the visual summary of the key products used on today's project for you to pin for easy reference:


You can see all of my Product and 'How To' summaries on my 'How To - Tips and Techniques' Pinterest board in case you've missed any. 

A tictactoe board offers so many creative possibilities - how does this week's board inspire you? Why not have a go? We would love to see you in the gallery and who knows - you might be selected for Designer's Choice and be eligible to be a guest designer on a future challenge. 

Enjoy your day; I'll be back tomorrow with another project. Until then, happy stampin'!


Stampin' Up! Supplies Used: 

Table built using Product Table Builder by The Crafty Owl - Independent Stampin' Up! Demonstrator.

Mini Catalogue

BROWSE THE CATALOGUE

The mini catalogue is now live! Read and download your copy here.

Shop Online

Access my online shop 24 x 7, 365 days of the year:

Current April hostess code:

VDKNV7BH

Shop Online

Join My Team

It's always a great time to join Stampin’ Up! New team members can get £130 worth of products for only £99 + free business supplies + free shipping + all the fun being a part of Stampin’ Up! Stampin' Up! has something for everyone: join my growing team and benefit from my support to enjoy Stampin' Up! however you choose.

If you're interested, call me for a chat to understand how I can help you realise your goals. Alternatively, if you have already decided to sign up and you just can't wait, please click here for the link to the online form where you can sign up and order your starter kit right away! 

Latest Kit!

Stampin Cut and Emboss

The Rock Legend Kit has all you need to make 8 cards with coordinating envelopes. Along with the new Panda Friends Kit, both are available from January 4th for just £14 each - get yours here!

2023-24 Annual Catalogue

BROWSE THE CATALOGUE

Click on the catalogue for a full list of current SU! supplies - if you would like to order any of the items featured, please drop me a line at [email protected] or give me a call on 07773 421446 - I'd be happy to help.

New Online Exclusives

There are new products available exclusively in the online store from 5 March - check them out here.

About Me

Hi I'm Joanne and live in Northampton and when I'm not looking after my husband and two beautiful children, am an avid crafter with a passion for all things Stampin' Up!

I must confess that I have never been a big rubber stamper - until I discovered Stampin' Up! that is. I love the fact that I can get such great results with co-ordinating stamps, inks, papers and punches - the possibilities are endless! Join me on my stamping journey as I share the things I love and be inspired to create amazing things yourself!

Follow Me

Monthly Newsletter

Box Builder

Click the button above to use Box Buster to create your custom box design using the Envelope Punch Board!

Kits Collection Now Available!

Stampin Cut and Emboss

The new Kits Collection from Stampin' Up! is now available!

Click here to see the current kits available and order yours online today.

I Design For


Stampin' Up Stuff

This is my personal blog and is not endorsed by Stampin’ Up! I hope you find it a plentiful source of ideas and personal inspiration but please don't copy my designs for contest submission or use for classes, publication or sale without express permission.