24 Hour Stamp Sale Starts Tonight Save 15% on Selected Cling Stamps

by Joanne James19. October 2021 19:32

Can’t stop staring at a certain stamp set (or two, or three)? Stock up on stamp sets at a stellar price! For one day only, you can buy select cling stamp sets at a 15% discount. This short and stamp-tacular sale only happens once a year, so get in gear—it’s time to shop ’til you drop! 

Are you ready? The biggest stamp sale of the year is coming up on 20 October - that's tomorrow! It’ll only last for 24 hours, so you will need to act fast to grab the goods. It actually starts at 11pm this evening here in the UK. 

For 24 hours from 19 October at 11:00 p.m. to 20 October 10:50 p.m. (UK) online, each of the cling stamp sets from the 2021–2022 Annual Catalogue will be available for purchase at a 15% discount.

Here's a list of all of the stamp sets included in the sale:


If you see something you like, you can either place an order through me, or you can shop directly through my online store. My shop will have a category entitled “Stamp Sale” that displays every stamp set on sale to ensure a quick and easy shopping experience.

The discount applies to individual stamp sets (not bundles) and can also be used in conjunction with a starter kit - what a great way to get more bang for your buck! Place your order here through my online store or by clicking on the shopping bag icon in the menu on the right hand side - don't forget to include the current hostess code ADG6HG9G for an extra thank you from me. 

I'll be back with another creative project tomorrow but in the meantime this is a 24 hour event only so you have to act fast to benefit from 15% off these amazing sets, so set your watches, it's almost time to go shopping - don't miss out! 

Delivering Autumn Cheer CCS 442

by Joanne James19. October 2021 13:00

It's Tuesday and time for a new challenge over at CAS Colours & Sketches. Vicky is hosting this month and this week she has a fabulous colour challenge for us: 


I just love this colour combination! Gorgeous colours for autumn, so I decided to use them to get colouring - take a look:


Here's the low-down on today's card:

I stamped a lady from the 'Delivering Cheer' stamp set, cropped her out using my Stitched Rectangles dies and coloured her in with my Blends in the challenge colours. 'Delivering Cheer' is such a fun stamp set with lots of fun combinations of tops and bottoms. It's photopolymer so super easy to align the pieces and is great for both paper-piecing and colouring. I especially like the stamp that allows you to add some funky patterned tights - check it out below:


Isn't that a fun detail? I added a piece of Regals designer paper to further emphasise the purple tones; I love purple but Rich Razzleberry isn't a colour I use often - I love it in this combo though! A simple sentiment from the 'Sparkle of the Season' stamp set completes today's card, which is already in the mail!

Here is the visual summary of the key products used on today's project for you to pin for easy reference:


You can see all of my 'How To' summaries on my 'How To - Tips and Techniques' Pinterest board in case you've missed any. 

As a reminder, for our colour challenges, you must use all of the stated challenge colours. You may also use neutral colours; however, the challenge colours should be the most noticeable ones featured on your card. We use Stampin' Up! color names for reference, but you are welcome to use any other companies' products as long as you match the challenge colours as closely as possible.

Enjoy your day and I'll be back tomorrow with another project. Until then, happy stampin'!


Stampin' Up! Supplies Used:

Table built using Product Table Builder by The Crafty Owl - Independent Stampin' Up! Demonstrator.

Enjoy The Moment Note Card

by Joanne James18. October 2021 17:23

Happy Monday everyone! I had a little time today to work on some future projects, and following a lunch time walk with the eldest of the James Juniors who is on half-term break already, where we admired the falling conkers and autumnal leaves, got a little side-tracked into creating a card on my return using this week's Color Throwdown colour palette:

I really loved this mix of browns and aqua and took the opportunity to use some items that haven't gotten much love lately - take a look:


Here's the low-down on today's card:

Enjoy The Moment - I really like the detailing on the seed heads in the 'Enjoy The Moment' stamp set and had it on my desk for another project, but couldn't resist another card with then in these colours. Found on page 26 of the annual catalogue, this is a great set for autumnal cards and works well in neutral colours. 

Everyday Label Punch - After stamping and colouring each of my images, I punched them out with my Everyday Label Punch, as I realised I hadn't used a punch on a card in ages and this label punch is super useful for both tags and cards alike. 

Cork Border - Did you notice the strip of cork paper I added beneath the gingham behind the punched pieces? This is some of the new cork specialty paper that is featured in the current mini catalogue. It's great for adding texture without bulk and really easy to cut with your paper trimmer. You can see it more closely on this image:


A little stamping on the inside completes my card:


Here is the visual summary of the key products used on today's project for you to pin for easy reference:


You can see all of my 'How To' summaries on my 'How To - Tips and Techniques' Pinterest board in case you've missed any. 

Enjoy your day and I'll be back tomorrow with another project for this week's new challenge over at CAS Colours & Sketches. I am also the Featured Designer over at The Color Throwdown this week so be sure to come back for another post featuring their new colours on Wednesday. Until tomorrow, happy stampin'!


Stampin' Up! Supplies Used:

Table built using Product Table Builder by The Crafty Owl - Independent Stampin' Up! Demonstrator.

Delicate Baubles Blackberry Bliss Christmas Tree AYSI261

by Joanne James15. October 2021 13:00

This is my second post of today - you can see my earlier Festive Friday post here in case you missed it. This is my design team card for our new challenge over at As you See It where it's time for a colour challenge:

 May be an image of fruit and text that says "い 10.15.21 BLACKBERRY GRANNY BLISS APPLE SILVER GREEN A.Yyo.SoeTt CHALLENGE BASIC WHITE 261"

I really love this combination of deep Blackberry Bliss, bright Granny Apple Green and white with a dash of metallic silver. I made another Christmas card, this time using my new Delicate Baubles Dies - take a look:


 Here's the low-down on today's card:

This card was actually really easy to create: I added a strip of Regals DSP to my card base, then added some adhesive sheet to my bauble background and paper-pieced the details into the top layer of my bauble in the challenge colours, adding a trio of rhinestones for extra sparkle:


A silver heat-embossed sentiment from 'Tidings and Trimmings' completes my festive card.

Here is the visual summary of the key products used on today's project for you to pin for easy reference:


You can see all of my 'How To' summaries on my 'How To - Tips and Techniques' Pinterest board in case you've missed any. 

I'm a sucker for an interesting die and I love the detail on the baubles in this set - you will definitely be seeing more of them this festive season!

Here's a summary of our challenge rules:

  • Create any card, scrapbooking page, 3D project or packaging project that fits the challenge.
  • Please include the challenge graphic and link back to the challenge in your blog post. Turn off word verification so we can leave you lots of lovely comments. Make sure you link the post not the whole blog to the Linky. Use #AYSIXXX when uploading to a public gallery.
  • If you’re unsure about ‘the rules’, check the details under the Challenge Guidelines tab on the As You See It Challenge homepage.
  • In a colour challenge, black or other neutral can be used in outlines and sentiments but no other colours should be included. Stampin’ Up colours are used for reference but colours that are a close match are welcome.
We look forward to seeing your creations in the AYSI gallery.

Today marks the end of a three-day expedition by the eldest of the James Juniors for her silver Duke of Edinburgh award so I am expecting tired feet this evening! At the same time, the youngest of the Juniors is embarking on an army cadet weekend and will be sleeping out in the forest somewhere in the wilds of Cambridgeshire this evening under an improvised shelter. He has an Arctic sleeping bag, but I am really hoping the rain holds off! Enjoy your day and I'll be back tomorrow with another project. Until then, happy stampin'!


Stampin' Up! Supplies Used:

Table built using Product Table Builder by The Crafty Owl - Independent Stampin' Up! Demonstrator.

Seasons Of Fun Roller Skating Pumpkin FF0095

by Joanne James15. October 2021 09:00

This is my first post of a two-post Friday and I'm here with my card for the new challenge over at Festive Friday. 


The challenge that we are celebrating this week is 'National Cat Day' which is on October 27th. Remember the fun thing is that at Festive Friday you do not need to actually celebrate the occasion; your goal is to simply use three or more items from the inspiration list on your project. This week I used cat, orange and texture from the inspo list along with the sketch layout over at Hand Stamped Sentiments to create a Halloween-inspired birthday card, perfect for a late October birthday - take a look:


I'm also linking up over at SUO Challenges where they are sharing all things Halloween for their current challenge too.

Here's the low-down on today's card:

Seasons of Fun - I thought the trick-or-treat roller skater in the 'Seasons of Fun' host set would make for a fun Halloween-inspired birthday card for someone celebrating a late October birthday, so stamped and coloured my image with Blends and added a combination of sentiments on the inside of my card for a play on the idea of 'trick or treat' that the image suggests to fit my birthday greeting:


I used up a whole bunch of retired Halloween DSP and a background panel embossed with a retired cobweb embossing folder for texture for the remaining details on the front of my card, along with a sprinkling of retired enamel dots.

Spot The Difference - Did you spot the difference between my roller-skating pumpkin and the stamp in the catalogue? I took a leaf out of my creative friend Vicky's book (she is a whizz at combining stamps in unexpected ways to come up with amazing designs!) and coloured and fussy-cut the cat from the image with the boy playing in the leaves that I used on this card here and added him to the little girl's pumpkin treat bucket:


Crafty, eh? Well, I had to get a cat onto my card somehow!

My Little Pumpkin - I realised when I went over to grab the link for Hand Stamped Sentiments to add my card to the gallery, that one of their design team, Ange McKay, also used this image on her card so mine does naturally look very similar. I hadn't seen her card before I made my own though; this cute image reminds me of a little pumpkin of my very own:


My children loved to dress up when they were little and this photo of Rebecca was her first Halloween photo when she could walk - check out those pink shoes! This photo is now more than 14 years old - but is still makes me smile!

Here is the visual summary of the key products used on today's project for you to pin for easy reference:


You can see all of my 'How To' summaries on my 'How To - Tips and Techniques' Pinterest board in case you've missed any. 

How does our board inspire you? I can’t wait to see what YOU create! For more inspiration, be sure to visit the rest of the  Festive Friday Challenge Design team:

Ann Schach

Beth McCullough

Sharon Hashimoto Burkert

Melanie Hungerford

Helen Jennings

Stephanie Lanzalotto

Melva Peters

Jaydee

Diane Evans

Joanne James

Enjoy your morning and I'll be back later with my project for the new challenge over at As You See It. Until then, happy stampin'!


Stampin' Up! Supplies Used:

Table built using Product Table Builder by The Crafty Owl - Independent Stampin' Up! Demonstrator.

Merriest Moments Simple One layer and a Fancy Technique

by Joanne James14. October 2021 11:10

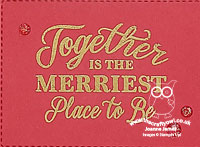
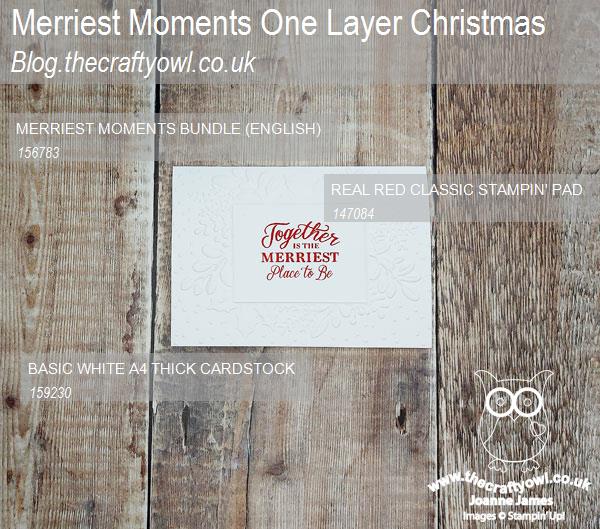
Today I'm sharing a couple of cards with you. I held my monthly class online at the start of the week and it featured the Merriest Moments bundle and following the discussions we had on the call I wanted to share another couple of cards featuring the most versatile of bundles. My first card is for the current challenge over at The Alphabet Challenge Blog, where they are on 'N is for No Layer'. I made the simplest of cards using a festive red and white colour combination - take a look:


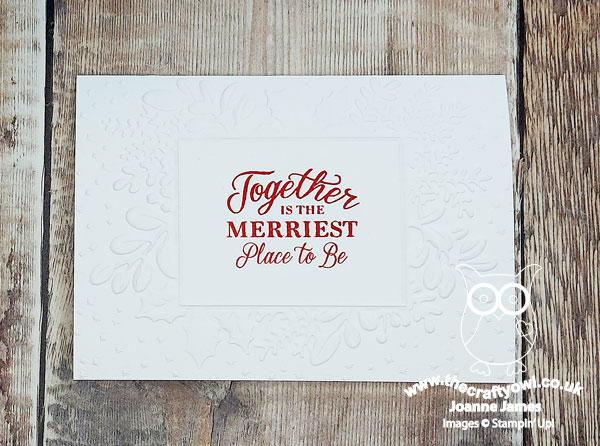
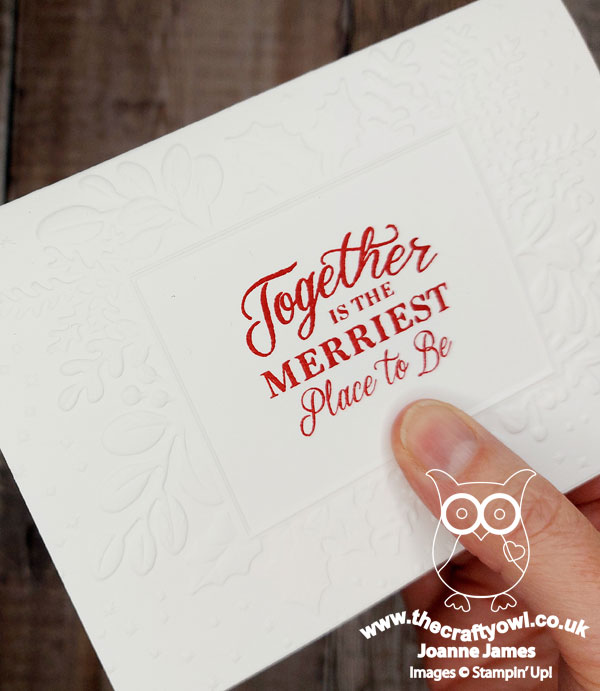
I embossed my thick basic white card base directly with the Merriest Frames Hybrid Embossing Folder and stamped my sentiment directly into the frame centre in Real Red. This embossing folder really is so pretty and whilst I did try a version adding some colour to the foliage, I didn't like it anywhere near as much as the 'naked' version - the detail of the embossing is stunning and I'm not sure that the photos do it justice:


This really is one of the easiest cards to make and would be great both for cards that need to be sent overseas and weight is an issue for example, or you simply want an impressive design that can be produced in multiples really quickly.

For my second card, I wanted to use the same embossing folder to join this week's trend week challenge over at Just Us Girls where they are asking us to experiment with a technique called heat embossed embossing folders:

If you've never tried this technique before, you should definitely watch Jennifer McGuire's video on it where she gives a thorough overview and lots of examples - you can see her video here. I've never tried it before, but though the Merriest Frames Hybrid Embossing Folder would be a great one to experiment with. For this card, I went bold with a festive Real Red and metallic gold colour combination - take a look:


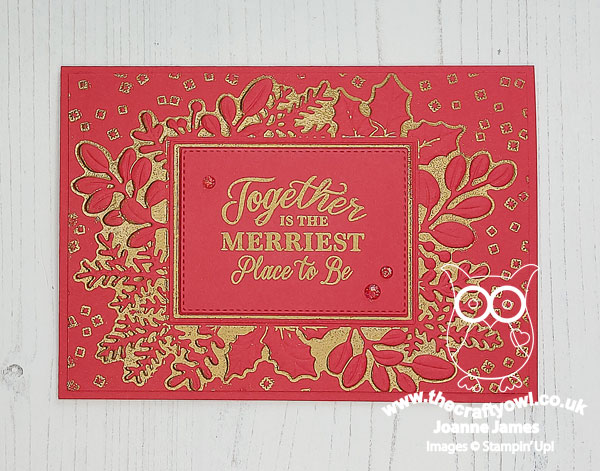
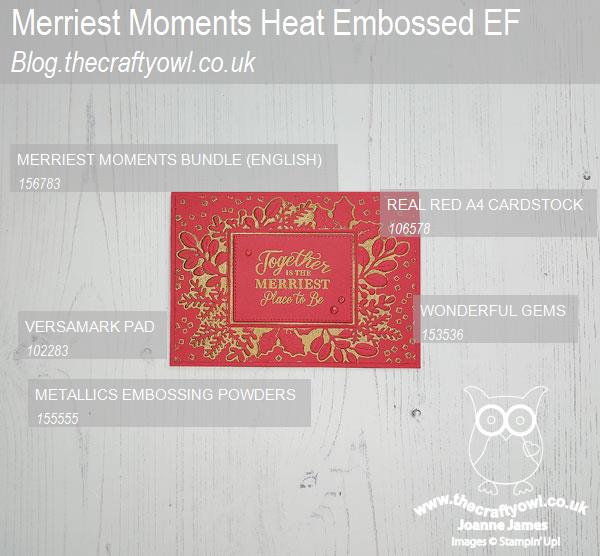
I decided to use the whole embossing folder and not cut out the foliage frame, as I wanted the background detail too. I added my red panel to a red card base, and also heat embossed my sentiment into gold onto a red stitched rectangle which I popped up on dimensionals in the centre of the frame, adding a trio of red sparkly faceted dots for good measure. Check out the detail that the heat embossing adds to the foliage:


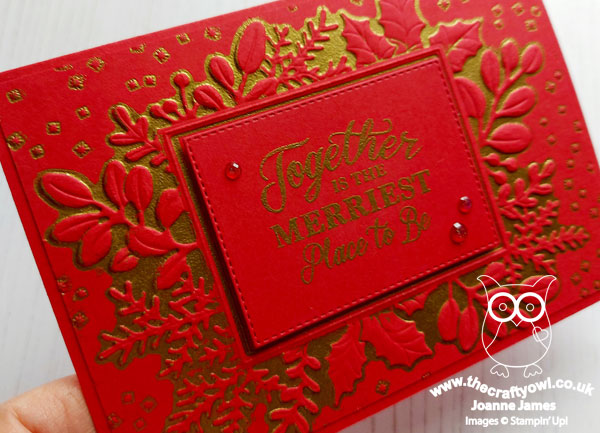
This was a really fun technique to try and I have to say I think the key to getting a good finish is to use a traditional rubber brayer to ink the flat side of your embossing folder with the Versamark - this way you don't get it into areas where you don't want to see the heat embossed detail and it picks out the surrounding space easily. This was my first attempt and will definitely be experimenting with other versions (and embossing folders!) If this technique is something that interests you, you should definitely check out the Just Us Girls DT samples and the gallery, where you will also see another sample using this embossing folder made by one of my lovely class attendees, Deborah Wheeler - how great that we were both inspired following my class!

I was asked by one of my customers last week, "If you could only choose one new bundle this Christmas, which one would it be?" This was a question that required much thought before answering, not least because I have never been known to buy just one stamp set and the beauty of being a Stampin' Up! demonstrator is that I acquire lots and lots of stamp sets cheaply or even for free! I decided that if I was only buying one bundle, it would have to be something that was versatile; I would want to be able to do lots of things with it and not get bored due to a lack of creative opportunities. The answer I gave to that customer? The Merriest Moments Bundle - it absolutely delivers on all fronts!

Here is the visual summary of the key products used on today's projects for you to pin for easy reference:


You can see all of my 'How To' summaries on my 'How To - Tips and Techniques' Pinterest board in case you've missed any. 

Enjoy your day and I'll be back tomorrow with another project. Until then, happy stampin'!


Stampin' Up! Supplies Used:

Table built using Product Table Builder by The Crafty Owl - Independent Stampin' Up! Demonstrator.

Blackberry Beauty A Reason To Celebrate CCS 441

by Joanne James12. October 2021 13:00

It's Tuesday and time for a new challenge over at CAS Colours & SketchesThis week's challenge is a sketch challenge and our hostess Vicky has asked that we create a card with a jaunty angle:


Feel free to flip or rotate the sketch when making your card.

I'm also linking up my card today with the team over at AAA cards who are celebrating their 200th challenge since my card has also been made to celebrate something special - take a look:


Here's the low-down on today's card:

A dear blogging friend of mine recently got married to her original childhood sweetheart, having been widowed for the past 11 years. I was delighted to hear this happy news and couldn't wait to create a card to send her my congratulations. I decided the Blackberry Beauty gold foiled paper was the perfect paper to showcase on that jaunty angled piece of the sketch, so I cut it with one of my Basic Borders Dies and added a simple gold embossed 'congratulations' greeting from the Art Gallery set.

Whilst this completed the outside of my card, I had to add some additional decoration to the inside, using both a floral image (stamped in gold) and a sentiment from the retired set 'Wonderful Romance':


I just love this set for wedding cards! I am sending this card overseas, so the flat clean and simple design is perfect. I wanted it to be special for my friend when she opened it though, so I created a custom envelope using shimmer gold vellum with a co-ordinating envelope flap to house her card, that I will then place inside another standard envelope for mailing:


I love the monochrome look for a clean and simple card and this elegant card is great for wedding congratulations I think - and definitely an event to be celebrated!

Here is the visual summary of the key products used on today's project for you to pin for easy reference:


You can see all of my 'How To' summaries on my 'How To - Tips and Techniques' Pinterest board in case you've missed any. 

Enjoy your day and I'll be back tomorrow with another project. Until then, happy stampin'!

Stampin' Up! Supplies Used:

Table built using Product Table Builder by The Crafty Owl - Independent Stampin' Up! Demonstrator.

Seasonal Swirls And A Pine Cone Christmas Wreath

by Joanne James11. October 2021 09:00

I have card class this morning so am getting my blog post out early! Today I'm sharing a card that uses Amy's sketch this week over at Freshly Made Sketches:

My card is also inspired by a recent Inspired By challenge photo that I loved but didn't get the opportunity to play along with at the time ( you can read all about that here). I made another Christmas card for my growing pile - take a look:


Here's the low-down on today's card:

Seasonal Swirls - Today's card features another Seasonal Swirls wreath, this time a Christmas one adorned with holly, pine cones and mistletoe pearl berries. This die set is perfect for making endless combinations of wreath decoration! I stamped a simple 'Noel' greeting from 'Tidings and Trimmings' in the centre of my wreath.

Not So Halloween Gingham - I used the central diagonal to accommodate a gingham bow with a (retired) sparkly jewel at it's centre. You may well have missed this ribbon in the current seasonal catalogue - it's on page 51 nestled amongst the Cute Halloween suite, but I think this ribbon is a winner with all-year round appeal. 

An Acetate Trick - For the other two elements of diagonal detail, I used some of the Hydrangea Hill Mercury Glass Designer Acetate - but featured the reverse side which is a lovely silver colour, rather than the lilac/pink front. Using the reverse makes this great for adding a touch of festive metallic to those festive projects:


I was initially a little unsure about the diagonals on Amy's sketch, but I actually like the way the sit against my Christmas wreath and am quite pleased with how this card turned out.

Here is the visual summary of the key products used on today's project for you to pin for easy reference:


You can see all of my 'How To' summaries on my 'How To - Tips and Techniques' Pinterest board in case you've missed any. 

Enjoy your day and I'll be back tomorrow with another project. Until then, happy stampin'!


Stampin' Up! Supplies Used:

Table built using Product Table Builder by The Crafty Owl - Independent Stampin' Up! Demonstrator.

Giving Gifts Autumn Leaves Thank You Card TTT134

by Joanne James7. October 2021 18:00

It's Thursday and time for a new challenge over at TicTacToe! It's the turn of Team X to host this week and I am the featured designer this week. This is the fun board that we are playing along with: 


I decided to go across the middle of the grid with leaves/thanks/shades of brown for a clean and simple card. I used the layout and layering idea from the CASE The Designer challenge over at Global Design Project and the colours over at Color Throwdown that are perfect for Autumn. I will also be linking up over at Addicted to CAS, having finally managed to create something suitably clean and simple befitting their Autumn codeword - take a look:


Here's the low-down on today's card:

Beauty Of Tomorrow - I love the large sentiment in the 'Beauty of Tomorrow' stamp set which sums up the changing seasons and advent of autumn beautifully I think so I had to feature this on the front of my card. Since this doesn't directly have anything to do with my middle square of 'thanks', I added one of my favourite stamps from the 'Well Defined' set to the inside of my card:


I love the idea of sending a card to someone thanking them for being part of my world, rather than as a show of gratitude for something someone did and this sentiment is so perfect for that.

Giving Gifts Autumn Leaves - I created a cascade of falling autumn leaves that I diecut from a piece of cardstock onto which I blended a selection of oranges and browns (see below) using the leaf die in the Giving Gifts Dies set. One of my blogging friends, the lovely Kim Singdahlsen of Joyful Creations with Kim, has made some fabulous cards with the dies in this set and was a total enabler when it cam to me puchasing these dies - I could resist no longer!  I particularly love the diecut detail on each leaf; I glued each of them on one half only, so that they could be gently folded upwards to add to the sensation of falling leaves - slightly easier to see on the angled photo below:

A Surprise Find - Finally, to add a little extra autumn-inspired detail to my card, I added some Grey Granite ink using a blending brush and an old stencil I found in my stash with a large knit pattern and faded it out from opposing corners. I am seeing some wonderful stencilling in the blogosphere lately, none more so than from my fellow Paper Player designer and CAS supremo the lovely Jaydee of Stampin! With Jaydee. She has a beautiful fine-knit stencil from The Greetery that she has been using lots lately and when I found this in my stash I thought it would be a good stencil to create a similar look and feel. This was also a good way to incorporate the soft, warm grey tones of the Color Throwdown palette. 

Here is the visual summary of the key products used on today's project for you to pin for easy reference:


You can see all of my Product and 'How To' summaries on my 'How To - Tips and Techniques' Pinterest board in case you've missed any. 

This is one of those cards that for all its simplicity seemed to take forever; it took a truck load of inspiration to get me there, but I must say I love the result and ended up making a few of these to send out to friends.

A tictactoe board offers so many creative possibilities - how does this week's board inspire you? Why not have a go? We would love to see you in the gallery and who knows - you might be selected for Designer's Choice and be eligible to be a guest designer on a future challenge. 

Enjoy your day; I do not know where this week has disappeared! I am still busy harvesting produce and I made another batch of raspberry jam yesterday. Today is oddly warm for this time of year, but still rather grey and it certainly doesn't feel like the return of summer that the weather forecasters promised! I'll be back soon with another project. Until then, happy stampin'!


Stampin' Up! Supplies Used: 

Table built using Product Table Builder by The Crafty Owl - Independent Stampin' Up! Demonstrator.

Clean and Simple Christmas Tree Trio CCS 440

by Joanne James5. October 2021 13:00

It's Tuesday and time for a new challenge over at CAS Colours & Sketches. We are now in October which means a new host and a new guest designer. My CAS-loving friend Vicky is hosting this month and our first challenge is a colour challenge: 


For my card today I decided to go Christmas and use up some of my Sale-A-Bration freebies! I know - these colours aren't a typical festive colour palette, but I think they work - take a look:


Here's the low-down on today's card:

Christmas Tree Trio - I used the Christmas Tree Dies from the 'Whimsy and Wonder' Suite to create my trio of white Christmas trees and incorporated the colour with a set of overlapping inked circles in the challenge colours behind using the round stamp in the Sale-A-Bration 'Textures and Frames' stamp set. This is the kind of set that I struggle to use and am generally doesn't draw me in, much to the amusement of some of my customers and friends who always see the potential of these kinds of sets. I like the idea of using the stamps as a base to showcase something else as I've done here. 

A Whimsical Tree - Not much stamping on the front of my card, but I did use the 'Whimsical Trees' stamp set on the inside of my card for a little extra decoration:


Sparkle and Texture - I couldn't resist adding a sparkly garland to the white Christmas trees on the front of my card using another Sale-A-Bration freebie, the Be Dazzling paper; I love the shimmer and texture it adds, without detracting from the overall clean feel of my card: 

I know the Sale-A-Bration promotion is now over for another year, but hopefully you picked up some of these free items and are still looking for fun ways to use them. 

Here is the visual summary of the key products used on today's project for you to pin for easy reference:


You can see all of my 'How To' summaries on my 'How To - Tips and Techniques' Pinterest board in case you've missed any. 

As a reminder, for our colour challenges, you must use all of the stated challenge colours. You may also use neutral colours; however, the challenge colours should be the most noticeable ones featured on your card. We use Stampin' Up! color names for reference, but you are welcome to use any other companies' products as long as you match the challenge colours as closely as possible.

Enjoy your day and I'll be back tomorrow with another project. Until then, happy stampin'!


Stampin' Up! Supplies Used:

Table built using Product Table Builder by The Crafty Owl - Independent Stampin' Up! Demonstrator.

Shop Online

Access my online shop 24 x 7, 365 days of the year:

Current May hostess code:

3NR3FB9W

Shop Online

2024-25 Annual Catalogue

BROWSE THE CATALOGUE

Click on the image to download your copy of the 2024-25 annual catalogue. For a full list of current SU! supplies, go to my online store. If you would like any help or advice, please drop me a line at [email protected] or give me a call on 07773 421446 - I'd be happy to help.

Join My Team

It's always a great time to join Stampin’ Up but during May it's even better! New team members can get £78.25 of new In Color products for FREE! That's in addition to another £130 worth of products of your choice for only £99 + free business supplies + free shipping + all the fun being a part of Stampin’ Up! Stampin' Up! has something for everyone: join my growing team and benefit from my support to enjoy Stampin' Up! however you choose.

If you're interested, call me for a chat to understand how I can help you realise your goals. Alternatively, if you have already decided to sign up and you just can't wait, please click here for the link to the online form where you can sign up and order your starter kit right away! 

Latest Kits!

Stampin Cut and Emboss

The City Sights Kit has all you need to make 8 cards with coordinating envelopes for £20. Along with the new Happy Hollyhocks Kit, a no stamping kit including 9 cards for just £14, both are available from May 1st - get yours here!

New Online Exclusives

There are new products available exclusively in the online store from 5 March - check them out here.

About Me

Hi I'm Joanne and live in Northampton and when I'm not looking after my husband and two beautiful children, am an avid crafter with a passion for all things Stampin' Up!

I must confess that I have never been a big rubber stamper - until I discovered Stampin' Up! that is. I love the fact that I can get such great results with co-ordinating stamps, inks, papers and punches - the possibilities are endless! Join me on my stamping journey as I share the things I love and be inspired to create amazing things yourself!

Follow Me

Monthly Newsletter

Box Builder

Click the button above to use Box Buster to create your custom box design using the Envelope Punch Board!

Kits Collection Now Available!

Stampin Cut and Emboss

The new Kits Collection from Stampin' Up! is now available!

Click here to see the current kits available and order yours online today.

I Design For


Mini Catalogue


The next mini catalogue will be live in September! 

Stampin' Up Stuff

This is my personal blog and is not endorsed by Stampin’ Up! I hope you find it a plentiful source of ideas and personal inspiration but please don't copy my designs for contest submission or use for classes, publication or sale without express permission.