2019-21 In-Color Artfully Aware Masculine Card

by Joanne James2. July 2019 20:00

A later post from me today as I've had a busy one that culminated in a wonderful Summer Serenade concert to listen to the youngest of my James Juniors sing - always a joy! Today I'm sharing a card for the current Fab Friday and Inspire.Create challenges which coincidentally both have exactly the same colour palettes this week - the new 2019-21 Stampin' Up! in colors:

   No photo description available.

Whilst I love all of these colours individually, I found it a challenge using all of them on one card - that's the idea though, right? So I resisted making a collection of monochromatic cards featuring each of the colours individually and pushed myself to get all 5 on one card. After much deliberation, this is what I came up with:


Here's the low-down on today's card:

Artfully Aware - I decided that the stamp that features five people intertwined in the 'Artfully Aware' stamp set would be a great way to incorporate all 5 in-colours on my card by giving each person a different colour sweater. I love the sketchy style of these stamps and this set has some great words of encouragement and support. I used one of the sentiments in the set too, but split it and included the first part 'together...' on the tab on the front of my card, then continued it inside with '...we make a difference'. 

A Mix of Mediums -  I did something I don't normally do and used a mix of Blends and inks and a blender pen to colour, as I still have inks in all colours bar Purple Posy, whereas this is the only in-colour I have in Blends. The colours are much softer with ink and a blender pen and I like the more watercoloured look. I decided that this would make a nice masculine encouragement card, so used the darker colours of Pretty Peacock and Terracotta Tile for my base and in-colour DSP layer, along with my tabbed piece.

A Blue Ribbon - The Artfully Aware stamp set co-ordinates with the Support Ribbon Framelits and I decided to use the small support ribbon framelit to cut a pale blue ribbon out of Seaside Spray as a small embellishment to anchor my sentiment.

Here is the visual summary of the key products used on today's project for you to pin for easy reference:


You can see all of my 'How To' summaries on my 'How To - Tips and Techniques' Pinterest board in case you've missed any. 

I really love this year's set of new in-colors and I know lots of you do too. For this first time this year I am running an In-Color Club for my customers and still have a few spaces in my latest round that are available; please contact me if you would like to take part - you can read all about it here.

Enjoy your evening and I'll be back tomorrow with another project. Until then, happy stampin'!


Stampin' Up! Supplies Used:

Table built using Product Table Builder by The Crafty Owl - Independent Stampin' Up! Demonstrator.

Over The Moon In My Favourite Purple Wellies

by Joanne James1. July 2019 10:00

This is already my second post of the day today as it's 1st July and there is lots going on, including the return of bonus days and a fabulous joining offer - you can read about both of these in my earlier post here. For today's creative post I'm sharing my card for this week's challenges over at As You See It and Just Add Ink that also fits the current challenge over at Time Out, which is a new-to-me challenge that I thought I would play along with too (I don't think it's a CAS challenge although a lot of the DT samples and gallery cards are and for once my card is a little less CAS than usual so I hope it fits the bill!):


So I'm not fully finished with my run on Bird Ballad projects, but I did get out another new stamp set that I just couldn't resist called 'Over The Moon' when I grabbed a little crafty time and couldn't resist making some fun cards with it - these comical cows are just adorable - take a look:


Here's the low-down on today's card:

How Now Brown Cow - So I think I am in love with these fun animals! I mean, three comical cows and a bunch of punny sentiments in the 'Over The Moon' stamp set - what's not to love?! I decided to colour mine today with Stampin' Blends, but stamped my outline in stamped-off Sahara Sand so it has an almost no-line look, which I think works nicely with my sweet brown cow. I repeated the same image on my envelope and inside my card too. My choice of browns to compliment the purple was brought about by my desire to use some of that fabby linen-look in-colour scallop edged ribbon and I like the finished look.

Daisy Delights - I continued my browns with a piece of tone-on-tone stamped Crumb Cake for my background, that I stamped randomly with one of the daisy stamps from the Daisy Lane stamp set, which I thought tied in with the flower my cow - let's call her Daisy! - is holding. I like the added detail without detracting from the main image. 

The Colour Purple - This whole card started with the colour purple; apart from navy, it is definitely the colour that features most highly in my wardrobe and is without doubt my most favourite colour to wear. I chose to use the new in-colour Purple Posy as the purple on my card today as it gave me the opportunity to break out new Blends, cardstock, in-colour DSP (love that gingham!) and co-ordinating ribbon and sequins too. My choice of the welly-wearing cow was also no accident, as I am even the proud owner of some beautiful purple wellington boots that the James Juniors gifted me for Christmas a few years ago. I couldn't find a photo of me wearing them, so took this quick snap of them next to a couple of my patio pots - check these out:

Aren't they just the best?! They are more Highland Heather than Purple Posy, however I didn't have as many embellishment options for that colour! There is something about gardening or trudging through the snow in purple wellies that is ever so cheery.

Here is the visual summary of the key products used on today's project for you to pin for easy reference:


You can see all of my 'How To' summaries on my 'How To - Tips and Techniques' Pinterest board in case you've missed any. 

Enjoy your day and I'll be back tomorrow with another project - I am organised this week as it's going to be a busy one! Until then, happy stampin'!


Stampin' Up! Supplies Used:

Table built using Product Table Builder by The Crafty Owl - Independent Stampin' Up! Demonstrator.

Just Because 2019-21 In Color Embossed Frame Cards for PP442

by Joanne James19. May 2019 09:00

Today it's Sunday and time for this week's new challenge over at The Paper Players! It's the turn of the fabulous Laurie to host this week and she has a clean and simple challenge for you to work with:


I was inspired by Nance's challenge badge this week so decided to go down the houseplant route and ink up another soon-to-be retired stamp set, but with a sneak peek of something new too - take a look:


Here's the low-down on today's card:

Goodbye Just Because - The houseplant on today's card is from one of the hostess sets in the Spring-Summer seasonal catalogue, 'Just Because'. These exclusive sets are sometimes overlooked, but they are a great perk for party hostesses who can claim them with Stampin' Rewards for a special price when they host a qualifying party. They can also be claimed if you place one large qualifying order and are always worth a look. I can confirm that the new annual catalogue has some fabulous hostess sets, so if you would like to host a party post the new catalogue launch, then do get in touch with me now to book a suitable date.

An Embossed Frame - The houseplant on today's card is rather green and uninteresting on its own, so I needed something that would add interest whilst still keeping to Laurie's 'clean and simple' theme. I decided on a stitched embossed frame, placed at a jaunty angle. I used my rectangle stitched framelits to cut a frame that I then ran through my Layered Leaves Dynamic Textured Embossing Folder; an easy way to draw the eye to the image and sentiment.  

Hello New 2019-21 In-Colours - My jaunty frame also gave me an opportunity to give you a sneak peek of the new 2019-21 in-colours. My main card showcases my favourite, Purple Posy, and I created a set with a frame in each new in-colour: left to right you can just see Terracotta Tile, Pretty Peacock, Rococo Rose, Seaside Spray and Purple Posy. 


My cards are a little 'unfinished' in as much as I wanted to add one of the new in-colour faceted dots to the right of my sentiment on each card, but alas we are having shipping issues here in the UK and mine hadn't arrived in time to make my card. For anyone local to me that is attending my Open House catalogue launch event on 5th June, you will be able to see the 'completed' card.

Here is the visual summary of the key products used on today's project for you to pin for easy reference:


You can see all of my Product and 'How To' summaries on my 'How To - Tips and Techniques' Pinterest board in case you've missed any. 

Before you reach for your ink and papers, check out what our amazing team has created to inspire you this week:

Here's a quick recap of our challenge rules:
 
1.  Create a new paper project
2.  Upload your creation to your blog with a link back to us and provide a direct link to the post featuring your challenge submission.
3.  Please link your card to no more than four challenges, TOTAL.
4.  Have FUN!
 

Also remember: this is clean and simple week. What do we mean by 'clean and simple' ? Create a card that has:

  • Minimal layers and embellishments
  • Plenty of open space, also known as 'white space'
  • Is simple and uncluttered

Enjoy your day; I am hoping to spend some time pottering in my garden and enjoying the sunshine. I'll be back tomorrow with another project. Until then, happy stampin'!


Stampin' Up! Supplies Used: 

Table built using Product Table Builder by The Crafty Owl - Independent Stampin' Up! Demonstrator.

Last Chance - The List of Retiring Products Has Been Announced!

by Joanne James15. April 2019 20:00


It's here - the list of products that will be retiring from this year's annual and Spring-Summer seasonal catalogues has been announced!

You can see and download the full list of items retiring from the current Spring-Summer catalogue by CLICKING HERE.

You can see and download the full list of items retiring from the current Annual catalogue by CLICKING HERE.

It's worth noting that there are some clear mount stamp sets that are included on the annual catalogue retiring list that are included because they are retiring in clear mount. They will still be available in the new annual catalogue, but in a new cling-mount version. Should you order one of these sets and stock of clear-mount sets already be depleted, you will be sent a new cling-mount version ahead of the new catalogue release, The affected stamp sets are as follows:

CARRY-OVER STAMP SETS NOW IN CLING:
Pop of Petals
Label Me Pretty
Special Celebrations
Itty Bitty Greetings
Botanical Bliss
This Little Piggy
Flourishing Phrases
Stitched All Around
Hold on to Hope
Heartland
Peaceful Place
Barn Door
Accented Blooms
Birthday Backgrounds
Perennial Birthday
Dashing Deer
Winter Woods
Kindness & Compassion
Dandelion Wishes
Healing Hugs
Sorry for Everything
Love You to Pieces
Tropical Chic
Bee Thankful
Animal Outing
Little Elephant
Beautiful You
Painted Glass
Little Twinkle
Beautiful Day
Magical Mermaid
First Frost
Rooted in Nature
Country Road
Lilypad Lake
Sea of Textures
Artisan Textures
Gallery Grunge
Bokeh Dots
Crafting Forever

Retiring products are only available WHILE STOCKS LAST, so if you've still items on your wish list from this year's annual or spring-summer seasonal catalogues, you need to check the retiring lists and if they're on it put an order in pronto! Don't forget to add this month's online hostess code: FRRF6WRW

Some of the things I will miss most that feature on this list include:

Table built using Product Table Builder by The Crafty Owl - Independent Stampin' Up! Demonstrator.
 

I will do a further review tomorrow, however if you want to stock up on any of the retiring in-colour items and you haven't already done so, especially re-inkers, I would urge you to do that sooner rather than later as they are always the first things to sell out.

Click on the links below to take you directly to my online shop to purchase any of the 2017-19 in-colour items that are retiring:

Table built using Product Table Builder by The Crafty Owl - Independent Stampin' Up! Demonstrator.

I will be putting in an order this evening at 8.30pm, so if you're a customer who lives local to me and would like to save postage, get your order to me by then and I will add it to mine. Alternatively hop online to get the latest on stock availability. There are no initial discounts on retiring items, however these may be introduced at a later date depending on stock levels. 

I hope to be back tomorrow with a creative post and an update on the retiring list; until then, happy shopping!

#SimpleStamping In-Colour Accented Blooms Cards

by Joanne James12. April 2019 08:00

Today I'm sharing a collection of cards that have been designed for this month's timely #SimpleStamping challenge which is to feature the 2017-19 soon-to-be-retiring in-colours, on a project using nothing more than stamps, ink and paper. I decided to use the Accented Blooms stamp set that I used on this card yesterday, with a clean and simple card that really lets these in-colours shine. 

So first of all, let's take a look at the five in-colours that we've all loved for the last two years and will soon be leaving us:


Clockwise from the left: Fresh Fig, Powder Pink, Berry Burst, Lemon-Lime Twist and Tranquil Tide in the centre. 

Do you have a favourite? Whilst I find these colours a challenge to use together on a project, you will find some great examples of projects that feature these colours in a variety of combinations elsewhere on my blog. I think if pushed I would rate Berry Burst as my favourite, but it's a close call. Each of these colours has something to offer. Here's a close-up of my favourite one:


For today's #SimpleStamping project I simply stamped the main floral image from the 'Accented Blooms' stamp set in my chosen in-colour onto a square of Whisper White cardstock measuring 9cm x 9cm and adhered it to a card base in the same in-colour, then stamped the sentiment in the same colour on a separate piece of Whisper White and cut it out by hand; you could use the Tailored Tag Punch for this for speed, but the shape is great for #SimpleStamping projects as it can be easily fussy-cut by hand too. I then popped this onto a couple of foam dimensionals and added to my project. Voila! It's that easy - I created on in each of the in-colours. Here's a peek:


I haven't yet had time to put the a quick and easy #SimpleStamping videos that demonstrate how easy this card is to put together - when I do you will see all five of these cards. Onstage has got in the way of video production this week so I'll update this post at some point early next week with the necessary demonstration!

The Accented Blooms stamp set is another one that is great for colouring but also works well with a monochromatic design too. For these cards all you need is the stamp set, one or more of the in-colours and the corresponding colour of cardstock, along with a pair of scissors and adhesive, and you are good to go! The Stamparatus will enable you to get a good solid image of the sentiment in particular, but this is by no means an essential tool to create this card.

Here is the visual summary of the key products used on today's project for you to pin for easy reference:


You can see all of my 'How To' summaries on my 'How To - Tips and Techniques' Pinterest board in case you've missed any. 

If you're new to these colours you only have a few more days to guarantee their availability; when the retiring list goes live on Monday 15th April (at 8pm) these will undoubtedly be one of the first things to sell-out - and once they're gone, they're gone! 

If you are a crafter who has been enjoying these colours and can't bare to see them go, make sure you stock up on re-inkers, cardstocks and accessories now to keep you going in the months to come! You can purchase everything you need from my online store via the links below:

Table built using Product Table Builder by The Crafty Owl - Independent Stampin' Up! Demonstrator.

Enjoy your day. I'm travelling to Onstage today with my teamies and looking forward to a CentreStage leadership reception this evening so if you want to see all things new be sure to follow my Facebook page where I will do my best to share the fun and excitement 'real time'. I am organised for once and I will be back here tomorrow with another project, so do pop back for more creative inspirationfacebook. Until then, happy stampin'!


Stampin' Up! Supplies Used:

Table built using Product Table Builder by The Crafty Owl - Independent Stampin' Up! Demonstrator.

Hand Delivered Balloons Pop-Up Slider Card To Celebrate The Paper Players 400th Birthday!

by Joanne James1. July 2018 09:00

It's Sunday and time for this week's new challenge over at The Paper Players! It's the turn of  the lovely Jaydee to host this week and we have something very special in store for you as The Paper Players is celebrating our 400th birthday - how awesome is that?! It is only right therefore that our theme challenge FOR THE NEXT TWO WEEKS - yes, we are running our challenge for two weeks in total, is all about celebration:
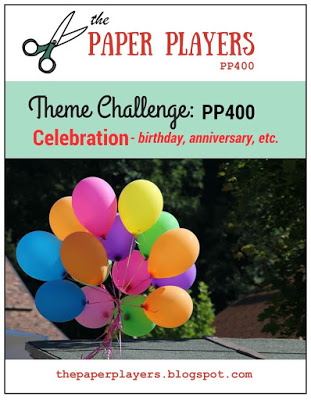
   

First and foremost, we are celebrating all of the lovely people who play along with The Paper Players challenge each week for 50 weeks of the year - it is for you and because of you that we are still going strong! It is without doubt the best team I have ever worked with - these gals are simply THE BEST! For our special celebration challenge this week, we are also joined by two of the original members of the Paper Players team: Ann Schach and Anne Marie Hile. And there are PRIZES this week - so many prizes!! 40 in fact, from our many generous sponsors across the crafting community - check out our post for more details but here is the full list to whet your appetite:

Listed in alphabetical order:

  1. Altenew - $30 gift card
  2. Atenew Academy - $20 gift card  - compliments of Jaydee
  3. Avery Elle - $20 store credit
  4. Butterfly Reflections - Breathe Rainbows Stamp Set (US only)
  5. CAS-ual Fridays - $25 store credit
  6. Cheery Lynn - $20 gift card  
  7. Cheery Lynn - $20 gift card - compliments of Laurie
  8. Concord & 9th - $25 gift card
  9. Craftin Desert Diva's - $10 store cedit
  10. Dies R Us - $15 gift card
  11. Ellen Hutson -  20 gift cards - compliments of Annie 
  12. Ellen Hutson $20 gift card - compliments of Eliz
  13. Happy Little Stampers - $20 store credit
  14. Heffy Doodle - Sticky Friends Stamp Sets (exclusive - not available for purchase)
  15. Heffy Doodle - Sticky Friends Stamp Set (exclusive - not available for purchase)
  16. Heffy Doodle - Sticky Friends Stamp Set (exclusive - not available for purchase)
  17. Heffy Doodle - Sticky Friends Stamp Set (exclusive - not available for purchase)
  18. Lawn Fawn - $25 gift card
  19. My Favorite Things - $25 store credit
  20. Neat & Tangled - $15 store credit 
  21. Newton's Nook - $20 store credit
  22. Pink & Main - $20 store credit
  23. Power Poppy - $10 store credit
  24. Stampendous - $20 rewards cards (US only)
  25. Stampendous - $20 reward card (US only)
  26. Stampendous - $20 reward card (US only)
  27. Stamplorations - $20 gift certificate
  28. Stampin' Up - $20 gift certificates compliments of Nance (US only)
  29. Stampin' Up! $20 gift certificate - compliments of LeAnne (US only)
  30. Stampin' Up! £20 gift certificate - compliments of Joanne (UK only)
  31. Stampin' Up! $20 gift certificate - compliments of Claire (US only)
  32. Stampin' Up $20 gift certificate - compliments of Jan (NZ only)
  33. Technique Tuesday - $20 gift card
  34. The Foiled Fox - $25 store credit
  35. Trinity Stamps - Let it Grow and Lady Liberty Stamp Sets
  36. Tutti Designs - $15 gift card
  37. Uniko - any in-stock stamp set of winner's choice
  38. Verve Stamps - stamp & accessory bundle - compliments of Sandy (US only)
  39. Verve Stamps - stamp & accessory bundle - compliments of Sandy (US only)
  40. Waffle Flower - $15 gift card

Isn't that fantastic?! All prizes will be awarded randomly between challenge participants - so if you enter, you are in with a chance of winning!

Whilst balloons are not mandatory for this challenge, I couldn't help but be inspired by the wonderful badge Nance created for us this week, so I pulled out my Hand Delivered hostess set and set to work on a fun fold for you - take a look:
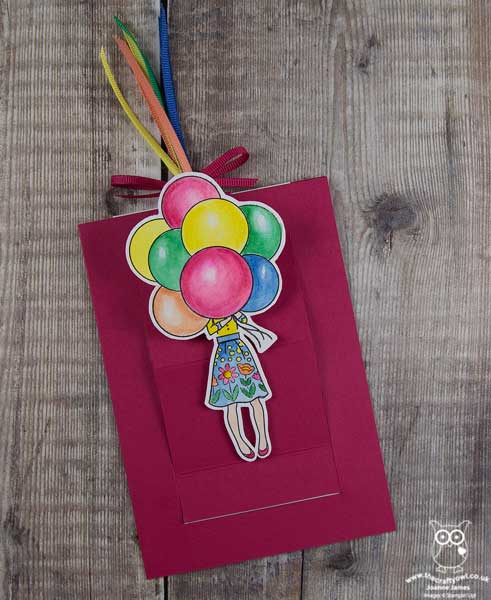
 

Here's the low-down on today's card:

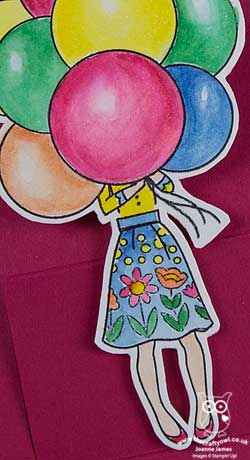
Hand Delivered - I used my favourite of the new hostess sets, Hand Delivered, for my card today. I love the way the pieces of this set mix and match; I've used the balloons again on today's card, but unlike my previous versions, this birthday girl is wearing the flowered skirt - so pretty! This is a great set with lots of variety - I used the birthday sentiments from this set on my card too, as you can see in the picture below. It's worth hosting a Stampin' Up! party just to get your hands on this set, so if you would like to talk to me about hosting one so that you can get your hands on exclusive hostess sets like this one, then do get in touch.

Pop-Up Slider Fancy Fold Card - I decided I would mimic the 'hidden' nature of the young lady behind her balloon with a pop-up slider card. I haven't made one of these cards in ages, but I loved the idea of a hidden message too. When the card is 'closed' it lies flat as in the picture above; when you pull the ribbons upwards, the girl moves into a vertical position and the hidden messages are revealed:
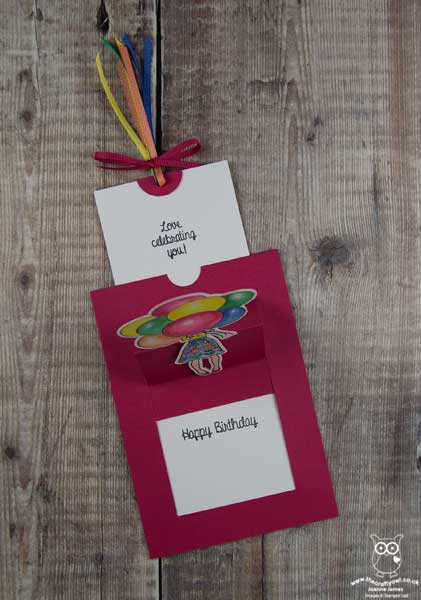
Isn't that fun?! And space still available to write a personalised message too.

New In Colours - I really love the palette of 2018-20 in colours; so much so, since I still can't decide which ones I like best I used them all! They work really well together and the bright colours definitely appeal to me. I used Lovely Lipstick for my cardbase, then used a combination of all 5 colours to colour the lady with my aquapainter. I also used ribbon in all 5 colours to create my pull tassel. Lastly, a liberal coat of Wink of Stella finished my balloons. I'm also linking up my card with the team over at Fab Friday, since they are featuring the new in colours too:

Here is the visual summary of the key products used on today's project for you to pin for easy reference:
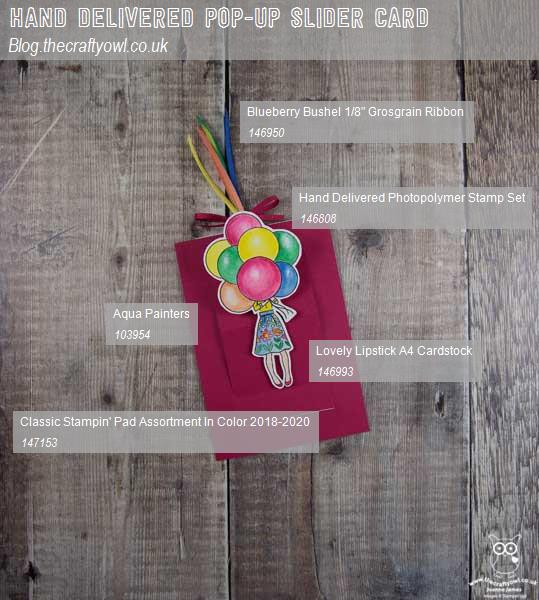
 

You can see all of my Product and 'How To' summaries on my 'How To - Tips and Techniques' Pinterest board in case you've missed any. 

Before you reach for your ink and papers, check out what our amazing team has created to inspire you this week:

Here's a quick recap of our challenge rules:
 
1.  Create a new paper project specifically for this challenge.
2.  Upload your creation to your blog with a link back to us and provide a direct link to the post featuring your challenge submission.
3.  Please link your card to no more than four challenges, TOTAL.
4.  Please be considerate of our requests; entries that do not follow any of these rules will be deleted without notification and will not be eligible for our prizes.
5.  Have FUN!
 
We also have an additional rule for this challenge only: please do not submit more than TWO cards for this challenge. This is simply so that everyone can have an equal opportunity to win a prize.
 
Remember: PP400 will run for two weeks (the challenge closes on Friday 13th July)- the Design Team will be posting a second card for our theme next Sunday, to give you even more inspiration and encouragement to participate All challenge winners will be announced on Saturday, June 14th. All prizes awarded to participants will be drawn from random.org from ALL participants and announced with our reminder post for challenge PP401 on Wednesday 18th July.

I can't wait to see how you interpret this week's theme and look forward to visiting your blogs this week and next! Enjoy the rest of your weekend - I'll be hoping to have a slightly more restful one than of late, catching up on a few chores and hopefully enjoying some of the lovely sunshine we've been having here in the UK these past few weeks. I'll be back soon with another project; until then, happy stampin'!


Stampin' Up! Supplies Used: 

Table built using Product Table Builder by The Crafty Owl - Independent Stampin' Up! Demonstrator.

Stampin' Up! Colour Collection Lined Alphabet Framed Home Decor Sampler

by Joanne James31. May 2018 11:00

Today is the last day for lots of things - you can read all about those in my earlier post here - but for today's creative post I'm sharing a piece of framed home decor that I made recently for a recent event and my upcoming new catalogue launch to illustrate to my customers the new Stampin' Up! colour collections following the colour revamp, whilst also highlighting both current sets of in-colours. 

I wanted something that would serve as a conversation-starter for questions and enable comparison of the new colour families so decided to take the opportunity to highlight one of my favourite bundles from the new catalogue, the Lined Alphabet bundle, to create a colour-themed piece of home decor - take a look:


This is a rather large framed piece, measuring a whopping 17 1/2" x 17 1/2" square (or 45cm x 45cm), so I've photographed it quite tightly so that you can see the detail. You might recognise the quotation - it is attributed to the Russian artist Wassily Kandinsky, famed for painting the first works of modern abstract art in the 20th century. In defining life, painting and the psychological impact of colour, he is quoted as saying:

"Colour is a power which directly influences the soul. Colour is the keyboard, the eyes are the hammer, the soul is the strings. The artist is the hand that plays, touching one key or another, to cause vibrations in the soul" (V. The psychological working of Colour: Quoted in: Hajo Düchting (2000) Wassily Kandinsky, 1866-1944: A Revolution in Painting. p. 17). 

This seemed perfectly suitable for my interpretation of the Stampin' Up! colours. All 53 colours feature: the new 2018-20 In-colours feature first (I repeated the Lovely Lipstick and Grapefruit Grove colours as I needed 6 colours for this word and a seventh panel to give me the symmetry for my overall design, but otherwise all colours feature just once). You can see each of the families in sequence, highlighted below - a little messy to label to be fair, as two of the colour families span more than one horizontal line, but hopefully you can make them all out:


This is then complimented by the three basics of Whisper White, Very Vanilla and Basic Black to make up the background.

What do you think of the new Lined Alphabet and the co-ordinating Layering Alphabet Edgelit Dies? I love them! Rest assured, these are an investment item and I will be getting my money's worth out of them so you will see lots more projects using them in the coming months for sure. They are really easy to use - I actually cut the letters first then stamped afterwards, but you could do the other way around which is the more conventional approach I guess. I like the subtle line detail that stamping the diecut letter adds for just that little bit of extra definition and the marker lines on the dies make it easy to get the words lined up. This is just one of the ways that I will be sharing the new colours with my customers - along with colour swatches, guides and the new in-color bookmarks that I sent out with my catalogues too.

I will be having a couple of new catalogue drop-in sessions next week for anyone who is local to me and would like to have a look at my new product displays including this frame in more detail, pick up their new catalogue, shop my 'buy one, get one free' stash of retired stock and more. These drop-ins will be on Wednesday 6th June 10am-12 noon and then again on Thursday evening 7th June from 6-8pm - please get in touch and let me know if you would like to attend either via email or my Facebook page.

Enjoy your day and I'll be back tomorrow with news of the new catalogue. Until then, happy stampin'!


Stampin' Up! Supplies Used: 

Table built using Product Table Builder by The Crafty Owl - Independent Stampin' Up! Demonstrator.

Wedding Invites Made Easy - All It Takes Is A Little Planning!

by Joanne James19. May 2018 18:00


Good evening everyone! Well, today has been a special day here in the UK - we celebrated the royal wedding of HRH Prince Harry and Meghan Markle. Whilst I'm not a devoted Royal watcher, I do think the Monarchy has an important role to play and one thing's for sure: I love a wedding, royal or otherwise! I enjoyed watching the wedding from my office as I was crafting this morning and ooh'ed and ahh'ed at the flowers, the dresses and those adorable and so well-behaved bridesmaids and page boys. Such a glorious day for it too and the bride was truly stunning.

Since weddings are the order of the day, I thought it would make a great topic for today's blog post too so I'm sharing with you the invites I designed recently for a bride who was keen to create her own stationery for the big day.

Making your own wedding stationery is a great way to create something individual and personal to you - take a look at the design we agreed upon:


The key things to remember when designing your own wedding stationery are as follows:

Make It Your Own - When you make your own wedding stationery, you are able to create something unique and personal to you in a way that off-the-shelf invitations will never be able to deliver. You can choose colours that co-ordinate with your scheme for the day and flowers or emblems that tie in with your chosen theme. For this wedding, the bride was keen to incorporate pale pink, but otherwise had no fixed views on design. This is one of the things I love about being a Stampin' Up! demonstrator - I love to design cards and projects, so working to a bride-to-be's brief is always an exciting prospect. It's great for the bride too - often they are keen to make their own stationery but have never done this (or sometimes any papercrafting) before, so they are keen to work with someone who can take their ideas and make them into a workable, reproductable, design. 

Keep It Simple - The key to good wedding stationery design is to keep it simple. Sometimes you may only have to make 20 invitations, but sometimes it is 120! For any kind of mass production, it's important to have a design that can be easily reproduced many times, each time as good as the last, so keeping it simple is key. For this invitation, we used the Detailed Floral Thinlits to create a gatefold-style card, with a Powder Pink Fresh Florals Designer Series Paper insert that was adhered on one side. When opened, the invitation wording was then on the inside.

Finishing Touches - Whilst the design is simple and easy to reproduce, the finishing touches are all-important to add that of luxury: the outer gatefold was cut from Shimmery White cardstock, with the addition of Powder Pink Shimmer Ribbon to create the tied closure that co-ordinates with the DSP lining. We also added a small round punched tag, with the words 'Mr & Mrs' from the 'Beautiful Bouquet' set stamped on it in pink, using a length of silver thread.  

These invitations were really not too tricky at all to make, armed with the right tools and a few pairs of hands. The most important thing to consider when making your own wedding stationery is to plan ahead - don't underestimate the time it takes to mass produce invitations and other stationery items and be sure to allow enough time to actually put it all together. This is the perfect activity to involve friends and bridesmaids in - after all, many hands make light work!

Here is the visual summary of the key products used on today's project for you to pin for easy reference:


You can see all of my 'How To' summaries on my 'How To - Tips and Techniques' Pinterest board in case you've missed any. 

If you are reading this and thinking you would like some help in designing your own wedding invitations, please don't hesitate to get in touch - I'd love to discuss your requirements and help you create the unique, bespoke stationery of your dreams.

Enjoy your day and I'll be back tomorrow with another project. Until then, happy stampin'!


Stampin' Up! Supplies Used:


Table built using Product Table Builder by The Crafty Owl - Independent Stampin' Up! Demonstrator.

Introducing Stampin' Up!'s New 2018-2020 In Colours - Order Yours Today!

by Joanne James1. May 2018 07:00

Today is a big news day and especially exciting for those of you who are eagerly awaiting the new annual Stampin' Up! catalogue and can't wait to get your hands on some new product! The first of my posts today is all about colour. I updated you on the details of Stampin' Up's colour revamp in my previous post here so now it's time to introduce you to the new in-colours for 2018-2020.

Every two years Stampin' Up! will continue to introduce a collection of 5 In Colours that will compliment the rest of the Stampin' Up! range. Here are the new in colours that will be joining us this year:

A collection of bright, contemporary colours that will compliment our core offering. Whilst at first glance these colours may appear similar to other existing colours or those we've seen before, when compared directly each is uniquely different. Here's a look at the overall collection, including the new and returning colours and the 2017-19 In Colours that are still with us for another year:

These new in colours are sure to feature in my projects lots in the forthcoming weeks and months; I've had mine for a few weeks and I have been enjoying working with them creating samples and getting to know them better. 

Now for today's news - from today, you can get your hands on these new colours too! As one of two early releases, the new in-colour ink pad collection is available for you to purchase and what's more, as a thank you, you will receive a 10% discount too - bonus!

Simply click on the link below to go straight to my online store to get your hands on yours!

Table built using Product Table Builder by The Crafty Owl - Independent Stampin' Up! Demonstrator.
 
This is not the only new release today - the fabulous 'Share What You Love' Suite is also on early release from the new catalogue with some exclusive bundles that can be yours this month only - you can read more about that in today's other post here!

Picnic With You Basket of Flowers Exploding Box Card

by Joanne James1. April 2018 18:00

No, it's no April Fools - it's another two-post day today! I have spent a relaxing day being treated to Sunday lunch, along with my fair share of chocolate eggs following this morning's obligatory Easter egg hunt and I wanted to share an exploding box card that I made recently that is just perfect for this week's challenge over at Stamps Ink Paper before it closes this evening:

My card looks rather inconspicuous from the outside, just like a simple lidded box. Yet when the lid is removed, my unassuming card 'explodes' and opens up to reveal a 3 dimensional basket of flowers - take a look at this top-down view, showing all of the flaps and pockets - you can also see the layering within my basket:


And here you can see properly what the flower basket centrepiece looks like:

A sweet basket of flowers, complete with butterfly, on a base edged with grass. Isn't that fun?! Here's the low-down on today's card:

Picnic With You - I used the stamps and framelits from the Picnic With You bundle to create my basket, cutting four basket pieces scoring and glueing at the corners to create a 3 dimensional basket to hold my flowers. I love the embossed basket weave detail that is added with the speciality piece in the Picnic Basket Builder Framelit set - it adds great detail and interest.  

In-Colour Colour Combo - My card features Berry Burst flowers and makes a real feature of the In Color designer series paper in Tranquil Tide. Whilst my main box is made out of Whisper White, the lid is made from Tranquil Tide DSP and I've carried this through for the pockets and mats for the inside of my card. I added a little Pool Party butterfly for an unexpected pop of contrasting colour. I love this deep, yet fresh colour combo - feel free to save it if you would like to use it for your future project inspiration:


Pockets and Tabs - I added a generic message from the Picnic With you stamp set on one of the inner flaps of my card, and another on the right hand side after I took this photo that displayed a 'Happy Mother's Day' message (this card was for my Mother-In-Law for Mother's Day - I knew she would appreciate something a little different and it I could deliver by hand, another bonus!) In addition, the pockets contained two simple slide out cards, with simple tabs courtesy of the Circle Tab Punch (such a useful punch!) - we wrote messages on ours but they would also be a great place to add some photos or even some Memories & More cards perhaps.

Here's another photo showing the centre of my card in detail: 

Here is the visual summary of the key products used on today's project for you to pin for easy reference:


You can see all of my 'How To' summaries on my 'How To - Tips and Techniques' Pinterest board in case you've missed any. 

I hope you have all enjoyed your day and I'll be back on Tuesday with another project. Until then, happy stampin'!


Stampin' Up! Supplies Used:

Table built using Product Table Builder by The Crafty Owl - Independent Stampin' Up! Demonstrator.

Mini Catalogue

BROWSE THE CATALOGUE

The mini catalogue is now live! Read and download your copy here.

Shop Online

Access my online shop 24 x 7, 365 days of the year:

Current April hostess code:

VDKNV7BH

Shop Online

Join My Team

It's always a great time to join Stampin’ Up! New team members can get £130 worth of products for only £99 + free business supplies + free shipping + all the fun being a part of Stampin’ Up! Stampin' Up! has something for everyone: join my growing team and benefit from my support to enjoy Stampin' Up! however you choose.

If you're interested, call me for a chat to understand how I can help you realise your goals. Alternatively, if you have already decided to sign up and you just can't wait, please click here for the link to the online form where you can sign up and order your starter kit right away! 

Latest Kit!

Stampin Cut and Emboss

The Rock Legend Kit has all you need to make 8 cards with coordinating envelopes. Along with the new Panda Friends Kit, both are available from January 4th for just £14 each - get yours here!

2023-24 Annual Catalogue

BROWSE THE CATALOGUE

Click on the catalogue for a full list of current SU! supplies - if you would like to order any of the items featured, please drop me a line at [email protected] or give me a call on 07773 421446 - I'd be happy to help.

New Online Exclusives

There are new products available exclusively in the online store from 5 March - check them out here.

About Me

Hi I'm Joanne and live in Northampton and when I'm not looking after my husband and two beautiful children, am an avid crafter with a passion for all things Stampin' Up!

I must confess that I have never been a big rubber stamper - until I discovered Stampin' Up! that is. I love the fact that I can get such great results with co-ordinating stamps, inks, papers and punches - the possibilities are endless! Join me on my stamping journey as I share the things I love and be inspired to create amazing things yourself!

Follow Me

Monthly Newsletter

Box Builder

Click the button above to use Box Buster to create your custom box design using the Envelope Punch Board!

Kits Collection Now Available!

Stampin Cut and Emboss

The new Kits Collection from Stampin' Up! is now available!

Click here to see the current kits available and order yours online today.

I Design For


Stampin' Up Stuff

This is my personal blog and is not endorsed by Stampin’ Up! I hope you find it a plentiful source of ideas and personal inspiration but please don't copy my designs for contest submission or use for classes, publication or sale without express permission.