by Joanne James22. April 2015 23:17It's Wednesday (still just!) so that means a new collection of Wednesday Weekly Deals! This week's deals are included below - they will be available for one week only, before a new collection of deals is announced.
As always, if you want to take advantage of any of the deals on offer, you can support my business by placing your order online by clicking here or using the link to my store on the right hand side of my blog page where it says 'Shop Online' or with me in person. Don't forget to add the Hostess Code for April DBJFM4DG and be sure to make sure that you don't check the 'no contact' box if you'd like to be kept updated with the progress of you order and receive a little thank you in the post from me.
Here's a summary of this week's one-week only Wednesday deals - click on each item to go to the online store to purchase:
Don't forget the retiring lists are still going strong too - lots of the cardstock, in-colour supplies and embellishments have already been snapped up, but the are still plenty of bargains to be had - you can find the updated retirement lists by clicking
here.
Back tomorrow with this week's post for Create With Connie and Mary; until then, happy shopping!

193f8b8e-7578-4df3-8df1-a15dc9094c84|0|.0|96d5b379-7e1d-4dac-a6ba-1e50db561b04
Tags: Build A Bouquet, Flower Medallion Punch, Handpicked Framelits, Vine Street Embossing Folder, Promotions, retiring accessories, Retiring Lists, retiring stamps, Shop online, Stampin' Up, Stampin' Up Card, Stampin' Up Card ideas, Stampin' Up Supplies, Stylish Stripes TIEF, Wednesday Weekly Deals
Promotions | Shop Online | Stamping
by Joanne James5. April 2015 10:00It's Sunday - my favourite day of the blogging week! It's time for a new challenge over at The Paper Players and this week the lovely Jaydee has a fun theme for us:
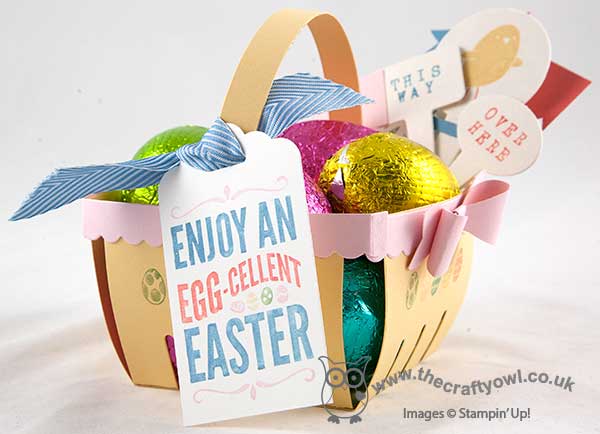
Use any die cut on your project - boy did I deliberate over this! I use die cuts all the time and my Big Shot is my crafting best friend, but what to share? I made several cards, all trying to showcase different aspects of dies and diecuts, but none of them were working for me; I think I was trying too hard! After much deliberating I decided to share a 3D project instead and since it's Easter Sunday today what better than an Easter basket made with the Berry Basket Bigz Die, along with some cute little tags all ready for today's Easter egg hunt:
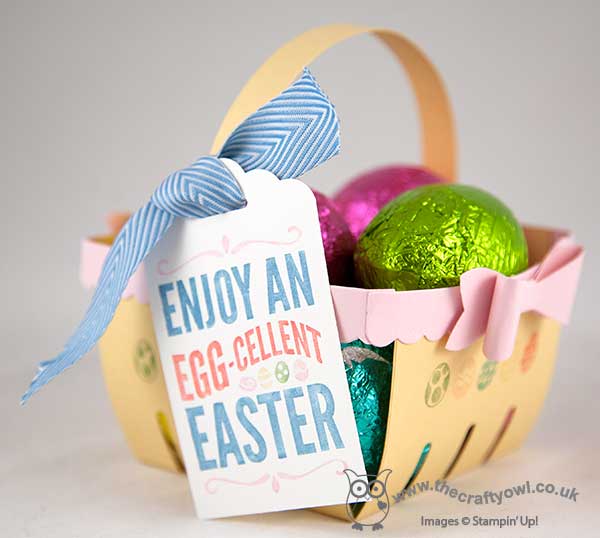
The basket itself is really easy to make using the die: I made mine out of So Saffron cardstock with a Pink Pirouette trim and handle, and having stamped some eggs on the basket using my Subtles Stampin' Write markers, I finished my completed basket with a couple of pink bows punched from the Bow Builder punch and a stamped tag tied on with some Marina Mist chevron ribbon. I then used my Big Shot, Handpicked framelit dies and my Alphabet rotary stamp to make a whole bunch of tags ready to place around the garden for our Easter egg hunt today - here are just a selection:
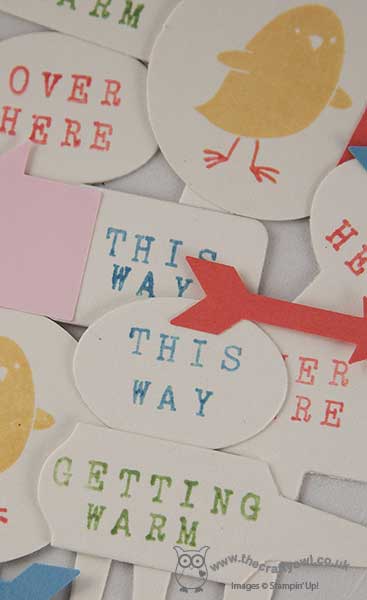
I made them out of coaster board, so that they would be extra-strong and added coloured punched out arrows to some of them to add to the fun.
There are some great projects from the Design Team this week - do pop by their blogs and take a look:
The Paper Players Design Team
Here's a quick recap of our challenge rules:
1. Create a new paper project
2. Upload your creation to your blog with a link back to us and provide a direct link to the post featuring your challenge submission.
3. Please link your card to no more than three challenges, TOTAL.
4. Have FUN!
I hope you like today's project - there are so many different dies to choose from, I can't wait to see what you come up with for your cards and projects in our gallery this week. I'm off to play Easter bunny and follow the James juniors around the garden collecting eggs, then attempt to persuade them to not eat them all before lunch! Back tomorrow with another project; until then, happy stampin'!
Stampin' Up! Supplies Used:
b6939163-881e-4321-8282-202ab3a0c86b|0|.0|96d5b379-7e1d-4dac-a6ba-1e50db561b04
Tags: Bow Builder Punch, Handpicked Framelits, Big Shot, Berry Basket Bigz L Die, For Peeps' Sake, Easter, Scalloped Tag Topper Punch, What's Up Punch, Stampin' Up, Stampin' Up Card, Stampin' Up Card ideas, Stampin' Up Supplies, Shop online, The Paper Players
3D Projects | Shop Online | Stamping
by Joanne James3. April 2015 22:26It's Good Friday already so I thought it was about time I shared with you some of the fun Easter projects that I've been making with my children and their friends in recent weeks. Both James Juniors love to craft and Rebecca especially likes the opportunity to spend some time in my craft room whenever she can. At the start of the Easter holidays, we had a big group of their friends round and spent a fun morning making these cute Easter treat boxes using one of my favourite products, the Curvy Keepsake Box Thinlit Die:
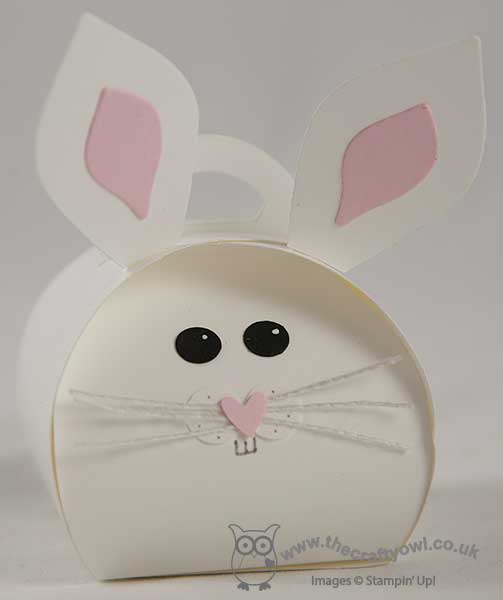
I couldn't resist creating some Easter themed containers using this die, further to the popularity of my Christmas ones - you can see my tips on using this thinlit die in my Stampissimo video with Paula Gorry from Stampin' Up! here.
The girls made cute bunnies - I've seen lots of different versions floating around Pinterest, but for mine I decided to use my Flower Fair framelits to create the ears and the various pieces from my trusty Owl Builder punch for the face, along with some strands of split white jute ribbon for his whiskers and some added detail with a Smoky Slate marker and my white gel pen.
The boys made these cute Easter chicks:
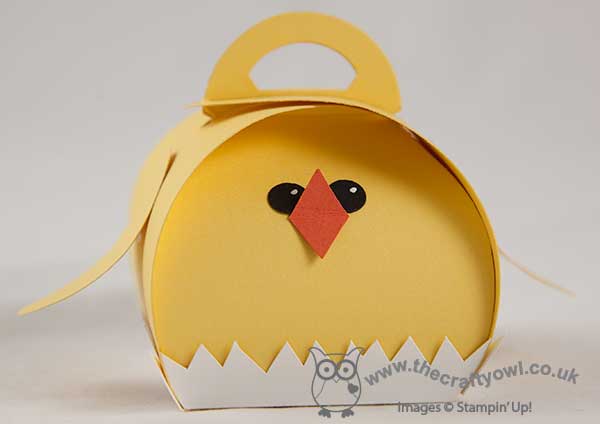
The boys were slightly younger, so we went with something a little less complicated with less small pieces required for the face.
In addition, everyone also made a little Easter bag, inspired by this one created by Brian King and using this fabulous little tutorial by Val Moody to create the basic bag shape:
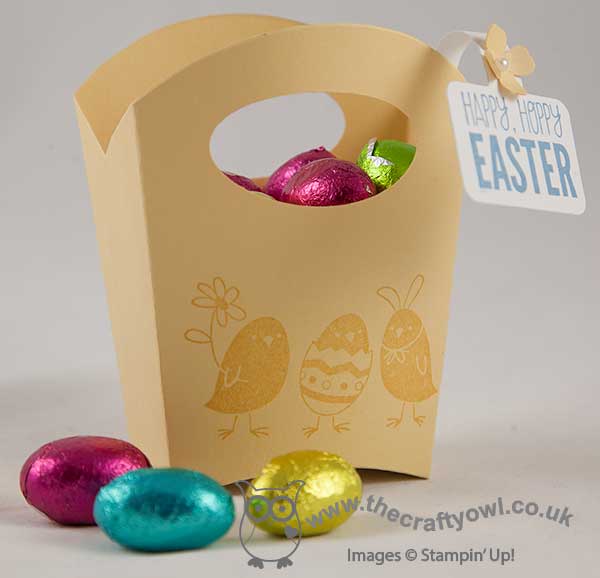
We kept things simple with some tone-on-tone stamping using the 'For Peep's Sake' Easter-themed stamp set and a little tag made with the handpicked framelits. These little bags are so easy to make and the perfect size for your mini Easter eggs. Everyone chose their own colours - here's a couple of pictures I took on the day of some of the children's finished projects:
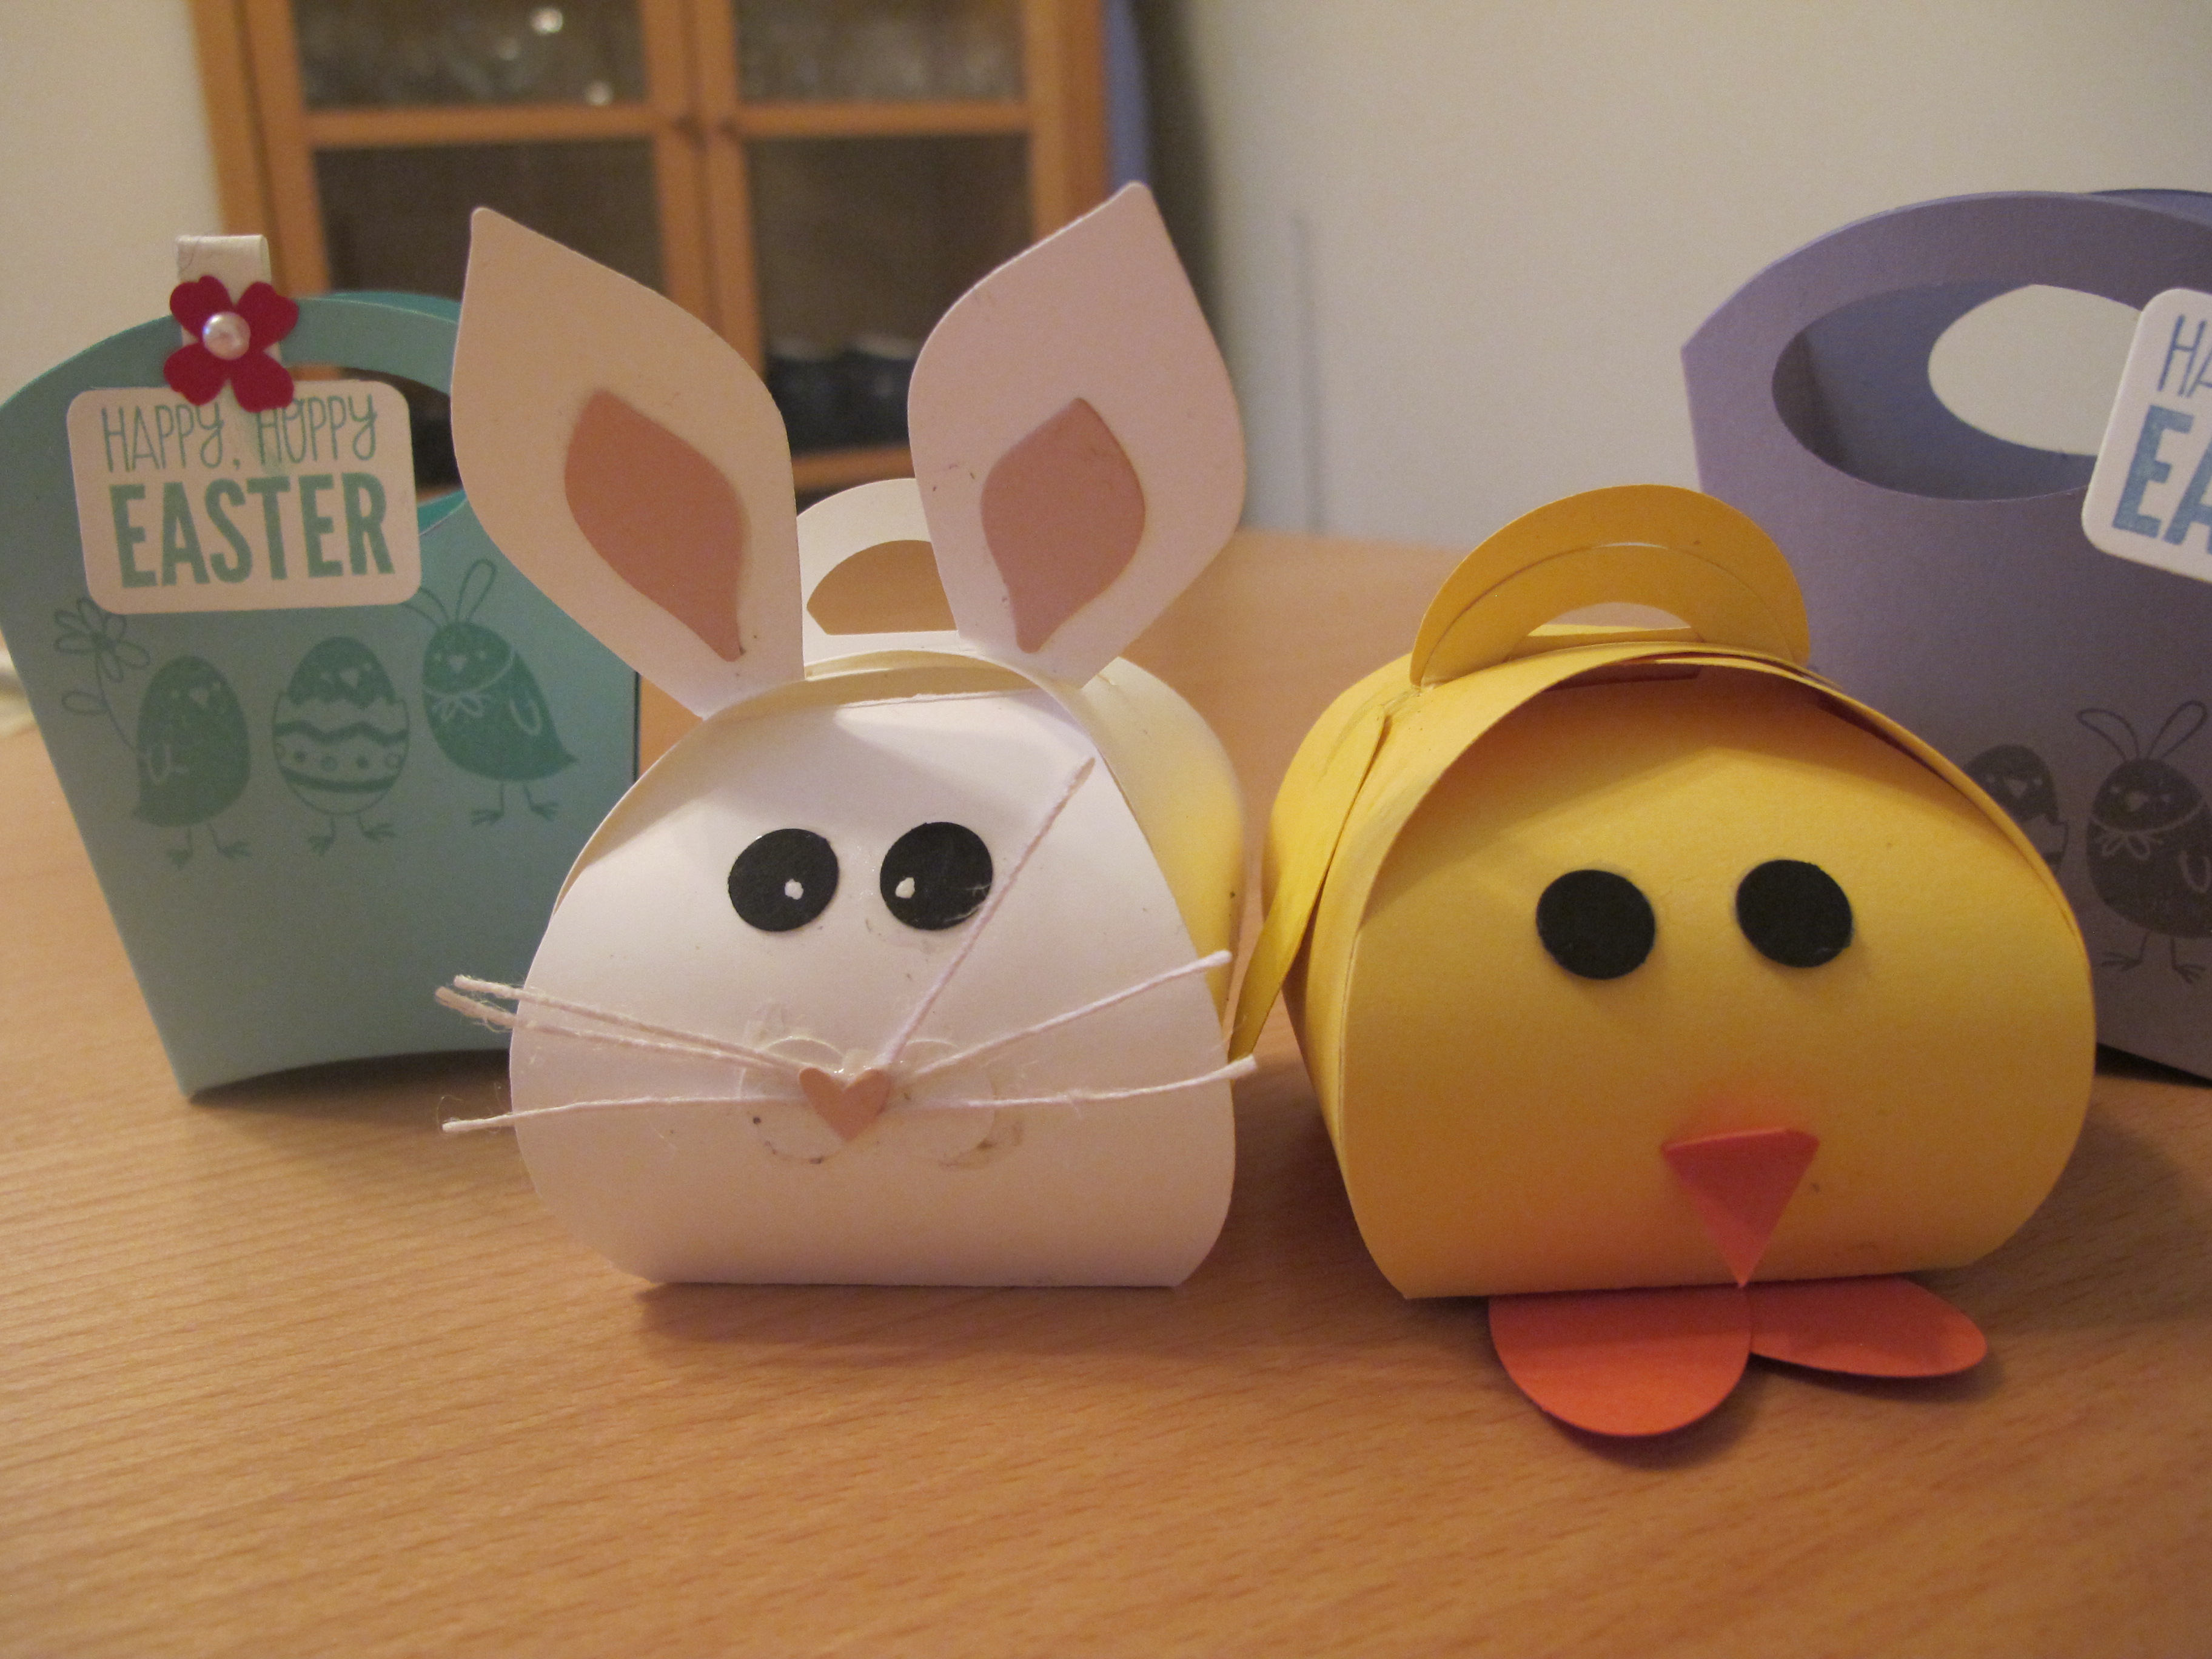
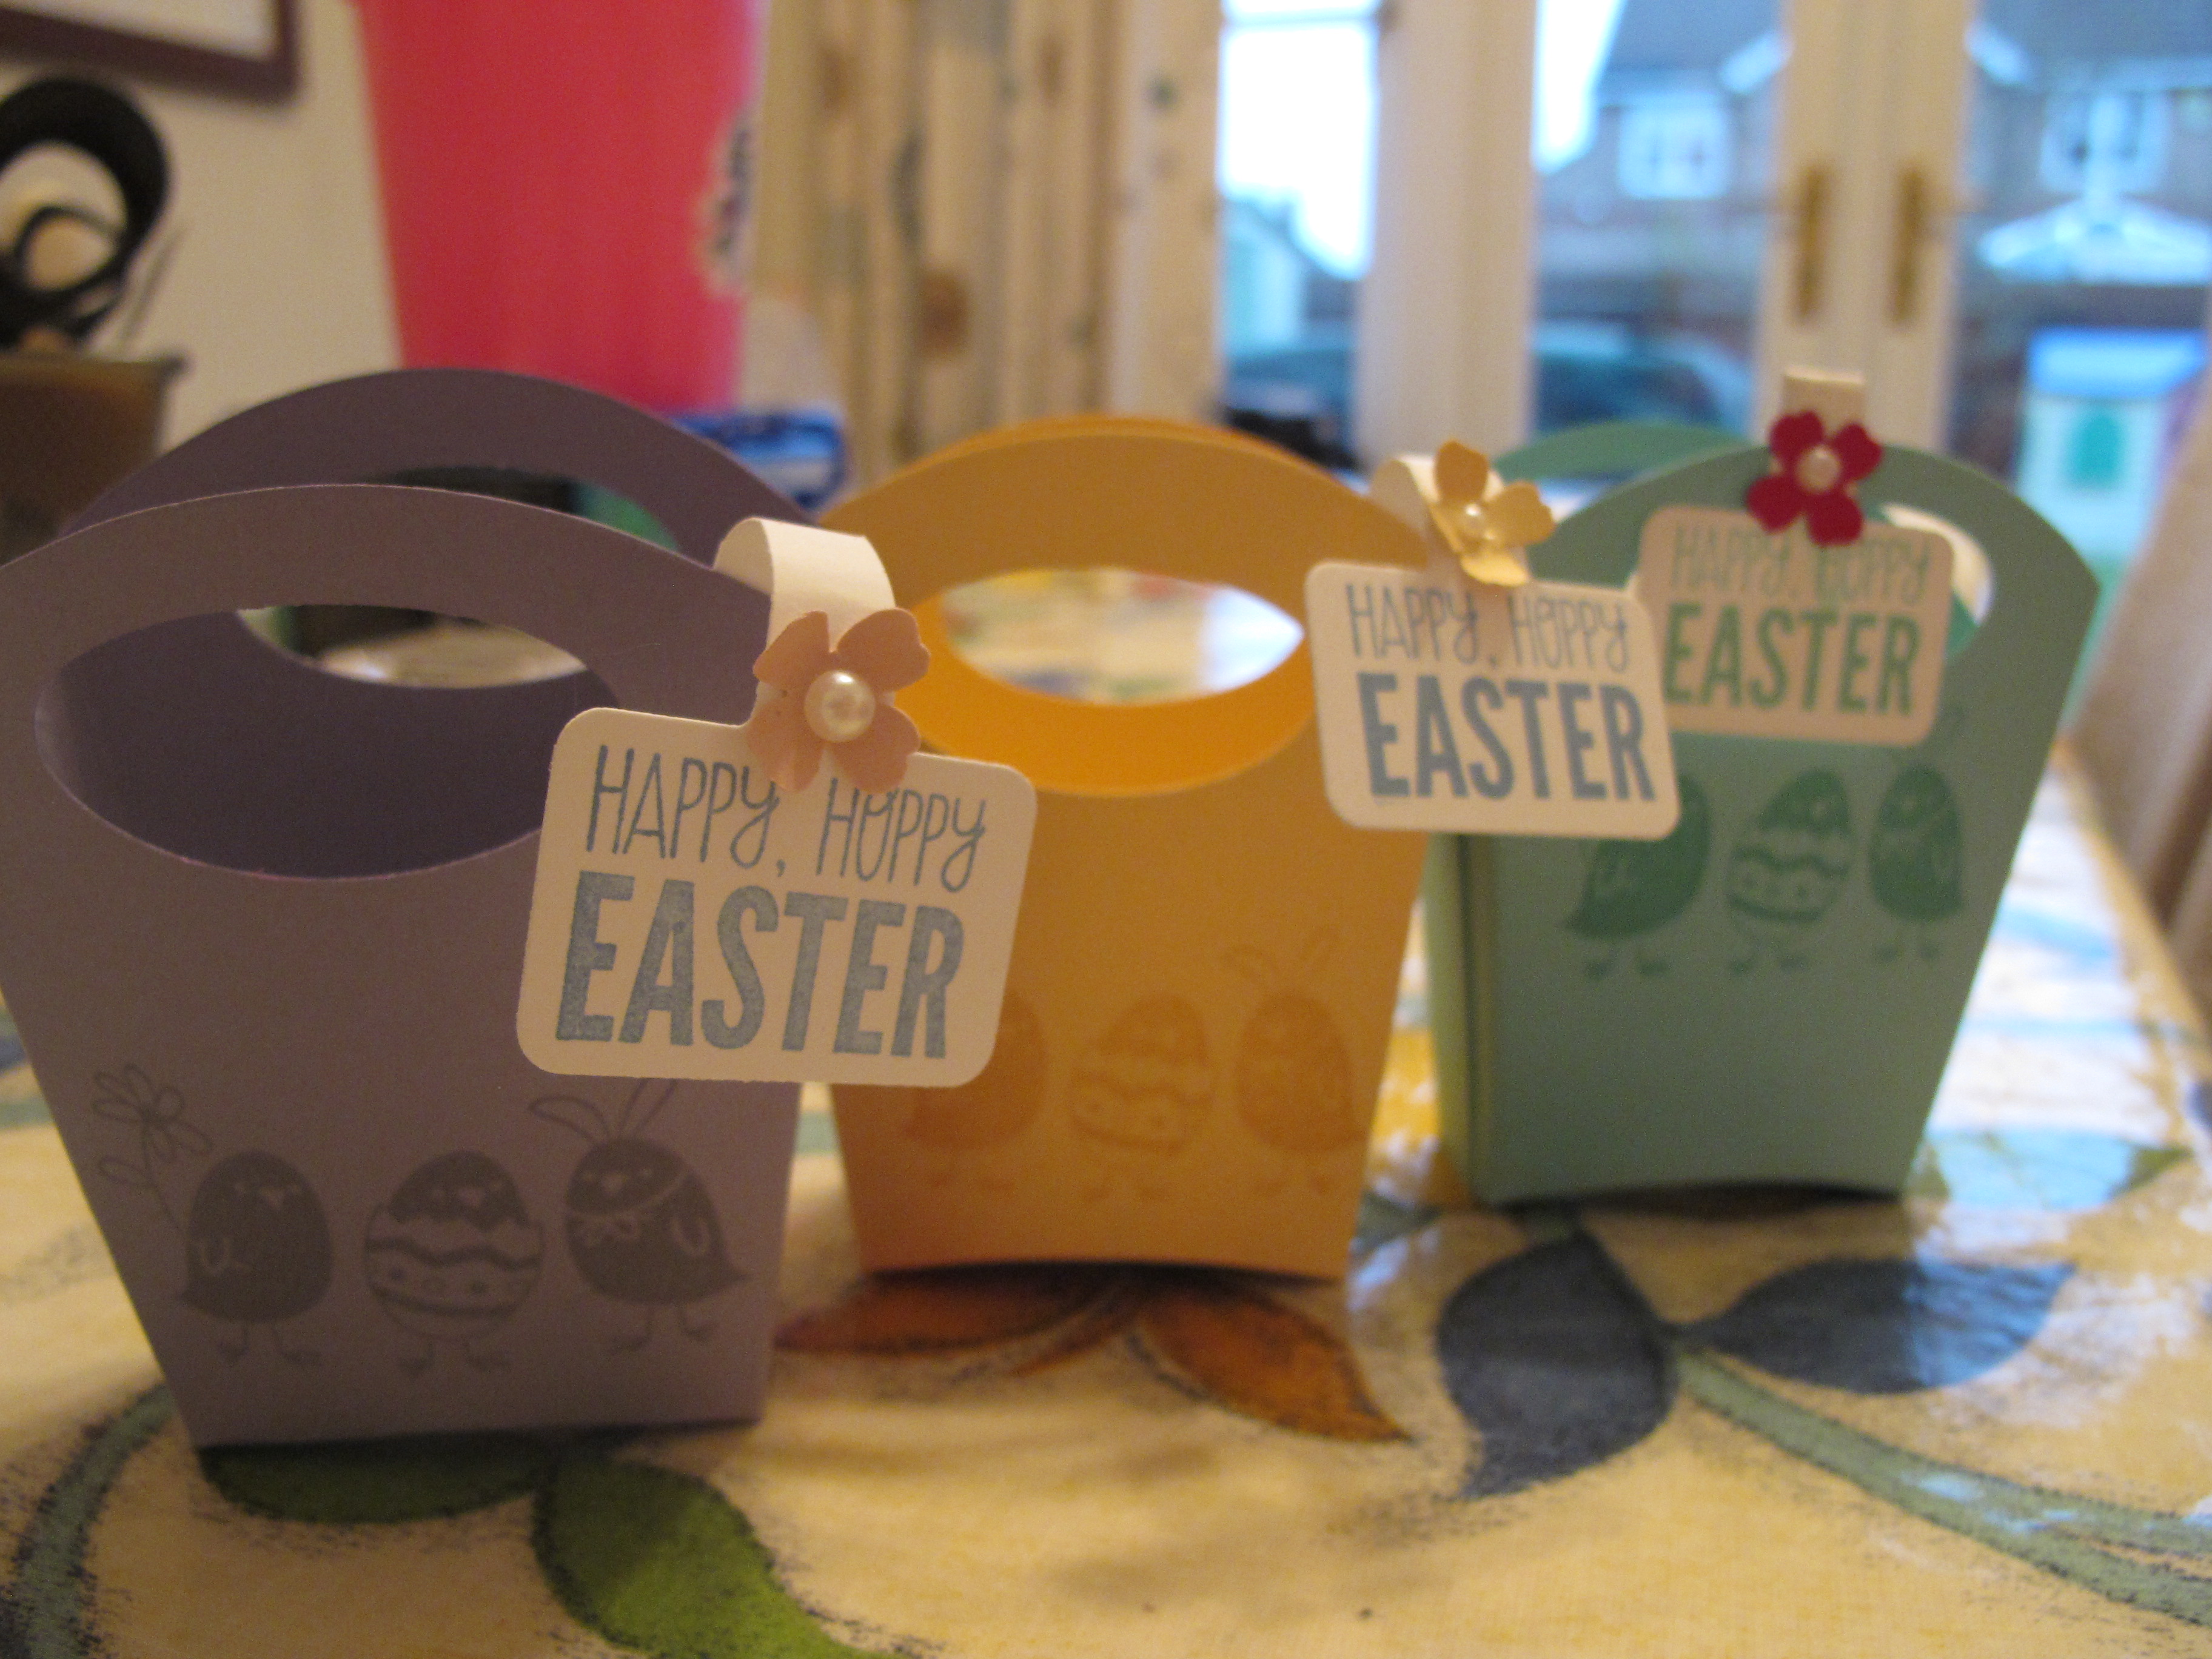
Not many 'action' photos I'm afraid - just too much going on. It was a busy few hours of crafting with 16 children taking part, but they were all so well behaved and thoroughly enjoyed making some great treat boxes to take home. I have another easy Easter-themed project to share with you tomorrow, so do pop back then if you're in need of some last minute Easter inspiration. Until then, happy stampin'!
Stampin' Up! Supplies Used:
For the rabbit box:
For the chick box:
For the Mini Egg Bag:
by Joanne James2. March 2015 08:50Happy Monday everyone! I am here to start the week with a clean and simple card that I made with a few challenges in mind:
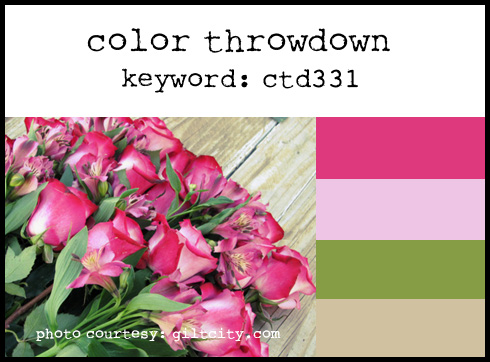
I love the pinks in the Color Throwdown palette this week and having seen many of my blog friends create the cutest 'mini' cards for CASology this week, I just couldn't resist having a go at my own. It is also my card for the 'Less is More' challenge this week, where the theme is 'This makes me happy'. Take a look at my card and I'll explain why:
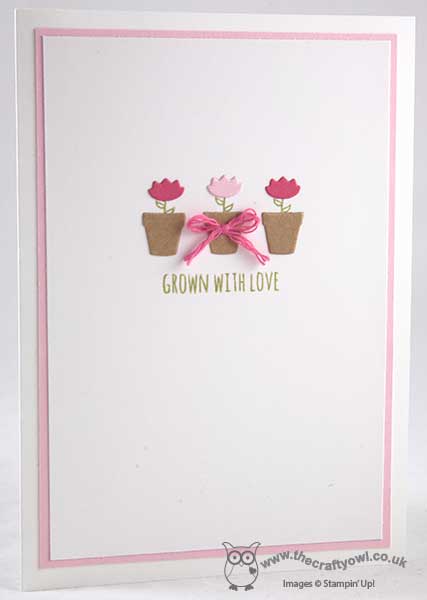
Aren't that trio of mini flowerpots just the cutest? I used the 'Handpicked From the Garden' framelits that I used on yesterday's card and cut a trio of flowerpots out of kraft cardstock, along with a trio of flower heads, two in Strawberry Slush and one in Pink Pirouette. Before adhering these to the card, I partially inked the vine leaves in Pear Pizzazz and stamped these onto my white base first to give my flowers stems and leaves, before adhering the diecuts over the top. I finished with a simple stamped sentiment of 'Grown With Love' also stamped in Pear Pizzazz and a little bow on my central pot, made from some separated strands of Strawberry Slush thick baker's twine. Here's a little close up of the detail:
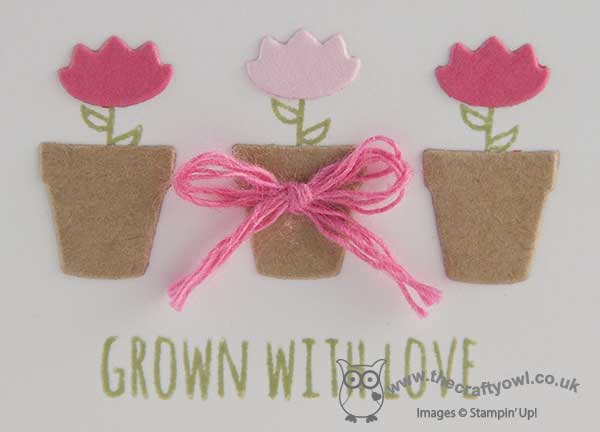
I'm not usually one to go for these teeny-tiny diecuts and I bought this set primarily for the plant tag framelits, which as a keen gardener I knew I would get lots of use for, but I'm loving these little diecuts - the set also includes a tiny trowel and a bow, perfect for adding finishing touches to gardening projects. With spring on the way, I am looking forward to be getting out into the garden more. My husband and children are keen vegetable gardeners and don't have much time for flowers, but I love nothing more than pottering around, planting tubs and hanging baskets to decorate the patio through the summer months. These little flowerpots remind me of this and it makes me happy to know that spring is on the way!
I would love to know what makes you happy - please feel free to leave me a comment below to share your thoughts and do pop on over to the LIM gallery to see what's putting everyone else in a good mood this week. Back tomorrow with another project; until then, happy stampin'!
Stampin' Up! Supplies Used:
by Joanne James1. March 2015 10:00It's Sunday and you know what that means - a new challenge over at The Paper Players. This week the lovely Laurie has a fun theme to help us shake off our Winter blues:
When I 'think Spring' I immediately think of spring pastels and flowers in bloom, so the obvious choice for my card today was one of my favourite pieces of DSP from the All Abloom DSP stack:
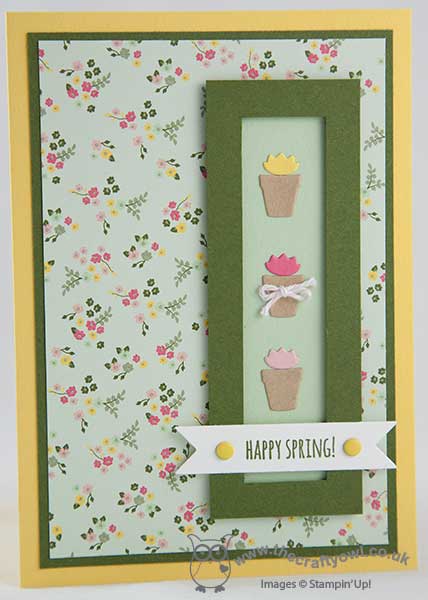
I love the pretty little flowers on this particular paper and wanted to showcase as much of the paper as possible. I decided it would make a great background layer for a shaker-style open window featuring some cute little die cut flowerpots that I cut from kraft and co-ordinating coloured cardstock using my Handpicked Framelit Dies. I finished one of the flowerpots with a tiny Blushing Bride baker's twine bow and used one of the Bitty Banner framelits to cut out the sentiment stamped from the 'From The Garden' stamp set and accented this with a couple of Daffodil Delight candy dots.
Before you reach for your ink pads, do visit the other design team members to see what interesting ideas they've had this week:
The Paper Players Design Team
Here's a quick recap of our challenge rules:
1. Create a new paper project
2. Upload your creation to your blog with a link back to us and provide a direct link to the post featuring your challenge submission.
3. Please link your card to no more than three challenges, TOTAL.
4. Have FUN!
I look forward to seeing your visions of Springtime in our gallery this week.
Back tomorrow with another project; until then, happy stampin'!
Stampin' Up! Supplies Used: