Foiled Floral Hearts For AYSI 242

by Joanne James22. January 2021 13:00

Friday already? Where did that week go?! Today I'm sharing my design team card for our new challenge over at As you See It where it's time for my favourite, a sketch challenge:
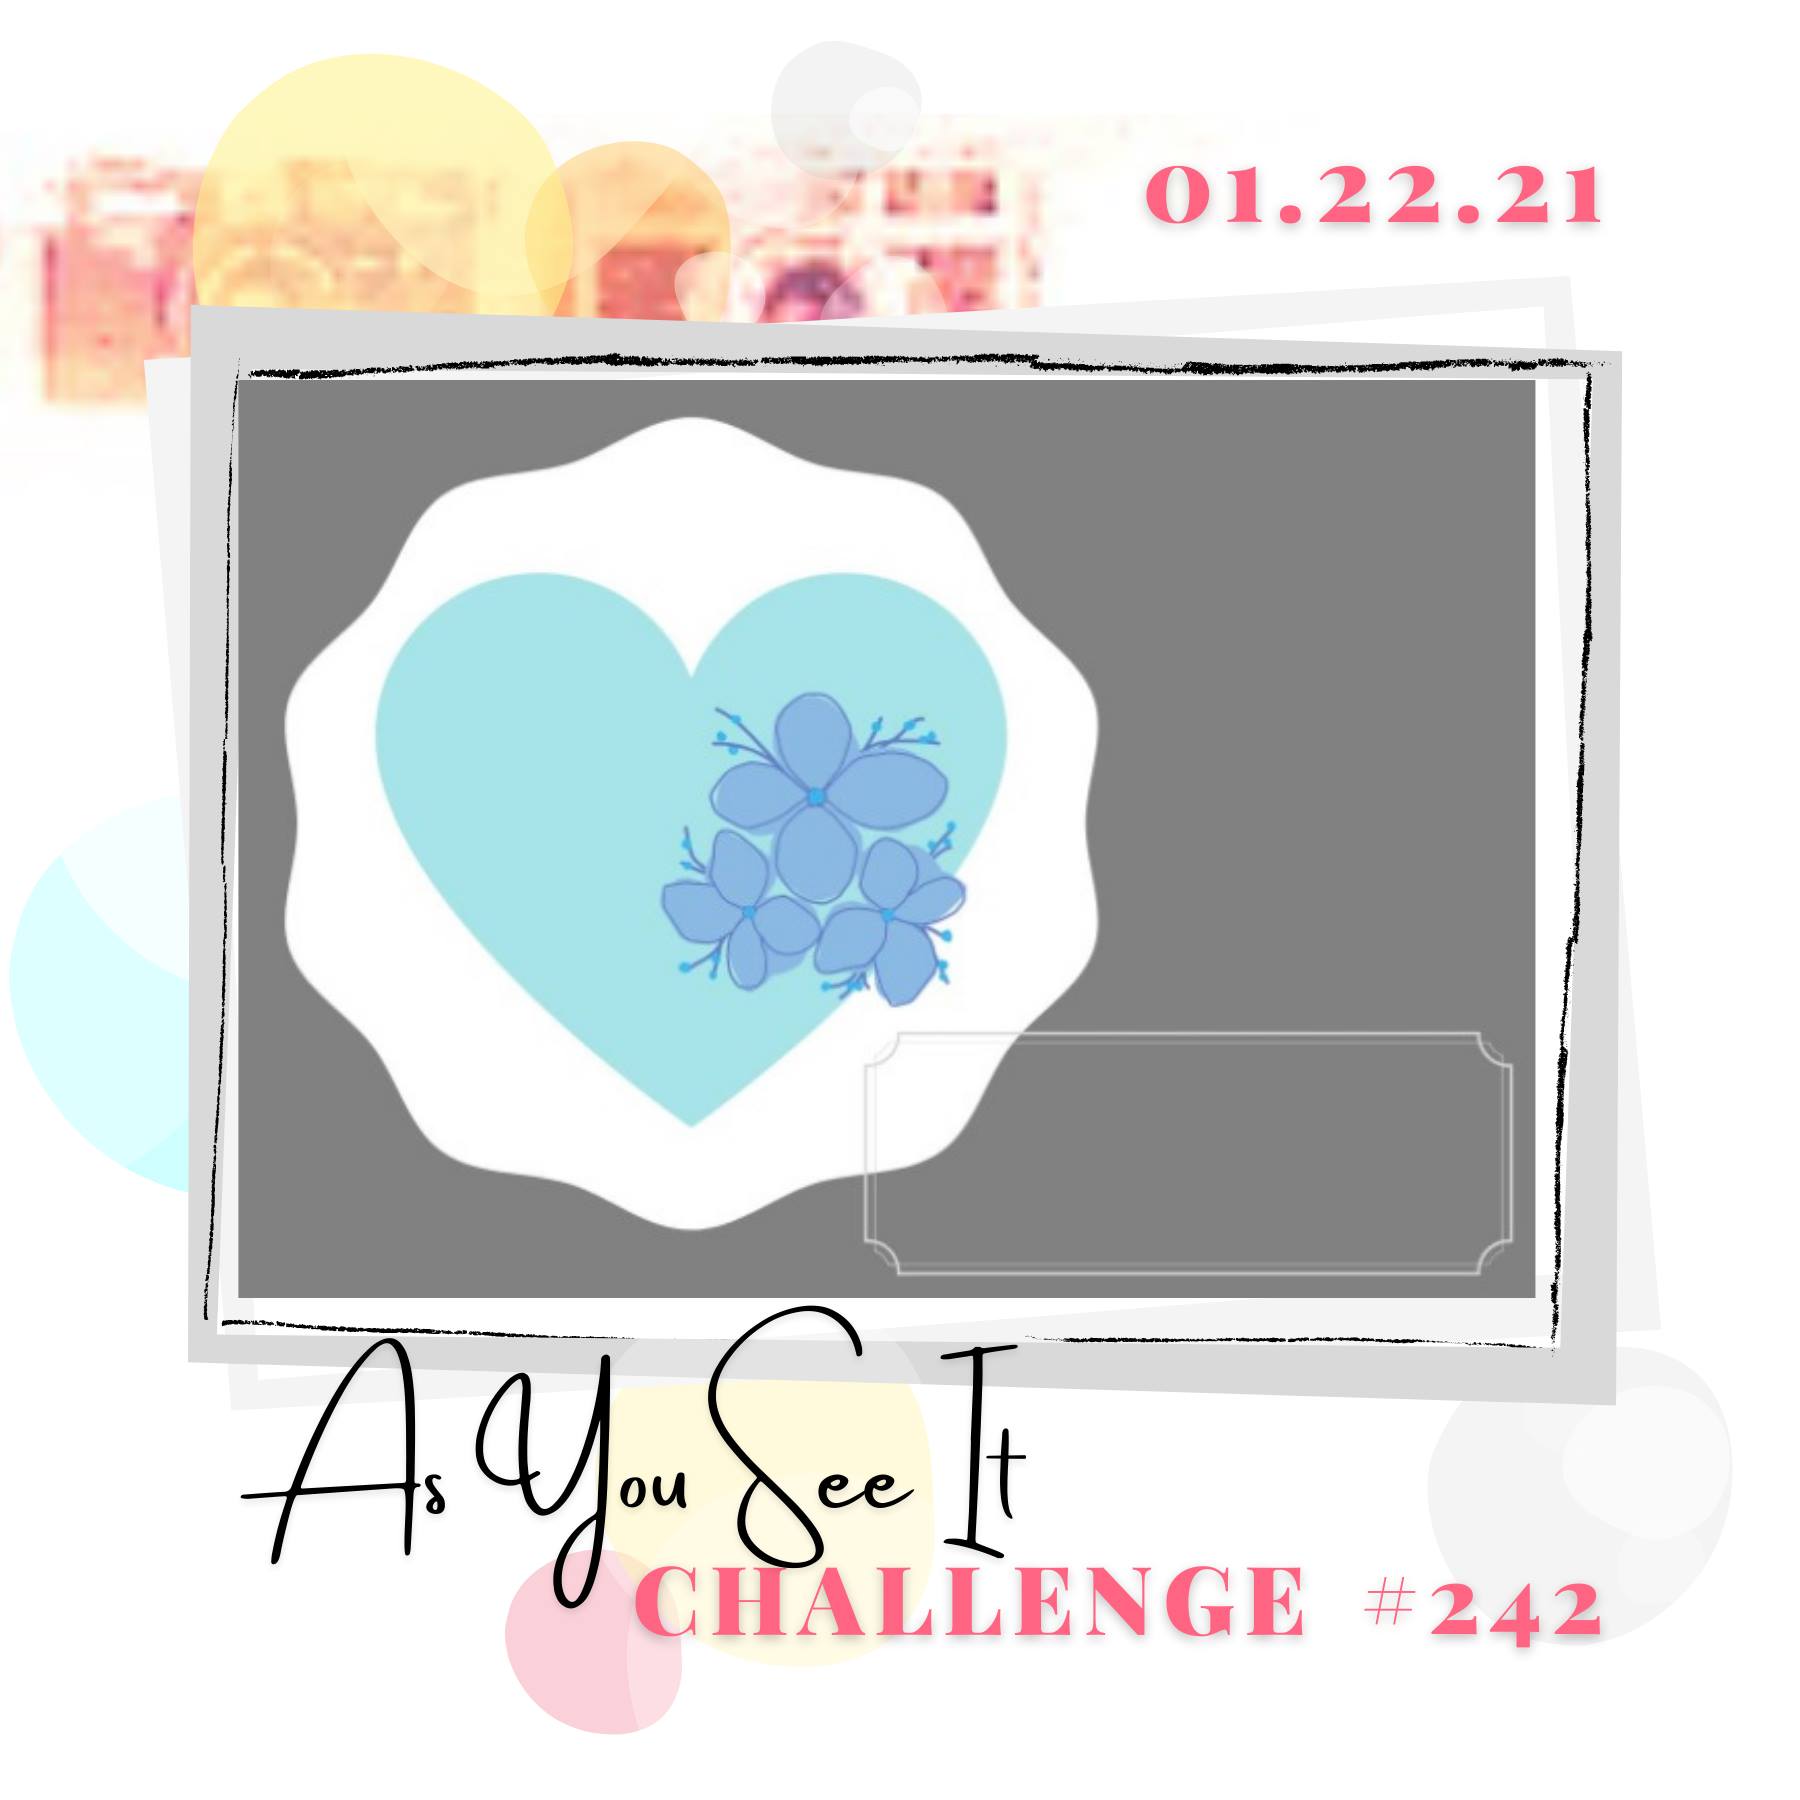
       

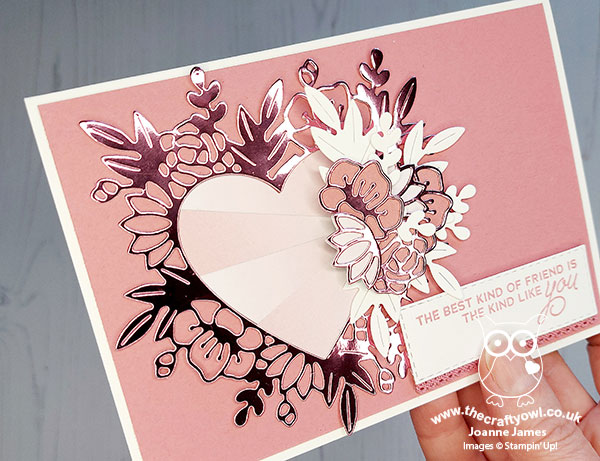
I need to warn you up front - this is a photo-heavy post with lots to look at! I took the sketch quite literally and decided to use that layered shape to make another card using my Floral Hearts Dies. Here's the card I made - take a look:
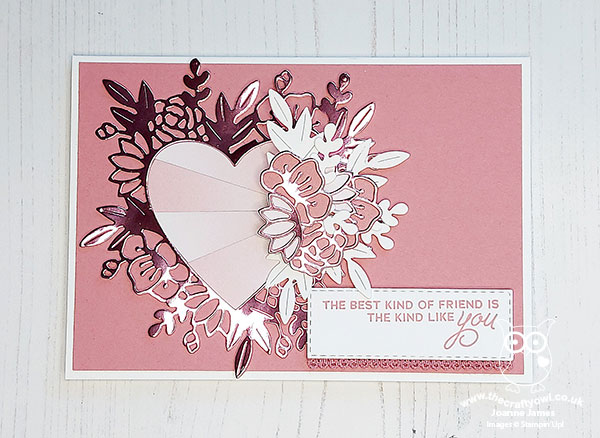
 

Here's the low-down on today's card:

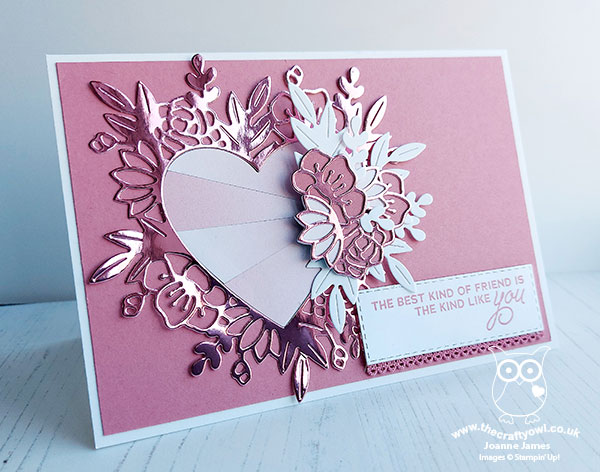
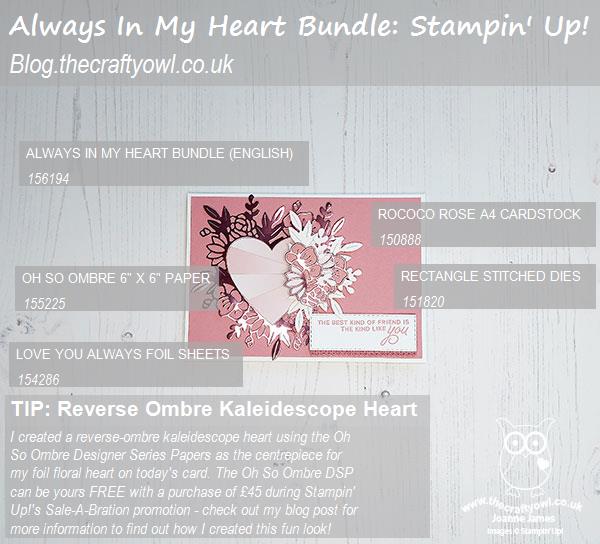
Photographing Foil - I couldn't resist another of those fabulous foil floral hearts, so decided to go with Rococco Rose foil again and a Rococco Rose/White colour scheme. I addition to my heart, I layered a cluster of layered flowers and leaves to the right of my heart. Foil is super tricky to photograph though, whether in natural or artificial light, because of it's reflective qualities. Here's another shot below - I just can't explain how beautiful this foil is in real life:
 

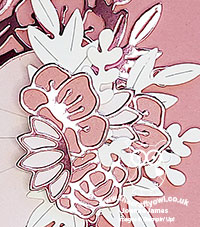
Reverse Ombre Kaleidescope Heart - I had seen a sunburst-type technique using the Oh So Ombre paper (yours free with a £45 purchase during Sale-A-Bration before the end of 28 February) and decided that with the floral cluster on the right of the heart, this would provide the perfect anchor for a similar effect on the centre of my heart. This technique is really easy to achieve: You need to cut two identical shapes, in my case hearts, but with the ombre design of the paper reversed each time, i.e. the first one needs to go light to dark from left to right, and the the second one needs to go dark to light from left to right. You then cut them identically into sections, and switch out alternating pieces before piecing back together. I used the very pale side of the paper for my heart, and I just love the subtle effect. You can see it more closely below:
 

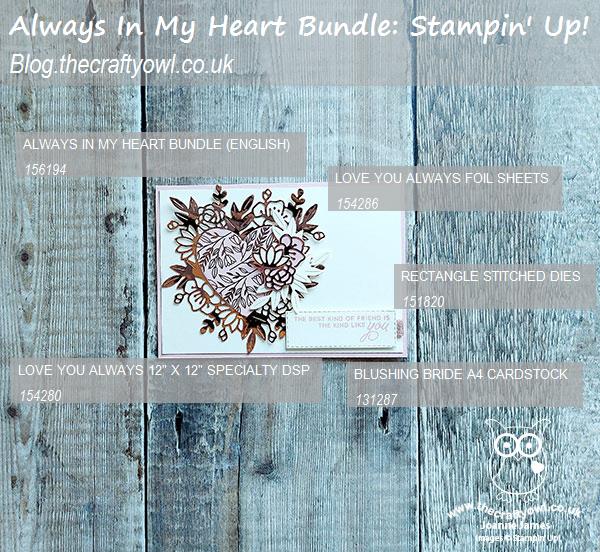
Even More Foil - I loved this card so much, I decided to make another using Very Vanilla and Blushing Bride, this time using the Love You Always Specialty Foil Papers for the centre of my heart:
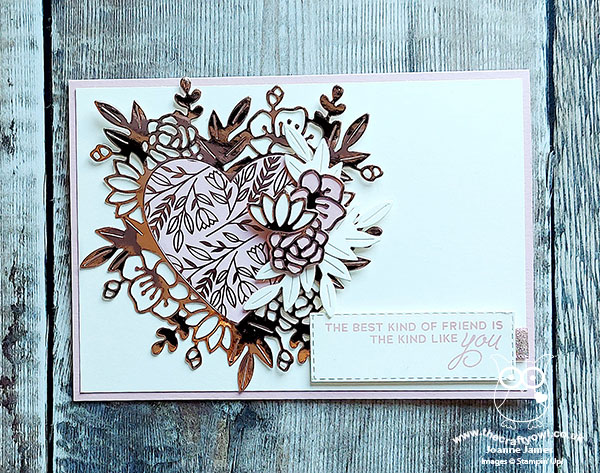
 

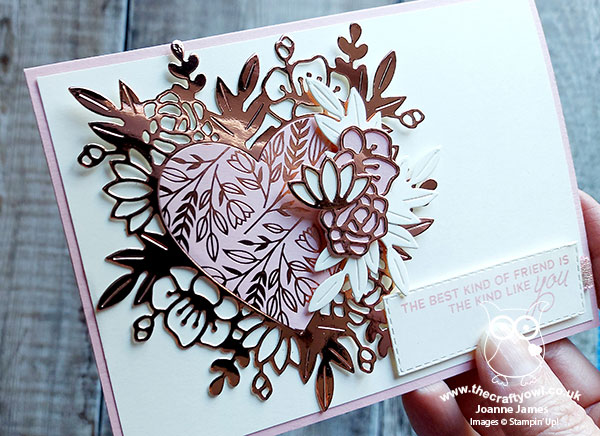
 Both cards feature the same sentiment and the first one is decorated with the edge of some linen scalloped ribbon, whilst this one has a tab of the pretty metallic Blushing Bride ribbon that features in the suite - check out those specialty foils below:
 

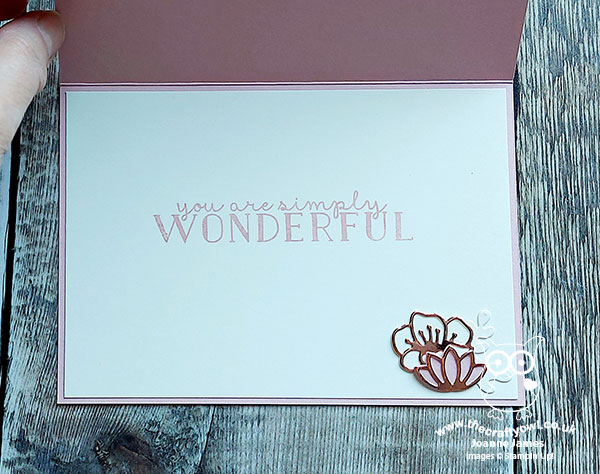
So, so pretty! I also remembered to take a picture of the inside of this one - I finished it with a sentiment from the Bloom & Grow stamp set:
 

I'm linking the first of today's cards up over at Global Design Project #GDP275 for their Love theme this week, and the second one over at SUO Challenges where they too are celebrating with a Love theme for their current challenge.

Here is the visual summary of the key products used on today's projects for you to pin for easy reference:
 

 And the second one:
 

You can see all of my 'How To' summaries on my 'How To - Tips and Techniques' Pinterest board in case you've missed any.  

Here's a summary of our challenge rules:

  • Create any card, scrapbooking page, 3D project or packaging project that fits the challenge.
  • Please include the challenge graphic and link back to the challenge in your blog post. Turn off word verification so we can leave you lots of lovely comments. Make sure you link the post not the whole blog to the Linky. Use #AYSIXXX when uploading to a public gallery.
  • If you’re unsure about ‘the rules’, check the details under the Challenge Guidelines tab on the As You See It Challenge homepage
  • In a sketch challenge, you are welcome to rotate or flip a sketch. You can replace shapes used such as substituting a circle panel for a square panel. However, we must be able to still see the basis of the original sketch in your finished product.
We look forward to seeing your creations in the AYSI gallery.

Enjoy your day. I have a day of household chores today, but will be rewarded with dinner being cooked for me today - young Master James has his practical Food & Nutrition lesson today and is cooking rissotto, so we are delaying the 'lesson' until dinner so that we can enjoy the fruits of his labour fresh from the stove. I'm looking forward to it already! I'll be back tomorrow with another project. Until then, happy stampin'!


Stampin' Up! Supplies Used:
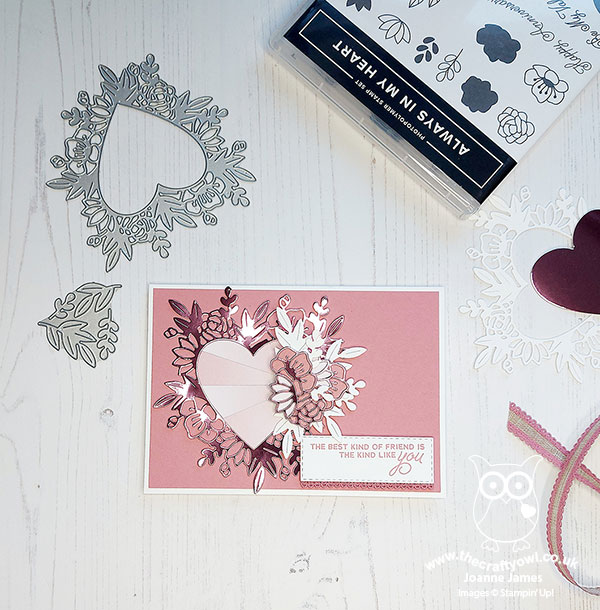
Table built using Product Table Builder by The Crafty Owl - Independent Stampin' Up! Demonstrator.

New Wednesday Weekly Deals!

by Joanne James30. September 2015 08:05

It's Wednesday and you know what that means: a new collection of Wednesday Weekly Deals! These offers are valid for one week only. As always, a new collection of deals will be announced next Wednesday.

If you want to take advantage of any of the deals on offer, you can support my business by placing your order online by clicking here or using the link to my store on the right hand side of my blog page where it says 'Shop Online' or with me in person. Don't forget to add the new Hostess Code for September HJQSKSW6 if your order is under £150 and be sure to make sure that you don't check the 'no contact' box if you'd like to be kept updated with the progress of you order and receive a little thank you in the post from me. 

Here's a summary of this week's one-week only Wednesday deals - click on each item to go to the online store to purchase:

Table built using Product Table Builder by The Crafty Owl - Independent Stampin' Up! Demonstrator.

Lots of lovelies again this week! The washi tape is perfect for adding to cards and parcels for a quick dash of pattern/colour but my favourite deal this week has to be the Mini Treat Bag Thinlits Dies - these are perfect for packaging little treats or small gifts and make light work of mass production - and at only £27 they really are a bargain! 

Back later with today's creative project; until then, happy shopping!

Brights Thank You Card with hand-dyed Filter Paper Flower

by Joanne James30. April 2013 19:56

As promised, today I have a card to match yesterday's lovely Melon Mambo treat holder, made with the Pop 'n' Cuts base. No dresses today, but another of those gorgeous filter paper flowers, this time hand-dyed yellow to really make it 'pop': 

This flower was made using the slightly smaller Floral Frames Framelit; the flowers can be coloured in a number of different ways - to achieve this effect, the edges were sponged with Daffodil Delight ink then the layers sprayed with a homemade mix of alcohol and shimmer spray to encourage the colour to 'bleed' and shimmer slightly. So easy and each time you make one, you get a slightly different look so all your flowers are unique.

The flower definitely takes centre stage here, however the background stamping, rhinestones and cute clip attaching the flag at the top all contribute to making this a great card, and one that perfectly co-ordinates with yesterday's treat holder. Here's a picture of both items together:

Rather lovely! Back tomorrow with another project and exciting news about a special promotion valid for the month of May only. To find out more, make sure you check back tomorrow for the full low-down. Until then, happy stampin'!


Stampin' Up Supplies:

Stamps: Oh, Hello

Cardstock: Melon Mambo, Whisper White, Sunshine and Sprinkles DSP

Ink: Basic Grey, Melon Mambo, Daffodil Delight

Tools: Floral Frames Framelits, Big Shot

Finishing Touches: Basics Rhinestones, 1/4" Stitched Grosgrain Ribbon Basic Grey, Creped Filter Paper, Cute Clips

Pop 'n' Cuts Treat Holder

by Joanne James29. April 2013 20:32

I'm back with more Pop 'n' Cuts to share today, but not as a card. As I mentioned yesterday, in the same way that the Dress Up Framelits can be used without the Pop 'n' Cuts base, the base can also be used without the framelits as a structure to make a pocket or treat holder. Here's an example of one such treat holder, designed by the lovely Monica Gale, that I made at my quarterly training session:

How lovely is this? it was so easy to put together: just cut a base using the die and the Big Shot, then emboss the front panel, score in the base lines and punch some ovals for handles, then decorate as desired. We used some strips of Sunshine and Sprinkles DSP and made a gorgeous flower from the filter paper that features on page 7 of the Spring-ummer catalogue. If you haven't noticed this, at £2.75 for 12 sheets it represents great value and each pack has enough to make lots of flowers in all different shapes and sizes. This flower was made with 6 layers of filter paper and the second smallest frameit in the Floral Frames set.

This treat holder would be great to wrap around a cellophane bag of chocolates or a hand-iced biscuit (that's what I'll be using mine for!) as a sweet treat for someone special. Come back tomorrow to see the card I made that co-ordinates with the treat holder that features a 'stepped up' filter paper flower. Until then, happy stampin'!


Stampin' Up Supplies:

Stamps: Friendly Phrases

Cardstock: Melon Mambo, Whisper White, Sunshine and Sprinkles DSP

Ink: Basic Grey

Tools: Pop 'n' Cuts Base, Floral Frames Framelits, Big Shot, Ticket Duo Builder Punch, Large Oval Punch, Vintage Wallpaper Embossing Folder

Finishing Touches: Basics Rhinestones, 1/4" Stitched Grosgrain Ribbon Basic Grey, Creped Filter Paper

New Online Exclusives

There are new products available exclusively in the online store from 5 November - check them out here.

Latest Kits!

Stampin Cut and Emboss

The Layered Landscapes Kit and Nature's Paintings Kit are the latest kits in the online store - get yours here!

Shop Online

Access my online shop 24 x 7, 365 days of the year:

Current November hostess code:

9NKXDTTR

Shop Online

Mini Catalogue

BROWSE THE CATALOGUE

'Tis The Season - the new Stampin' Up! Mini Catalogue is here! For more details and to download your copy click here

Scrapbooking

Stampin' Up! has introduced a new range of 12x12" scrapbooking product and kit - the full range is now available to purchase online. To download a copy of the new digital Scrapbooking Catalogue click here.

2024-25 Annual Catalogue

BROWSE THE CATALOGUE

Click on the image to download your copy of the 2024-25 annual catalogue. For a full list of current SU! supplies, go to my online store. If you would like any help or advice, please drop me a line at joanne@thecraftyowl.co.uk or give me a call on 07773 421446 - I'd be happy to help.

Join My Team

It's always a great time to join Stampin’ Up! New team members can get £130 worth of products for only £99 + free business supplies + free shipping + all the fun being a part of Stampin’ Up! Stampin' Up! has something for everyone: join my growing team and benefit from my support to enjoy Stampin' Up! however you choose.

If you're interested, call me for a chat to understand how I can help you realise your goals. Alternatively, if you have already decided to sign up and you just can't wait, please click here for the link to the online form where you can sign up and order your starter kit right away! 

About Me

Hi I'm Joanne and live in Northampton and when I'm not looking after my husband and two beautiful children, am an avid crafter with a passion for all things Stampin' Up!

I must confess that I have never been a big rubber stamper - until I discovered Stampin' Up! that is. I love the fact that I can get such great results with co-ordinating stamps, inks, papers and punches - the possibilities are endless! Join me on my stamping journey as I share the things I love and be inspired to create amazing things yourself!

Follow Me

Monthly Newsletter

Box Builder

Click the button above to use Box Buster to create your custom box design using the Envelope Punch Board!

Kits Collection Now Available!

Stampin Cut and Emboss

The new Kits Collection from Stampin' Up! is now available!

Click here to see the current kits available and order yours online today.

I Design For


Stampin' Up Stuff

This is my personal blog and is not endorsed by Stampin’ Up! I hope you find it a plentiful source of ideas and personal inspiration but please don't copy my designs for contest submission or use for classes, publication or sale without express permission.