Giraffe Punch Art

by Joanne James24. May 2013 21:19

As promised, I'm back today with the last of the owl punch cards from this month's class. Our last card was another alternative use for this versatile punch; this time, to make a cute giraffe punch art card:


To make this card, the owl's body (minus his feet!) becomes the giraffe's head - clever, right?! We then used a variety of circle punches and the large oval punch to create the rest of him. The edges of the finished giraffe were sponged in So Saffron ink to add dimension and I placed him inside the card looking out, for added interest. The oval aperture was easy to make using an oval framelit and a few branches from the Bird Builder punch were added to give the giraffe something to munch on. I finished this card with embossed clouds and an 'Oh Hello' sentiment highlighted with a Cute Clip (love these!), but you could just as easily use a happy birthday greeting - I think this would make a lovely card for a little person.

I hope you like the finished card - there were a few interesting adaptations to this card by the ladies at my class: everything from hearts added to the sentiment banner to eyelashes on the giraffe. That's one of the things I love about teaching classes - whilst I scope out the original design, it can still be adapted or customised to make it individual to you. If you would like to attend my stamping classes, please do get in touch via joanne@thecraftyowl.co.uk for more details. Next month's class is a One Sheet Wonder class using the Secret Garden stamp set and framelits. 

Back tomorrow with another project - until then, happy stampin'!


Stampin' Up Supplies:

Stamps: Oh Hello

Cardstock: Whisper White, Marina Mist, Pink Pirouette, So Saffron, Chocolate Chip, Basic Black, Certainly Celery

Ink/Stampin' Write Markers: Early Espresso

Tools: Owl Punch, Cloudy Day Textured Impressions Embossing Folder, 1" Circle Punch, 3/4" Circle Punch, Bird Builder Punch, Oval Framelits, Itty Bitty Shapes Punch (circle), Large Oval Punch

Finishing Touches: Cute Clip


Thoughts of You - Rain or Shine?

by Joanne James4. May 2013 16:05

Well, it might be May, but this is so a day of April showers! After my third trip back out to the washing line to rescue my washing from another downpour, I gave up and resorted to the tumble dryer. Not very eco-friendly I know, but with sports kits that need to be washed, dried and ironed to be back at school on Tuesday, what is a girl to do?!

Given the weather, it seems like a great oportunity to share another of my training day outputs with you:


The Cloudy Day Embossing Folder is a personal favourite of mine, and my 'go to' embossing pattern at the moment - I love the ease with which you can create the cloud effect. A nice pink umbrella, fussy cut with my trusty paper snips - who wouldn't be cheered by one of these on a showery day? - and another Cute Clip, to highlight the sentiment. There's a lot going on around the sentiment - here's a close up view:


This would be a great card to brighten someone's day - I hope it has lifted your spirits too! I'm off to do a quick hour's crafting whilst the house is quiet, as everyone else has gone out to the weekly swimming lesson. Back tomorrow with another project; until then, happy stampin!


Stampin' Up Supplies:

Stamps: Rain or Shine

Cardstock: Lucky Limeade, Pacific Point, Whisper White, Sunshine and Sprinkles DSP

Ink: Basic Grey, Pacific Point

Tools: Cloudy Day Embossing Folder, Scallop Trim Border Punch

Finishing Touches: Basics Rhinestones, 1/4" Stitched Grosgrain Ribbon Basic Grey, Cute Clips

Brights Thank You Card with hand-dyed Filter Paper Flower

by Joanne James30. April 2013 19:56

As promised, today I have a card to match yesterday's lovely Melon Mambo treat holder, made with the Pop 'n' Cuts base. No dresses today, but another of those gorgeous filter paper flowers, this time hand-dyed yellow to really make it 'pop': 

This flower was made using the slightly smaller Floral Frames Framelit; the flowers can be coloured in a number of different ways - to achieve this effect, the edges were sponged with Daffodil Delight ink then the layers sprayed with a homemade mix of alcohol and shimmer spray to encourage the colour to 'bleed' and shimmer slightly. So easy and each time you make one, you get a slightly different look so all your flowers are unique.

The flower definitely takes centre stage here, however the background stamping, rhinestones and cute clip attaching the flag at the top all contribute to making this a great card, and one that perfectly co-ordinates with yesterday's treat holder. Here's a picture of both items together:

Rather lovely! Back tomorrow with another project and exciting news about a special promotion valid for the month of May only. To find out more, make sure you check back tomorrow for the full low-down. Until then, happy stampin'!


Stampin' Up Supplies:

Stamps: Oh, Hello

Cardstock: Melon Mambo, Whisper White, Sunshine and Sprinkles DSP

Ink: Basic Grey, Melon Mambo, Daffodil Delight

Tools: Floral Frames Framelits, Big Shot

Finishing Touches: Basics Rhinestones, 1/4" Stitched Grosgrain Ribbon Basic Grey, Creped Filter Paper, Cute Clips

Sunshine and Sprinkles Scrapbook Page

by Joanne James19. April 2013 21:09

Today I thought I would share something a little different: as many of my followers will know, I love to design and make cards. I'm not a scrapbooker - it's just not my 'thing'. In many ways this may surprise those close to me, as we are a household of keen photographers and have a collection of literally thousands of memories captured on slide, film and digitally. I love to have photographs on display - for me though, I struggle to design a page without a specific photograph in mind.

All that being said, I made a scrapbook page at training last Sunday and I thought I would share it with you, as even though I haven't yet chosen the photos to put on it, the layout could be used and adapted in so many ways I'm sure it will inspire some of you reading this, who I know are keen scrapbookers. Here is my finished page: 
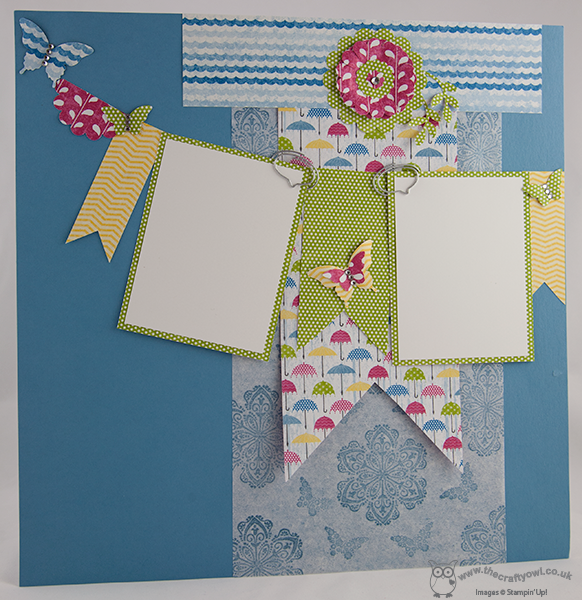
This page was designed by the lovely Bekka Prideaux and features one of my favourite current designer papers in the Spring Summer catalogue, Sunshine and Sprinkles. I also like the background stamped sheet - this is Marina Mist ink stamped straight on to filter paper.

Here's a close-up of the top section - there's so much going on here: 
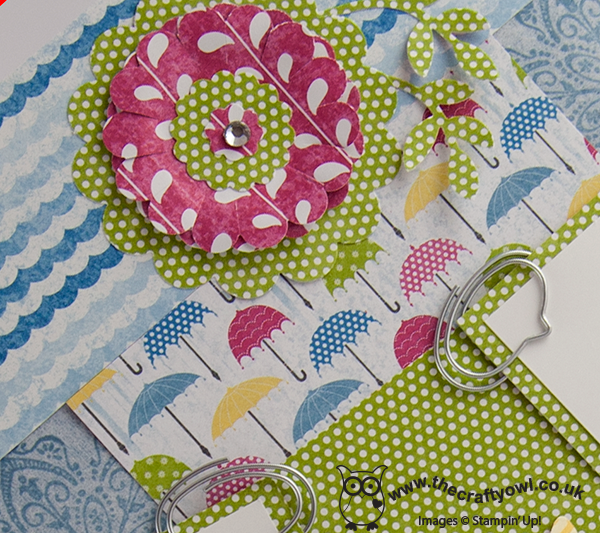
Did you notice the lovely speech bubble paper clips too - aren't they cute? You may have overlooked them in the catalogue (p.28, Spring Summer Cat.): there are 2 different packs - each with 8 of 3 different designs (there is an arrow and a coat hanger in this set too) and at £4.50 per pack they represent great value. One or two on a scrapbook page or card is enough to add just the right amount of detail. One more photo - a close-up of one of the butterflies:
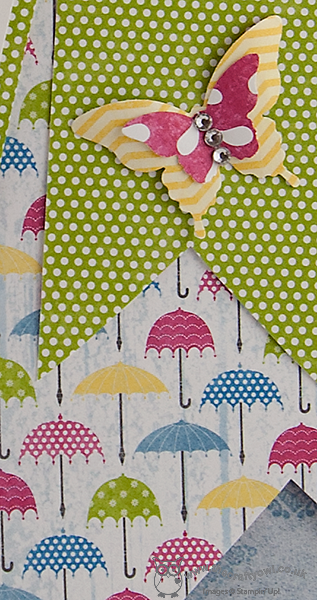
As Bekka herself would say, you can never have too many butterflies! I love the way the Bitty Butterfly punch is layered with the Elegant Butterfly punch to create a double one and the rhinestones add just enough 'bling' without overpowering the page. I really like this layout and there's even some space on the base page if you wanted to add some journalling or commentary. For those of you that enjoy journalling, I will have more great Stampin' Up! news coming soon - all 'top secret' currently, but watch this space - that's all I'm saying for now!

I hope you enjoyed the change in direction today; back with another card tomorrow. Unti then, happy stampin'!


Stampin' Up Supplies:

Stamps: Mixed Bunch, Papillon Potpourri

Cardstock: Marina Mist, Whisper White, Sunshine and Sprinkles DSP

Ink/Stampin' Write Markers: Marina Mist

Tools: Elegant Butterfly punch, Bitty Butterfly punch, 2-Step Bird punch, 1 3/4" Scallop Circle punch, 2 3/8" Scallop Circle punch, 7/8" Scallop Circle punch, Itty Bitty Shapes punch

Finishing Touches: Cute Clips, Basics Rhinestones

New Online Exclusives

There are new products available exclusively in the online store from 5 November - check them out here.

Latest Kits!

Stampin Cut and Emboss

The Layered Landscapes Kit and Nature's Paintings Kit are the latest kits in the online store - get yours here!

Shop Online

Access my online shop 24 x 7, 365 days of the year:

Current November hostess code:

9NKXDTTR

Shop Online

Mini Catalogue

BROWSE THE CATALOGUE

'Tis The Season - the new Stampin' Up! Mini Catalogue is here! For more details and to download your copy click here

Scrapbooking

Stampin' Up! has introduced a new range of 12x12" scrapbooking product and kit - the full range is now available to purchase online. To download a copy of the new digital Scrapbooking Catalogue click here.

2024-25 Annual Catalogue

BROWSE THE CATALOGUE

Click on the image to download your copy of the 2024-25 annual catalogue. For a full list of current SU! supplies, go to my online store. If you would like any help or advice, please drop me a line at joanne@thecraftyowl.co.uk or give me a call on 07773 421446 - I'd be happy to help.

Join My Team

It's always a great time to join Stampin’ Up! New team members can get £130 worth of products for only £99 + free business supplies + free shipping + all the fun being a part of Stampin’ Up! Stampin' Up! has something for everyone: join my growing team and benefit from my support to enjoy Stampin' Up! however you choose.

If you're interested, call me for a chat to understand how I can help you realise your goals. Alternatively, if you have already decided to sign up and you just can't wait, please click here for the link to the online form where you can sign up and order your starter kit right away! 

About Me

Hi I'm Joanne and live in Northampton and when I'm not looking after my husband and two beautiful children, am an avid crafter with a passion for all things Stampin' Up!

I must confess that I have never been a big rubber stamper - until I discovered Stampin' Up! that is. I love the fact that I can get such great results with co-ordinating stamps, inks, papers and punches - the possibilities are endless! Join me on my stamping journey as I share the things I love and be inspired to create amazing things yourself!

Follow Me

Monthly Newsletter

Box Builder

Click the button above to use Box Buster to create your custom box design using the Envelope Punch Board!

Kits Collection Now Available!

Stampin Cut and Emboss

The new Kits Collection from Stampin' Up! is now available!

Click here to see the current kits available and order yours online today.

I Design For


Stampin' Up Stuff

This is my personal blog and is not endorsed by Stampin’ Up! I hope you find it a plentiful source of ideas and personal inspiration but please don't copy my designs for contest submission or use for classes, publication or sale without express permission.