Yay it's Sunday and time for a new challenge over at The Paper Players - and this week I'm the hostess! With Father's Day approaching, I thought that masculine cards would make a great theme this week and it would at least encourage me to be organised!
I have lots of photos to share with you today, as I made not just one but two projects: a fun card using the mini treat bag thinlits and a matching gift bag using my new Gift Bag Punch Board - oh how I love this!
So first to my card: I've seen a few of these fun cards on Pinterest using the Mini Treat Bag Thinlits Die to create a fancy shirt with a sliding insert (one of my favourites is this one by Julie Kettlewell) and have been wanting to have a go at creating my own version for a while. Here it is:
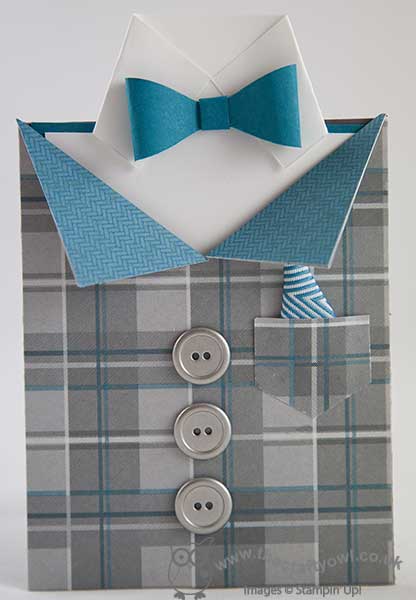
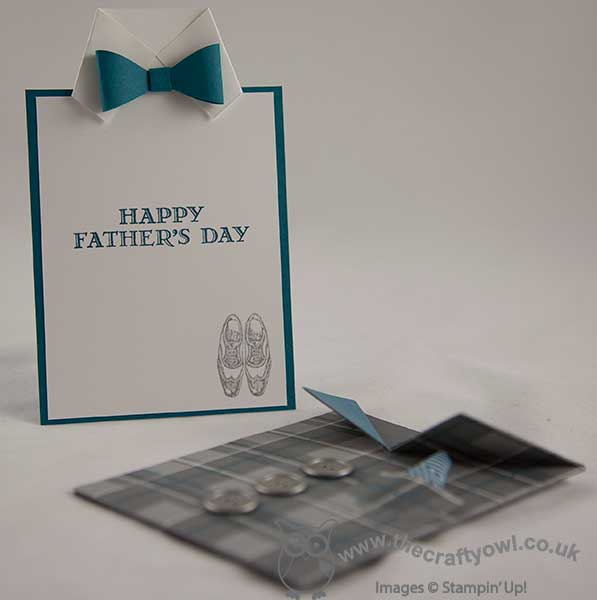
I have used the now retired Adventure Bound DSP for my card - this paper is just so fabulous for masculine cards and I hope you all stocked up before it retired! The Mini Treat Bag Thinlits are great for making simple slider cards as well as treat bags; I added silver buttons, a pocket punched with my hexagon punch and with a snippet of Island Indigo chevron ribbon in for a handkerchief. For my insert, I cut it taller than my pocket, then snipped in a third of the way each side to create my turned down collar and added my bow tie. The picture below shows the insert with my stamped sentiment from the 'Guy Greetings' stamp set and a pair of shoes to finish off this dapper outfit:
Pleased as I was with this cute little card, I couldn't stop there; I had to create a matching gift bag using my new Gift Bag Punch Board. I think this is going to be one of my new favourite tools - it is so easy to use and offers so many creative possibilities that go beyond the constraints of the board. Here is my bag:
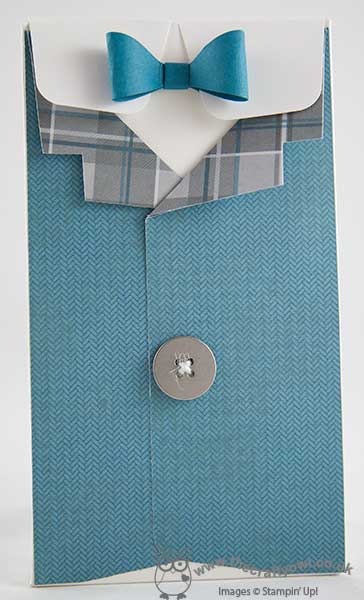
I made my bag using the 'L' measurements on the board and used a sheet of Whisper White cardstock measuring 9 1/2" x 12". Once I'd punched the bottom according to the board instructions, I flipped it around and did the same on the other end, cutting away all except the long flap on the back of the bag, which I then also punched in the middle to create my collar. I then used the collar as the close mechanism for my bag, by tucking it underneath the bow tie - the photo below of the open bag illustrates that more clearly:
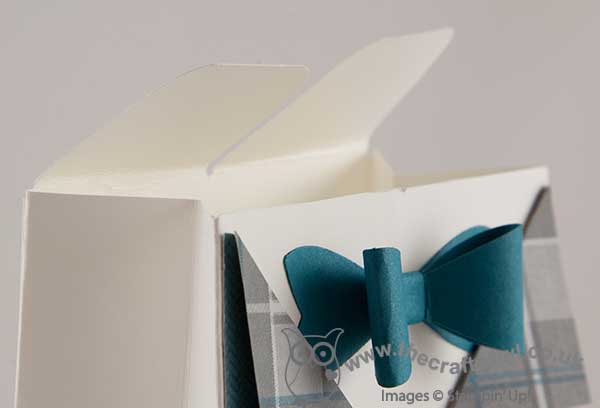
I then added two pieces of DSP with co-ordinating lapels and a large silver button threaded with a piece of white jute ribbon trim to finish my bag. Here are both items together:
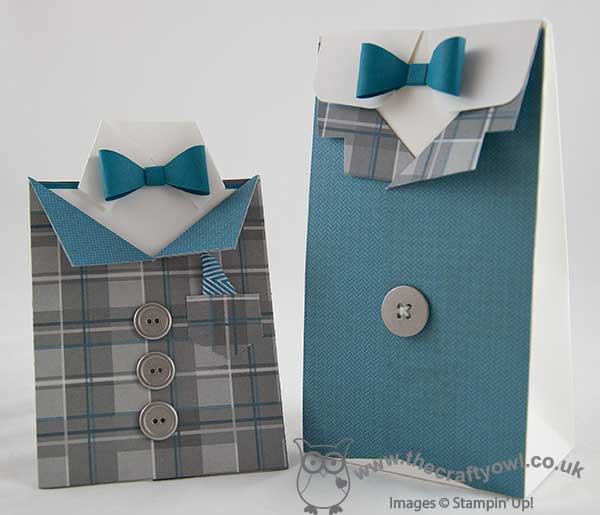
I'm really pleased with this project duo; the gift bag is large enough for a couple of pairs of socks, some toiletries, a sweet treat (or two!) - pretty much anything that might be on a Dad's wish list. I hope you like them too and they inspire you to create some fun masculine projects this week! Before you reach for your ink and papers, check out what our amazing team has created to inspire you this week, including our three new guest designers:
The Paper Players Design Team
Here's a quick recap of our challenge rules:
1. Create a new paper project
2. Upload your creation to your blog with a link back to us and provide a direct link to the post featuring your challenge submission.
3. Please link your card to no more than three challenges, TOTAL.
4. Have FUN!
I look forward to seeing your masculine creations in the gallery this week. I'm off to finish preparations for this week's technique classes and tackle my mountain of ironing. How does the saying go - no rest for the wicked?!
Back tomorrow with another project; until then, happy stampin'!
Stampin' Up! Supplies Used: