Oceanfront Fathers Day Card PP643

by Joanne James4. June 2023 08:00

Today it's Sunday and time for this week's new challenge over at The Paper Players! It's the turn of the fabulous Ann to host this week and she has a fun theme challenge for us to work with:


I decided to use Jen M's layout over at Freshly Made Sketches and was also inspired by the masculine blues and browns of Laurel's Inspired By photo for my Father's Day card this week - take a look:


Here's the low-down on today's card:

Oceanfront - I haven't used the Oceanfront stamp set in ages, so thought today's card was a good opportunity to rectify this! This is such a great stamp for making beautiful beach scenes and is so easy to use. I stamped my scene with a Boho Blue sky, Misty Moonlight ocean and Crumb Cake sand with Copper Clay grasses - done! I also added some birds in Pebble Path from the 'Beside Me' set that I had out on my desk for my sentiment and some retired pebble enamel shapes to add a little extra detail. I wanted to diecut my scene with a stitched rectangle, but since they are now retired I thought I would consider other current options first and what do you know - one of the scalloped rectangles in the Scalloped Contours Dies was the perfect size!

Fresh As A Daisy - I used two pieces of designer paper for my split panel background - do you recognise them? In addition to all of the lovely floral patterns, the Fresh As A Daisy papers have a beautiful wash reverse in each of the new in-colours. I used the Boho Blue and Copper Clay papers to echo the colours of my oceanfront scene, with the diagonal proving a useful way to combine the two.

A Sketch Liberty - Whilst I think it's clear to see how Jen's FMS sketch inspired my layout this week, you will notice I did take a few liberties with it to suit my finished design (I hope she doesn't mind!). The size of my final card is larger than usual (14.9cm x 21cm) as I wanted to be able to accommodate my scene and still have plenty of background on show. I also re-angled the diagonal of my background layer; I wanted the diagonal to follow the diagonal of the shoreline of my ocean scene, so instead of going corner to corner I cut across the the main panel. This way the design still looks cohesive and the diagonal works with my scene, rather than making everything look slightly out of kilter:

A simple heat-embossed sentiment cut out with the label (shortened to fit) from the Cheerful Daisies Dies and a fancy linen thread bow complete my Father's Day card. This one will be headed to my Dad in a couple of weeks time - hope he likes it!

Here is the visual summary of the key products used on today's project for you to pin for easy reference:


You can see all of my Product and 'How To' summaries on my 'How To - Tips and Techniques' Pinterest board in case you've missed any. 

Before you reach for your ink and papers, check out what our amazing team has created to inspire you this week:

Here's a quick recap of our challenge rules:
 
1.  Create a new paper project
2.  Upload your creation to your blog with a link back to us and provide a direct link to the post featuring your challenge submission.
3.  Please link your card to no more than four challenges, TOTAL.
4.  Have FUN!

Enjoy your day; after what has been a decidedly chilly week here in the UK, the sun is finally shining and temperatures are on the up - hurrah! I am looking forward to spending some time in the garden today, hopefully with a good book. I'll be back soon with another project. Until then, happy stampin'!


Stampin' Up! Supplies Used: 

Table built using Product Table Builder by The Crafty Owl - Independent Stampin' Up! Demonstrator.

Beside Me Trio For Father's Day FF0135

by Joanne James26. May 2023 08:00

Today I have my card for the new challenge over at Festive Friday Card Making and Paper Crafting Challenge

    May be an illustration of text

The challenge that we are celebrating this week is 'Father's Day' which is on 18th June. This time around we are also teaming up with Double Trouble: entering both challenges gives you double the chance of winning. Their Thing 1 challenge is to create a masculine card. Their Thing 2 challenge is to enter our Festive Friday Challenge. Their Thing 3 challenge is to include a plaid/check. Here's the link to enter their challenge: Double Trouble ChallengeRemember the fun thing is that at Festive Friday you do not need to actually celebrate the occasion; your goal is to simply use three or more items from the inspiration list on your project. This week I used blue, monochromatic, masculine, plaid/checks and diecuts and decided to create a Father's Day card - this is what I came up with:


Here's the low-down on today's card:

Inked Botanicals - The plaid paper that I used for my background inspired the subtle colour scheme for today's card. You may be surprised to know that this soft plaid is one of the designs in the new Inked Botanicals designer paper pack. I though the soft Pool Party and Lost Lagoon tones would provide the perfect background for my coastal themed card which I'm also linking up with the lovely ladies over at SUO Challenges who are all about the blues and sea-inspired cards.

Nested Essentials - I framed my stamped scene using one of the new Nested Essentials Dies. These are one of those 'easily overlooked' products as they are a die-only set. Comprising 12 dies including 4 banners, 4 rounded corner rectangles and 4 nested diamonds with straight edges all of which have a neat stitched border detail, these are great for framing and layering and I know that they will become a new craft room staple. 

Beside Me - But Not As You Know It - The image on the front of my card is from the 'Beside Me' set - but the eagle-eyed amongst you will have noticed that there is something missing! I love this image as it looks exactly like the James Juniors with their Dad, but I don't think they have ever been fishing together - so the fishing rods had to go! This was so easy to achieve: I simply inked the stamp in Lost Lagoon and masked off the fishing rods before inking, so that they weren't present when stamped - voila! I wanted to stick with my simple colour scheme, so chose not to colour the image itself, instead masking it before inking in a sky and sea using a blending brush. You can see the results of my handiwork more closely below:

This wasn't the only stamp I tweaked on today's card. I stamped a combination of sentiments from the set inside my card, but since the image on the front of the card had two children, I wanted the sentiment to read 'You've always been there for us' as opposed to 'me'. Again, this was simple enough to achieve: I stamped the sentiment having masked out the 'me', then added in a 'u' and 's' using my Stamp-a-ma-jig to line them up, having selectively inked them up on one of the other stamps in the set:


I think it works - don't you? I love that I can tailor my stamps to create something that is bespoke to my needs. Do you ever do that with your stamps? Do leave me a comment below - I would love to know about your 'stamp hacks' too.

Here is the visual summary of the key products used on today's project for you to pin for easy reference:


You can see all of my 'How To' summaries on my 'How To - Tips and Techniques' Pinterest board in case you've missed any. 

How does our board inspire you? I can’t wait to see what YOU create! For more inspiration, be sure to visit the rest of the Festive Friday Card Making and Paper Crafting Challenge

 Design team:


Enjoy your day and I'll be back tomorrow with another project. Until then, happy stampin'!


Stampin' Up! Supplies Used:

Table built using Product Table Builder by The Crafty Owl - Independent Stampin' Up! Demonstrator.

Beside Me Quick Father's Day Card AYSI295

by Joanne James24. March 2023 12:00

Today I'm sharing my design team card for our new challenge over at As you See It where it's time for our monthly speed challenge, this time with a theme chosen by Jan - I also used one of the current Try Stamping On Tuesday sketches for my layout and the fresh colour palette over at Sunday Stamps ( I used dark blue, light blue and red):
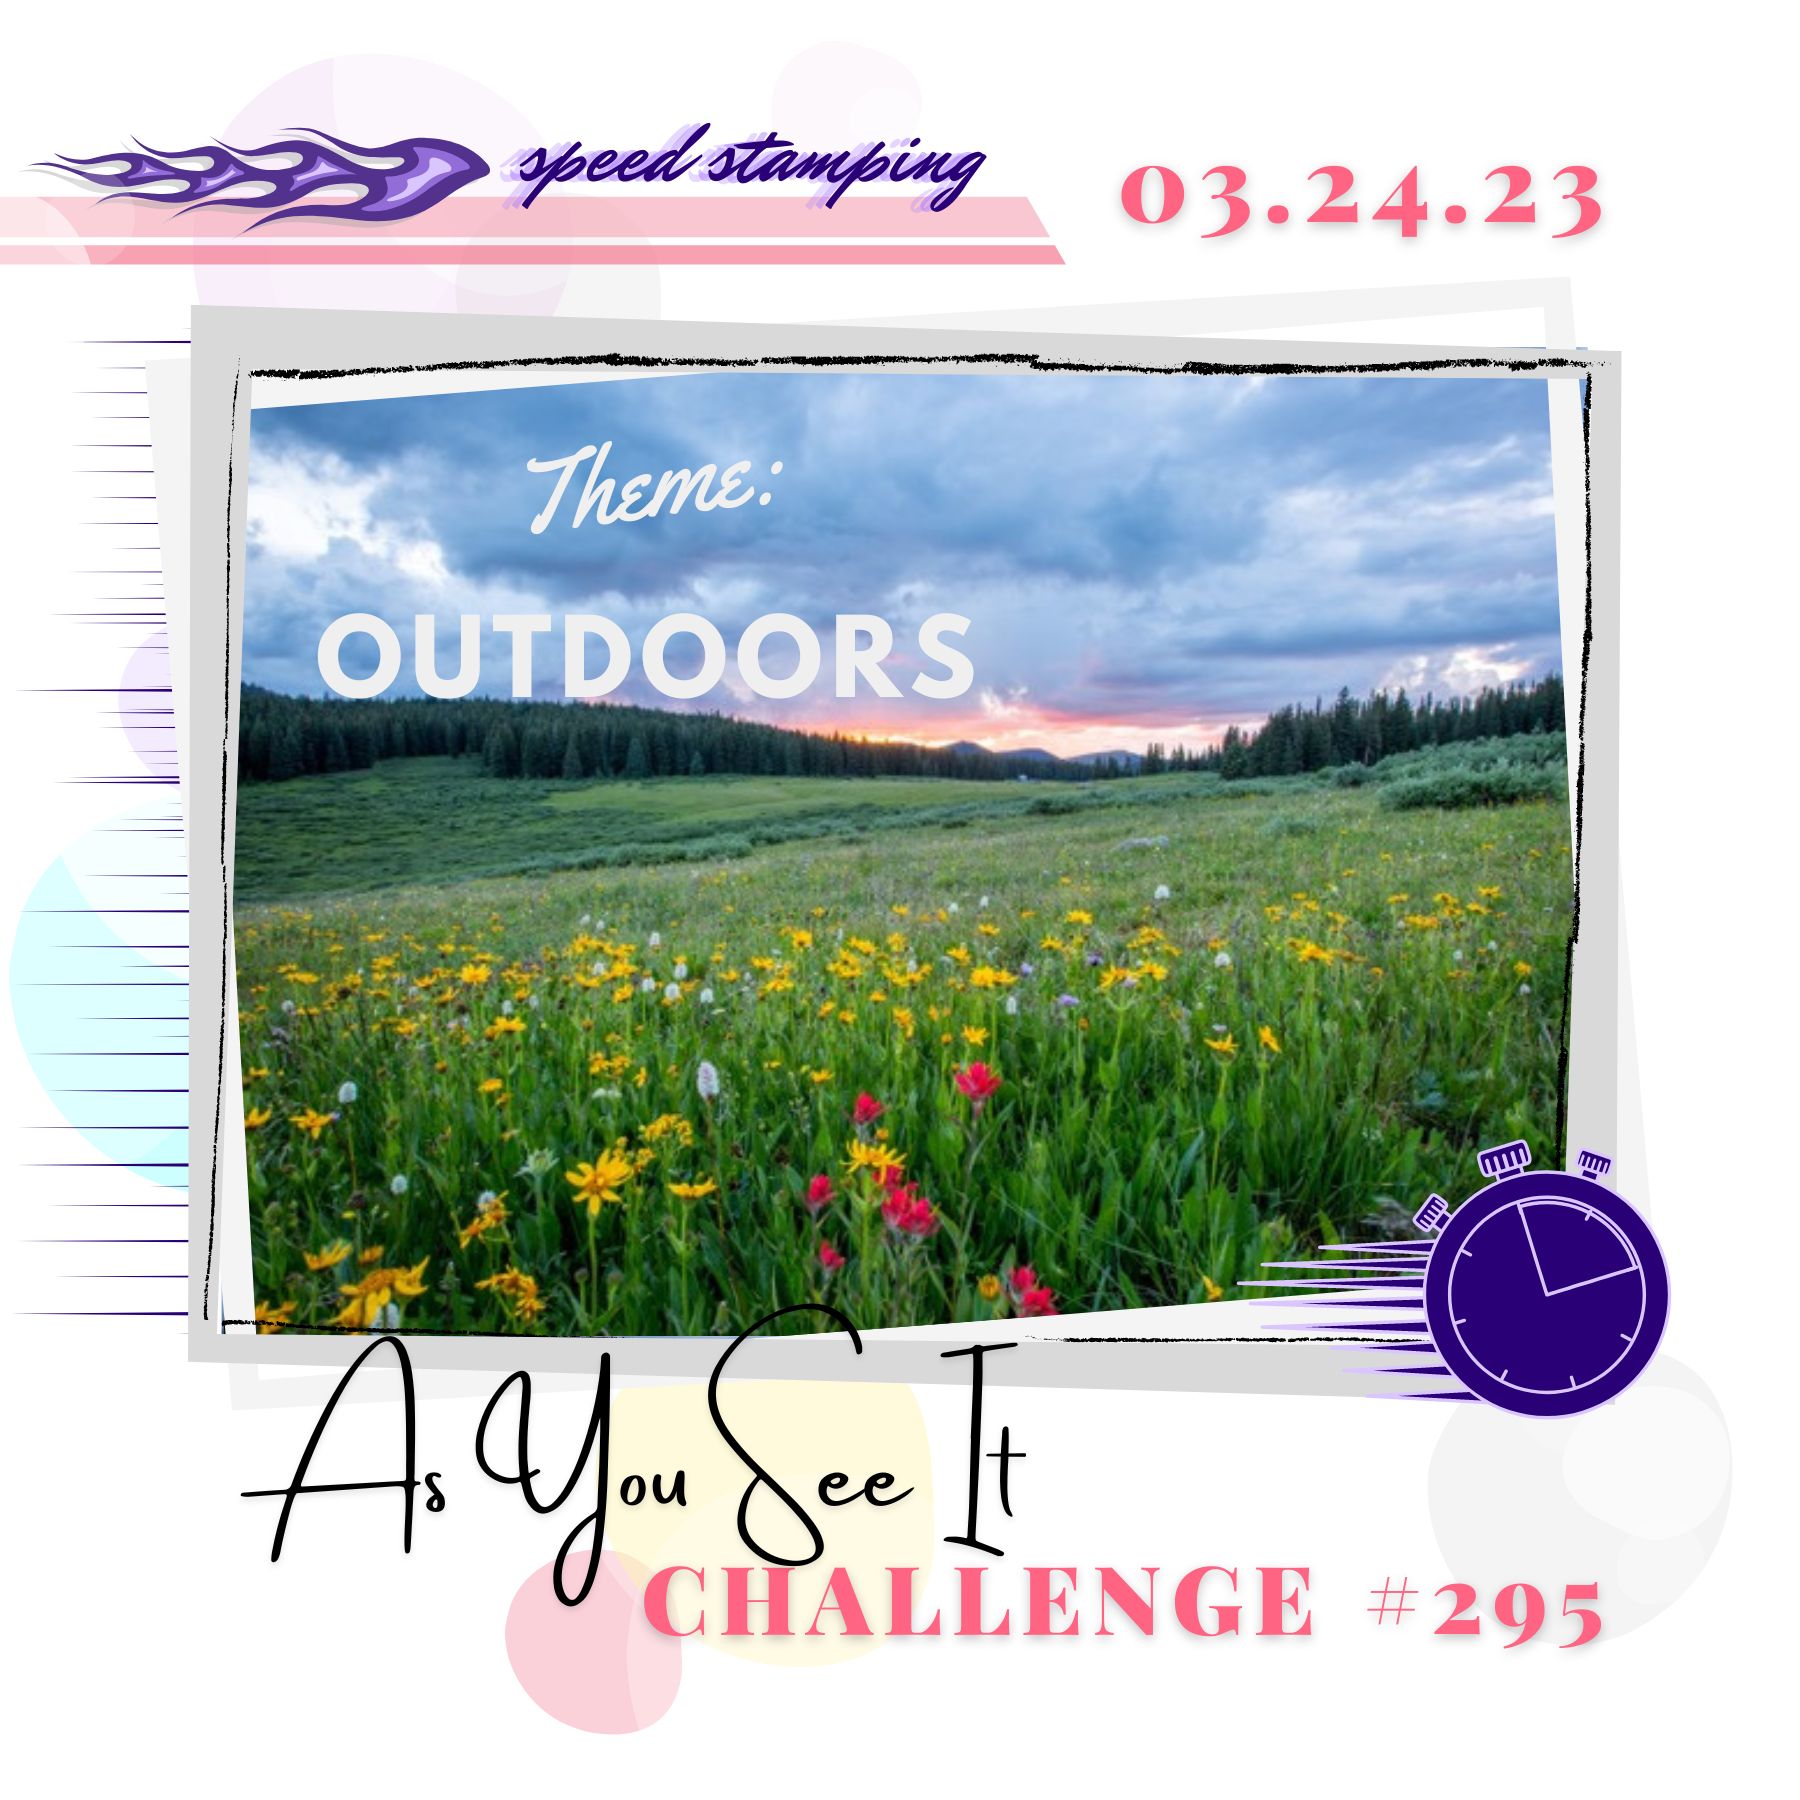
    

The great outdoors! I decided I didn't want to go with anything floral or scenic for my card, so my mind wandered to sport and outdoor pursuits and I decided to ink up a new and as yet unused stamp set called 'Beside Me' and make a Father's Day card; I know Father's Day is still some time away here in the UK (it falls on 18th June) but the 'Beside Me' stamp set has such great images and if not carried over will be retired by then, so I'm getting in on the action now. Here's the card I came up with:
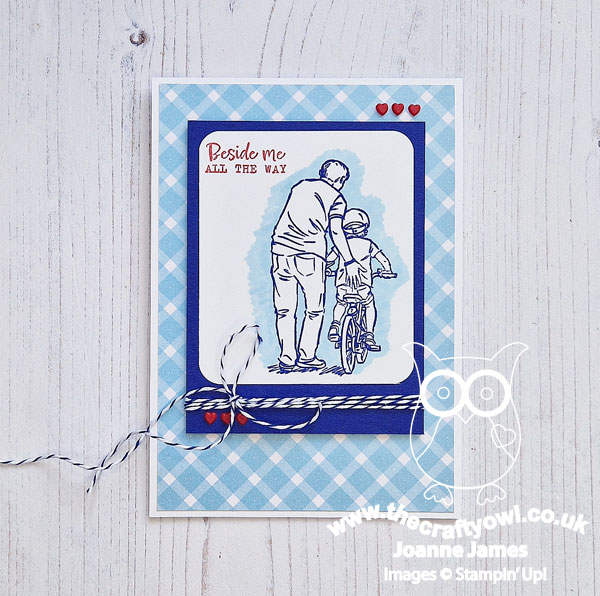
 

Here's the low-down on today's card:

It's All In The Preparation - As we always say when we have a speed challenge, the key is to be prepared. Gather all your supplies up front and plan what you are going to do - this can all be done before the stopwatch starts. I decided on my design and colour scheme and got everything ready, including my cardstock, paper, twine, embellishments, Stampin' Blends, ink pads and tools such as mu Stamparatus. My cardbase was already cut as I keep a stack of white ones ready as these are the ones I use most and the large piece of DSP was already cut to size as I had this cut for a previous project but didn't use it. I worked out the sizes needed for my other two layers, mounted my stamps on my platform, then started my stopwatch!

A False Start - The first thing I planned to do was stamp and colour my image. I thought my design would allow me time to roughly colour this small image, but alas - my timer went off just as I finished colouring. Here's the first image I coloured - this alone took me 10 minutes:
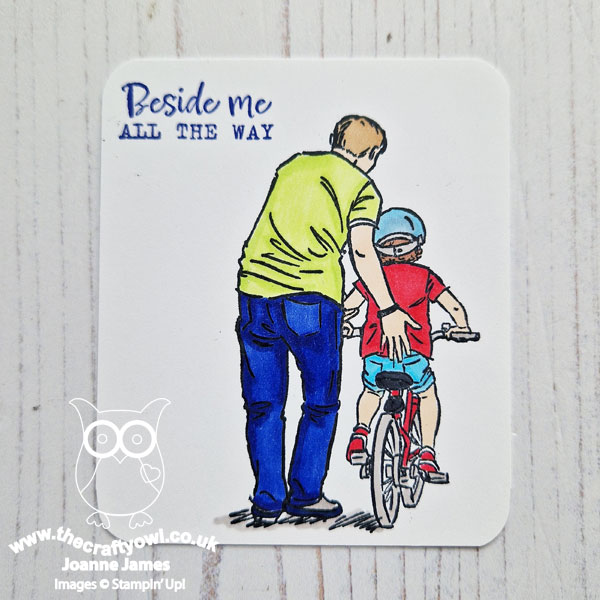
 

I know colouring can be time-consuming, but I clearly under-estimated this one! So I set that image aside, thought about how I could use way less time, got a new piece of black white cardstock and reset the timer. Take two!

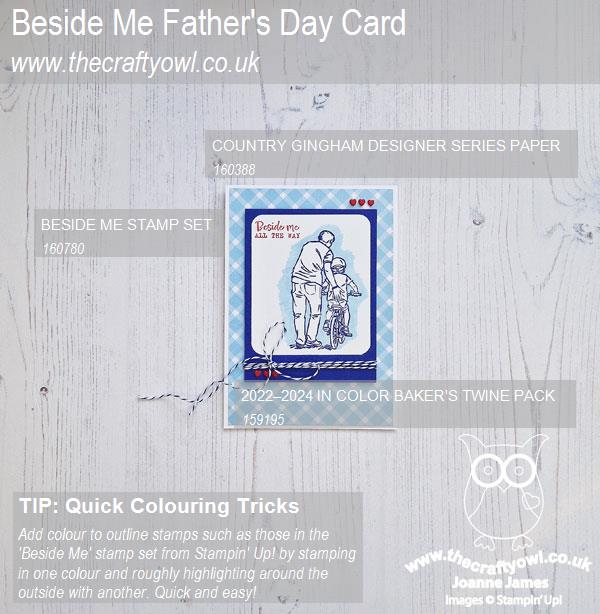
Back To The Drawing - or Colouring - Board - I decided that the key to speedy colouring would rely on focusing on the outline of the image along, rather than colouring it, so I changed up the colours and stamped it in Starry Sky instead of black and stamped the sentiment in Sweet Sorbet. This was so quick, I decided to then just add some rough highlighting to the image and scribbled my lightest Balmy Blue Blend around the image to highlight it. No blending, just a rough colour - I think it works though, what do you think?
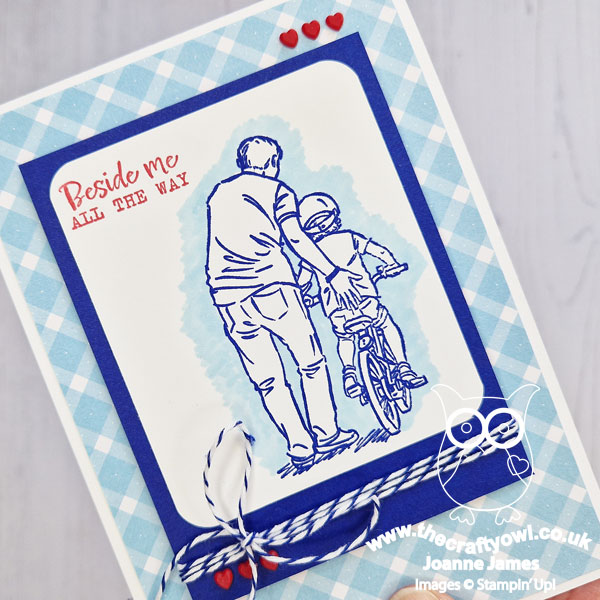
 

I then quickly rounded the corners and put the whole thing together, adding my baker's twine and two trios of heart embellishments to finish. I quickly stopped my timer - 9 minutes and 58 seconds, get in! Most of the time was spent trying to get the hearts straight!! This is such a simple way to use a line image designed for colouring and it's perfect for a quick card or if you're just not a fan of colouring with markers or pencils. 

I so love the images in this set - this one reminds me of when my husband was teaching Ben to ride his bike, so I just had to have it!

Here is the visual summary of the key products used on today's project for you to pin for easy reference:
 

You can see all of my 'How To' summaries on my 'How To - Tips and Techniques' Pinterest board in case you've missed any. 

Here's a summary of our challenge rules:

  • Create any card, scrapbooking page, 3D project or packaging project that fits the challenge.
  • Please include the challenge graphic and link back to the challenge in your blog post. Turn off word verification so we can leave you lots of lovely comments. Make sure you link the post not the whole blog to the Linky. Use #AYSIXXX when uploading to a public gallery.
  • If you’re unsure about ‘the rules’, check the details under the Challenge Guidelines tab on the As You See It Challenge homepage.
  • In a speed stamping challenge, please time yourself and say in your post how long your card took to complete
We look forward to seeing your creations in the AYSI gallery.

Enjoy your day and I'll be back tomorrow with another super clean and simple project. Until then, happy stampin'!


Stampin' Up! Supplies Used:

Table built using Product Table Builder by The Crafty Owl - Independent Stampin' Up! Demonstrator.

New Online Exclusives

There are new products available exclusively in the online store from 5 November - check them out here.

Latest Kits!

Stampin Cut and Emboss

The Perpetual Beauty Calendar Kit and Cherry Blossoms Treat Boxes Kit are the latest kits in the online store - get yours here!

Shop Online

Access my online shop 24 x 7, 365 days of the year:

Current December hostess code:

9NKXDTTR

Shop Online

Mini Catalogue

BROWSE THE CATALOGUE

'Tis The Season - the new Stampin' Up! Mini Catalogue is here! For more details and to download your copy click here

Scrapbooking

Stampin' Up! has introduced a new range of 12x12" scrapbooking product and kit - the full range is now available to purchase online. To download a copy of the new digital Scrapbooking Catalogue click here.

2024-25 Annual Catalogue

BROWSE THE CATALOGUE

Click on the image to download your copy of the 2024-25 annual catalogue. For a full list of current SU! supplies, go to my online store. If you would like any help or advice, please drop me a line at joanne@thecraftyowl.co.uk or give me a call on 07773 421446 - I'd be happy to help.

Join My Team

It's always a great time to join Stampin’ Up! New team members can get £130 worth of products for only £99 + free business supplies + free shipping + all the fun being a part of Stampin’ Up! Stampin' Up! has something for everyone: join my growing team and benefit from my support to enjoy Stampin' Up! however you choose.

If you're interested, call me for a chat to understand how I can help you realise your goals. Alternatively, if you have already decided to sign up and you just can't wait, please click here for the link to the online form where you can sign up and order your starter kit right away! 

About Me

Hi I'm Joanne and live in Northampton and when I'm not looking after my husband and two beautiful children, am an avid crafter with a passion for all things Stampin' Up!

I must confess that I have never been a big rubber stamper - until I discovered Stampin' Up! that is. I love the fact that I can get such great results with co-ordinating stamps, inks, papers and punches - the possibilities are endless! Join me on my stamping journey as I share the things I love and be inspired to create amazing things yourself!

Follow Me

Monthly Newsletter

Box Builder

Click the button above to use Box Buster to create your custom box design using the Envelope Punch Board!

Kits Collection Now Available!

Stampin Cut and Emboss

The new Kits Collection from Stampin' Up! is now available!

Click here to see the current kits available and order yours online today.

I Design For


Stampin' Up Stuff

This is my personal blog and is not endorsed by Stampin’ Up! I hope you find it a plentiful source of ideas and personal inspiration but please don't copy my designs for contest submission or use for classes, publication or sale without express permission.

DSP Special Release

Check out 3 popular designer series paper designs in fresh new colourways! Available exclusively in the online store from 3 December - check them out here