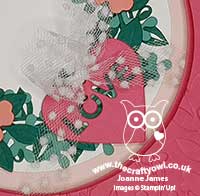
Fancy Fold Wreath Of Love For AYSI 228

by Joanne James19. June 2020 11:00

Today I'm sharing my design team card for our new challenge over at As you See It where it's time for a recipe challenge:
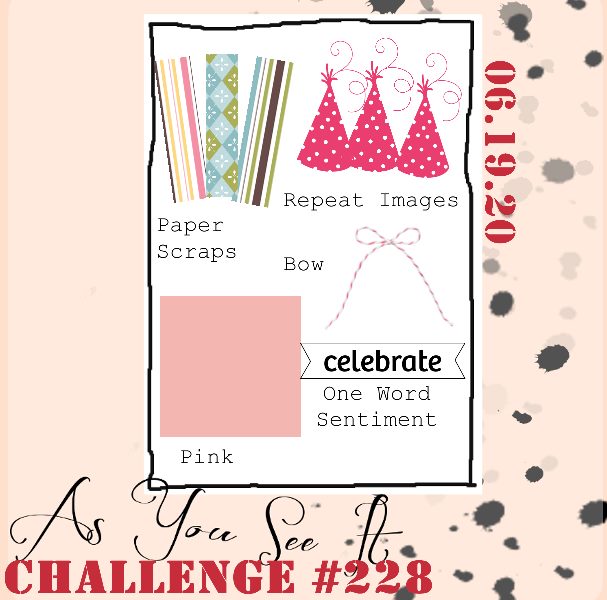
 

I thought I'd go simple with my card today, but I reached for some new goodies and by the time I had incorporated all the elements of this week's recipe, I ended up creating something altogether more fancy - take a look:
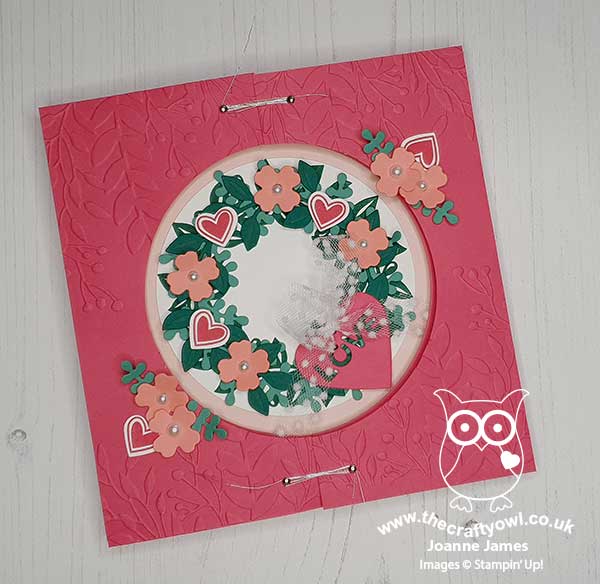
 

Here's the low-down on today's card:

I decided to create a square card with a wreath in the centre as I wanted to play with my new 'Arrange A Wreath' bundle as I am running an online class with it on 27th July so wanted to start getting the ideas flowing. I decided to go with hearts and flowers so that I could incorporate my 'pink' and 'repeating images' elements. I ended up creating a fancy fold style card, with an outer wrap that I added a couple of panels to that I embossed with one of the new 'Greenery' embossing folders, and diecutting a circle in the centre to reveal my wreath on the inner card below. The outer flaps are held closed by some silver twine wrapped around a couple of mini brads, that when untwined open up to reveal the body of the card inside:
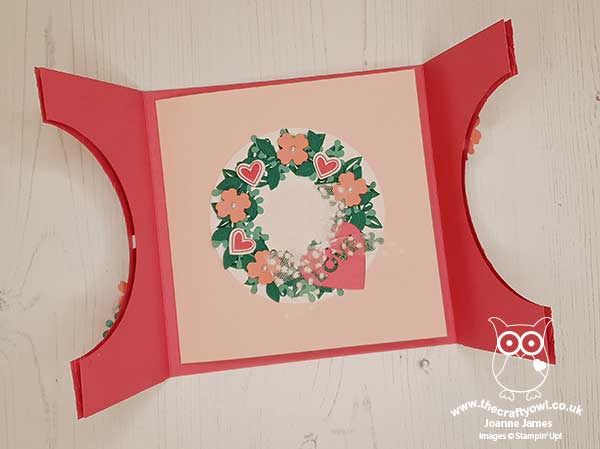
 

This is the layer where I created my wreath, which is a combination of stamped and diecut pieces. Fortunately there is a die in the Wreath Builder Die set that has the word 'love' cut out of a heart, so I used that for my one-word sentiment (check) and added a bow of white spotted tulle ribbon (check!). This card layer then opens as a conventional card to reveal the inside where you can write your greeting:
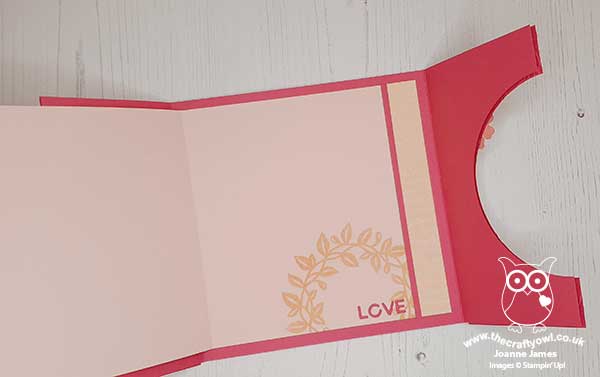
 

I added a little tone-on-tone sentiment and the letters that diecut out of the heart on the front, along with a strip of Petal Pink DSP leftover from another project (check!!)

I have no idea what kind of fold this is called - I saw one similar on Pinterest but without any details, and I had a search but am honestly none the wiser! So if it has a name that you know of, do let me know! Either way, it definitely constitutes 'fancy' in my book so I will be linking up with the team over at Just Add Ink where that is their challenge theme this week:

Here is the visual summary of the key products used on today's project for you to pin for easy reference:
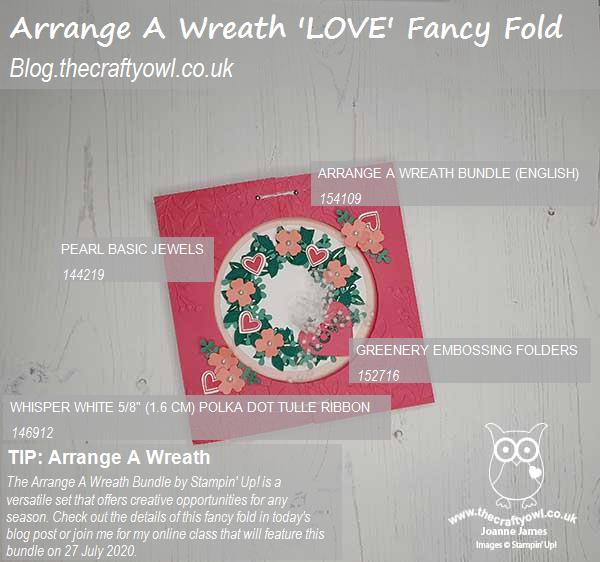
 

You can see all of my 'How To' summaries on my 'How To - Tips and Techniques' Pinterest board in case you've missed any. 
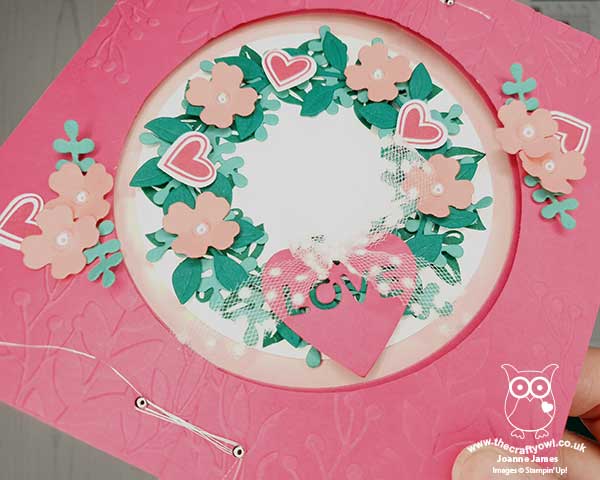
What do you think? When I'd finished I wondered if I'd got a little carried away, as this card is certainly a little busier than my usual cards. 

Here's a summary of our challenge rules:

  • Create any card, scrapbooking page, 3D project or packaging project that fits the challenge.
  • Please include the challenge graphic and link back to the challenge in your blog post. Turn off word verification so we can leave you lots of lovely comments. Make sure you link the post not the whole blog to the Linky. Use #AYSIXXX when uploading to a public gallery.
  • If you’re unsure about ‘the rules’, check the details under the Challenge Guidelines tab on the As You See It Challenge homepage.

We look forward to seeing your creations in the AYSI gallery.

And talking of Just Add Ink - I have some exciting news today! In an hour's time there will be another blog post from me as I am guesting with the lovely Kelly Kent, one of the JAI design team, and her Paper Adventures team on a blog hop so be sure to come back and check it out. Until then, happy stampin'!


Stampin' Up! Supplies Used:

Table built using Product Table Builder by The Crafty Owl - Independent Stampin' Up! Demonstrator.


Comments (3) -

Vicky
VickyUnited Kingdom
19/06/2020 20:37:03 #

Yep, this is definitely a fancy fold! I was just wondering where you'd write your greeting and lo! the next photo revealed an extra fold-back piece with some pretty stamping inside. Very well thought out Joanne - and I have my eye on that fabulous set too! Vicky x

LeAnne Pugliese
LeAnne PuglieseUnited States
19/06/2020 23:00:27 #

Wow, this is very cool!  I really liked the idea of that stamp set in the catalog, it's nice to see it put to life!

Kelly Kent
Kelly KentAustralia
24/06/2020 15:11:28 #

Fancy indeed!  Loving this style of card Joanne!  Thanks for sharing with us at Just Add Ink!  Kelly x

Comments are closed

Mini Catalogue

BROWSE THE CATALOGUE

The mini catalogue is now live! Read and download your copy here.

Shop Online

Access my online shop 24 x 7, 365 days of the year:

Current April hostess code:

VDKNV7BH

Shop Online

Join My Team

It's always a great time to join Stampin’ Up! New team members can get £130 worth of products for only £99 + free business supplies + free shipping + all the fun being a part of Stampin’ Up! Stampin' Up! has something for everyone: join my growing team and benefit from my support to enjoy Stampin' Up! however you choose.

If you're interested, call me for a chat to understand how I can help you realise your goals. Alternatively, if you have already decided to sign up and you just can't wait, please click here for the link to the online form where you can sign up and order your starter kit right away! 

Latest Kit!

Stampin Cut and Emboss

The Rock Legend Kit has all you need to make 8 cards with coordinating envelopes. Along with the new Panda Friends Kit, both are available from January 4th for just £14 each - get yours here!

2023-24 Annual Catalogue

BROWSE THE CATALOGUE

Click on the catalogue for a full list of current SU! supplies - if you would like to order any of the items featured, please drop me a line at [email protected] or give me a call on 07773 421446 - I'd be happy to help.

New Online Exclusives

There are new products available exclusively in the online store from 5 March - check them out here.

About Me

Hi I'm Joanne and live in Northampton and when I'm not looking after my husband and two beautiful children, am an avid crafter with a passion for all things Stampin' Up!

I must confess that I have never been a big rubber stamper - until I discovered Stampin' Up! that is. I love the fact that I can get such great results with co-ordinating stamps, inks, papers and punches - the possibilities are endless! Join me on my stamping journey as I share the things I love and be inspired to create amazing things yourself!

Follow Me

Monthly Newsletter

Box Builder

Click the button above to use Box Buster to create your custom box design using the Envelope Punch Board!

Kits Collection Now Available!

Stampin Cut and Emboss

The new Kits Collection from Stampin' Up! is now available!

Click here to see the current kits available and order yours online today.

I Design For


Stampin' Up Stuff

This is my personal blog and is not endorsed by Stampin’ Up! I hope you find it a plentiful source of ideas and personal inspiration but please don't copy my designs for contest submission or use for classes, publication or sale without express permission.