A Clean and Simple Easter Chick

by Joanne James20. April 2022 09:00

Today I'm sharing another clean and simple card that was inspired by a few challenges:


I wouldn't normally gravitate towards the spring pastel palette over at Sunday Stamps, but the minute I saw it I couldn't help thinking it would be perfect for an Easter chick. So I paired it with the current challenge over at AAA Cards where they are looking for 'small and few' paired with Easter or spring for a fluffy chick (perfect for the CASology cue word too) and a few pastel Easter eggs hidden in the grass - take a look:


Here's the low-down on today's card:

I used my blending brushes to create a blended corner panel of yellow 'sunrays' and a little green across the bottom for the base of my scene, then added some diecut eggs from the retired Chick Dies in two shades of pale pink behind some grass, cut using one of the Horizon dies. My Easter chick is courtesy of the Birthday Chick Dies - I had completely overlooked this little diecut chick and discovered it when I was using these dies on this card earlier this month and thought it would make the perfect tiny Easter chick:


An Easter sentiment from the retired set 'Welcome Easter' completes my card. I know Easter has already been and gone, but it's always good to have a few cards set aside for next year - when Easter rolls around I never seem to have enough!

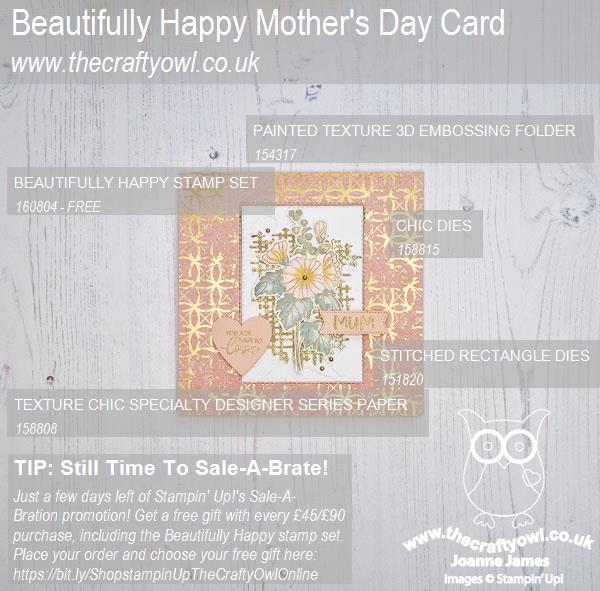
Here is the visual summary of the key products used on today's project for you to pin for easy reference:
 

You can see all of my 'How To' summaries on my 'How To - Tips and Techniques' Pinterest board in case you've missed any. 

Enjoy your day and I'll be back tomorrow with another project. Until then, happy stampin'!


Stampin' Up! Supplies Used:
Table built using Product Table Builder by The Crafty Owl - Independent Stampin' Up! Demonstrator.

Measure of Love Clean and Simple CCS 466

by Joanne James19. April 2022 12:00

It's Tuesday and time for a new challenge over at CAS Colours & Sketches. Bhavya is hosting for the month of April and it's time for our second colour challenge of the month: 


I thought these colours would be perfect for a bowl of cherries for a sweet friend - so I grabbed the retiring 'Measure of Love' stamp set and set to work - take a look:


Here's the low-down on today's card:

 A simple bowl of cherries, backed with some Pattern Party black and white gingham and with an added Cherry Cobbler scalloped border detail to finish:


A super clean and simple card!

Here is the visual summary of the key products used on today's project for you to pin for easy reference:


You can see all of my 'How To' summaries on my 'How To - Tips and Techniques' Pinterest board in case you've missed any. 

As a reminder, for our colour challenges, you must use all of the stated challenge colours. You may also use neutral colours; however, the challenge colours should be the most noticeable ones featured on your card. We use Stampin' Up! color names for reference, but you are welcome to use any other companies' products as long as you match the challenge colours as closely as possible.

Enjoy your day and I'll be back tomorrow with another project. Until then, happy stampin'!


Stampin' Up! Supplies Used:

Table built using Product Table Builder by The Crafty Owl - Independent Stampin' Up! Demonstrator.

Celebrate With Sunshine and Rainbows PP587

by Joanne James17. April 2022 08:00

Today it's Sunday and time for this week's new challenge over at The Paper Players! It's the turn of the fabulous Claire to host this week and she has a timely clean and simple challenge for you to work with:


April showers! None of those here today though as the UK celebrates its warmest days of the year so far for a wonderful Easter bank holiday weekend! My card today does feature raindrops - and sunshine and the best thing to result from both after an April shower: rainbows!  I used the current sketch layout over at CAS on Friday for my clean and simple card today (I was thrilled to be a winner there last week with this stencilled card - look out for my guest spot there soon!):


Here's the low-down on today's card:

I took a piece of retired Sale-A-Bration Sunshine and Rainbows designer series paper and overlaid it with some stitched clouds cut with my Basic Borders Dies and a row of rainbows cut with one of the Brilliant Rainbows Dies. I then stamped a sentiment from the retiring 'Celebrate With Flowers' set twice, once in Magenta Madness onto a circle of So Saffron and a second time in Mango Melody on white and fussy cut the word 'sunshine' and layered the two together. To finish, I added a trio of iridescent rhinestones for a little added sparkle:


I used lots of different bits and pieces on today's card, but my minimising my layers and embellishments and focusing my design into the main square, I preserved my all-important 'white space', a key feature of clean and simple cards.

Here is the visual summary of the key products used on today's project for you to pin for easy reference:


You can see all of my Product and 'How To' summaries on my 'How To - Tips and Techniques' Pinterest board in case you've missed any. 

Before you reach for your ink and papers, check out what our amazing team has created to inspire you this week:

Here's a quick recap of our challenge rules:
 
1.  Create a new paper project
2.  Upload your creation to your blog with a link back to us and provide a direct link to the post featuring your challenge submission.
3.  Please link your card to no more than four challenges, TOTAL.
4.  Have FUN!

Enjoy your day; we spent yesterday at the farm visiting all of the baby animals - bottle feeding the lambs was a definite highlight! - and today we will be Easter egg hunting and enjoying Sunday lunch in the garden - bliss! I hope you are all enjoying a restful weekend break too! I'll be back tomorrow with another project. Until then, happy stampin'!


Stampin' Up! Supplies Used: 

Table built using Product Table Builder by The Crafty Owl - Independent Stampin' Up! Demonstrator.

Hues of Happiness New Catalogue Sneak Peek FF107

by Joanne James15. April 2022 08:00


Today I have my card for the new challenge over at Festive Friday. I used the great sketch over at Sunday Stamps for my layout too:


The challenge that we are celebrating this week is 'International Dance Day' which is on 29th April. Remember the fun thing is that at Festive Friday you do not need to actually celebrate the occasion; your goal is to simply use three or more items from the inspiration list on your project. I received my new annual catalogue pre-order earlier this week and couldn't wait to open it and start creating! So on today's card I used blue, rhinestones, patterned paper and diecuts from the inspo list and I have a sneak peek of new products for you - take a look:


 Here's the low-down on today's card:

Hues of Happiness Suite - Today's card features a number of products from the new 'Hues of Happiness' Suite. Behind my layered circle I used the beautiful trellis patterned diecut from the Blossoming Happiness Dies, but the star of today's card is most definitely the beautiful flowers that were cut from the Hues of Happiness designer series paper. The Blossoming Happiness Dies fit the flowers and leaves on two of the paper patterns perfectly; beautifully coloured flowers that can be cut out with ease - bonus! Here's a close up of these beautiful blooms: 

Aren't they just gorgeous?! I have cut up a whole pack of this paper already and will definitely be needing more of it!!

Happiness Abounds - The sentiment on the front of my card is from the 'Happiness Abounds' set that is also part of this suite; I added another two to the inside of my card. along with some outline floral detail:


This stamp set will be great for colouring too - I am so looking forward to working with it again.

Finishing Touches - A sprinkling of iridescent rhinestones and a couple of strips of retiring Gorgeous Grape glimmer paper complete my card.

If you think you don't need any more florals, the Hues of Happiness Suite will most definitely change your mind! I can't wait to share more new products with you. 

Would you like a copy of the new Stampin' Up! Annual Catalogue? If you have placed an order with me in the last 6 months, then great news - you are already on my mailing list to receive a new annual catalogue. If you haven't and would like one, please do get in touch to request one and I can add you to my list!

Here is the visual summary of the key products used on today's project for you to pin for easy reference:


You can see all of my 'How To' summaries on my 'How To - Tips and Techniques' Pinterest board in case you've missed any. 

How does our board inspire you? I can’t wait to see what YOU create! For more inspiration, be sure to visit the rest of the  Festive Friday Challenge Design team:

Ann Schach
Beth McCullough
Sharon Hashimoto Burkert
Melanie Hungerford
Helen Jennings
Stephanie Lanzalotto
Melva Peters
Jaydee
Diane Evans
Joanne James

Enjoy your day and I'll be back tomorrow with another project. Until then, happy stampin'!


Stampin' Up! Supplies Used:

Table built using Product Table Builder by The Crafty Owl - Independent Stampin' Up! Demonstrator.


Peekaboo Farm And A Welsh Lamb

by Joanne James14. April 2022 10:00

Today I'm sharing a card that was inspired by a few current clean and simple challenges:


Over at AAA Cards they are asking us to create a design that is both along the edge and represents your country. Since I am Welsh I considered daffodils, but settled on one of the other things that my homeland is famed for - take a look:


Yes, a Welsh lamb! Perfect for the animal challenge over at Addicted to CAS and the code word 'Fluffy' over at CASology too!

Here's the low-down on today's card:

A Welsh Lamb - The 'Peekaboo Farm' stamp set was perfect for today's card: I extended my brick wall to run along the edge of the base of my card, with the lamb peeking over the top. The eagle-eyed amongst you will see this is a slightly doctored image - the lamb in the stamp set has horns, but since I wanted the emphasis on 'fluffy' I thought I'd remove them. I fussy-cut my lamb, minus the horns, and popped him over the wall using a couple of glue dots:


Take 5 - This is a great #simplestamping card that uses only five key supplies: white cardstock, black ink, a stamp set and my watercolour pencils that I used dry - perfect for a beginner. I'm generally prefer my Blends markers for colouring as I like the more saturated colour they give, but since this is a (largely) one layer card, I went with pencils to avoid the issue of colour bleeding through to the reverse of my cardstock. On closer inspection I think my pencil blending needs a little work, but it was nevertheless fun to create - I might have to make another card to practice my technique!

Here is the visual summary of the key products used on today's project for you to pin for easy reference:


You can see all of my 'How To' summaries on my 'How To - Tips and Techniques' Pinterest board in case you've missed any. 

Enjoy your day and I'll be back tomorrow with another project. Until then, happy stampin'!


Stampin' Up! Supplies Used:

Table built using Product Table Builder by The Crafty Owl - Independent Stampin' Up! Demonstrator.

What's Cookin? CCS 465

by Joanne James12. April 2022 12:00

It's Tuesday and time for a new challenge over at CAS Colours & Sketches. Bhavya is hosting for the month of April and it's time for her first sketch challenge of the month: 


Feel free to flip or rotate the sketch when making your card. For my card today I decided to grab my retiring 'What's Cookin'' stamp set and Cookin' Dies and create a simple card for the baker or would-be chef in your life - take a look:


Here's the low-down on today's card:

I almost passed over the colours at Just Add Ink this week, when it occurred to me that they really reminded me of Cornishware pottery, with its distinctive blue or red and vanilla stripes, so I decided that a Cornishware-inspired mixing bowl, along with a little texture from my neutral chopping board and mixing spoon and a pop of red from a Cherry Cobbler sentiment and twine bow were just what I needed for today's clean and simple card. Check out the texture that the die gives the chopping board on the closeup below:


I also added a little additional decoration to the inside of my card - aren't those miniature chef hats just the cutest?!


I can't believe this set is on the retiring list this year; I had so many more plans for it and am really sad to see it leave the annual catalogue. I will definitely be holding on to mine - I love to spend time in the kitchen and I know I'll find many more uses for it. If you would like to be the proud owner of the What's Cookin' stamp set and co-ordinating Cookin' Dies, they will only be around for another couple of weeks, and even then only whilst stocks last, so do get your order in sooner rather than later! I'm also sharing today's card over at Less Is More where the theme this week is 'occupations'  - this set is perfect for chefs, bakers and kitchen enthusiasts! 

Here is the visual summary of the key products used on today's project for you to pin for easy reference:


You can see all of my 'How To' summaries on my 'How To - Tips and Techniques' Pinterest board in case you've missed any. 

I love to cook and my family suggest I'm quite good at it. Whilst out for lunch at the weekend, my son was tucking into his lasagne and when asked if everything was ok with his meal, he announced "It's good - but not as good as my Mum's!" I'm not sure there's anything you can reply to that; if only all problems could be solved with a homemade lasagne!

Enjoy your day and I'll be back tomorrow with another project. Until then, happy stampin'!


Stampin' Up! Supplies Used:

Table built using Product Table Builder by The Crafty Owl - Independent Stampin' Up! Demonstrator.

Embossed Dandelions Notecard

by Joanne James11. April 2022 11:15

Today I'm sharing a card I made at the weekend that uses Jen M's great layout over at Freshly Made Sketches this week and also uses the current Color Hues combination of pink and green:


Jen's sketch has a lovely open panel that can be used in so many different ways. I decided it would be a great place to have one last hurrah with my Dandelions 3D embossing folder - take a look:


Here's the low-down on today's card:

I simply embossed my dandelions on a panel of white cardstock and added Polished Pink to the seed heads and Pear Pizazz to the stems lightly with a blender brush for just a hint of colour to the raised elements. I added them to a base covered with a piece of Polished Pink In-Colour designer paper and added a simple heat embossed sentiment from 'Flowing Flowers' and a trio of iridescent rhinestones for some subtle sparkle:


I think this embossing folder is so pretty and a great way to make texture a feature on an otherwise clean and layered card. 

Here is the visual summary of the key products used on today's project for you to pin for easy reference:


You can see all of my 'How To' summaries on my 'How To - Tips and Techniques' Pinterest board in case you've missed any. 

Just a quick post from me today - I have a long 'to do' list that I'm trying to rattle through and a new annual catalogue pre-order that has just arrived that I want to get the opportunity to play with!

Enjoy your day and I'll be back tomorrow with another project. Until then, happy stampin'!


Stampin' Up! Supplies Used:

Table built using Product Table Builder by The Crafty Owl - Independent Stampin' Up! Demonstrator.

Good Luck From All Of Us

by Joanne James10. April 2022 20:10

I have an extra card today to share a card a special card I made for Rebecca and her hockey team mates to say goodbye to one of their members who is leaving at the end of the season to go to university. I thought the motley crew of animals in the retiring 'From All of Us' stamp set would be perfect for a team farewell - take a look:


I used a bright and fun unconventional colour scheme to colour my group of animals and fussy cut them and placed on the centre of a larger A5 card, over a simple scored panel of Coastal Cabana - I needed room for lots of messages inside! I added a 'good luck' message using a retired alphabet set either side of my colourful gang:


I added one other stamp to the inside to finish:


Cute, right?! This is a great stamp if you need a collective card from a group.

Here is the visual summary of the key products used on today's project for you to pin for easy reference:


You can see all of my 'How To' summaries on my 'How To - Tips and Techniques' Pinterest board in case you've missed any. 

I'm sharing this card over at SUO Challenges with the theme is 'animals and critters' and The Alphabet Challenge where their theme is 'A for Animal Antics' - I think my collective definitely look they could get up to some mischief!

I'll be back tomorrow with another project. Until then, happy stampin'!


Stampin' Up! Supplies Used:

Table built using Product Table Builder by The Crafty Owl - Independent Stampin' Up! Demonstrator.

Pierced Blooms And A Hippo Birthday PP586

by Joanne James10. April 2022 08:00

Today it's Sunday and time for this week's new challenge over at The Paper Players! It's the turn of the fabulous Anne Marie to host this week and she has a bright colour challenge for us to work with:


I love Anne Marie's bright and sunny colours this week and ended up making a couple of cards. First up I used this week's layout over at Hand Stamped Sentiments and went with some florals, care of my Pierced Blooms Dies - take a look:


Here's the low-down on today's card:

I diecut a trio of layered flowers and leaves and paired them with a piece of Daffodil Delight coloured Hand Penned designer series paper and used white as my neutral. A few polished pink gems add a touch of sparkle to the front of my card:


And a little extra stamping inside completes my card:


I wanted to try and use these colours on something other than flowers, so made a second card using the retiring 'Hippo Happiness' stamp set and co-ordinating Hippo & Friends Dies:


Some simple stamping and diecutting is all there is to it. The best part about this card is definitely the punny sentiment though - Hippo birthday...


... 2 ewe! Isn't that just so sweet?!


I used the sketch over at TGIF Challenges this week for the layout for this card and I am also linking up over at SUO Challenges where they are all about 'animals and critters' for their current challenge.

Two very different cards but I think both work with these colours. Which one do you prefer? Do leave me a comment below - I'd love to hear your thoughts.

Here is the visual summary of the key products used on today's projects for you to pin for easy reference:


You can see all of my Product and 'How To' summaries on my 'How To - Tips and Techniques' Pinterest board in case you've missed any. 

Before you reach for your ink and papers, check out what our amazing team has created to inspire you this week:

Here's a quick recap of our challenge rules:
 
1.  Create a new paper project
2.  Upload your creation to your blog with a link back to us and provide a direct link to the post featuring your challenge submission.
3.  Please link your card to no more than four challenges, TOTAL.
4.  Have FUN!

Enjoy your day; we have some chores to take care of and we are out to lunch - should be a good day! I'll be back tomorrow with another project. Until then, happy stampin'!


Stampin' Up! Supplies Used (where still available): 

Table built using Product Table Builder by The Crafty Owl - Independent Stampin' Up! Demonstrator.


Ornate Layers Meets All Things Fabulous AYSI272

by Joanne James8. April 2022 12:00

Happy Friday everyone - the end of the week is here! This also means I'm sharing my design team card for our new challenge over at As you See It where it's time for a fun sketch challenge:


I paired our sketch full of horizontals with this week's Color Throwdown colours and set to work. Initially this sketch had me stumped; my 'go to' would normally be designer series paper but I just wasn't inspired (check out what some of my teamies did with DSP though - amazing!) I perused my catalogue and then happened upon a retiring die that I thought would make a pretty repeating design - take a look at what I came up with:


Here's the low-down on today's card:

Do you recognise this die? Or actually dies, as it uses two? Both the stitched rectangle and the floral line are from the retiring Ornate Layers Dies. In addition to the fancy frames in this set, there are two pretty floral diecut elements too and this is one of them. What this card lacks in supplies - you need literally just a handful of items to recreate it - it more than makes up for in time: all of the tiny floral elements have been paper-pieced into the negative of the white rectangles and yes it took a while! It's so worth it though; I considered leaving the panels white with the negative space unfilled and also considered cutting the panels from coloured cardstock, but they just didn't look as good. Instead I cut five rectangles with the negative die inset, then diecut the floral band an additional five times each in Coastal Cabana and Soft Sea Foam and using some Press 'n' Seal and the putty end of my Take Your Pick Tool, paper-pieced the pieces into each white panel (having first adhered it to a piece of cardstock using an adhesive sheet. 

For the gold elements, instead of using gold foil I rubbed the remaining areas with gold gilded leafing; this stuff gets everywhere, but I love the bright shine and slightly textured effect that it gives - you can see it more closely below:

I finished with a sentiment from the retiring 'All Things Fabulous' which has sadly already sold out here in the UK (love this set!) So what do you think? This card took a while but was so worth it - I love it! I'm also linking today's card up over at The Flower Challenge where they want us to add a heart to our floral cards; is it me, or are those not 'hidden' gold hearts on their sides either side of the central flower? For all you Walt Disney World fans out there, think of it like a hunt for 'hidden Mickey's' - you see them, right?!

Here is the visual summary of the key products used on today's project for you to pin for easy reference:


You can see all of my 'How To' summaries on my 'How To - Tips and Techniques' Pinterest board in case you've missed any. 

Here's a summary of our challenge rules:

  • Create any card, scrapbooking page, 3D project or packaging project that fits the challenge.
  • Please include the challenge graphic and link back to the challenge in your blog post. Turn off word verification so we can leave you lots of lovely comments. Make sure you link the post not the whole blog to the Linky. Use #AYSIXXX when uploading to a public gallery.
  • If you’re unsure about ‘the rules’, check the details under the Challenge Guidelines tab on the As You See It Challenge homepage.
  • In a sketch challenge, you are welcome to rotate or flip a sketch. You can replace shapes used such as substituting a circle panel for a square panel. However, we must be able to still see the basis of the original sketch in your finished product.
We look forward to seeing your creations in the AYSI gallery.

Enjoy your day; I have my usual list of Friday chores to complete today, including amongst other things trying to line-dry my washing in between the April showers (so far this week the score is 'Weather 2 - Joanne 0'!) but I'm hoping since I have a helper or two I met get done quicker and be able to squeeze in a little crafty time too. I'll be back tomorrow with another project. Until then, happy stampin'!


Stampin' Up! Supplies Used:

Table built using Product Table Builder by The Crafty Owl - Independent Stampin' Up! Demonstrator.
 

Mini Catalogue

BROWSE THE CATALOGUE

The mini catalogue is now live! Read and download your copy here.

Shop Online

Access my online shop 24 x 7, 365 days of the year:

Current April hostess code:

VDKNV7BH

Shop Online

Join My Team

It's always a great time to join Stampin’ Up! New team members can get £130 worth of products for only £99 + free business supplies + free shipping + all the fun being a part of Stampin’ Up! Stampin' Up! has something for everyone: join my growing team and benefit from my support to enjoy Stampin' Up! however you choose.

If you're interested, call me for a chat to understand how I can help you realise your goals. Alternatively, if you have already decided to sign up and you just can't wait, please click here for the link to the online form where you can sign up and order your starter kit right away! 

Latest Kit!

Stampin Cut and Emboss

The Rock Legend Kit has all you need to make 8 cards with coordinating envelopes. Along with the new Panda Friends Kit, both are available from January 4th for just £14 each - get yours here!

2023-24 Annual Catalogue

BROWSE THE CATALOGUE

Click on the catalogue for a full list of current SU! supplies - if you would like to order any of the items featured, please drop me a line at [email protected] or give me a call on 07773 421446 - I'd be happy to help.

New Online Exclusives

There are new products available exclusively in the online store from 5 March - check them out here.

About Me

Hi I'm Joanne and live in Northampton and when I'm not looking after my husband and two beautiful children, am an avid crafter with a passion for all things Stampin' Up!

I must confess that I have never been a big rubber stamper - until I discovered Stampin' Up! that is. I love the fact that I can get such great results with co-ordinating stamps, inks, papers and punches - the possibilities are endless! Join me on my stamping journey as I share the things I love and be inspired to create amazing things yourself!

Follow Me

Monthly Newsletter

Box Builder

Click the button above to use Box Buster to create your custom box design using the Envelope Punch Board!

Kits Collection Now Available!

Stampin Cut and Emboss

The new Kits Collection from Stampin' Up! is now available!

Click here to see the current kits available and order yours online today.

I Design For


Stampin' Up Stuff

This is my personal blog and is not endorsed by Stampin’ Up! I hope you find it a plentiful source of ideas and personal inspiration but please don't copy my designs for contest submission or use for classes, publication or sale without express permission.