Today it's Sunday and time for this week's new challenge over at The Paper Players! It's my turn to host this week and I have a seasonal clean and simple challenge for us to work with:
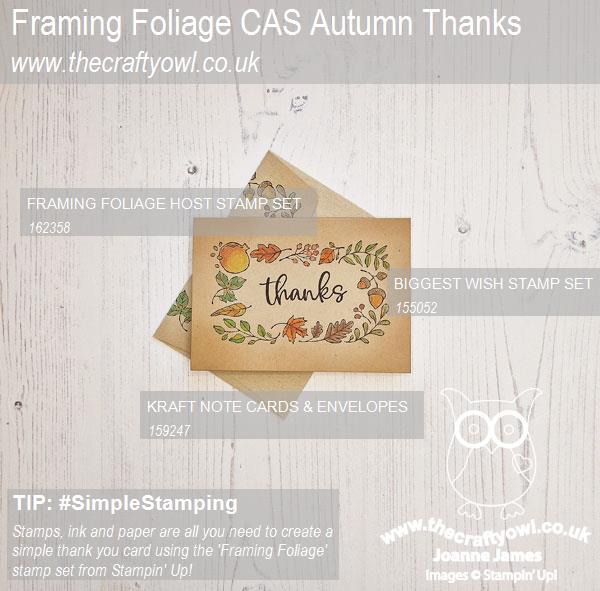
Signs of autumn - this can mean so many things but for me is summed up above all in the changing colours of the leaves on the trees as I drive through the countryside each day. The 'Framing Foliage' host stamp set has a lovely autumnal frame made of leaves, fruit and berries that is perfect for clean and simple cards - take a look:

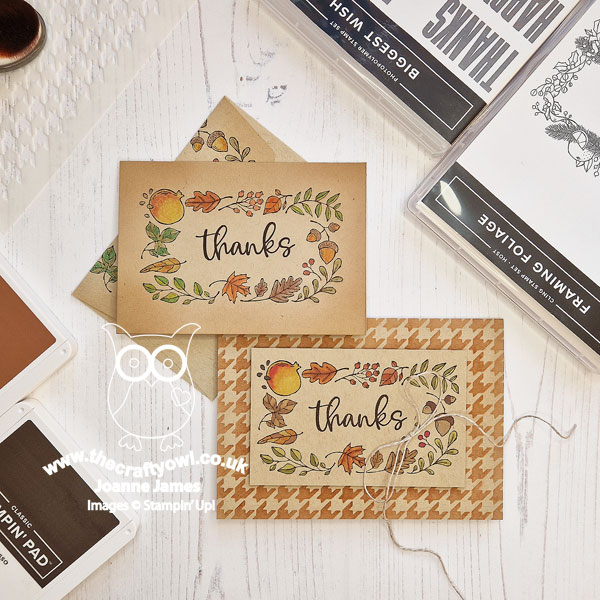
Here's the low-down on today's card:
#SimpleStamping - Firstly, did you miss the Framing Foliage stamp set in the current mini catalogue? It's on page 79 and is an exclusive stamp set that can be purchased with Stampin' Rewards earned when you host your own Stampin' Up! party (or place a single order of a qualifying amount). For my clean and simple design I decided to go with a one layer, #simplestamping card: stamps, ink and paper and nothing more. I stamped the frame, my 'thanks' sentiment from 'Biggest Wish' stamp set in Early Espresso on a kraft notecard and having added a little Crumb Cake ink to the edges of my card base with a blending brush, I coloured the details of the frame with my watercolour pencils. I also stamped a partial frame onto the outer envelope flap and coloured that to coordinate. Super simple - done! I don't make smaller notecards often, although it's a great size to pop into customer order bags, so I made a few of these and that's where they'll be headed.
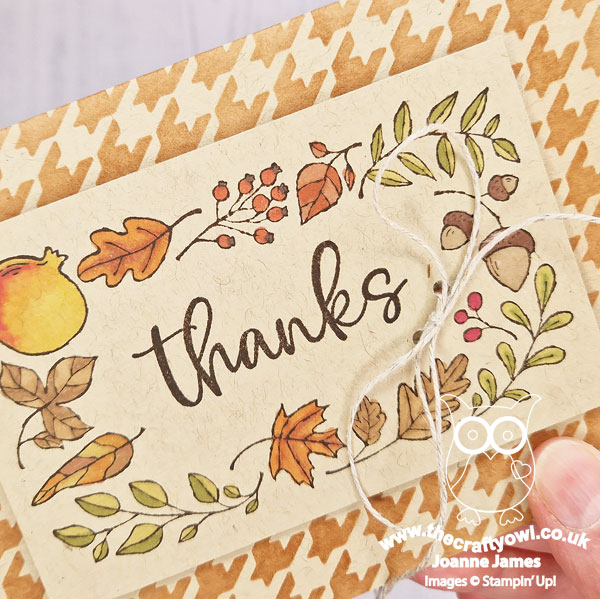
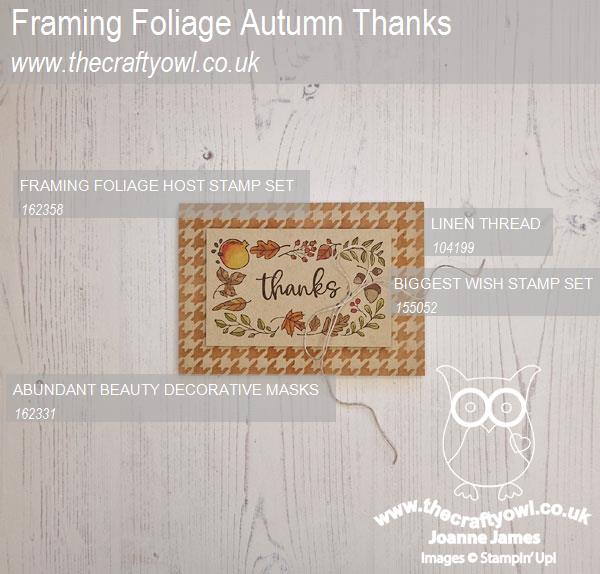
Stepped Up - Whilst I had everything out on my desk, I thought I'd also create a second, stepped up version to show how a few additional elements can enhance the basic design. This time I used a standard size card base and added a pattern to my cardfront using a blending brush and some Copper Clay ink with the houndstooth pattern Abundant Beauty Decorative Mask. I stamped the frame onto a second piece of cardstock, cropped it closely then this time coloured the elements with my Stampin' Blends markers.
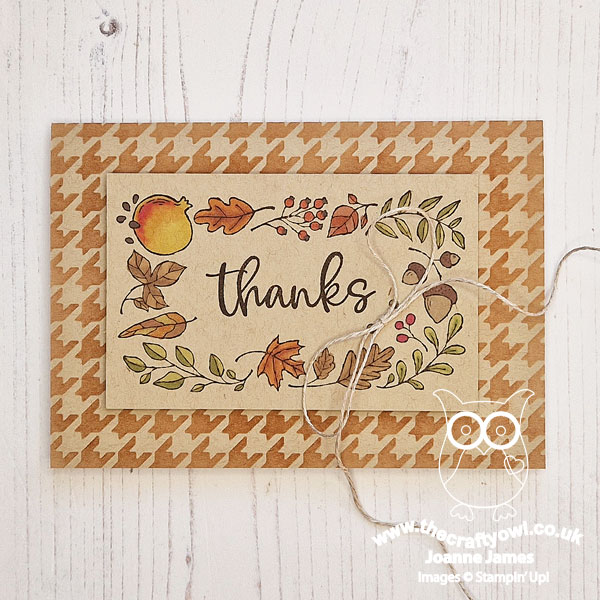
Before adding my stamped panel to my cardbase with dimensionals, I punched a couple of holes and thread some linen thread through, tying in a bow. I could have just glued on my bow, but one of our Guest Designers currently, the lovely Fran Wing, has such creative ways of adding thread to her cards I thought I'd take a leaf out of her book and try something a little different!
So one design, two ways - which one do you prefer? Both are fairly clean and simple and I think I prefer the second one if I'm honest, but the first one is I think a great example of #SimpleStamping and how you don't need much in the way of supplies to create a decent card.
I'm linking up my first card today with the team over at CASOnSunday where their current challenge theme is also autumn; my second card I'm linking up over at The Alphabet Challenge Blog where they are currently on 'N is for Nature'.
Here is the visual summary of the key products used on today's project for you to pin for easy reference:
You can see all of my Product and 'How To' summaries on my 'How To - Tips and Techniques' Pinterest board in case you've missed any.
Before you reach for your ink and papers, check out what our amazing team has created to inspire you this week:
The Paper Players Design Team
Here's a quick recap of our challenge rules:
1. Create a new paper project
2. Upload your creation to your blog with a link back to us and provide a direct link to the post featuring your challenge submission.
3. Please link your card to no more than four challenges, TOTAL.
4. Have FUN!
Enjoy your day; I have no special plans so am hoping to enjoy some cooking and crafting in equal measure! I'll be back tomorrow with another project. Until then, happy stampin'!
Stampin' Up! Supplies Used: