Celebrate With Sunshine and Rainbows PP587

by Joanne James17. April 2022 08:00

Today it's Sunday and time for this week's new challenge over at The Paper Players! It's the turn of the fabulous Claire to host this week and she has a timely clean and simple challenge for you to work with:


April showers! None of those here today though as the UK celebrates its warmest days of the year so far for a wonderful Easter bank holiday weekend! My card today does feature raindrops - and sunshine and the best thing to result from both after an April shower: rainbows!  I used the current sketch layout over at CAS on Friday for my clean and simple card today (I was thrilled to be a winner there last week with this stencilled card - look out for my guest spot there soon!):


Here's the low-down on today's card:

I took a piece of retired Sale-A-Bration Sunshine and Rainbows designer series paper and overlaid it with some stitched clouds cut with my Basic Borders Dies and a row of rainbows cut with one of the Brilliant Rainbows Dies. I then stamped a sentiment from the retiring 'Celebrate With Flowers' set twice, once in Magenta Madness onto a circle of So Saffron and a second time in Mango Melody on white and fussy cut the word 'sunshine' and layered the two together. To finish, I added a trio of iridescent rhinestones for a little added sparkle:


I used lots of different bits and pieces on today's card, but my minimising my layers and embellishments and focusing my design into the main square, I preserved my all-important 'white space', a key feature of clean and simple cards.

Here is the visual summary of the key products used on today's project for you to pin for easy reference:


You can see all of my Product and 'How To' summaries on my 'How To - Tips and Techniques' Pinterest board in case you've missed any. 

Before you reach for your ink and papers, check out what our amazing team has created to inspire you this week:

Here's a quick recap of our challenge rules:
 
1.  Create a new paper project
2.  Upload your creation to your blog with a link back to us and provide a direct link to the post featuring your challenge submission.
3.  Please link your card to no more than four challenges, TOTAL.
4.  Have FUN!

Enjoy your day; we spent yesterday at the farm visiting all of the baby animals - bottle feeding the lambs was a definite highlight! - and today we will be Easter egg hunting and enjoying Sunday lunch in the garden - bliss! I hope you are all enjoying a restful weekend break too! I'll be back tomorrow with another project. Until then, happy stampin'!


Stampin' Up! Supplies Used: 

Table built using Product Table Builder by The Crafty Owl - Independent Stampin' Up! Demonstrator.

Make Way Clouds - Beautiful Rainbow Coming Through!

by Joanne James26. March 2022 12:12

Today I'm sharing a card using the sketch over at Fusion (rotated through 180 degrees):


No bookshelves though - as promised, I've another rainbow card for you - take a look:


Here's the low-down on today's card:

I thought the sketch really lent itself to a rainbow peeking through the clouds, so I added some Pool party patterned 'Sunshine and Rainbows' Sale-A-Bration patterned paper to my card base, then added a split panel with diecut stitched cloud edges cut with the Basic Border Dies. A diecut rainbow coming through the clouds bridges the gap:


A gold heat embossed sentiment and a few enamel raindrops complete my card.

Here is the visual summary of the key products used on today's project for you to pin for easy reference:


You can see all of my 'How To' summaries on my 'How To - Tips and Techniques' Pinterest board in case you've missed any. 

I made this card when I made my Thursday make - here's a photo of both cards together:


I hope you've been enjoying my rainbows in their various guises this week! 

Enjoy your day; I'm off to hockey this afternoon. I'll be back tomorrow with another project. Until then, happy stampin'!


Stampin' Up! Supplies Used:

Table built using Product Table Builder by The Crafty Owl - Independent Stampin' Up! Demonstrator.

Brilliant Rainbow Dies Clean And Simple TTT154

by Joanne James24. March 2022 18:00

It's Thursday and time for a new challenge over at TicTacToe! It's the turn of Team X to host this week and I am the featured designer this week. This is the fun board that we are playing along with: 


I went across the top row with rainbow/green/diecut as my 3 options and using this week's Try Stamping On Tuesday sketch (no punny sentiment I'm afraid!) set to work and this is what I came up with:


Here's the low-down on today's card:

Sunshine and Rainbows - The colour scheme for today's rainbow card is taken from the (now retired) Sunshine and Rainbows designer paper that was free during Sale-A-Bration; I still have some left so don't be surprised to see it on my projects in the coming weeks/months - I'm hoping it will give you lots of inspiration as to how you can use the paper you earned free too! I love this colour mix; I also used the colours of the paper stripes for the die infills of my rainbow border too, mixing and matching as I went along.

Brilliant Rainbow Dies - I created a rainbow border across my card using the rainbow tag die in the Brilliant Rainbow Dies set; the actual rainbow border in the set was too small and didn't line up with the stripes of my paper, so instead I created my own, layering the tags across my card so that each rainbow covered four vertical stripes. I then added a plain white panel and stamped my sentiment at the very bottom, with a trio of pink hearts as an accent.

Ribbons of Colour - I decided to add a large and showy ribbon bow to my card, pulling colours from the rainbow paper and adding in some sparkly white too for an additional feminine touch. I also added some of the new iridescent rhinestones basic jewels from the mini catalogue. These are just so sparkly and pretty and I love the way they are faceted so take on some of the colour beneath them, which you can see closer on the photo below:


Since rainbows are very much a feature of today's card, I'm also linking up with the Paper Craft Crew (non-traditional colours) and over at Global Design Project #GDP355 where they also have rain/rainbows as their theme.

Here is the visual summary of the key products used on today's project for you to pin for easy reference:


You can see all of my Product and 'How To' summaries on my 'How To - Tips and Techniques' Pinterest board in case you've missed any. 

A tictactoe board offers so many creative possibilities - how does this week's board inspire you? Why not have a go? We would love to see you in the gallery and who knows - you might be selected for Designer's Choice and be eligible to be a guest designer on a future challenge. 

Enjoy the rest of your day; I'll be back tomorrow with another project for this week's new challenge over at As You See it. Until then, happy stampin'!


Stampin' Up! Supplies Used: 

Table built using Product Table Builder by The Crafty Owl - Independent Stampin' Up! Demonstrator.

Brilliant Rainbow Dies Shaker Card PP576

by Joanne James30. January 2022 09:00

Today it's Sunday and time for this week's new challenge over at The Paper Players! It's my turn to host this week and since it is the fifth Sunday of the month I have a tic-tac-toe challenge for you to work with:


I designed this board with lots of things that I wanted to use so that when it came to making my card, I was spoilt for choice! In my excitement I duplicated the 'birthday' square and didn't notice until my dear teamie Nance had already made the challenge graphic, so I decided to go with it - we all need lots of excuses for birthday cards, right?! That said, I ended up going in a completely different direction! I used the layout from Jen M's sketch over at Freshly Made Sketches this week (I rotated the sketch 90 degrees to the left and flipped it on the vertical edge for a mirror image) and went across the top row of my board with rainbow/sparkle/diecut and made a fun rainbow shaker card - take a look:


Here's the low-down on today's card:

A Brilliant Rainbow - Having firstly used some Pool Party ink and a blending brush to create a cloudy sky background, I used the largest of the Brilliant Rainbow Dies to cut the windows for my half rainbow. I backed these with a piece of window sheet, ready to create my shaker. 

Frosted Shaker - I chose the four colours for my rainbow stripes, then selected some co-ordinating beads from the frosted beads assortment in the mini catalogue for my shaker element. For added sparkle, I brushed the coloured back panels with clear Wink of Stella. The rainbow shaker effect is so pretty - here's a close-up to show it in more detail:


I used the foam adhesive strips to create four individual shaker elements so that I could keep the colours separate. It's worth noting that because of the size of the frosted beads, the shaker does need a double thickness of foam strips to allow your beads to shake freely. This does made the card quite thick, but I think it's worth it!

All Things Stitched - I used my Basic Borders Dies to create a border of white clouds and to make a stencil for my background, with a combination of a stitched circle and four layered stitched triangles behind for my sunshine. The sentiment is from the free Sale-A-Bration set 'Special Moments' and I paired it with another from the same set on the inside, with some faintly stencilled clouds behind:


I think this will make a nice special card to show appreciation for someone who went the extra mile, don't you?

Here is the visual summary of the key products used on today's project for you to pin for easy reference:


You can see all of my Product and 'How To' summaries on my 'How To - Tips and Techniques' Pinterest board in case you've missed any. 

Before you reach for your ink and papers, check out what our amazing team has created to inspire you this week:

Here's a quick recap of our challenge rules:
 
1.  Create a new paper project
2.  Upload your creation to your blog with a link back to us and provide a direct link to the post featuring your challenge submission.
3.  Please link your card to no more than four challenges, TOTAL.
4.  Have FUN!

Enjoy your day; I'll be back soon with another project. Until then, happy stampin'!


Stampin' Up! Supplies Used: 

Table built using Product Table Builder by The Crafty Owl - Independent Stampin' Up! Demonstrator.

Edit: Jen B chose my card as one of the princesses for FMS520 - yay!

See the source image

Sweets And Treats Christmas Pudding Card

by Joanne James29. November 2021 07:00

Happy Monday everyone! Today I'm sharing a card using Jen B's fabulous sketch over at Freshly Made Sketches that was also inspired by the colours of the festive photo over at Inspired By:


I loved Jen's sketch and combined with the red, green and brown of the Inspired By photo it was perfect for me to use two things in my crafting stash from the current mini catalogue that have yet to see ink - take a look:


 Here's the low-down on today's card:

Sweets & Treats - The minute I saw Jen's sketch I knew that it would be a great opportunity for me to ink up the Christmas pudding in the 'Sweets & Treats' stamp set. I bought this set for this very stamp! A Christmas or 'plum' pudding is a quintessentially British festive tradition dating back to medieval times; I coloured mine with my Stampin' Blends and fussy cut it and positioned it over a strip of Heartwarming Hugs DSP with a stitched scalloped edge. I used the same stamp set to add a festive cupcake to the inside of my card too:


A Merry Melody - The Merry Melody Embossing Folder was another of those items that made it into my pre-order basket but I have yet to use. I thought it would make a fun background for my Christmas pudding (I am hearing a chorus of 'So bring us some figgy pudding...' as I type!) - you can see the texture in more detail below - I blended some ink around the edges with a blender brush to accentuate the detail:


A fussy cut heat-embossed sentiment completes my card.

The Pudding Club - I decided I liked this card so much, I'd make another one in the same style but using Cinnamon Cider instead of Soft Suede for my background:


What do you think? Which card do you prefer? I think on balance I prefer my original version; do leave me a comment below - I'd love to hear your thoughts! You can see them next to each other further down this post for comparison. 

Here is the visual summary of the key products used on today's project for you to pin for easy reference:


You can see all of my 'How To' summaries on my 'How To - Tips and Techniques' Pinterest board in case you've missed any.

Enjoy your day and I'll be back tomorrow with another project. Until then, happy stampin'!


Stampin' Up! Supplies Used:

Table built using Product Table Builder by The Crafty Owl - Independent Stampin' Up! Demonstrator.
 
Edit: My card was chosen by Linda as a Princess of Clean for FMS513 - yay!
See the source image

Blackberry Beauty A Reason To Celebrate CCS 441

by Joanne James12. October 2021 13:00

It's Tuesday and time for a new challenge over at CAS Colours & SketchesThis week's challenge is a sketch challenge and our hostess Vicky has asked that we create a card with a jaunty angle:


Feel free to flip or rotate the sketch when making your card.

I'm also linking up my card today with the team over at AAA cards who are celebrating their 200th challenge since my card has also been made to celebrate something special - take a look:


Here's the low-down on today's card:

A dear blogging friend of mine recently got married to her original childhood sweetheart, having been widowed for the past 11 years. I was delighted to hear this happy news and couldn't wait to create a card to send her my congratulations. I decided the Blackberry Beauty gold foiled paper was the perfect paper to showcase on that jaunty angled piece of the sketch, so I cut it with one of my Basic Borders Dies and added a simple gold embossed 'congratulations' greeting from the Art Gallery set.

Whilst this completed the outside of my card, I had to add some additional decoration to the inside, using both a floral image (stamped in gold) and a sentiment from the retired set 'Wonderful Romance':


I just love this set for wedding cards! I am sending this card overseas, so the flat clean and simple design is perfect. I wanted it to be special for my friend when she opened it though, so I created a custom envelope using shimmer gold vellum with a co-ordinating envelope flap to house her card, that I will then place inside another standard envelope for mailing:


I love the monochrome look for a clean and simple card and this elegant card is great for wedding congratulations I think - and definitely an event to be celebrated!

Here is the visual summary of the key products used on today's project for you to pin for easy reference:


You can see all of my 'How To' summaries on my 'How To - Tips and Techniques' Pinterest board in case you've missed any. 

Enjoy your day and I'll be back tomorrow with another project. Until then, happy stampin'!

Stampin' Up! Supplies Used:

Table built using Product Table Builder by The Crafty Owl - Independent Stampin' Up! Demonstrator.

Gingerbread and Peppermint Memories and More Christmas Cookies Card AYSI260 and FF00094

by Joanne James1. October 2021 09:00

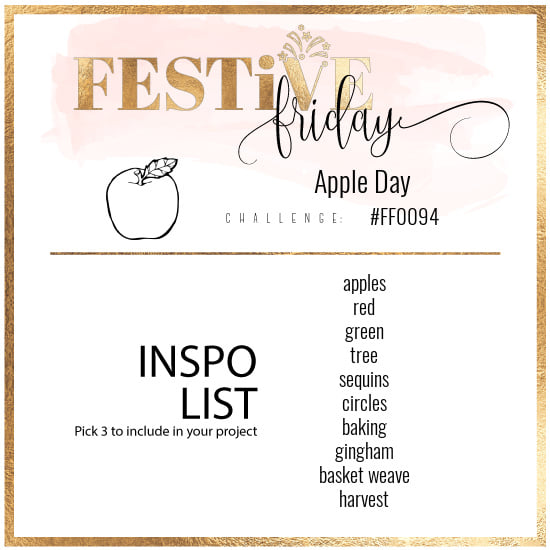
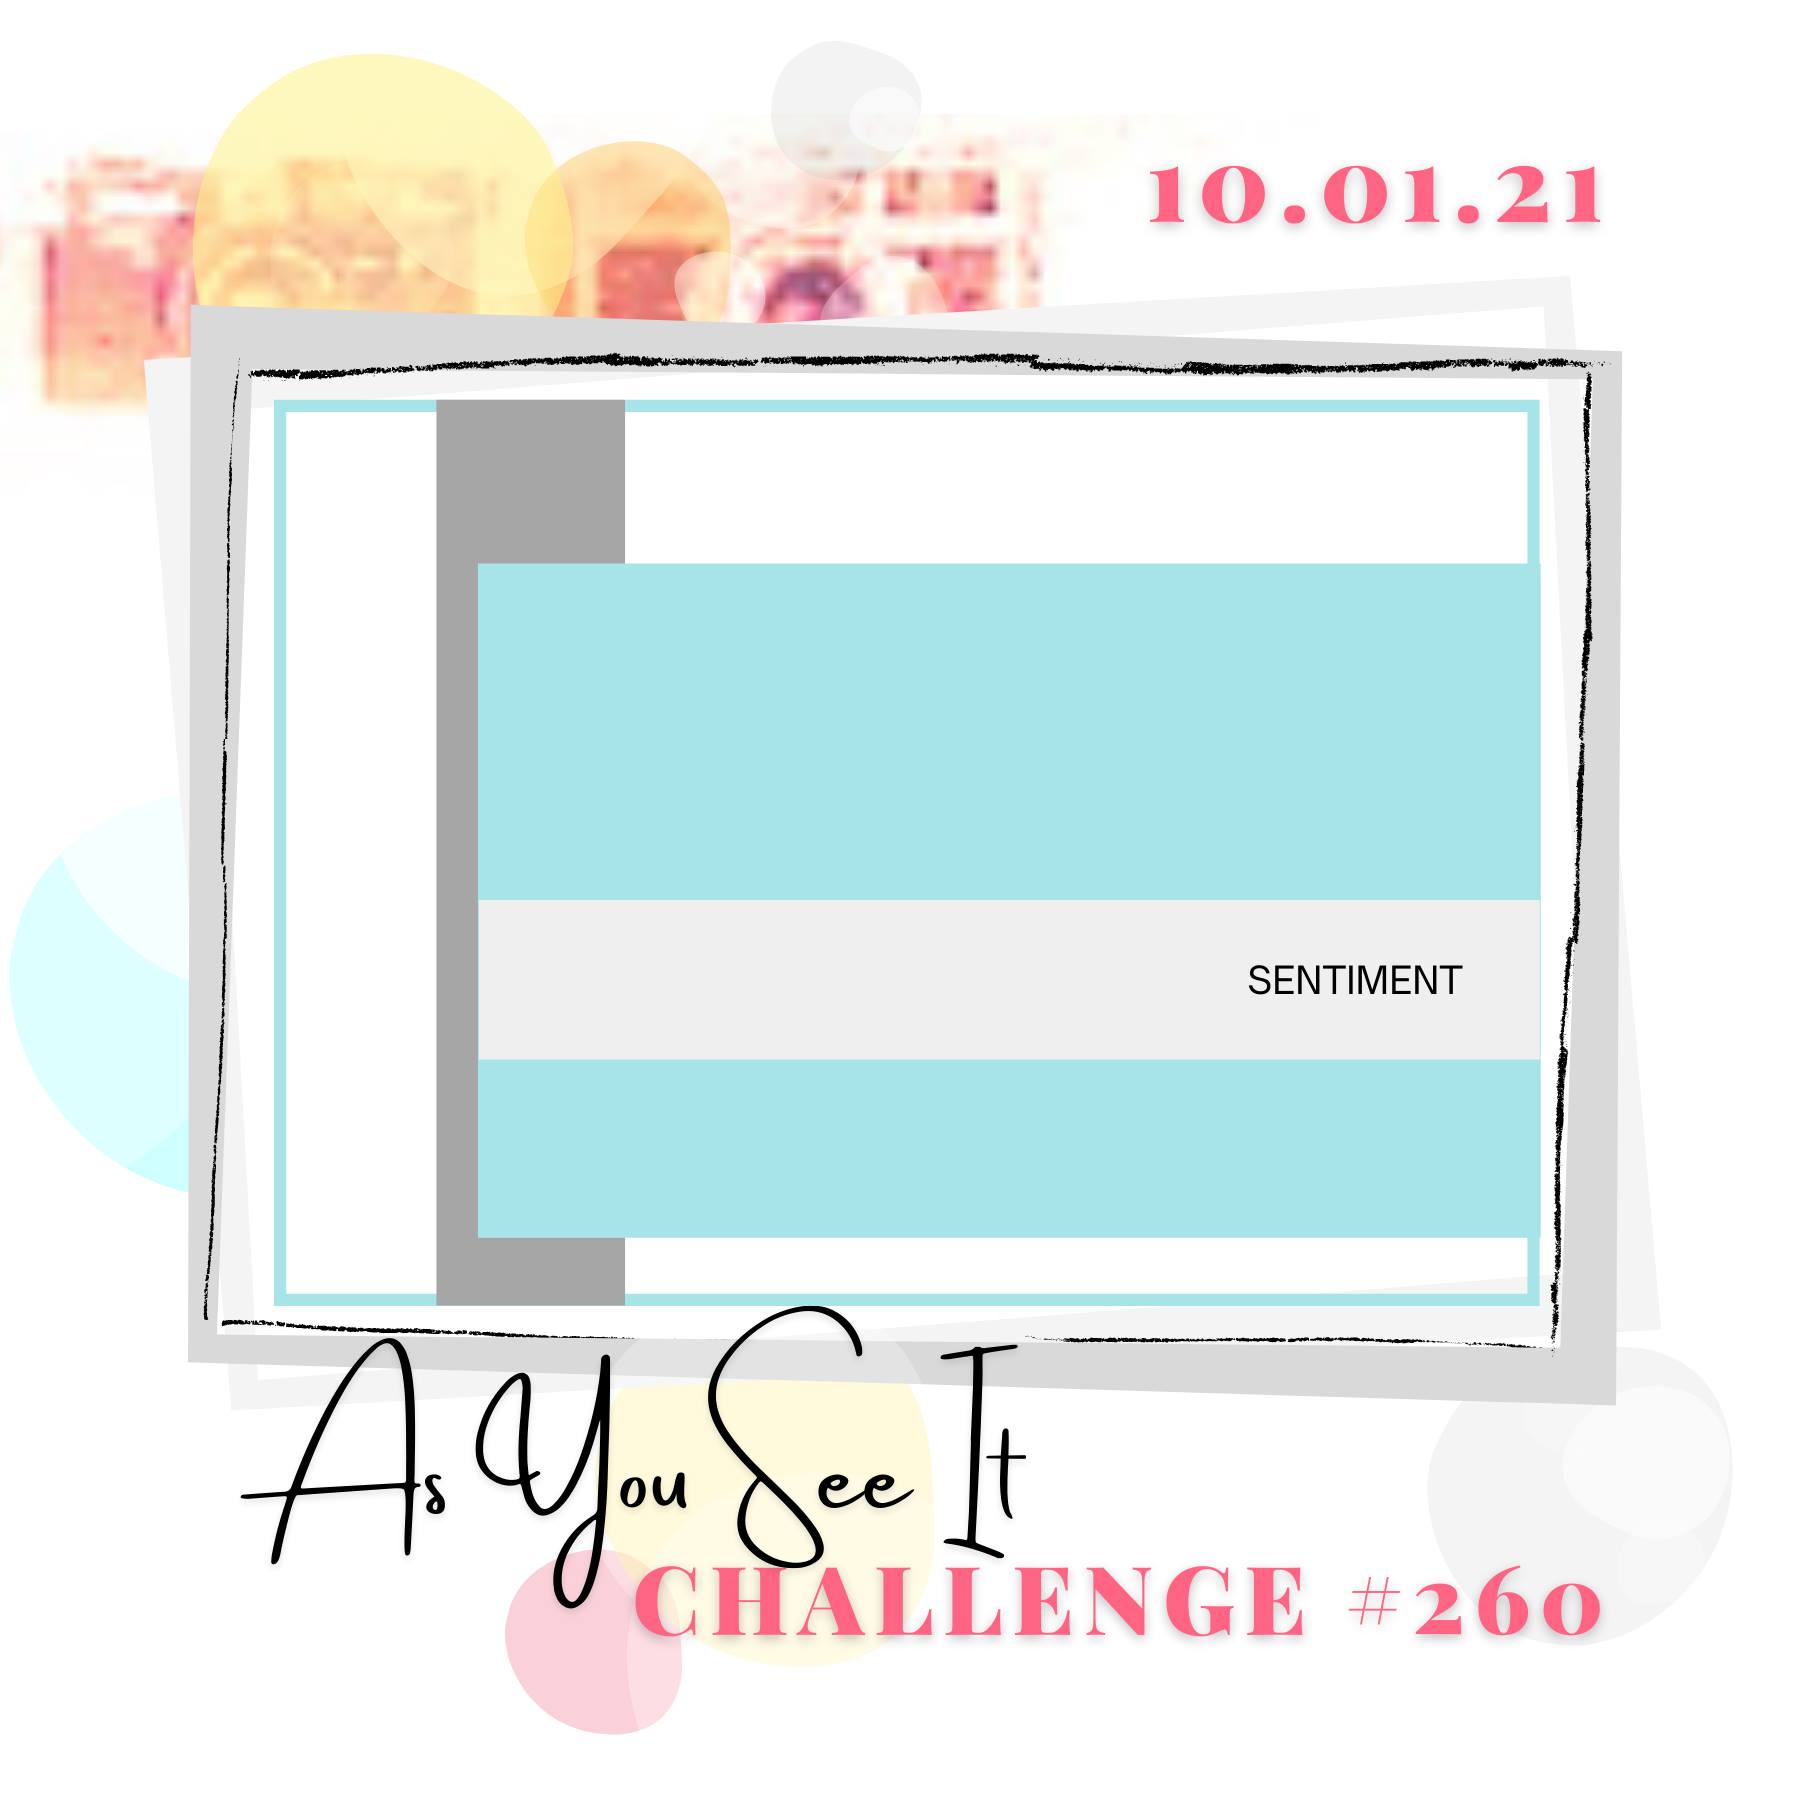
Today I'm actually combining my design team card for both our new challenge over at As you See It where it's time for a sketch challenge and the new challenge over at Festive Friday:
    

It just so happened my card fulfilled both briefs, so I thought I would go with it as I've been time-pressed this week (nothing new there then!) At As You See It we have a sketch challenge and at Festive Friday we are celebrating World Apple Day - but if you check out my card, you'll see there's not an apple in sight! Take a look at my card and you'll see what I mean:
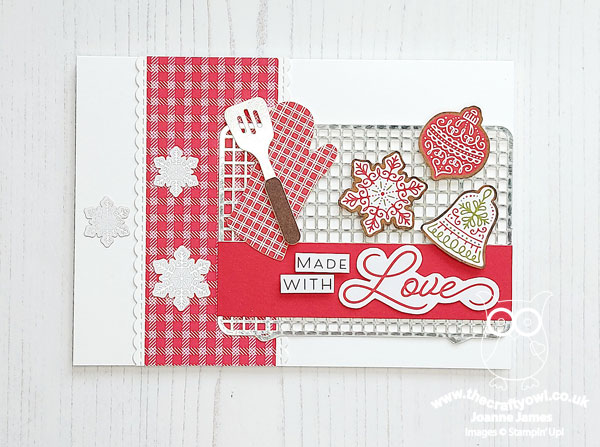
 

My card today is for a baker - and a Christmas baker at that! The fun thing is that at Festive Friday you do not need to actually celebrate the occasion; your goal is to simply use three or more items from the inspiration list on your project. This week I used red, green, baking and gingham on today's creation.

Here's the low-down on today's card:

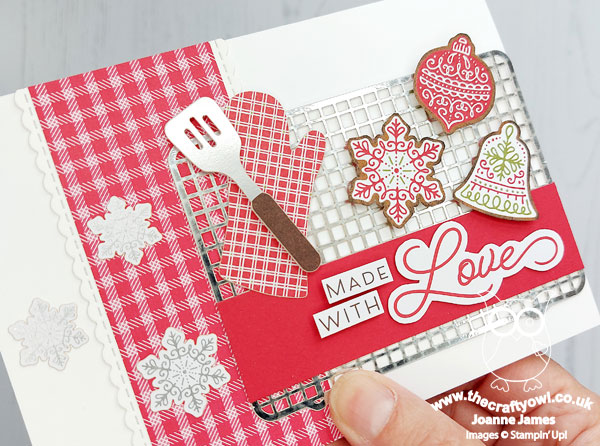
Gingerbread and Peppermint - One of my many passions in life is to bake, and at Christmas time I am known for my gingerbread cookies, so the Gingerbread and Peppermint Suite from Stampin' Up! immediately appealed to my inner baker. I love the papers in particular, as they are perfect for fussy cutting and that's where I took my trio of gingerbread cookies from that are on my card today. If you're not a fan of fussy-cutting, the Gingerbread Dies fit some of the shapes on the designer series paper, but honestly they are super easy to kit by hand too. The gingham banner on my card is some old retired paper, as there isn't a pattern that is technically gingham in this paper pack. There are lots of check and plaid patterns, but since I was being a purist I grabbed some old papers, but if you wanted to CASE my card, I would totally use one of the other patterns in this paper pack.

Memories & More - One of the other things I love about the Gingerbread & Peppermint Suite is that it features this season's Memories and More cards too. I will be using them to document my own festive bakes, but they are also great for cards too and on today's card, they really are the star of the show. So many of the elements that you see on my card come from the Gingerbread & Peppermint Memories and More pack: The spatula, oven glove, foil embossed snowflakes, that fabulous metal cooling rack and even the sentiment, which I fussy cut from one of the cards in the pack. So many great elements to play with:
 

Look No Stamping - Did you notice there isn't a single stamp on today's card? Not even on the inside, where I decided to use one of the memories and More stickers:
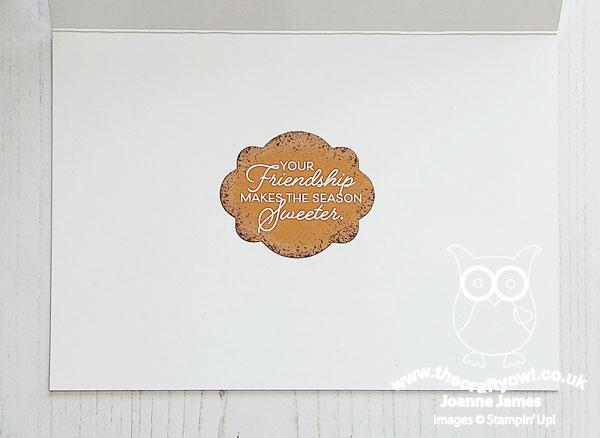
 

They really do make for easy cards, but with so many bits and pieces you can have a lot of creative fun with them too. I will be sending this card to a friend along with some of my famous gingerbread cookies during December; I might have to make a few more too!

Here is the visual summary of the key products used on today's project for you to pin for easy reference:
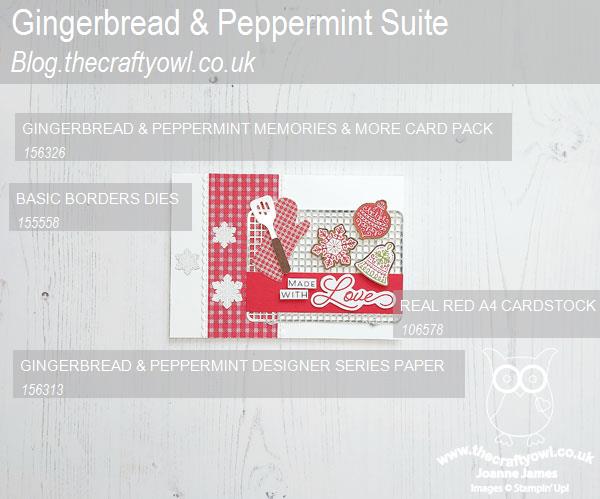
 

You can see all of my 'How To' summaries on my 'How To - Tips and Techniques' Pinterest board in case you've missed any. 

Here's a summary of the As you See It challenge rules:

  • Create any card, scrapbooking page, 3D project or packaging project that fits the challenge.
  • Please include the challenge graphic and link back to the challenge in your blog post. Turn off word verification so we can leave you lots of lovely comments. Make sure you link the post not the whole blog to the Linky. Use #AYSIXXX when uploading to a public gallery.
  • If you’re unsure about ‘the rules’, check the details under the Challenge Guidelines tab on the As You See It Challenge homepage.
  • In a sketch challenge, you are welcome to rotate or flip a sketch. You can replace shapes used such as substituting a circle panel for a square panel. However, we must be able to still see the basis of the original sketch in your finished product.
We look forward to seeing your creations in the AYSI gallery. Likewise, How does our Festive Friday board inspire you? I can’t wait to see what you create! For more inspiration, be sure to visit the rest of the Festive Friday Challenge Design team:

Ann Schach

Beth McCullough

Sharon Hashimoto Burkert

Melanie Hungerford

Helen Jennings

Stephanie Lanzalotto

Melva Peters

Jaydee

Diane Evans 

Joanne James - that's me!

Enjoy your day and I'll be back tomorrow with another project. Until then, happy stampin'!


Stampin' Up! Supplies Used:

Table built using Product Table Builder by The Crafty Owl - Independent Stampin' Up! Demonstrator.


Shop Online

Access my online shop 24 x 7, 365 days of the year:

Current May hostess code:

VDKNV7BH

Shop Online

2024-25 Annual Catalogue

BROWSE THE CATALOGUE

Click on the image to download your copy of the 2024-25 annual catalogue. For a full list of current SU! supplies, go to my online store. If you would like any help or advice, please drop me a line at [email protected] or give me a call on 07773 421446 - I'd be happy to help.

Join My Team

It's always a great time to join Stampin’ Up but during May it's even better! New team members can get £78.25 of new In Color products for FREE! That's in addition to another £130 worth of products of your choice for only £99 + free business supplies + free shipping + all the fun being a part of Stampin’ Up! Stampin' Up! has something for everyone: join my growing team and benefit from my support to enjoy Stampin' Up! however you choose.

If you're interested, call me for a chat to understand how I can help you realise your goals. Alternatively, if you have already decided to sign up and you just can't wait, please click here for the link to the online form where you can sign up and order your starter kit right away! 

Latest Kits!

Stampin Cut and Emboss

The City Sights Kit has all you need to make 8 cards with coordinating envelopes for £20. Along with the new Happy Hollyhocks Kit, a no stamping kit including 9 cards for just £14, both are available from May 1st - get yours here!

New Online Exclusives

There are new products available exclusively in the online store from 5 March - check them out here.

About Me

Hi I'm Joanne and live in Northampton and when I'm not looking after my husband and two beautiful children, am an avid crafter with a passion for all things Stampin' Up!

I must confess that I have never been a big rubber stamper - until I discovered Stampin' Up! that is. I love the fact that I can get such great results with co-ordinating stamps, inks, papers and punches - the possibilities are endless! Join me on my stamping journey as I share the things I love and be inspired to create amazing things yourself!

Follow Me

Monthly Newsletter

Box Builder

Click the button above to use Box Buster to create your custom box design using the Envelope Punch Board!

Kits Collection Now Available!

Stampin Cut and Emboss

The new Kits Collection from Stampin' Up! is now available!

Click here to see the current kits available and order yours online today.

I Design For


Mini Catalogue


The next mini catalogue will be live in September! 

Stampin' Up Stuff

This is my personal blog and is not endorsed by Stampin’ Up! I hope you find it a plentiful source of ideas and personal inspiration but please don't copy my designs for contest submission or use for classes, publication or sale without express permission.