by Joanne James28. December 2013 20:33Another quick post from me today in between continuing festivities. We had one of our two annual trips to the pantomime today: this one our family visit to one of the smaller theatres in town, which is always guaranteed to put on a good show. This year was no exception - the performance of 'Wind In The Willows' was one of the best I've seen in some time and we all had a lovely time. If you're local to Northampton you really should visit the Royal before the run finishes - you won't regret it.
Now for today's project! As my regular blog readers will know, one of my other hobbies is biscuit baking and decorating. I've made lots of them in the last few weeks, mostly as gifts for teachers, friends and neighbours. I've packaged them in lots of different ways and often use jars tied with ribbon for my bite-size cookies, but one of my favourite methods of presentation for standard size biscuits has to be the Tag a Bag Gift Boxes - you can decorate and embellish, but I love the 'sneak peek' you get of the contents inside through the acetate sleeve. These boxes are also super sturdy, which is great for transporting their reasonably fragile contents. Many of my boxes were made and gifted before I got the chance to photograph them, but I managed to get a shot of my very last box before its departure:
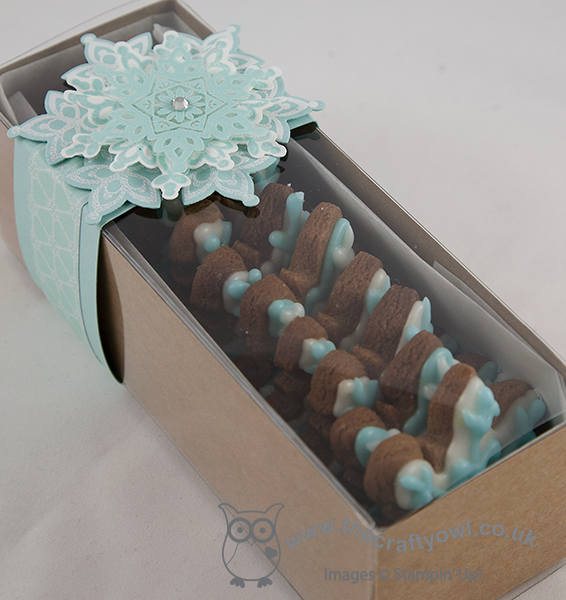
I finished the box with a belly band of Pool Party layered with a strip of Winter Frost DSP through the centre and finished with a pretty triple-layered snowflake, just right for my festive snowflake iced gingerbread biscuits in a co-ordinating colourway. This particular box of biscuits was destined for Aaron, the UPS man who delivers my Stampin' Up! parcels all year round; just one of the many people I like to show my appreciation for, especially at this time of year.
Tomorrow I have a special project to share: not a Christmas themed project, but rather something I made for a dear friend of mine as a Christmas gift. Here's a little glimpse just to whet your appetite:
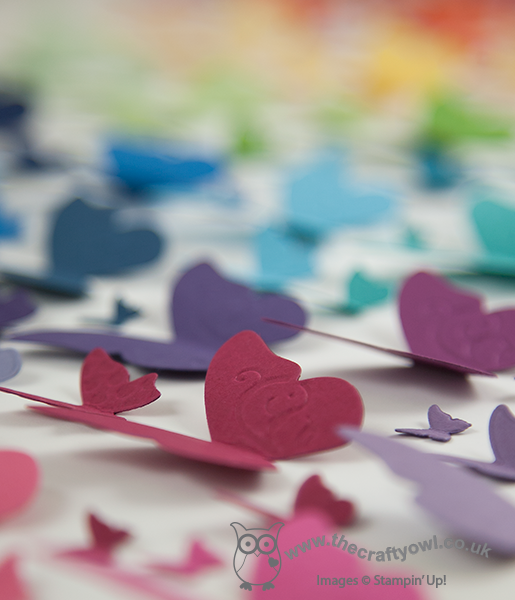
Hopefully you're intrigued - pop back tomorrow to see the whole thing. Until then, happy stampin'!
Stampin' Up! Supplies Used:
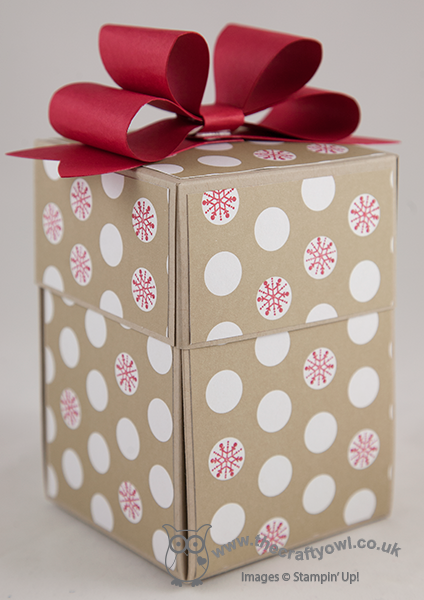
by Joanne James26. December 2013 20:29Today I'm going to share another of my Christmas projects, this time a fun packaging solution for a cute chocolate snowman that I bought at my local supermarket. From the outside, it looked like a fairly straightforward nicely packaged box, complete with bow:
It's when the box is opened that the 'reveal' happens - the snowman is sitting in the middle with the inside of the box decorated with four co-ordinating stamped 'snow day' snowmen:

I love the snowman stamp set in the 'Snow Day' set and as soon as I saw the chocolate snowman I knew the two belonged together. The box base uses one 12" x 12" sheet of Crumb Cake cardstock and is a great way to turn a simple chocolate gift into something extra-special.
Today is going to be an early night for me I think; after all the food and excesses of the last few days and a lovely long walk in the fresh air this afternoon, I am absolutely shattered! Back tomorrow with another project; until then, happy stampin'!
Stampin' Up! Supplies Used:
e255bd13-0bdf-4533-8c21-96bf506938a9|0|.0|96d5b379-7e1d-4dac-a6ba-1e50db561b04
Tags: 3D Projects, boxes, Christmas, Big Shot, Gift Bow Bigz L Die, Snow Day, Shop online, Stampin' Up, Stampin' Up Supplies, Exploding Box, Season of Style
3D Projects | Boxes | Stamping
by Joanne James22. December 2013 21:17Well it's been another busy few days here in the James household with a trip to the movies on Friday, a fun trip iceskating yesterday and swimming, grocery shopping and a pre-Christmas festive family get-together this evening. The big day is almost upon us, but I finally managed to get some photographs taken today in between all my last minute Christmas preparations and today would like to share some of my quick but attractive festive packaging ideas for stocking-fillers and small gifts. Here's the first one - a simple pouch made using the envelope punch board:
I made lots of these in various colours to tie in with the Winter Frost DSP stack to package some little gifts for the lovely ladies who have attended my classes over the past year (I can't tell you what's inside though - it's not Christmas Day yet ;-)! )
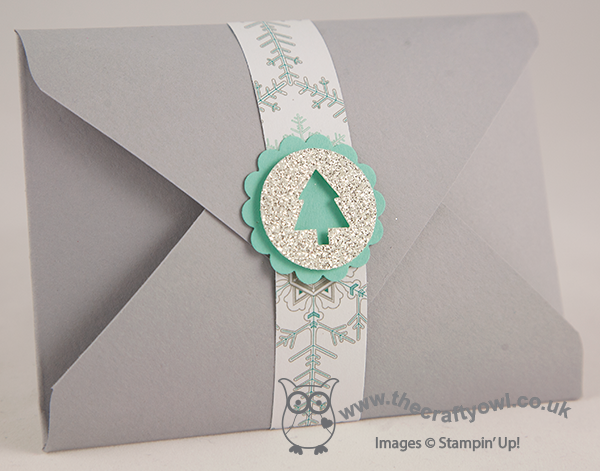
The second of my projects is a little stocking filler I made for my daughter - a pair of hairclips decorated with Frosted Finishes Embellishments and packaged in a cute little triangular carton that I made using a sheet of the Winter Frost DSP stack:
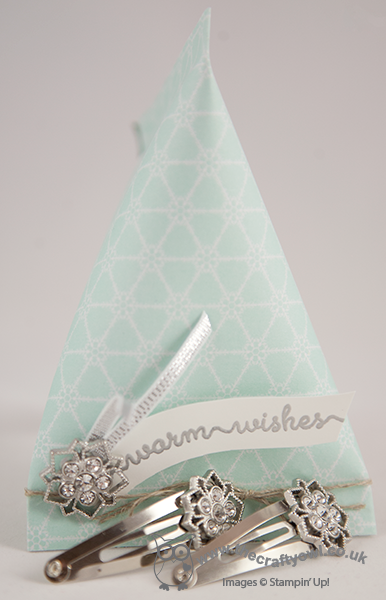
I embossed the 'warm wishes' sentiment from the 'Snow Day' stamp set using silver embossing powder and it added a real feel of luxury to the finished packaging. For the clips, I simply adhered a Frosted Finishes Embellishments using Crystal Effects to a couple of standard hair clips.
My last packaging idea that I'm going to share today is one of the lovely little muslin bags, which I stamped with the 'Love and Joy' single stamp and decorated with another Frosted Finishes embellishment, a ribbon tie and a little Dazzling Diamonds for some extra sparkle:
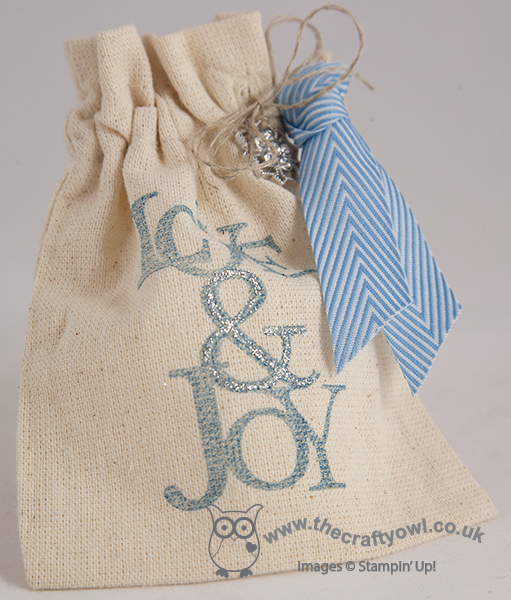
These bags are a great size and perfect for a little sweet treat or a small gift such as nail polish or some candles, or maybe a miniature bottle of a favourite tipple, a pack of playing cards or a micro torch for a more masculine gift.
So some easy ideas to make those little gifts extra special.
I have a date with a very large ironing basket tomorrow evening (the exciting life I lead!), but all being well will be back with another post as I've a few more Christmas-themed things to share and am running out of time in which to do it.
Until then, happy stampin'!
Stampin' Up! Supplies Used:
f179dbd2-3545-4e46-b6c7-8b9de0c424f5|0|.0|96d5b379-7e1d-4dac-a6ba-1e50db561b04
Tags: 3D Projects, Christmas, Snow Day, Love and Joy, Frosted Finish Embellishments, Envelope Punch Board, Merry Minis, circle punch, scallop circle punch, Shop online, Stampin' Up, Stampin' Up Card, Stampin' Up Supplies, Stampin' Up Card ideas
3D Projects | Stamping
by Joanne James11. December 2013 20:39Evening all! I've been busy in the kitchen today icing biscuits that I baked yesterday in readiness for end-of term teacher gifts later in the week. More to do tomorrow and I will endeavour to share some pictures later in the week, but for today something fun! A little while ago I entered a competition to create a video advertising a Stampin' Up! event or product. The winners were announced at this year's European Convention and whilst I didn't win, today I thought I would share with you my entry as it features - yes, you've guessed it - the Stampin' Up! Gift Bow Bigz Die!
This really is a great product, as there is so much you can do with it, including, but in no way exclusively, make the most beautiful bows. In addition, as with all Stampin' Up! dies, it will cut cut not only cardstock, but other materials too: cork, coaster board, fabric, felt and lots more. The inspiration for my video came from Bryony the elf, who features in one of my favourite Christmas movies, 'Arthur Christmas'. She is an ace gift wrapper whose catchphrase is "there's always time for a bow!". Here she is doing her thing:
And here I am, doing mine:
Did you spot the 'make' that I haven't shared with you separately? It really is so easy to use the Gift Bow Bigz Die to make so many different projects. I still have more I would like to share with you; I just need more hours in my day to make them all!
I hope you enjoyed today's fun video - back next time with more creative inspiration. Until then, happy stampin'!
Stampin' Up! Supplies Used:
by Joanne James9. December 2013 21:00So today is the start of the last week of school for the James' juniors, so there are lots of daily activities with Christmas in mind. I've just returned from watching my youngest in his Christmas school production, having given a stellar performance as the 'Bethlehem Census Man' (imagine town crier!) and delivered his one line with true dramatic style: "Hear ye, hear ye - census in Bethlehem! Your country needs you !" There's nothing like a Christmas production to make you feel like the festive season is upon us.
And so to today's creation with the Gift Bow Bigz Die: hot on the heels of yesterday's gift bow angel, a Christmas pudding tree ornament! Now, for my non-UK readers, you may not know that Christmas or plum puddings are a peculiarly British fayre, traditionally eaten after Christmas lunch on Christmas Day. They are eaten with either white sauce or brandy butter and are something of an acquired taste, or so my American friends told me after I sent them one for Christmas one year! So without further ado, here's a picture of the finished pudding:
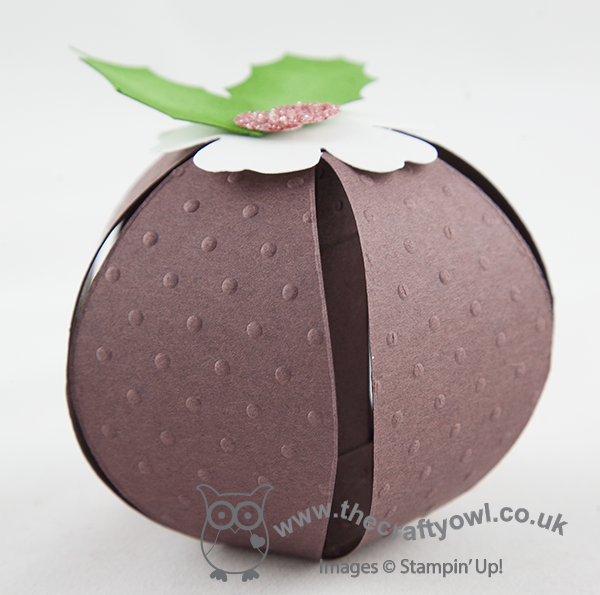
I made a few of these a while ago (tomorrow's post will explain all!) and I think they make another cute ornament for Christmas time. You could just follow the instructions to make a plain sphere out of patterned paper, but I decided mine needed dressing up, hence the Christmas pudding. I made a video showing you how easy they are to create using the Gift Bow Bigz Die from Stampin' Up!; the video also shares a handy technique for colouring your glimmer paper to match your product - did you know you can colour Stampin' Up!'s Glimmer Paper using your Stampin' Write markers? If not, watch the video to find out how:
I hope you like today's project - back tomorrow with something a little different, but still bow-related!
Until then, happy stampin'!
Stampin' Up! Supplies Used:
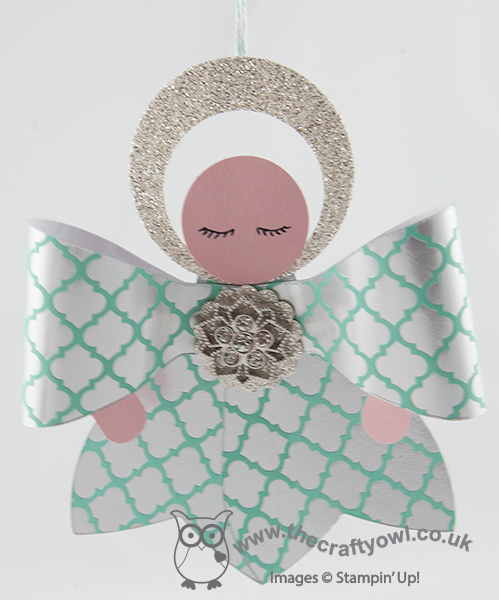
by Joanne James8. December 2013 16:00Another weekend of James family busy, busy. Yesterday: hairdressers, mad science parties and swimming gala on top of the usual homework and household chores. Today: swimming lessons, family lunch and decorating the house ready for Christmas. Finally I'm able to share today's post with a cute project: this adorable angel Christmas tree ornament made using the Stampin' Up! Gift Bow Bigz Die:
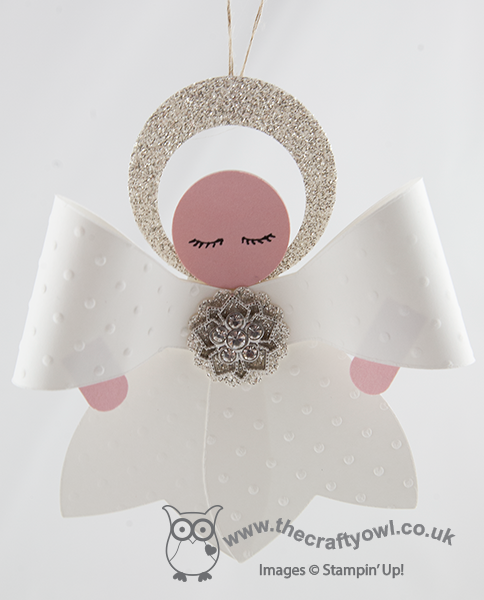
I've seen a few different examples of these angels on the internet; the first one I saw was on Tanya Bell's blog here which also included a great tip for getting even eyes. I'm not sure where the original idea came from, but as they are all a little different I thought I would share with you my version; I've been making lots of these to decorate the house this year and love that I can use my Gift Bow Die for so many more things than making bows. I made a video tutorial for you to show how I put these together; here it is:
The supplies and equipment you need to make an angel are listed below and the key measurements for the cardstock to make the main part which is the angel dress body are:
2 pieces cardstock: 10.5cm x 5cm
1 piece cardstock: 1.5cm x 8cm
These card sizes enable you to get three angels out of one sheet of A4 cardstock. Come back tomorrow for another project using the Gift Bow Bigz Die; until then, happy stampin'!
Stampin' Up! Supplies Used:
6dd3e7f4-e0fe-4cd0-b37d-78b3eb9e9c0a|0|.0|96d5b379-7e1d-4dac-a6ba-1e50db561b04
Tags: 3D Projects, Christmas, Gift Bow Bigz L Die, circle punch, Itty Bitty Punches, Perfect Polka Dots Embossing Folder, Shop online, Stampin' Up, Stampin' Up Card, Stampin' Up Supplies, Frosted Finish Embellishments
3D Projects | Punch Art | Video Tutorials
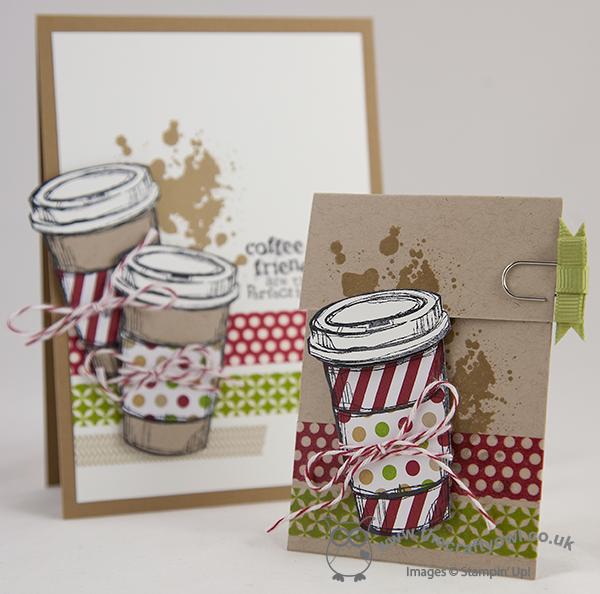
by Joanne James5. December 2013 13:31Where is this week going?! I am so busy and feeling like Christmas is getting nearer and nearer and I am sooo not ready! Didn't manage to squeeze a blog post in yesterday as there was so much going on, so thought I'd better do a quick one today over lunch as I'm out again later and won't get the opportunity. Which is a shame, as I've still so many lovely Christmas projects to share! Today is a super quick card and gift card holder set that was designed by my lovely upline's upline Monica Gale at a recent Convention team gathering. Both items feature the 'Perfect Blend' stamp set. Firstly, here's the card:
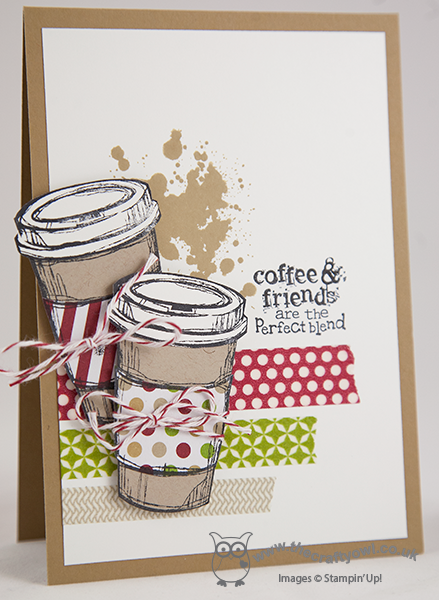
This is one of those cards that requires some paper snipping, but it's not tricky and worth it for the overall effect. We also made a matching gift card holder, which is just the right size for the credit-sized card coffee gift cards available from some of the large coffee house chains:
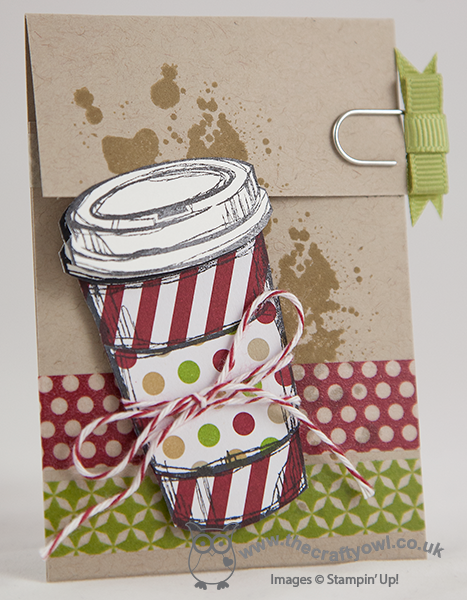
How cute is this?! I love the colours here and the little bow clip use to secure the gift card holder shut. I have a few friends who love a nice cup of coffee, so I might have to make a few more of these - not least because I received some extra Season of Style washi tape in a parcel that arrived yesterday, one of the things I won in a recent Stampin' Up! competition for World Cardmaking Day back in October - you can see my winning card here.
That's it for today. As always, if you would like to have a go at making either of the above project, the links to purchase the items you will need are included in the table below. Back tomorrow with a special Christmas project; until then, happy stampin'!
Stampin' Up! Supplies Used:
by Joanne James3. December 2013 12:30Today I have a quick post with the last of my Convention-related makes to share with you. One of the things we have to do for Convention is make a bag tag featuring our names. Why? Well, we are each given a Convention rucksack full of goodies and everything we will need to get us through the event. The rucksacks are great, but there's only one problem - they're all the same! So it's really important that we have a name tag that enables us to identify our bags, and each other, in the crowd. I made bag tags for each of the team members travelling with me that featured our team logo - The Crafty Owl:
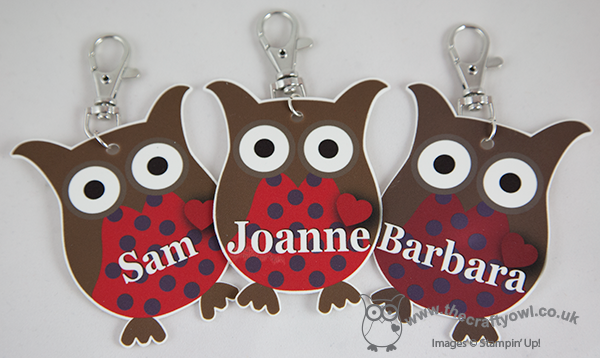
Cute, eh?! I made these by printing onto shrink plastic at 250% of finished size, then cut out the shapes, punched a hole for the keyring and shrunk them in the oven. I was so pleased with the result, I made a few more for some of my good friends and members of my wider Stampin' Up! team, this time using My Digital Studio (my logo was created using alternative software when UK demos didn't have access to MDS). I used the butterfly stamp that comes as part of the Creative Elements stamp set, and coloured the sections individually using the brush tool, using various shades of greens and turquoise - here are a couple of them:
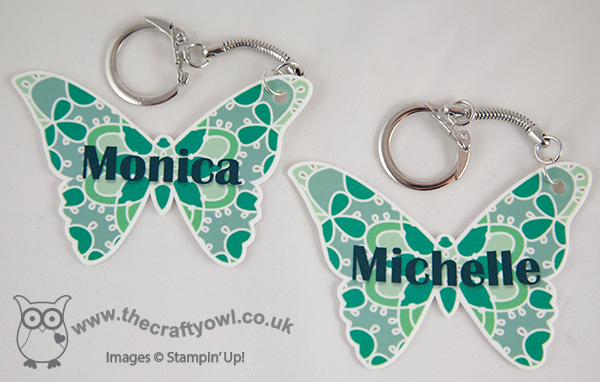
What do you think? These bag tags are really eye-catching and certainly helped my team stand out from the crowd - my friends loved theirs too, especially Michelle whose team is a called the Butterfly Belles - how appropriate! I just thought I would share to show how versatile MDS can be - it's not just for cards!
The MDS shop links are included below if you don't already have it; Creative Elements is part of the standard software version so there is no product link for this, however as today is Digital Downloads Weekly Release Day I've also included the links to all of this week's new MDS downloads - some lovely festive sets here.
Right, off to attend my son's Christingle service at school; I'm hoping for a nice photo or two for my December photo journal (another MDS project that I'll be sharing with you another day!) Back tomorrow with another project - I'm thinking we might need to get back to Christmas, it is the 3rd December after all! Until then, happy stampin'!
Stampin' Up! Supplies Used:
by Joanne James28. November 2013 20:36Today I have another festive project to share - this was also one of my convention swaps for some of the members of my wider team. I made a whole bunch of chocolate spoon stirrers - here's a close-up photo of the unwrapped spoon:
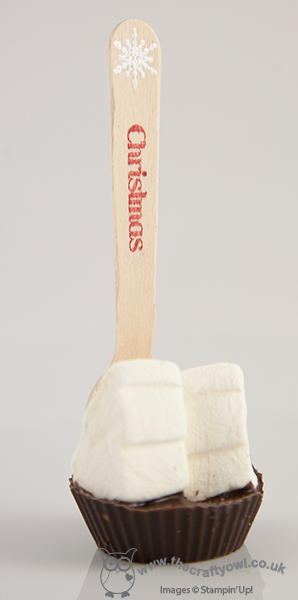
These really are so easy to make. All you need are some disposable wooden spoons and some small cello bags. To make the spoon, first I stamped it; I stamped the tiny snowflake in white kraft ink and heat embossed it for shine and texture, then stamped the word 'Christmas' in Real Red along the length of the spoon. This is a partial stamp from the 'Christmas Greetings' in the 'Warmth and Wonder' stamp set. This is a lovely hostess exclusive set, available when you host a Stampin' Up! party. Once the spoon has been stamped, I melted some milk chocolate in a small silicone cake mould and inserted both the spoon and some festive shaped marshmallows into it and left it to set before removing the mould. Here is a picture of the finished packaged spoons:
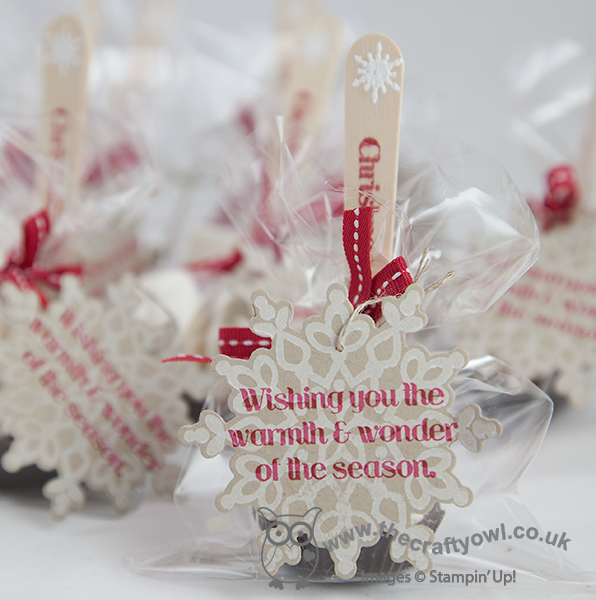
All you need to do is package in a small cello bag and tie with red grosgrain ribbon and attach a Festive Flurry snowflake stamped gift tag, stamped in white kraft on Crumb Cake cardstock and overstamped in Real Red with one of the other greetings from the 'Warmth and Wonder' set. So simple, yet a lovely gift for hostesses, customers, neighbours or friends during the festive season.
Back tomorrow with another project; until then, happy stampin'!
Stampin' Up! Supplies used:
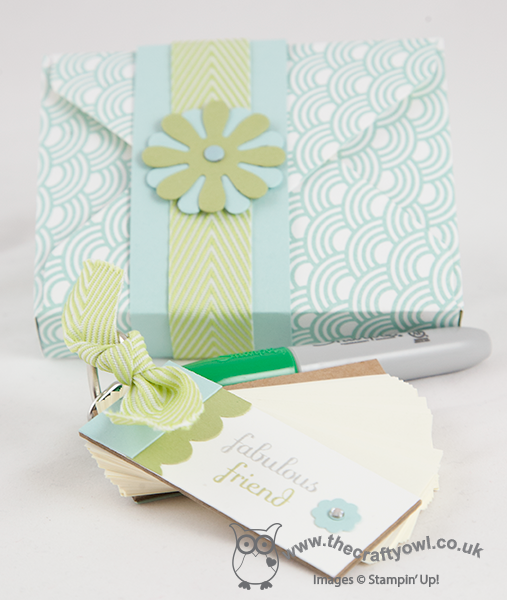
by Joanne James27. November 2013 21:02Today I'm sharing a gift I made for some of my most supportive stamping friends who I met up with at Convention. One of the great things about being a Stampin' Up! demonstrator is the friendships you make along the way - I have friends that I would never have met if it wasn't for Stampin' Up! and they are some of the most supportive when it comes to sharing successes, failures and ideas. Here is one of the gifts I made:
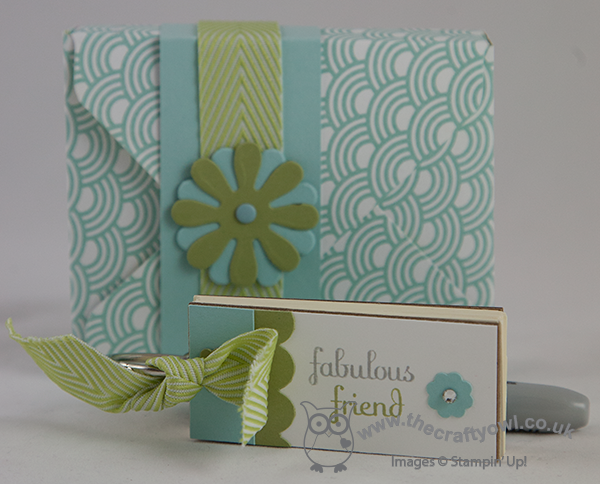
I found these cute little keyring notebooks in a local stationery store and customised them with stamps, punches and ribbon. I added a keyring Sharpie pen to each one, then made a little box with my Envelope Punch Board and closed with a co-ordinating belly band.
These are perfect for keeping in your handbag to always ensure you have a pen and paper to hand for quick notes.
Back tomorrow with another project. until then, happy stampin'!
Stampin' Up! Supplies Used: