Season of Chic Speedy Seashells AYSI 301

by Joanne James16. June 2023 12:00

Today I'm sharing my design team card for our new challenge over at As you See It where it's time for the 'dreaded' speed challenge:


I know some of you dread the idea of creating a card in under 10 minutes, but with a little preparation it doesn't have to be tricky - take a look:


Here's the low-down on today's card:

I knew that I would be using the shell stamps and dies from the Seasons of Chic stamp set and Chic Dies for my card today as they are my only current seashells, so I grabbed each of the dies and laid up each of the stamps and found a piece of the co-ordinating (retired) Texture Chic designer series paper to use for my background. This is the easiest way to get big design impact in the shortest possible time. Having found my sheet of paper, I pulled out the co-ordinating ink pads and cardstock (Petal Pink, Pebbled Path and an offcut of distressed gold), started my timer and set to work!

I cut a piece of designer paper to cover my entire cardbase, stamped a shell and diecut it along with three more in solid cardstock colours all in one go to save time, the stamped my sentiment onto a banner of Basic White and attached it to my cardfront, anchored with my shells. I added some clear Wink of Stella to my stamped shell and a sprinkling of basic pearls to complete my cardfront:


I did a quick timecheck and was doing so well, I even managed a quick stamped detail on the inside of my card within the allotted time:


And - stop the clock! I used a total of 7 minutes 59 seconds to create today's card - I managed to surprise myself at just how much time I had left over! My desk was a mess and I hadn't cleaned a single stamp, but it just goes to show if you need a card in a hurry, it can be done! The designer paper definitely does the heavy lifting on this card - the same background could be created using the stamps in the set, but it would take sooo much longer! I am also sharing today's beach-inspired card with thoughts of summer with the team over at Inkspirational where they are looking for seasonal cards.

Here is the visual summary of the key products used on today's project for you to pin for easy reference:


You can see all of my 'How To' summaries on my 'How To - Tips and Techniques' Pinterest board in case you've missed any. 

Here's a summary of our challenge rules:

  • Create any card, scrapbooking page, 3D project or packaging project that fits the challenge.
  • Please include the challenge graphic and link back to the challenge in your blog post. Turn off word verification so we can leave you lots of lovely comments. Make sure you link the post not the whole blog to the Linky. Use #AYSIXXX when uploading to a public gallery.
  • If you’re unsure about ‘the rules’, check the details under the Challenge Guidelines tab on the As You See It Challenge homepage.
  • In a speed stamping challenge, please time yourself and say in your post how long your card took to complete. 
We look forward to seeing your creations in the AYSI gallery.

Enjoy your day and I'll be back tomorrow with another project. Until then, happy stampin'!


Stampin' Up! Supplies Used:

Table built using Product Table Builder by The Crafty Owl - Independent Stampin' Up! Demonstrator.

Beautifully Happy Mother's Day Fancy Fold Card AYSI293

by Joanne James24. February 2023 12:00

Today I'm sharing my design team card for our new challenge over at As you See It where our leader and chief organiser, the lovely Heather C, has a recipe challenge for us with a distinctly feminine feel:
    

Recipe challenges usually send me into a bit of a spin, but this one actually worked out surprisingly well for me! I was inspired to have a go at a fancy fold card layout that was recently shared by Stampin' Up's CEO, Sara Douglas and decided to take the opportunity to make my Mother's Day card and use a new floral stamp set that will be available for just a few more days - take a look:
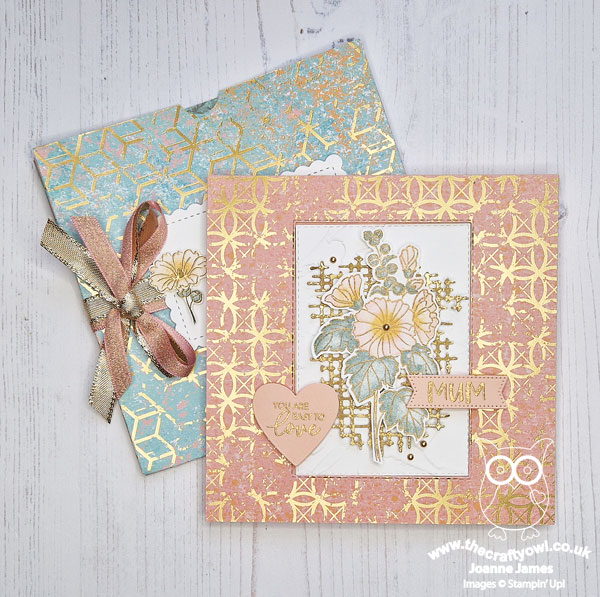
 

This is a photo-heavy post, so time to get comfy! Here's the low-down on today's card:

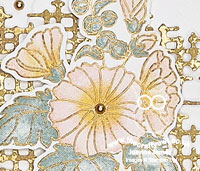
Beautifully Happy - The flower at the centrepiece of today's card is from the 'Beautifully Happy' stamp set - one of the items that can be yours FREE with a £90 purchase during the current Sale-A-Bration promotion. Can you believe I've had this set for almost 2 months and this is the first time I've used it?! So many stamp sets, so little time! Anyway, I digress - this is a two-step stamp set, with an outline that can be used along and coloured freehand, or alternatively used with the infill stamps. I wanted to heat-emboss my flower, so my Stamparatus was key here: I stamped the flower outline in Sahara Sand, then added the infills without removing from my Stamparatus, then stamped the outline again in Versamark and heat-embossed in gold. I fussy cut the main stem and added a gold pearl for the stamen and used this flower  as the centrepiece of my card:
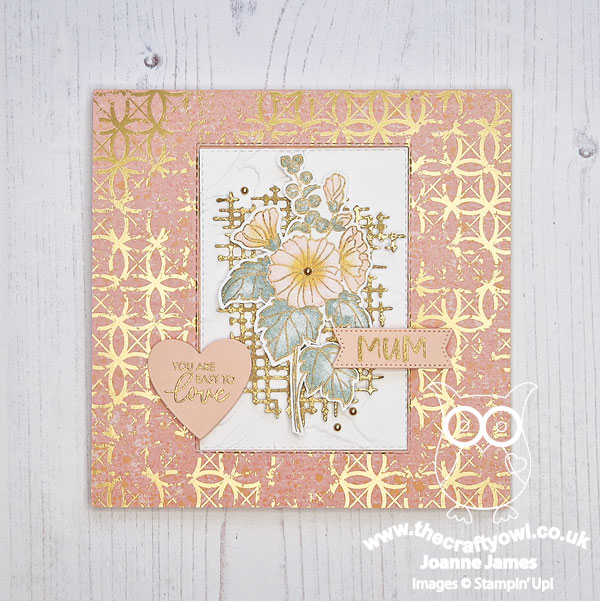
 

I also added a stemless version inside and a single bloom to my envelope label, and I used the outline for some tone-on-tone stamping on the first inside layer of my card - you can see below how the card opens:
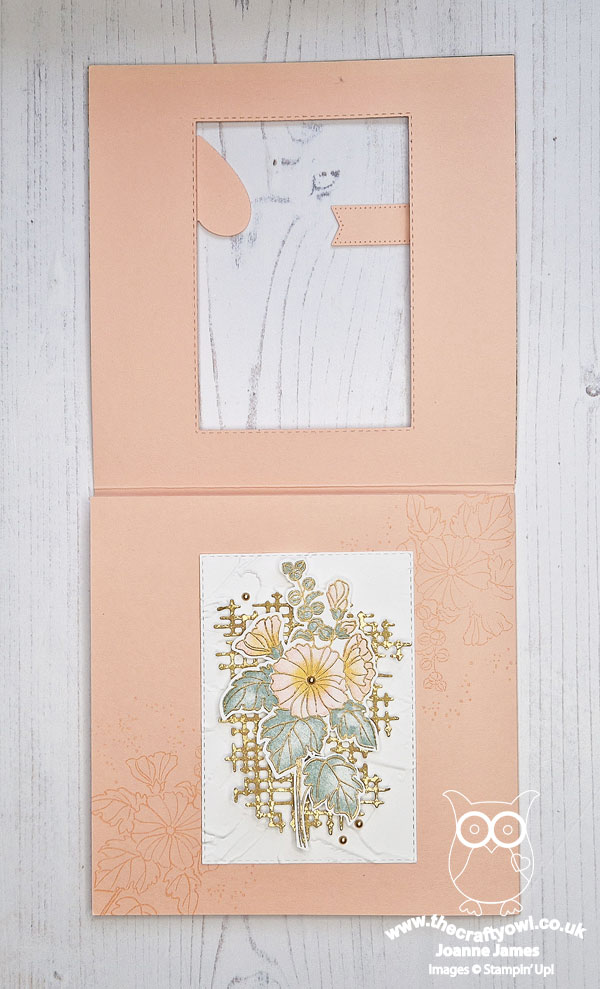
 

The sentiment in the heart on the front of my card is also from this stamp set. If 'Beautifully Happy' is on your Sale-A-Bration wishlist, you have just 4 days to place your £90 order and receive this stamp set for free. Time to get shopping!
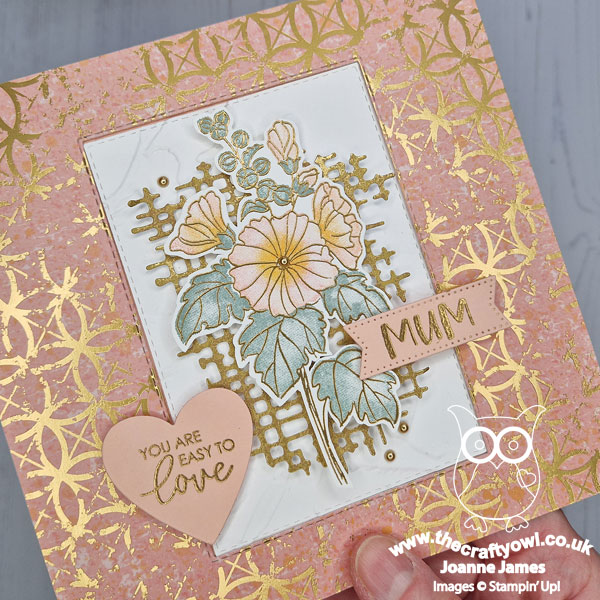
Texture Chic - The recipe ingredient of 'distressed paper' sent me immediately reaching for my Distressed Gold Specialty Paper and Texture Chic Specialty Designer Series Papers - both add a distressed look without any tearing or self-made grunge, neither of which are my style! The Texture Chic papers also include various shades of pink to compliment my Petal Pink stamped flower and lots of faux-texture. I also added actual texture with my Painted Texture Embossing Folder on the panel behind my fussy cut flower stem. 

The Distressed Gold paper is just beautiful; I used it to add some hatched diecut details on both the front and left inside panels:
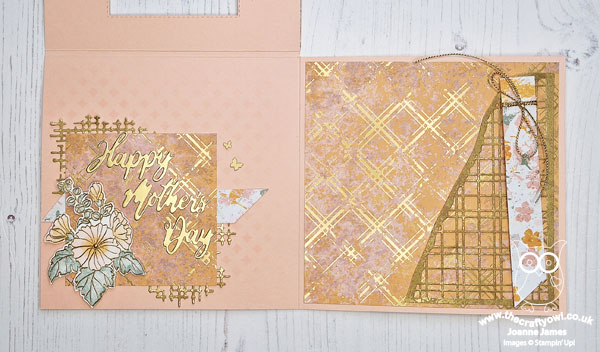
 

Here's a close-up of that detail on the left (the diecut sentiment uses the now retired Word Wishes Dies):
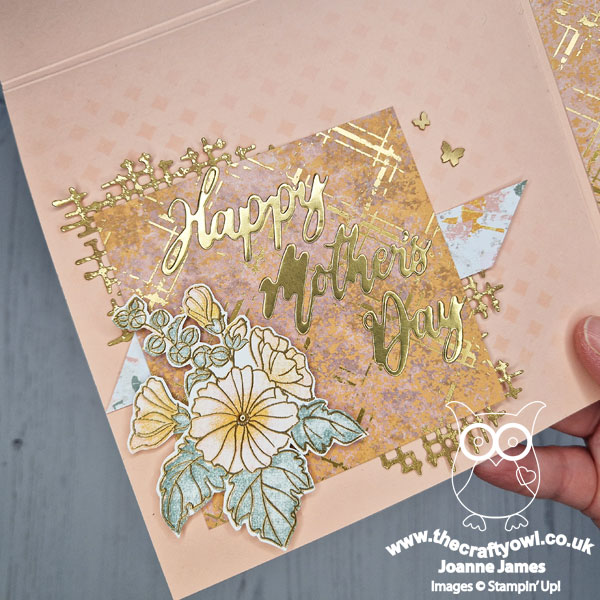
 

I also used the Distressed Gold Paper to create a pocket using the Split Textures Dies:
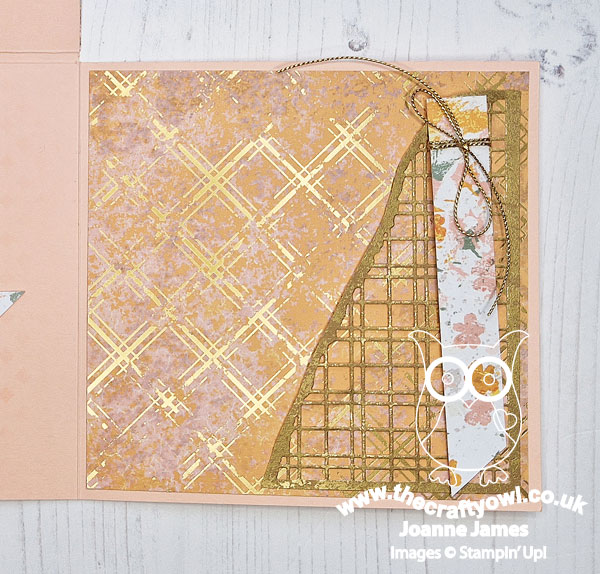
 

I handwrote my Mother's Day message, along with a poem, on a separate card that I tucked in here after photographing.

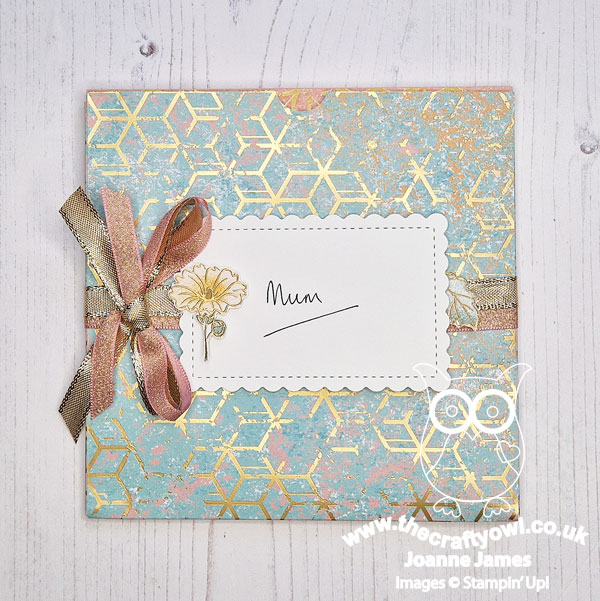
Fancy Inside and Out - A fancy card with a little bulk requires a fancy envelope too, so I created a simple file folder style, adding some retired ribbon and a scalloped address label. You can see in properly below:
 

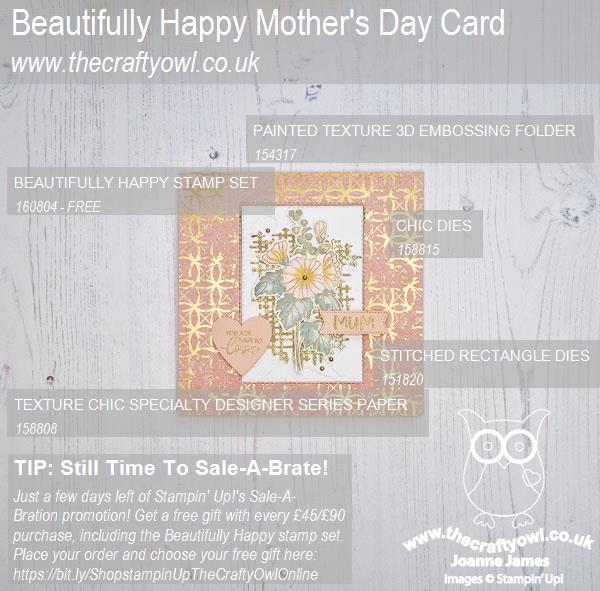
Here is the visual summary of the key products used on today's project for you to pin for easy reference:
 

You can see all of my 'How To' summaries on my 'How To - Tips and Techniques' Pinterest board in case you've missed any. 

It's not Mother's Day here in the UK until next month (March 19th) but it pays to be organised! Equally, if you don't make or send Mother's Day cards, this could be easily adapted and used as a fancy birthday card for someone special. These kinds of card do take a long time to make, however for someone special it's totally worth it. I'm linking up today's card over at The Flower Challenge where they are asking us to use our newest flower stamps and dies - it looks like I'm getting there just in time!

Here's a summary of our challenge rules:

  • Create any card, scrapbooking page, 3D project or packaging project that fits the challenge.
  • Please include the challenge graphic and link back to the challenge in your blog post. Turn off word verification so we can leave you lots of lovely comments. Make sure you link the post not the whole blog to the Linky. Use #AYSIXXX when uploading to a public gallery.
  • If you’re unsure about ‘the rules’, check the details under the Challenge Guidelines tab on the As You See It Challenge homepage.
We look forward to seeing your creations in the AYSI gallery.

Enjoy your day. I'm off to the hairdressers first thing then am collecting the eldest of the James Juniors and a friend for a trip up north to Newcastle for a university offer day tomorrow, so that should be fun. I'll be back Sunday with my project for this week's Paper Players challenge so do join me then. Until then, happy stampin'!


Stampin' Up! Supplies Used:
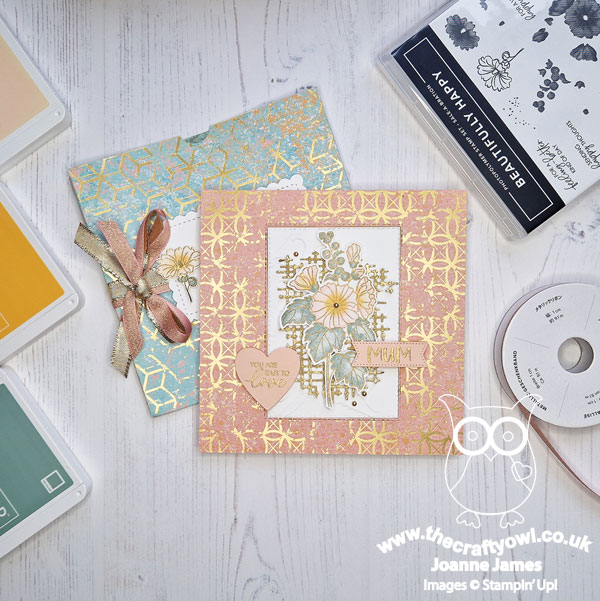
Table built using Product Table Builder by The Crafty Owl - Independent Stampin' Up! Demonstrator.

Texture Chic Memories and More Card FF114

by Joanne James22. July 2022 09:00

Hurrah it's Friday! Today I have my card for the new challenge over at Festive Friday where the challenge that we are celebrating this week is 'International Owl Awareness Day' which is on Friday 5th August.


Remember the fun thing is that at Festive Friday you do not need to actually celebrate the occasion; your goal is to simply use three or more items from the inspiration list on your project. This week I was tempted to go with an owl theme for obvious reasons, but my search for an inspirational quote took me in a completely direction. I ended up using inspirational quote, texture and brown and this is what I came up with:


Here's the low-down on today's card:

Memories and More - The starting point for today's card was the quote on the front of my card. One of the best places to look for inspirational quotes is a Memories and More card pack - and that's where I found this one, in the Texture Chic card pack. I thought these words would make a lovely card for an anniversary, or a much-loved friend to let them know how much they mean to you. I added a stitched edge by running the card through my diecutting machine and then set about incorporating other elements from the Texture Chic Suite into my design.

Texture, Texture - There is an abundance of texture on today's card: the beautiful Texture chic designer paper is used for both a mat layer and for the base layer to my leaves (which I cut out of the middle of the mat layer to be economical!), then there is the stunning distressed gold speciality paper that I used for the top layer 'skeleton' leaves. I decided that my Soft Suede mat was too plain, so picking up the pattern on the quote card, I partially embossed it on opposing corners with one of the (retired) Checks and Dots embossing folders, then applied heat and stick powder and gold Gilded Leafing to these areas and the panel edges to add to tie in with the other gold elements. You do lose some of the definition of the embossing I think, but it does add tons of textural detail:


Some linen thread and Elegant Faceted Gems also add texture to the front of my card.

Seasons of Chic - Having used the Chic Dies to cut the leaves to decorate the front of my card, I used the co-ordinating 'Season of Chic' stamp set for my inside sentiment, along with some extras for decoration:

I rarely make this sort of card, which is quite shabby chic in it's look and feel and contrasts to my usual clean and layered style, but it just sort of evolved and I'm actually quite happy with how it turned out; it's always fun to step out of one's comfort zone once in a while!

Here is the visual summary of the key products used on today's project for you to pin for easy reference:


You can see all of my 'How To' summaries on my 'How To - Tips and Techniques' Pinterest board in case you've missed any. 

How does our board inspire you? I can’t wait to see what YOU create! For more inspiration, be sure to visit the rest of the  Festive Friday Challenge Design team:

Ann Schach
Beth McCullough
Sharon Hashimoto Burkert
Melanie Hungerford
Helen Jennings
Stephanie Lanzalotto
Melva Peters
Jaydee
Diane Evans
Joanne James

Enjoy your day and I'll be back tomorrow with another project. Until then, happy stampin'!


Stampin' Up! Supplies Used:

Table built using Product Table Builder by The Crafty Owl - Independent Stampin' Up! Demonstrator.

New Online Exclusives

There are new products available exclusively in the online store from 5 November - check them out here.

Latest Kits!

Stampin Cut and Emboss

The Layered Landscapes Kit and Nature's Paintings Kit are the latest kits in the online store - get yours here!

Shop Online

Access my online shop 24 x 7, 365 days of the year:

Current November hostess code:

9NKXDTTR

Shop Online

Mini Catalogue

BROWSE THE CATALOGUE

'Tis The Season - the new Stampin' Up! Mini Catalogue is here! For more details and to download your copy click here

Scrapbooking

Stampin' Up! has introduced a new range of 12x12" scrapbooking product and kit - the full range is now available to purchase online. To download a copy of the new digital Scrapbooking Catalogue click here.

2024-25 Annual Catalogue

BROWSE THE CATALOGUE

Click on the image to download your copy of the 2024-25 annual catalogue. For a full list of current SU! supplies, go to my online store. If you would like any help or advice, please drop me a line at joanne@thecraftyowl.co.uk or give me a call on 07773 421446 - I'd be happy to help.

Join My Team

It's always a great time to join Stampin’ Up! New team members can get £130 worth of products for only £99 + free business supplies + free shipping + all the fun being a part of Stampin’ Up! Stampin' Up! has something for everyone: join my growing team and benefit from my support to enjoy Stampin' Up! however you choose.

If you're interested, call me for a chat to understand how I can help you realise your goals. Alternatively, if you have already decided to sign up and you just can't wait, please click here for the link to the online form where you can sign up and order your starter kit right away! 

About Me

Hi I'm Joanne and live in Northampton and when I'm not looking after my husband and two beautiful children, am an avid crafter with a passion for all things Stampin' Up!

I must confess that I have never been a big rubber stamper - until I discovered Stampin' Up! that is. I love the fact that I can get such great results with co-ordinating stamps, inks, papers and punches - the possibilities are endless! Join me on my stamping journey as I share the things I love and be inspired to create amazing things yourself!

Follow Me

Monthly Newsletter

Box Builder

Click the button above to use Box Buster to create your custom box design using the Envelope Punch Board!

Kits Collection Now Available!

Stampin Cut and Emboss

The new Kits Collection from Stampin' Up! is now available!

Click here to see the current kits available and order yours online today.

I Design For


Stampin' Up Stuff

This is my personal blog and is not endorsed by Stampin’ Up! I hope you find it a plentiful source of ideas and personal inspiration but please don't copy my designs for contest submission or use for classes, publication or sale without express permission.