2019-21 In-Color Artfully Aware Masculine Card

by Joanne James2. July 2019 20:00

A later post from me today as I've had a busy one that culminated in a wonderful Summer Serenade concert to listen to the youngest of my James Juniors sing - always a joy! Today I'm sharing a card for the current Fab Friday and Inspire.Create challenges which coincidentally both have exactly the same colour palettes this week - the new 2019-21 Stampin' Up! in colors:

   No photo description available.

Whilst I love all of these colours individually, I found it a challenge using all of them on one card - that's the idea though, right? So I resisted making a collection of monochromatic cards featuring each of the colours individually and pushed myself to get all 5 on one card. After much deliberation, this is what I came up with:


Here's the low-down on today's card:

Artfully Aware - I decided that the stamp that features five people intertwined in the 'Artfully Aware' stamp set would be a great way to incorporate all 5 in-colours on my card by giving each person a different colour sweater. I love the sketchy style of these stamps and this set has some great words of encouragement and support. I used one of the sentiments in the set too, but split it and included the first part 'together...' on the tab on the front of my card, then continued it inside with '...we make a difference'. 

A Mix of Mediums -  I did something I don't normally do and used a mix of Blends and inks and a blender pen to colour, as I still have inks in all colours bar Purple Posy, whereas this is the only in-colour I have in Blends. The colours are much softer with ink and a blender pen and I like the more watercoloured look. I decided that this would make a nice masculine encouragement card, so used the darker colours of Pretty Peacock and Terracotta Tile for my base and in-colour DSP layer, along with my tabbed piece.

A Blue Ribbon - The Artfully Aware stamp set co-ordinates with the Support Ribbon Framelits and I decided to use the small support ribbon framelit to cut a pale blue ribbon out of Seaside Spray as a small embellishment to anchor my sentiment.

Here is the visual summary of the key products used on today's project for you to pin for easy reference:


You can see all of my 'How To' summaries on my 'How To - Tips and Techniques' Pinterest board in case you've missed any. 

I really love this year's set of new in-colors and I know lots of you do too. For this first time this year I am running an In-Color Club for my customers and still have a few spaces in my latest round that are available; please contact me if you would like to take part - you can read all about it here.

Enjoy your evening and I'll be back tomorrow with another project. Until then, happy stampin'!


Stampin' Up! Supplies Used:

Table built using Product Table Builder by The Crafty Owl - Independent Stampin' Up! Demonstrator.

Cancer Support Ribbon CAS Card for PP402

by Joanne James22. July 2018 09:00

It's Sunday and time for this week's new challenge over at The Paper Players! It's the turn of our wonderful leader Nance to host this week and she has a clean and simple challenge for you to work with:
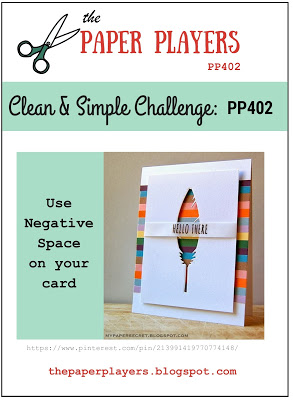
 

Remember in addition to the theme of "negative space", this week is a Clean-and-Simple (CAS) challenge!  What do we mean by CAS?

  • Minimal layers and embellishments
  • Plenty of open space, aka "white" space
  • Simple and uncluttered

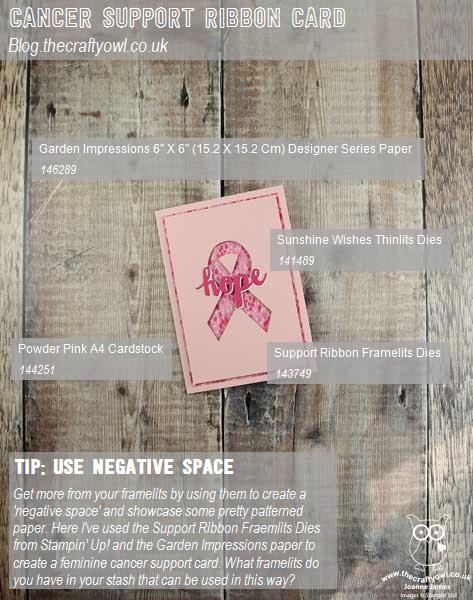
Now I love to use negative space on a card - if you browse my blog you will find tons of examples. Today though I have a card that is super quick and easy to recreate using a thinlit I haven't used before, that also showcases a glimpse of one of the fabulous designer series papers that is on offer as part of this month's 'buy 3, get 1 free' paper promotion - take a look:
 

Here's the low-down on today's card:

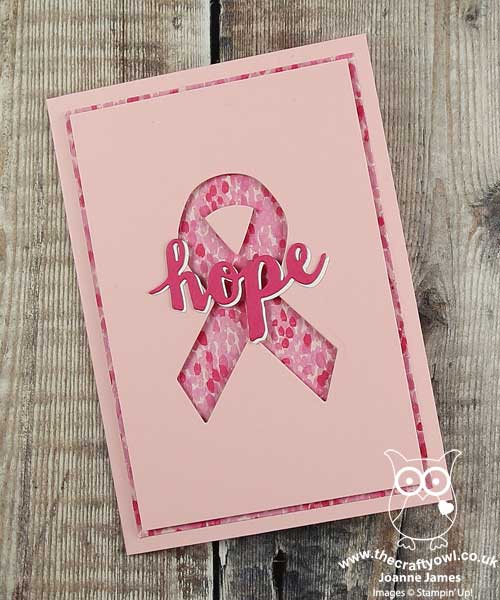
Negative Space - I am a big fan of using dies to create 'negative space' as I think it creates real interest on a clean and simple card. Today I chose to use the largest die in my Support Ribbon Framelits. This die cuts a ribbon shape and in order to retain this shape when you are using the negative, you need to remember to retain and add in the extra piece that forms the centre of the loop. This will be loose once you've made your diecut - the easiest way to ensure you get it in the right place is to place the positive diecut back into the gap to align the centre piece and stick it in place, before the removing the positive diecut once more. 

Impressionist Pinks - I decided to add interest to my ribbon by using designer series paper in my negative space, and chose this gorgeous impressionist pattern of pinks from the Garden Impressions DSP set. I think this is my current favourite paper; good job it's in the 'buy 3, get 1 free' set so that I can stock up and save at the same time! Patterned paper should be used sparingly with lots of white (or in my case pink!) space surrounding it, to ensure a 'CAS' feel is retained.

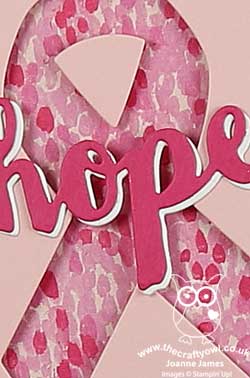
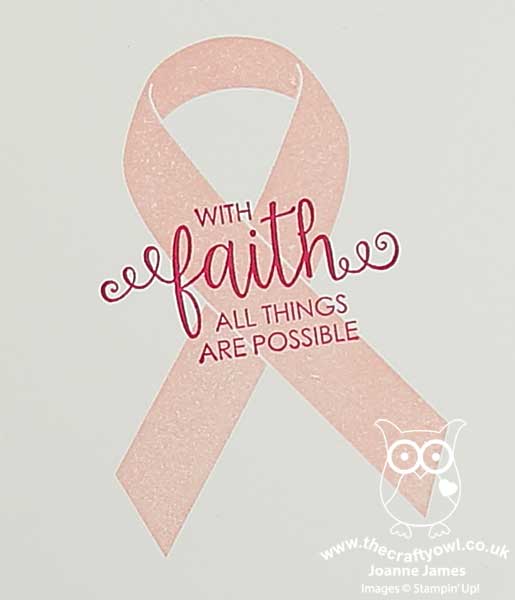
Hope and Courage - I overlaid my negative space with a stacked diecut of the word 'hope' from the Sunshine Wishes thinlits set, which I felt fitted with the theme of my card. Cancer is such a vicious disease, hope is essential for those diagnosed with it. It also tied in perfectly with the stamped inside of my card (the only stamping on today's card!), courtesy of the Ribbon of Courage stamp set:
 

I hope this card will be uplifting for the recipient and brighten their day.

Here is the visual summary of the key products used on today's project for you to pin for easy reference:
 

You can see all of my Product and 'How To' summaries on my 'How To - Tips and Techniques' Pinterest board in case you've missed any. 

Before you reach for your ink and papers, check out what our amazing team has created to inspire you this week:

Here's a quick recap of our challenge rules:
 
1.  Create a new paper project
2.  Upload your creation to your blog with a link back to us and provide a direct link to the post featuring your challenge submission.
3.  Please link your card to no more than four challenges, TOTAL.
4.  Have FUN!
 
I can't wait to see your clean and simple creations and look forward to visiting your blogs this week! Enjoy the rest of your weekend - it looks like we are going to enjoy another day of sunshine here in the UK so I will be looking forward to spending some time in my garden, amongst other things. I'll be back tomorrow with another project; until then, happy stampin'!


Stampin' Up! Supplies Used: 

Table built using Product Table Builder by The Crafty Owl - Independent Stampin' Up! Demonstrator.

New Online Exclusives

There are new products available exclusively in the online store from 5 November - check them out here.

Latest Kits!

Stampin Cut and Emboss

The Layered Landscapes Kit and Nature's Paintings Kit are the latest kits in the online store - get yours here!

Shop Online

Access my online shop 24 x 7, 365 days of the year:

Current November hostess code:

9NKXDTTR

Shop Online

Mini Catalogue

BROWSE THE CATALOGUE

'Tis The Season - the new Stampin' Up! Mini Catalogue is here! For more details and to download your copy click here

Scrapbooking

Stampin' Up! has introduced a new range of 12x12" scrapbooking product and kit - the full range is now available to purchase online. To download a copy of the new digital Scrapbooking Catalogue click here.

2024-25 Annual Catalogue

BROWSE THE CATALOGUE

Click on the image to download your copy of the 2024-25 annual catalogue. For a full list of current SU! supplies, go to my online store. If you would like any help or advice, please drop me a line at joanne@thecraftyowl.co.uk or give me a call on 07773 421446 - I'd be happy to help.

Join My Team

It's always a great time to join Stampin’ Up! New team members can get £130 worth of products for only £99 + free business supplies + free shipping + all the fun being a part of Stampin’ Up! Stampin' Up! has something for everyone: join my growing team and benefit from my support to enjoy Stampin' Up! however you choose.

If you're interested, call me for a chat to understand how I can help you realise your goals. Alternatively, if you have already decided to sign up and you just can't wait, please click here for the link to the online form where you can sign up and order your starter kit right away! 

About Me

Hi I'm Joanne and live in Northampton and when I'm not looking after my husband and two beautiful children, am an avid crafter with a passion for all things Stampin' Up!

I must confess that I have never been a big rubber stamper - until I discovered Stampin' Up! that is. I love the fact that I can get such great results with co-ordinating stamps, inks, papers and punches - the possibilities are endless! Join me on my stamping journey as I share the things I love and be inspired to create amazing things yourself!

Follow Me

Monthly Newsletter

Box Builder

Click the button above to use Box Buster to create your custom box design using the Envelope Punch Board!

Kits Collection Now Available!

Stampin Cut and Emboss

The new Kits Collection from Stampin' Up! is now available!

Click here to see the current kits available and order yours online today.

I Design For


Stampin' Up Stuff

This is my personal blog and is not endorsed by Stampin’ Up! I hope you find it a plentiful source of ideas and personal inspiration but please don't copy my designs for contest submission or use for classes, publication or sale without express permission.