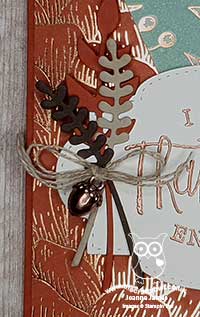
Gilded Autumn Patterned Paper Trio of Thank You Cards for PP505

by Joanne James23. August 2020 09:00

Today it's Sunday and time for this week's new challenge over at The Paper Players! It's the turn of the amazingly talented LeAnne to host this week and she has my favourite, a sketch challenge for you to work with:
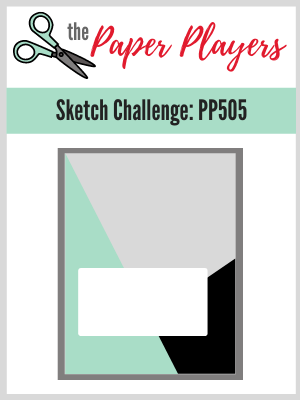
    

LeAnne's sketch is perfect to showcase some designer series papers and I couldn't resist another card using the Gilded Autumn speciality designer series papers - take a look:
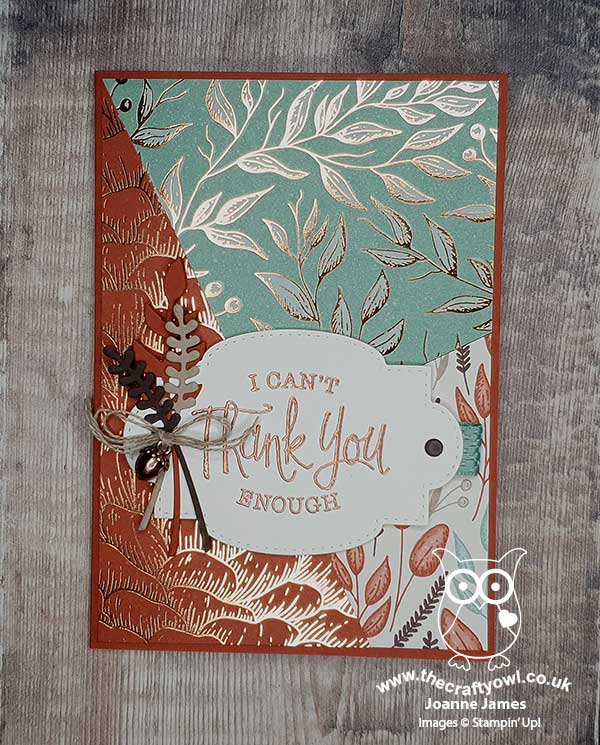
 

Here's the low-down on today's card:

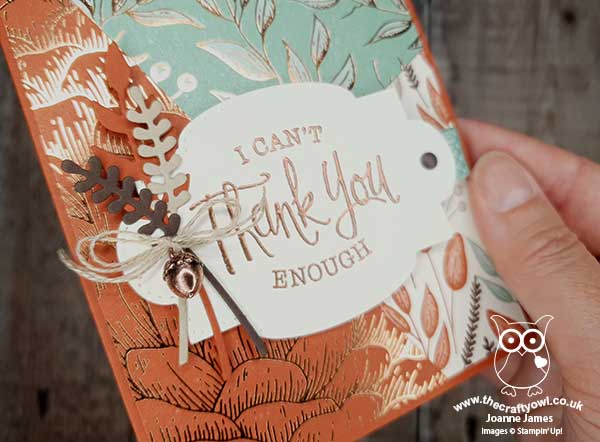
Gilded Autumn Goodness - The Gilded Autumn papers are beautiful, with some fabulous foil detailing. I paired my chosen patterns with a sentiment and label from the 'So Sentimental' bundle and added some of the ribbon from the suite to my label too.

A Copper Acorn - I used some retired dies for my diecut leaves (from the Beautiful Bouquet die set) as they had a shape that works well with the patterns on the paper and added a double linen thread bow. I stopped there on my two additional cards as I wanted them to be post-friendly, however I couldn't resist adding one of the lovely copper acorn trinkets from the suite to one of my cards - these are just so pretty:
 

I'm going to link this card up over at Hand Stamped Sentiments too - I just love their inspiration photo this week, it's so perfect for the season!

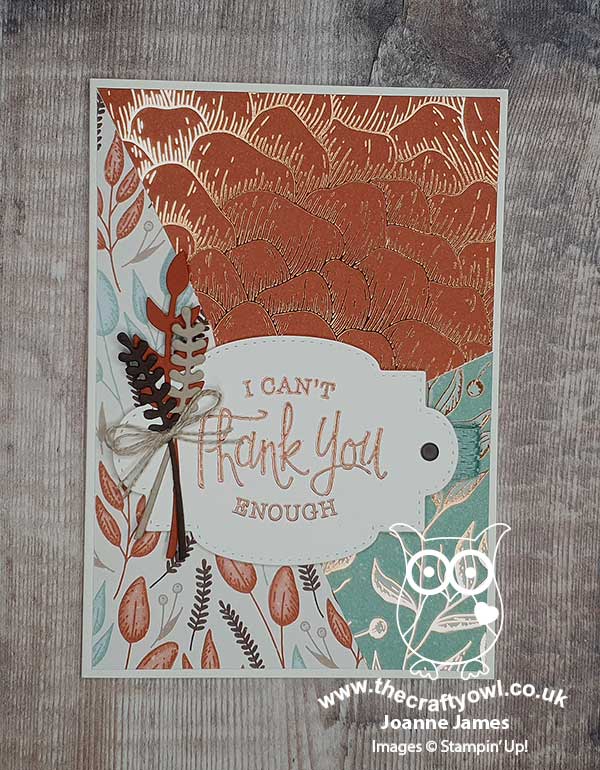
And Two Makes Three - As I mentioned above, having cut 3 rectangular pieces of DSP, and then cut all three together at the same angle on my guillotine, I made another two cards to use up all of the pieces. Here's my second card:
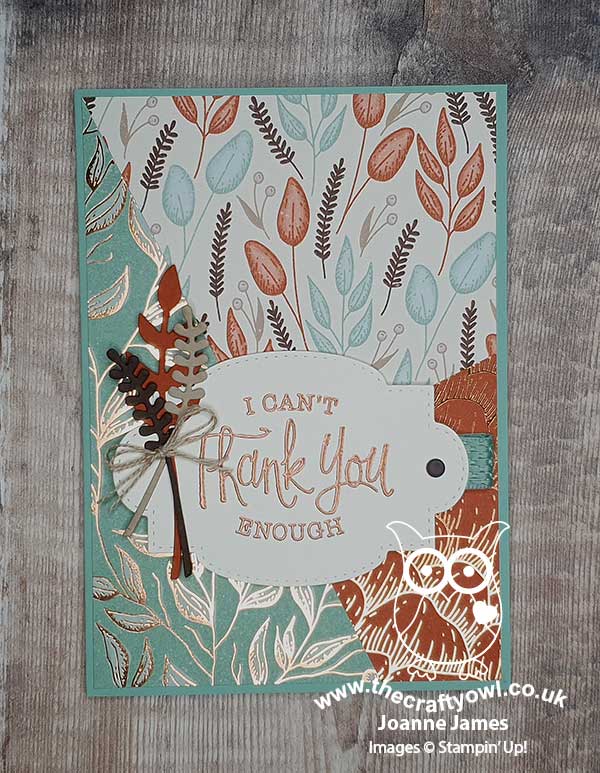
 

And my third card:
 

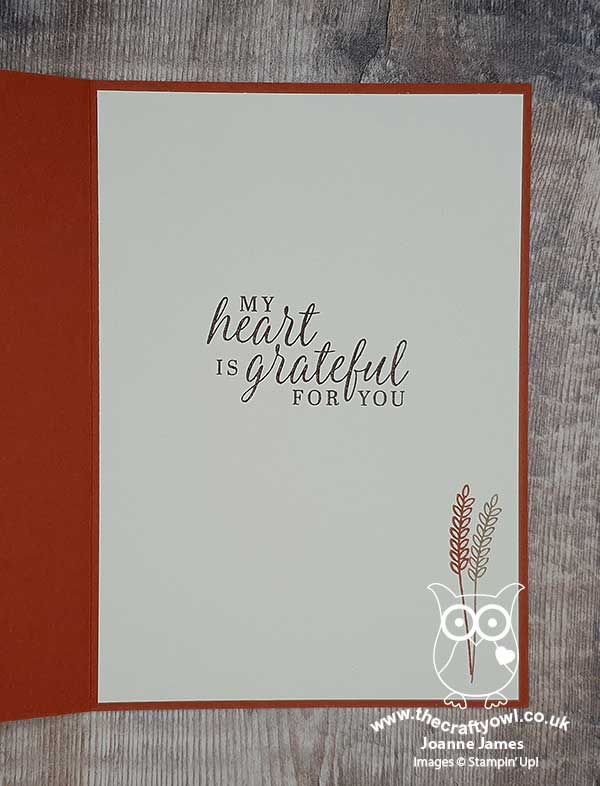
A little simple stamping using the 'Beautiful Autumn' set inside finished each card:
 

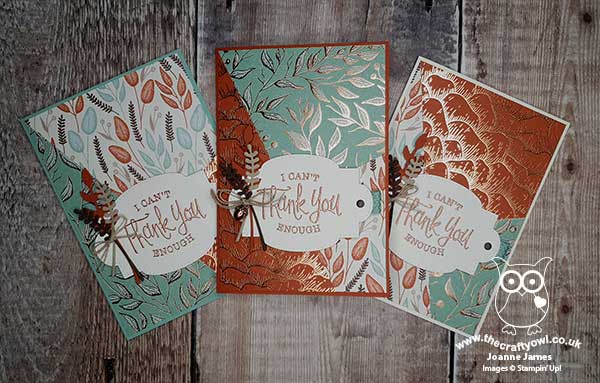
Here's all three of my cards together - do you have a favourite? Leave me a comment, I would love to hear your thoughts.
 

Here is the visual summary of the key products used on today's project for you to pin for easy reference:
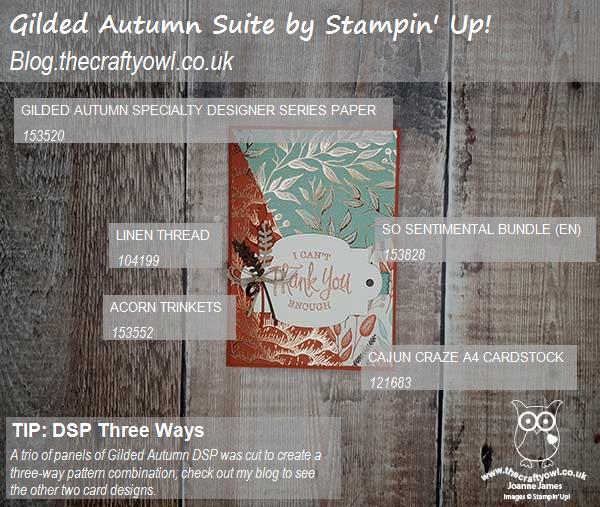
 

You can see all of my Product and 'How To' summaries on my 'How To - Tips and Techniques' Pinterest board in case you've missed any. 

Before you reach for your ink and papers, check out what our amazing team has created to inspire you this week:

Here's a quick recap of our challenge rules:
 
1.  Create a new paper project
2.  Upload your creation to your blog with a link back to us and provide a direct link to the post featuring your challenge submission.
3.  Please link your card to no more than four challenges, TOTAL.
4.  Have FUN!

You can see all of my 'How To' summaries on my 'How To - Tips and Techniques' Pinterest board in case you've missed any. 

Enjoy your day; I'll be back tomorrow with another project. Until then, happy stampin'!


Stampin' Up! Supplies Used: 

Table built using Product Table Builder by The Crafty Owl - Independent Stampin' Up! Demonstrator.

Ornate Border Dies Inlaid Diecut Thank You Card

by Joanne James17. April 2020 20:18

Yay it's Friday! I feel more than ever the need to start my post with the day of the week just to remind myself - is it me or do they all seem to blur into one these days?! Today I'm sharing a card that I made using this week's Color Throwdown colours: 


I wanted to have a play with my new Ornate Border Dies having seen a lovely stencilled card that my friend LeAnne created with hers. When I saw these colours and the quilt in the photo though I thought they would be nice for a little inlaid diecutting - take a look:


Here's the low-down on today's card:

Ornate Border Dies - The new Ornate Border Dies are part of the early release Ornate Garden Release. I knew I would love these dies as soon as I saw them! I did have a few erroneous cuts before I realised which side the die was cutting the outer edge on, but once I'd worked this out I was fine. I cut the die three times: once in Basic Black for my mat, then again in Smoky Slate and Real Red, and used these latter two to inlay the flowers and leaves into my black panel. 

Take Your Pick - You might think that inlaid diecutting is a tricky business and whilst it does take a little while, there is one tool that can make it really easy: the Take your Pick tool. That end with a little bob of blue tac is super useful for easily picking up tiny pieces and dropping them into the spaces in the die openings. I can highly recommend one - adding adhesive sheets to the back of your cardstock before diecutting helps from a gluing perspective too.

So Sentimental - For my panel I used a piece of retired gingham DSP from Sale-A-Bration last year and I finished my card with a thank you sentiment from the 'So Sentimental' set and cut it out with one of the co-ordinating Stitched So Sweetly Dies. I added a scrap of red ribbon and my card was done!

Here is the visual summary of the key products used on today's project for you to pin for easy reference:


You can see all of my 'How To' summaries on my 'How To - Tips and Techniques' Pinterest board in case you've missed any. 

We took part in a family online quiz yesterday, hosted (virtually, of course!) by some friends of ours with lots of other friends online which was great fun. Determined to continue in a similar vein and do something different again today, I joined an online 'pilates for runners' class, run by the physio that has been treating me for my frozen shoulder rehabilitation. I'm keen to get back to running but am nowhere near fit enough at the moment, plus it's more fun to cycle with the Juniors whilst they are at home. It was tough but I thoroughly enjoyed it - I'm sure my glutes will feel be feeling the effects tomorrow though! What are you doing to make each day a little different to the one that went before? Enjoy your evening and I'll be back tomorrow with another project. Until then, happy stampin'!


Stampin' Up! Supplies Used:

Table built using Product Table Builder by The Crafty Owl - Independent Stampin' Up! Demonstrator.

Time For Confetti Birthday Card

by Joanne James25. February 2020 09:00

Today I'm sharing a card that uses both the CAS(E) This Sketch layout and the theme over at Time Out this week:


I have a combination of old and new for my card today! I've been desperately trying to increase my stash of on-hand birthday cards and use up some of my stash of retired designer series paper so the above challenges gave me the perfect opportunity - take a look:


Here's the low-down on today's card:

So Sentimental - I used the 'This calls for confetti!' stamp from the new 'So Sentimental' stamp set as the starting point for today's card, picking up on the theme over at Time Out and paired this with some retired Picture Perfect Party DSP that has a fun scattered confetti photographic print for a fun birthday party vibe - which just so happened to perfectly fit the CAS(E) This Sketch layout too.

Label Me Fancy - I heat embossed my sentiment into silver onto some Pool Party cardstock and punched it out with the new Label Me Fancy punch, and backed it with one in a contrasting colour that I'd split in half so that you can just see a border. I added a tiny piece of retired ribbon from my scrapbox for a little extra detail (this ribbon is currently available on the Clearance Rack if you would like to stock up on a ribbon bargain!). 

Sending You Thoughts - I used the Sale-A-Bration free stamp set, Sending You Thoughts, for the inside of my card, along with a little sprinkle of stamped confetti to finish off my celebratory card:

I also added the offcut of my DSP to the envelope flap for a little extra envelope decoration. So a super simple card that meant I could run off a few to add to my stash of birthday cards for when the James Juniors need one for a friend in a hurry!

Here is the visual summary of the key products used on today's project for you to pin for easy reference:


You can see all of my 'How To' summaries on my 'How To - Tips and Techniques' Pinterest board in case you've missed any. 

So it's Shrove Tuesday today - hands up who's having pancakes for dinner this evening? I have been badgered all the way to school today to make some this evening - but just to whet your appetite, here are some American-style ones I had for brunch at the weekend - can you spot the 'hidden Mickey' (or Minnie, with the bacon bow!) - fellow Disney fans, this one is for you!


They were delicious! Enjoy your day and I'll be back tomorrow with another project. Until then, happy stampin'!


Stampin' Up! Supplies Used:

Table built using Product Table Builder by The Crafty Owl - Independent Stampin' Up! Demonstrator.

A Best Dressed Lilac Thank You Card

by Joanne James20. February 2020 12:00


It's Thursday and time for a new challenge over at TicTacToe! It's the turn of Team X to host and the lovely Amy Ottmers is our featured designer this week. This is the fun board that we are playing along with: 


I used the current sketch over at Fab Friday and went with the top line of the board - Diecut, CAS, Purple - take a look:


Here's the low-down on today's card:

Best Dressed - This Purple Posy floral paper from the Best Dressed DSP pack was the starting point that inspired my whole card today. So soft and pretty, with a delicate ombre effect I couldn't resist using a whole panel on my card.

So Sentimental - I used a simple thank you sentiment from the So Sentimental stamp set, masked off and inked in a combination of Highland Heather and Basic Grey and cut out using the co-ordinating Stitched So Sweetly Dies. This label is one of 4 in the set, along with the stitched scalloped rectangles that I showcased previously on this card.

A Pop of Colour - I fussy cut a flower from one of the other patterns of paper in the Best Dressed pack to embellish my sentiment with and picked out the colours of the flower centre and leaves to use for the banners behind my sentiment for a little added pop of colour.

Here is the visual summary of the key products used on today's project for you to pin for easy reference:


You can see all of my Product and 'How To' summaries on my 'How To - Tips and Techniques' Pinterest board in case you've missed any. 

I love this sketch and think I'll be using it again! What about the board though? A tictactoe board offers so many creative possibilities - how does this week's board inspire you? Why not have a go? We would love to see you in the gallery and who knows - you might be selected for Designer's Choice and be eligible to be a guest designer on a future challenge. 

Enjoy your day; the weather here is still wet and grey, so following indoor climbing yesterday the Juniors are breaking up their mock exam revision with indoor roller skating this afternoon - I will be watching safely from the sidelines! I'll be back tomorrow with another project. Until then, happy stampin'!


Stampin' Up! Supplies Used: 

Table built using Product Table Builder by The Crafty Owl - Independent Stampin' Up! Demonstrator.

New Online Exclusives

There are new products available exclusively in the online store from 5 November - check them out here.

Latest Kits!

Stampin Cut and Emboss

The Layered Landscapes Kit and Nature's Paintings Kit are the latest kits in the online store - get yours here!

Shop Online

Access my online shop 24 x 7, 365 days of the year:

Current November hostess code:

9NKXDTTR

Shop Online

Mini Catalogue

BROWSE THE CATALOGUE

'Tis The Season - the new Stampin' Up! Mini Catalogue is here! For more details and to download your copy click here

Scrapbooking

Stampin' Up! has introduced a new range of 12x12" scrapbooking product and kit - the full range is now available to purchase online. To download a copy of the new digital Scrapbooking Catalogue click here.

2024-25 Annual Catalogue

BROWSE THE CATALOGUE

Click on the image to download your copy of the 2024-25 annual catalogue. For a full list of current SU! supplies, go to my online store. If you would like any help or advice, please drop me a line at joanne@thecraftyowl.co.uk or give me a call on 07773 421446 - I'd be happy to help.

Join My Team

It's always a great time to join Stampin’ Up! New team members can get £130 worth of products for only £99 + free business supplies + free shipping + all the fun being a part of Stampin’ Up! Stampin' Up! has something for everyone: join my growing team and benefit from my support to enjoy Stampin' Up! however you choose.

If you're interested, call me for a chat to understand how I can help you realise your goals. Alternatively, if you have already decided to sign up and you just can't wait, please click here for the link to the online form where you can sign up and order your starter kit right away! 

About Me

Hi I'm Joanne and live in Northampton and when I'm not looking after my husband and two beautiful children, am an avid crafter with a passion for all things Stampin' Up!

I must confess that I have never been a big rubber stamper - until I discovered Stampin' Up! that is. I love the fact that I can get such great results with co-ordinating stamps, inks, papers and punches - the possibilities are endless! Join me on my stamping journey as I share the things I love and be inspired to create amazing things yourself!

Follow Me

Monthly Newsletter

Box Builder

Click the button above to use Box Buster to create your custom box design using the Envelope Punch Board!

Kits Collection Now Available!

Stampin Cut and Emboss

The new Kits Collection from Stampin' Up! is now available!

Click here to see the current kits available and order yours online today.

I Design For


Stampin' Up Stuff

This is my personal blog and is not endorsed by Stampin’ Up! I hope you find it a plentiful source of ideas and personal inspiration but please don't copy my designs for contest submission or use for classes, publication or sale without express permission.