Sophisticated Sled Ice Skates Wreath Quartet PP715

by Joanne James10. November 2024 08:00

Today it's Sunday and time for this week's new challenge over at The Paper Players! It's the turn of the fabulous Claire to host this week and she has a fabulous bright colour challenge for us to work with:


Bright colours may not be considered traditional for a Christmas card, but I am on a roll and so that is my starting point for everything currently! I decided the best way to highlight each of these was to balance it with lots of white and a touch of festive silver - take a look:


Here's the low-down on today's card:

I've chosen to feature the ice skates and wreath from the Sophisticated Sled bundle - one of my favourite Online Exclusives bundle for the festive season. I love both the sled and the ice skates in this set - both items that I've never owned in my craft collection previously. I've used the sled on a couple of cards previously (you can see those cards here and here) but for today's card I wanted to feature the ice skates.

These skates are so cute; they have separate diecuts for the blades and boots and a neat slit into which you can insert the separate diecut laces - so clever. I decided to add four pairs of skates, each with a different coloured pair of laces. In order to accommodate 4 pairs, I decided to use a slimline design. I created a mat layer comprising a panel of each of the 4 colours, then added a white panel embossed with the Snowflake Sky embossing folder (you can see this detail more clearly on the photo below). Whilst this is a narrow embossing folder, it's easy to emboss one half of the panel then move the cardstock along and emboss the other half to achieve a continuous background.

I hung each pair of skates from a silver-on-white heat-embossed wreath, decorated with clear basic rhinestones for a little added sparkle. I finished each wreath with a large co-ordinating bow (this is from the retired Pierced Blooms Dies). You can see the detail of the individual elements that make up the wreath and skates in the close-up below:


I added a simple sentiment, also from the 'Sophisticated Sled' stamp set to the bottom corner of my card base, to complete my card. The diecutting on this card took a little while, but I love the finished card - it was worth it!

Here is the visual summary of the key products used on today's project for you to pin for easy reference:


You can see all of my Product and 'How To' summaries on my 'How To - Tips and Techniques' Pinterest board in case you've missed any. 

Before you reach for your ink and papers, check out what our amazing team has created to inspire you this week:

Here's a quick recap of our challenge rules:
 
1.  Create a new paper project
2.  Upload your creation to your blog with a link back to us and provide a direct link to the post featuring your challenge submission.
3.  Please link your card to no more than four challenges, TOTAL.
4.  Have FUN!

Enjoy your day; I'll be spending mine attending more of the virtual #Stampin' Up! Backstage@Home2024 event - a training event for leaders with lots to be learned. I'll be back tomorrow with another project. Until then, happy stampin'!


Stampin' Up! Supplies Used: 

Table built using Product Table Builder by The Crafty Owl - Independent Stampin' Up! Demonstrator.

Pierced Blooms And A Hippo Birthday PP586

by Joanne James10. April 2022 08:00

Today it's Sunday and time for this week's new challenge over at The Paper Players! It's the turn of the fabulous Anne Marie to host this week and she has a bright colour challenge for us to work with:
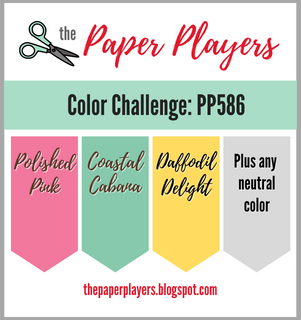
    

I love Anne Marie's bright and sunny colours this week and ended up making a couple of cards. First up I used this week's layout over at Hand Stamped Sentiments and went with some florals, care of my Pierced Blooms Dies - take a look:
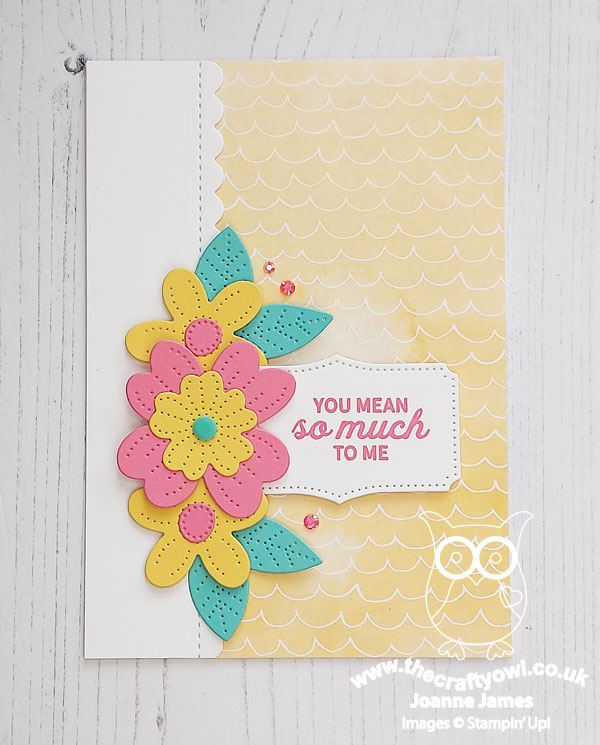
 

Here's the low-down on today's card:

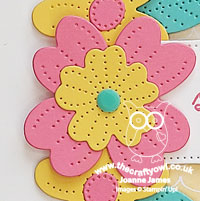
I diecut a trio of layered flowers and leaves and paired them with a piece of Daffodil Delight coloured Hand Penned designer series paper and used white as my neutral. A few polished pink gems add a touch of sparkle to the front of my card:
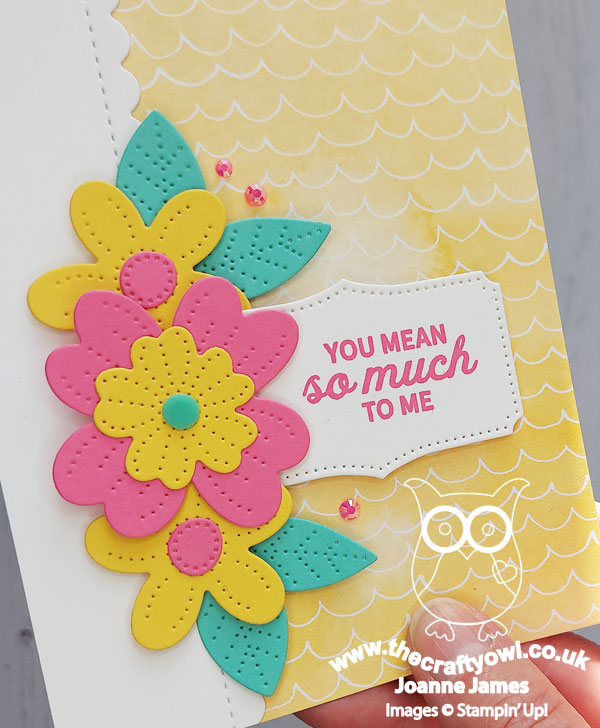
 

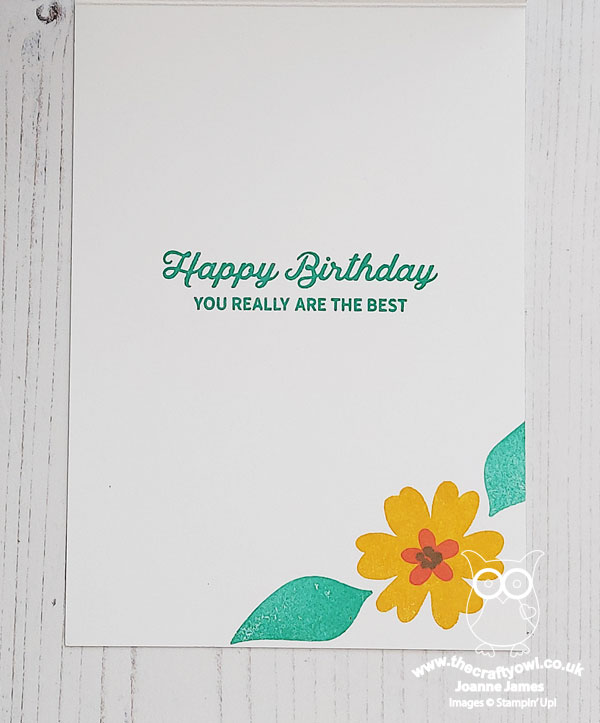
And a little extra stamping inside completes my card:
 

I wanted to try and use these colours on something other than flowers, so made a second card using the retiring 'Hippo Happiness' stamp set and co-ordinating Hippo & Friends Dies:
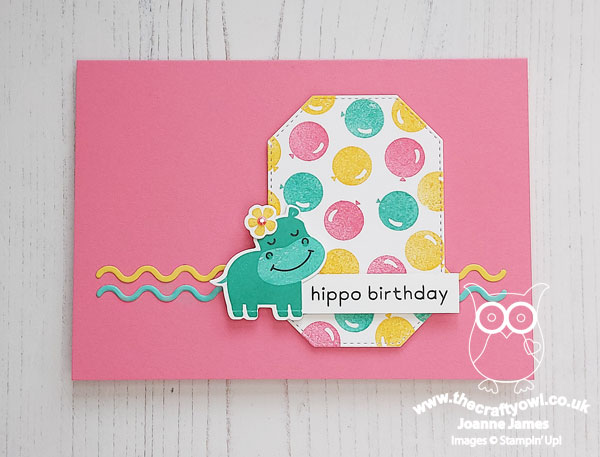
 

Some simple stamping and diecutting is all there is to it. The best part about this card is definitely the punny sentiment though - Hippo birthday...
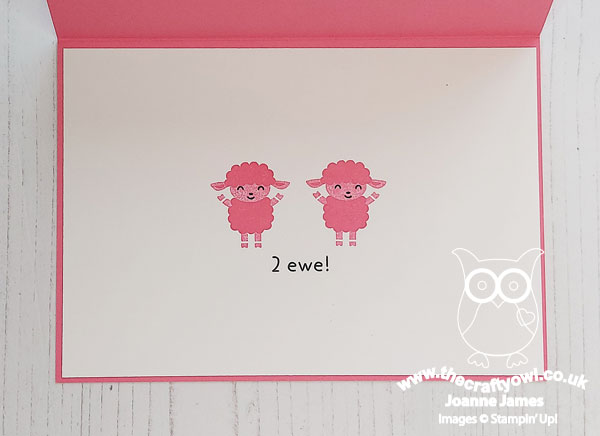
 

... 2 ewe! Isn't that just so sweet?!
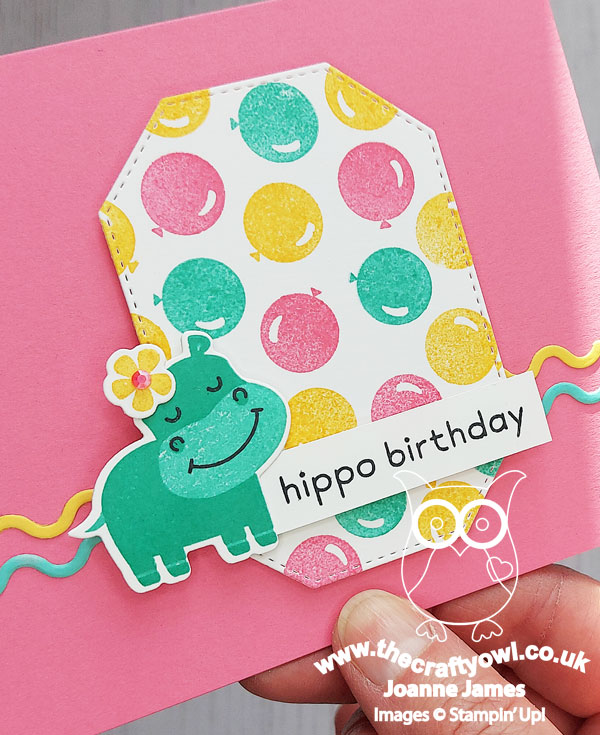
 

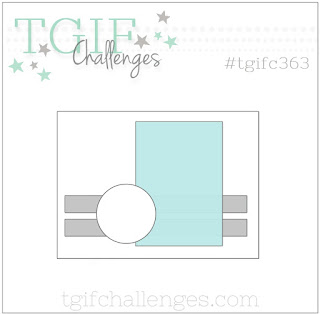
I used the sketch over at TGIF Challenges this week for the layout for this card and I am also linking up over at SUO Challenges where they are all about 'animals and critters' for their current challenge.
Two very different cards but I think both work with these colours. Which one do you prefer? Do leave me a comment below - I'd love to hear your thoughts.

Here is the visual summary of the key products used on today's projects for you to pin for easy reference:
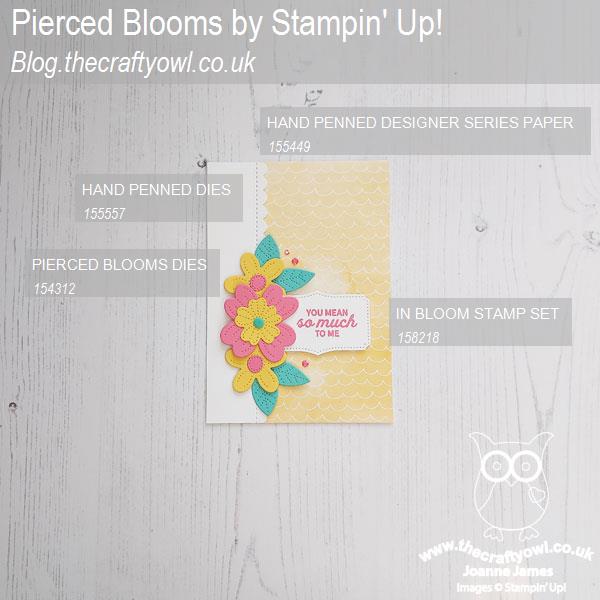
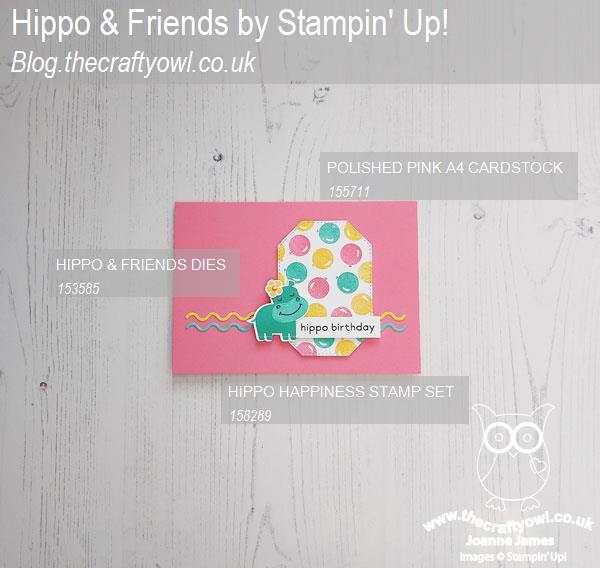


You can see all of my Product and 'How To' summaries on my 'How To - Tips and Techniques' Pinterest board in case you've missed any. 

Before you reach for your ink and papers, check out what our amazing team has created to inspire you this week:

Here's a quick recap of our challenge rules:
 
1.  Create a new paper project
2.  Upload your creation to your blog with a link back to us and provide a direct link to the post featuring your challenge submission.
3.  Please link your card to no more than four challenges, TOTAL.
4.  Have FUN!

Enjoy your day; we have some chores to take care of and we are out to lunch - should be a good day! I'll be back tomorrow with another project. Until then, happy stampin'!


Stampin' Up! Supplies Used (where still available): 
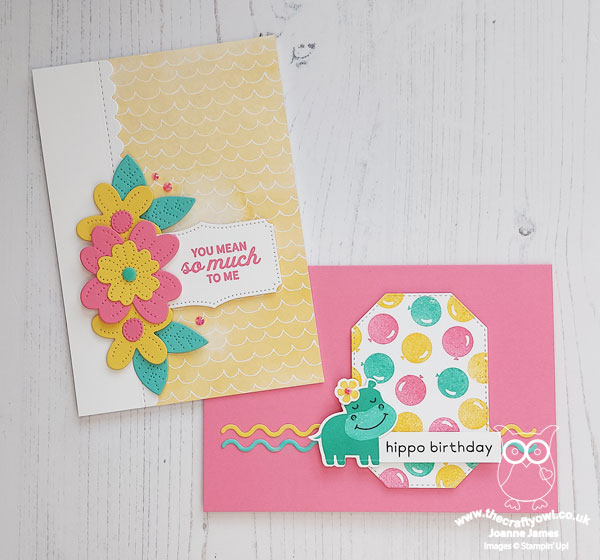
Table built using Product Table Builder by The Crafty Owl - Independent Stampin' Up! Demonstrator.


Pierced Blooms For The Happiest of Birthdays

by Joanne James7. April 2022 15:00

It's Thursday and today's card is for a couple of challenges: 


I used the colour palette over at TGIF Challenges (love those colours!) and the new sketch over at Atlantic Hearts Sketch Challenge for a birthday card to pay homage to a favourite retiring stamp set and some of my most favourite ever dies - take a look:


Here's the low-down on today's card:

Happiest of Birthdays - I used the big sentiment from 'Happiest of Birthdays' front and centre - the size of this greeting really makes a card, with nothing more than some decoration required.

Farewell Pierced Blooms - For said decoration, I used my Pierced Blooms Dies to cut some flowers and leaves and layered them to decorate both the outside and the inside of my card, where I also used another of the sentiments in the set:

Finishing Touches - A strip of contrasting Brights designer paper, some 'retired) sparkly enamel dots and a pair of tiny brushed brass butterflies add some final finishing touches:

Some of my favourite retiring products today though, both of which will be 'keepers' for me; it's not all sad though - I'm sure there will be some great new ones arriving soon!

Here is the visual summary of the key products used on today's project for you to pin for easy reference:


You can see all of my Product and 'How To' summaries on my 'How To - Tips and Techniques' Pinterest board in case you've missed any. 

Enjoy your day; I'll be back tomorrow with another project. Until then, happy stampin'!


Stampin' Up! Supplies Used: 

Table built using Product Table Builder by The Crafty Owl - Independent Stampin' Up! Demonstrator.

Pastel Pierced Blooms CAS Thank You Card CCS459

by Joanne James1. March 2022 13:00

It's Tuesday and time for a new challenge over at CAS Colours & Sketches. It's the first of March and a new month means a new hostess! Jeanne is hosting this month and our first challenge is a colour challenge: 


Since it's the first of March and St David's Day I feel like I should be using daffodils on my card, but Jeanne's colour choices don't really lend themselves to my national flower! Instead my card today features some pierced blooms and uses the sketch layout over at Fusion:


I used all three colours for my duo of diecut blooms and added them to a simple layered background. A 'thanks' sentiment from 'Artistically Inked' and a trio of Fresh Freesia rhinestones complete today's card and goes across the centre middle row of the Paper Craft Crew TicTacToe board too. 


Here is the visual summary of the key products used on today's project for you to pin for easy reference:


You can see all of my 'How To' summaries on my 'How To - Tips and Techniques' Pinterest board in case you've missed any. 

As a reminder, for our colour challenges, you must use all of the stated challenge colours. You may also use neutral colours; however, the challenge colours should be the most noticeable ones featured on your card. We use Stampin' Up! color names for reference, but you are welcome to use any other companies' products as long as you match the challenge colours as closely as possible.

Enjoy your day and I'll be back tomorrow with another project. Until then, happy stampin'!


Stampin' Up! Supplies Used:

Table built using Product Table Builder by The Crafty Owl - Independent Stampin' Up! Demonstrator.

Daffodil Daydream Meets Daffodil Afternoon For Sunday Stamps

by Joanne James20. January 2022 13:28

Today I'm sharing a card that is a 'sneak peek' of one of the cards that I am making with the lovely ladies signed up form my 'Daffodil Daydream' online card class that is taking place next week; I used the great sketch over at Sunday Stamps for my layout, so am linking up with their current challenge. Here's their sketch:

And here's the card that I made using it as my starting point:


Here's the low-down on today's card:

Daffodil Afternoon - I knew I wanted to use this particular design of Daffodil Afternoon designer series paper as my background. Bold designs on dark backgrounds can be intimidating, so I chose it as I wanted to give my class attendees ideas how to use them. Taking advantage of the split panel and choosing the lighter colours for both the card base and mat layer both serve to lighten this pattern. Lots to love about this paper pack, but most of all - it's FREE with a £45 purchase during the current Sale-A-Bration promotion! If you buy the Daffodil Daydream stamp set and die bundle, this makes a great free product choice to accompany it as it co-ordinates beautifully.  

Daffodil Dies - And so onto those Daffodil Dies! There are lots of die pieces in this set but they go together really easily when you know how. We will be going through that in class, so it was only right that I make up a couple of flower heads and use them to decorate my sentiment label. I cut them from colours that matched the daffodils on the paper, then added some ink with a blender brush to each piece to bring a little more depth to the colours. 

And A Beautiful Shape - Finally, I did start out with a circle shape as per the sketch, albeit I then layered it with my sentiment label and daffodil heads almost covering it up! You can see that circle. courtesy of a new die in the Beautiful Shapes set, a little closer on the photo below, where the debossed detail can just about be seen:


I know this die is one I'll be using lots; the added detail makes it a nice centrepiece. It's no stitched circle, granted, but it is a nice alternative!

I'm looking forward to making a version of this card in my 'Daffodil Daydream' online card class next week. I have lots of other classes and events planned in the coming months - if you would like more information, then do get in touch - I'd love you to join me!

Here is the visual summary of the key products used on today's project for you to pin for easy reference:


You can see all of my 'How To' summaries on my 'How To - Tips and Techniques' Pinterest board in case you've missed any. 

Enjoy your day; I have been granted a free pass on the school run this afternoon, so am fortunate to be getting a little extra crafting time (I might even make a head start on tomorrow's chores too!). I'll be back tomorrow with another project. Until then, happy stampin'!


Stampin' Up! Supplies Used:

Table built using Product Table Builder by The Crafty Owl - Independent Stampin' Up! Demonstrator.

Pantone-Inspired Pierced Blooms You're Amazing Card CCS 418

by Joanne James4. May 2021 12:00

It's Tuesday and time for a new challenge over at CAS Colours & Sketches. Samantha is hosting for the month of May and our first challenge is a colour challenge: 


Samantha's chosen colours this week are very reminiscent of the 2021 Pantone Colour of the Year pairing of grey and yellow so are very contemporary and on point. I wanted the yellow to be my 'white space' on my card as I wanted to use white as part of my design, so I grabbed this week's Global Design Project sketch layout and set to work with my 'In Bloom' stamp set and co-ordinating Pierced Blooms Dies - take a look:


Here's the low-down on today's card:

I used the label from the Pierced Blooms dieset for my sentiment which I stamped in Basic Grey, then added a cluster of diecut flowers and leaves in the challenge colours and white to mimic the circular shape of the sketch. In order to preserve a feeling of CAS and my all-important white (or yellow!) space, I resisted the urge to add any additional embellishments to my card:


I had a spare diecut flower leftover so I added that to the inside too:


Here is the visual summary of the key products used on today's project for you to pin for easy reference:


You can see all of my 'How To' summaries on my 'How To - Tips and Techniques' Pinterest board in case you've missed any. I really love this dieset and am thrilled that it has carried over to the new annual catalogue too so will be with us beyond the end of June when the mini catalogue leaves us. I can see me getting lots more use from it!

As a reminder, for our colour challenges, you must use all of the stated challenge colours. You may also use neutral colours; however, the challenge colours should be the most noticeable ones featured on your card. We use Stampin' Up! color names for reference, but you are welcome to use any other companies' products as long as you match the challenge colours as closely as possible.

Enjoy your day and I'll be back tomorrow with another project. Until then, happy stampin'!

Stampin' Up! Supplies Used:

Table built using Product Table Builder by The Crafty Owl - Independent Stampin' Up! Demonstrator.

Heartfelt Wishes in Shades of Green

by Joanne James15. March 2021 14:00

Happy Monday everyone - another Monday, another week! This week includes St Patrick's Day, so there are naturally lots of challenges that feature either the colour green, the theme of luck, shamrocks and generally all things Irish around at the moment! So today I'm sharing a card inspired by a few of them:


I was inspired by the sketch and photo over at Inspired By this week, and the lovely ladies over at Just Add Ink are asked us to create with shades of green. At The Card Concept the theme is the 'Luck of the Irish'. Whilst I don't know anyone who celebrates St Patrick's Day card and would appreciate a card, it's always a good opportunity to create a good luck card or something in green - such a soothing colour. I decided to make a clean and simple card that has a play on the word 'luck' that is perfect to send to a friend - take a look:


Here's the low-down on today's card:

Shades of Green - I masked off my Basic White cardstock panel and used my chosen shades of green - Soft Sea Foam, Granny Apple Green, Call Me Clover and Shaded Spruce - with my blending brushes to create a trio of columns of blended ombre greens, deepening in colour towards my sentiment and lucky clover/shamrock at the base. There is something so calming about shades of green used in such a simple way I think - don't you agree? 

Heartfelt Wishes - The sentiment I used on my card today comes from the 'Heartfelt' stamp set and is the perfect play on the word 'luck' to show appreciation for someone's friendship and seemed to fit the theme perfectly, with a card that I could actually send to someone! 

Pierced Blooms Lucky Clover - I created my shamrock or lucky four-leaf clover from a five-petal floral die from the Pierced Blooms Dies. I simply snipped away part of one of the petals to leave me with 4 leaves and a stem:


I finished my clover with a gold faceted gem to add an extra detail to my focal embellishment (from my collection rather than the pot at the end of the rainbow I hasten to add!)


Here is the visual summary of the key products used on today's project for you to pin for easy reference:


You can see all of my 'How To' summaries on my 'How To - Tips and Techniques' Pinterest board in case you've missed any. 

Enjoy your day; I have just received a '911' from one of the James Juniors imploring me to bring a snack at school pickup - clearly lunch was lacking today and I think my growing 13 year old son has hollow legs at the moment! Whatever did we do before Whats App??! So off to sort before I head out on the school run! I'll be back tomorrow with my card for this week's new challenge over at CAS Colours & Sketches. Until then, happy stampin'!


Stampin' Up! Supplies Used:

Table built using Product Table Builder by The Crafty Owl - Independent Stampin' Up! Demonstrator.


Flower and Field Happy Thoughts TTT 102

by Joanne James25. February 2021 15:00

It's Thursday and time for a new challenge over at TicTacToe! It's the turn of Team X to host this week and the lovely Betty is our featured designer this week. This is the fun board that we are playing along with: 


I went down the first column with thinking of you/stitching/flowers for my card today, that also makes the most of one of the Sale-A-Bration freebies that can still be yours for a few more days so is perfect to play along with the team over at TGIF Challenges too - take a look:


Here's the low-down on today's card:

Flower and Field - Although I didn't eventually choose it, I was considering 'shades of green' as one of my board options and I immediately thought of this paper in the Flower and Field Sale-A-Bration DSP pack as it makes such a beautiful use of Just Jade as its background colour. I decided to use this paper anyway as it's so pretty and the green, pink and yellow combo give me three colours to play with the peeps over at Paper Craft Crew this week too! It's also a great reminder that there are just 3 days to go until the end of the current Sale-A-Bration promotion. If you are a regular Stampin' Up! customer, don't be caught out - the current promotion ends a whole month earlier than it has in previous years. That's no bad thing, as it means we will get a second Sale-A-Bration promotion later in the year, but if you still have things on your current SAB wishlist, you need to earn them whilst you still can!

Thinking of You - The sentiment I chose for my card today comes from the 'Happy Thoughts' stamp set, inspired by the Million Sales Achiever Jackie Bolhuis. This is a sentiment-only set, designed with beginner crafters in mind. It has great basic sentiments for every occasion, along with some longer ones that work perfectly as a feature or on the insdie of a card. What's more, this set was designed to co-ordinate with a number of our basic punches, so is really versatile and a great way to build on a beginner's collection of basic items. 

Pierced Blooms - I added a few Pierced Blooms to decorate my card - another long-awaited addition to my collection - although as I went to finishe my card with some black enamel dots on those itty bitty pink flowers I realised ... yes, I've run out! So use your imagination as I go off to order more of these craft room staples!

Here is the visual summary of the key products used on today's project for you to pin for easy reference:


You can see all of my Product and 'How To' summaries on my 'How To - Tips and Techniques' Pinterest board in case you've missed any. 

A tictactoe board offers so many creative possibilities - how does this week's board inspire you? Why not have a go? We would love to see you in the gallery and who knows - you might be selected for Designer's Choice and be eligible to be a guest designer on a future challenge. 

Enjoy your day; I'll be back tomorrow with another project. Until then, happy stampin'!


Stampin' Up! Supplies Used: 

Table built using Product Table Builder by The Crafty Owl - Independent Stampin' Up! Demonstrator.

New Online Exclusives

There are new products available exclusively in the online store from 5 November - check them out here.

Latest Kits!

Stampin Cut and Emboss

The Layered Landscapes Kit and Nature's Paintings Kit are the latest kits in the online store - get yours here!

Shop Online

Access my online shop 24 x 7, 365 days of the year:

Current November hostess code:

9NKXDTTR

Shop Online

Mini Catalogue

BROWSE THE CATALOGUE

'Tis The Season - the new Stampin' Up! Mini Catalogue is here! For more details and to download your copy click here

Scrapbooking

Stampin' Up! has introduced a new range of 12x12" scrapbooking product and kit - the full range is now available to purchase online. To download a copy of the new digital Scrapbooking Catalogue click here.

2024-25 Annual Catalogue

BROWSE THE CATALOGUE

Click on the image to download your copy of the 2024-25 annual catalogue. For a full list of current SU! supplies, go to my online store. If you would like any help or advice, please drop me a line at joanne@thecraftyowl.co.uk or give me a call on 07773 421446 - I'd be happy to help.

Join My Team

It's always a great time to join Stampin’ Up! New team members can get £130 worth of products for only £99 + free business supplies + free shipping + all the fun being a part of Stampin’ Up! Stampin' Up! has something for everyone: join my growing team and benefit from my support to enjoy Stampin' Up! however you choose.

If you're interested, call me for a chat to understand how I can help you realise your goals. Alternatively, if you have already decided to sign up and you just can't wait, please click here for the link to the online form where you can sign up and order your starter kit right away! 

About Me

Hi I'm Joanne and live in Northampton and when I'm not looking after my husband and two beautiful children, am an avid crafter with a passion for all things Stampin' Up!

I must confess that I have never been a big rubber stamper - until I discovered Stampin' Up! that is. I love the fact that I can get such great results with co-ordinating stamps, inks, papers and punches - the possibilities are endless! Join me on my stamping journey as I share the things I love and be inspired to create amazing things yourself!

Follow Me

Monthly Newsletter

Box Builder

Click the button above to use Box Buster to create your custom box design using the Envelope Punch Board!

Kits Collection Now Available!

Stampin Cut and Emboss

The new Kits Collection from Stampin' Up! is now available!

Click here to see the current kits available and order yours online today.

I Design For


Stampin' Up Stuff

This is my personal blog and is not endorsed by Stampin’ Up! I hope you find it a plentiful source of ideas and personal inspiration but please don't copy my designs for contest submission or use for classes, publication or sale without express permission.