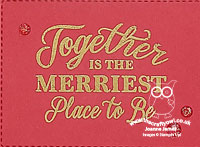
Merriest Frames Snowy White Velvet Christmas Card

by Joanne James12. December 2022 09:00

Today I've a quick post to share a card for the current challenges over at Time Out where the theme is 'Winter/Holiday Season' and at SUO Challenges where the theme is Christmas:

    SUO Challenges -

I love to make an all-white card and I hadn't made any this year, so I decided that the theme of 'Winter' along with the sub-zero temperatures here in the UK  - and waking to snow on the ground this morning were the perfect inspiration - take a look:


Here's the low-down on today's card:

I used some retiring favourites for today's card: Snowy White velvet sheets and the Merriest Moments stamp set and hybrid embossing folder. I went with some simple layers: First I ran a piece of velvet paper through with the embossing folder, then added this to my card front. Then I used the embossing folder with the embossing die to cut the large base foliage design out of white glimmer paper and adhered it to my cardbase. I then added another diecut and embossed foliage layer, this time using the smaller detailed foliage die and Snowy White velvet paper. I cut a rectangle of white glimmer paper and used this to back a diecut stitched rectangle of white cardstock, onto which I heat-embossed my sentiment in silver: 


I added a trio of opal rounds to complete my design. This is a card of many layers and wonderful texture, but was actually quick and easy to execute. I will miss Merriest Moments for sure!

Here is the visual summary of the key products used on today's project for you to pin for easy reference:


You can see all of my 'How To' summaries on my 'How To - Tips and Techniques' Pinterest board in case you've missed any. 

Enjoy your day and I'll be back tomorrow with another project. Until then, happy stampin'!


Autumn Leaves Merriest Frames

by Joanne James25. October 2021 06:00

Today I'm sharing a card using Jacqui's layout over at Freshly Made Sketches and the photo inspiration over at Just Add Ink:


Jacqui's sketch has a lovely open space and the colours on the leaves in the JAI inspiration photo are just beautiful! They were the very inspiration I needed to create a project I've been wanting to get to since my last card class - take a look:


Here's the low-down on today's card:

Merriest Frames - I'm such a fan of the Merriest Frames Embossing Folder and die set; whilst designed for Christmas, by changing up the colours and using a non-festive sentiment gives this frame a completely different look that stretches it across the seasons. It was also the perfect centrepiece for Jacqui's sketch! I also used it to add a touch of glamour to my envelope too.

Blended Autumn Leaves - I used a blending brush to add a collection of autumnal colours to my leafy frame and added a few small raindrop clear enamel dots in a nod to the photo. 

Beauty of Tomorrow - I showcased my favourite autumnal sentiment from the 'Beauty of Tomorrow' stamp set in the centre of my frame and added a small twine-tied diecut leaf embellishment to complete my card:


I really love this card! The frame is so lovely - a riot of blended autumnal colour.

Here is the visual summary of the key products used on today's project for you to pin for easy reference:


You can see all of my 'How To' summaries on my 'How To - Tips and Techniques' Pinterest board in case you've missed any. 

Enjoy your day and I'll be back tomorrow with another project. Until then, happy stampin'!


Stampin' Up! Supplies Used:

Table built using Product Table Builder by The Crafty Owl - Independent Stampin' Up! Demonstrator.

Merriest Moments Simple One layer and a Fancy Technique

by Joanne James14. October 2021 11:10

Today I'm sharing a couple of cards with you. I held my monthly class online at the start of the week and it featured the Merriest Moments bundle and following the discussions we had on the call I wanted to share another couple of cards featuring the most versatile of bundles. My first card is for the current challenge over at The Alphabet Challenge Blog, where they are on 'N is for No Layer'. I made the simplest of cards using a festive red and white colour combination - take a look:
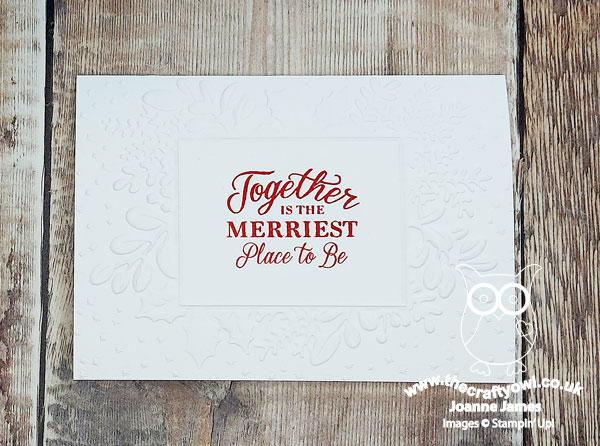
 

I embossed my thick basic white card base directly with the Merriest Frames Hybrid Embossing Folder and stamped my sentiment directly into the frame centre in Real Red. This embossing folder really is so pretty and whilst I did try a version adding some colour to the foliage, I didn't like it anywhere near as much as the 'naked' version - the detail of the embossing is stunning and I'm not sure that the photos do it justice:
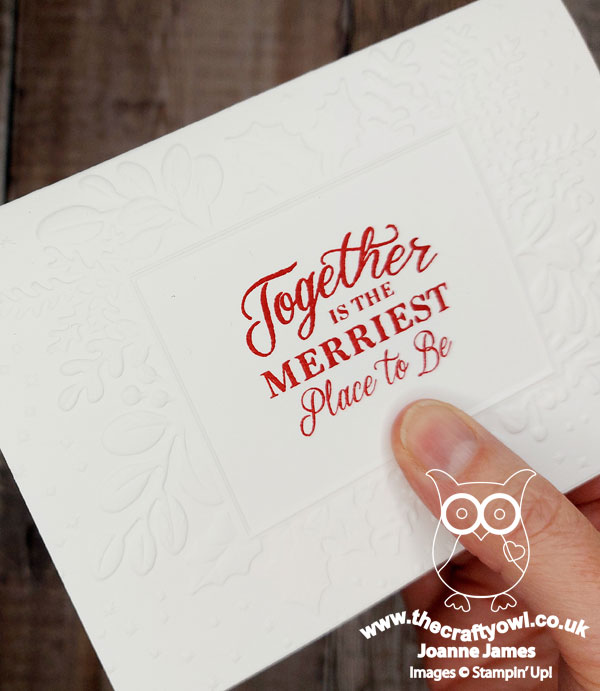
 

This really is one of the easiest cards to make and would be great both for cards that need to be sent overseas and weight is an issue for example, or you simply want an impressive design that can be produced in multiples really quickly.

For my second card, I wanted to use the same embossing folder to join this week's trend week challenge over at Just Us Girls where they are asking us to experiment with a technique called heat embossed embossing folders:

If you've never tried this technique before, you should definitely watch Jennifer McGuire's video on it where she gives a thorough overview and lots of examples - you can see her video here. I've never tried it before, but though the Merriest Frames Hybrid Embossing Folder would be a great one to experiment with. For this card, I went bold with a festive Real Red and metallic gold colour combination - take a look:
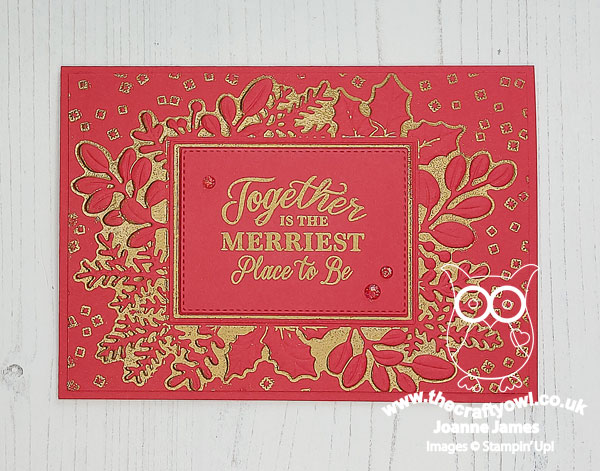
 

I decided to use the whole embossing folder and not cut out the foliage frame, as I wanted the background detail too. I added my red panel to a red card base, and also heat embossed my sentiment into gold onto a red stitched rectangle which I popped up on dimensionals in the centre of the frame, adding a trio of red sparkly faceted dots for good measure. Check out the detail that the heat embossing adds to the foliage:
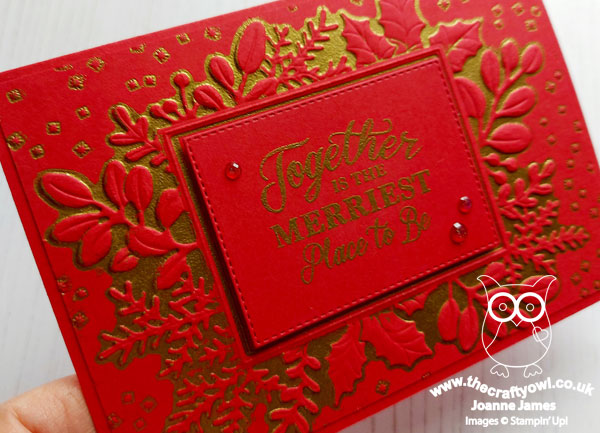
 

This was a really fun technique to try and I have to say I think the key to getting a good finish is to use a traditional rubber brayer to ink the flat side of your embossing folder with the Versamark - this way you don't get it into areas where you don't want to see the heat embossed detail and it picks out the surrounding space easily. This was my first attempt and will definitely be experimenting with other versions (and embossing folders!) If this technique is something that interests you, you should definitely check out the Just Us Girls DT samples and the gallery, where you will also see another sample using this embossing folder made by one of my lovely class attendees, Deborah Wheeler - how great that we were both inspired following my class!

I was asked by one of my customers last week, "If you could only choose one new bundle this Christmas, which one would it be?" This was a question that required much thought before answering, not least because I have never been known to buy just one stamp set and the beauty of being a Stampin' Up! demonstrator is that I acquire lots and lots of stamp sets cheaply or even for free! I decided that if I was only buying one bundle, it would have to be something that was versatile; I would want to be able to do lots of things with it and not get bored due to a lack of creative opportunities. The answer I gave to that customer? The Merriest Moments Bundle - it absolutely delivers on all fronts!

Here is the visual summary of the key products used on today's projects for you to pin for easy reference:
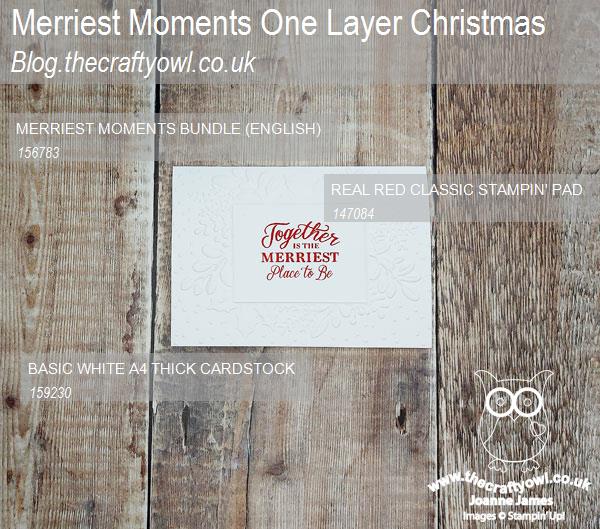
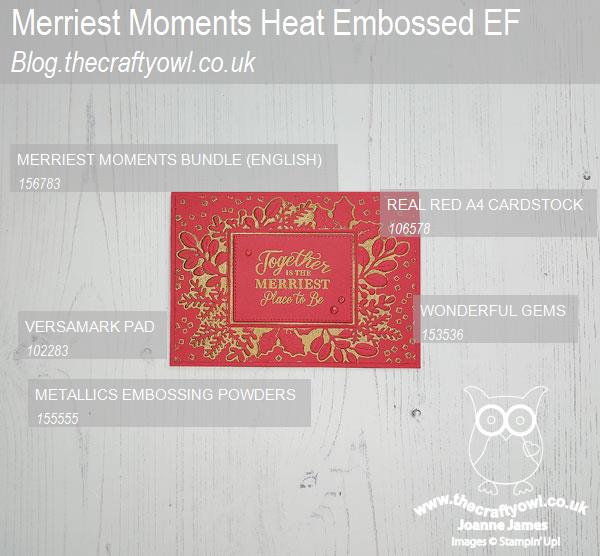


You can see all of my 'How To' summaries on my 'How To - Tips and Techniques' Pinterest board in case you've missed any. 

Enjoy your day and I'll be back tomorrow with another project. Until then, happy stampin'!


Stampin' Up! Supplies Used:

Table built using Product Table Builder by The Crafty Owl - Independent Stampin' Up! Demonstrator.

Merriest Moments Traditional Christmas Card PP553

by Joanne James8. August 2021 08:00

Today it's Sunday and time for this week's new challenge over at The Paper Players! It's the turn of the fabulous Claire to host this week and she has a colour challenge for you to work with:


These colours immediately made me think of florals, then Christmas and since I had just taken delivery of some new goodies that ticked both boxes I couldn't wait to try them out - take a look:


Here's the low-down on today's card:

Merriest Moments - Merriest Moments, like the Art in Bloom bundle in the annual catalogue, is a 3 in 1 bundle comprising a stamp set, dies and a hybrid embossing folder that enables you to get beautifully textured die-cut images in seconds.

Perfect for the challenge over at Just Add Ink this week, where they are asking us to 'use a frame' on our cards, the Merriest Moments hybrid embossing folder adds a beautifully textured frame, choc full of festive foliage. I embossed my card base, then embossed and cut my frame and I added some sponged white kraft ink to give it some highlighting:


I added a sentiment panel and a trio of red and yellow Christmas poinsettias to accent it. I also stamped another flower and a sentiment inside my card to finish:


This bundle has everything you need to make your Christmas cards in one go - just add your colours and create! This bundle will feature in my class on October 11th so if it appeals to you, then do drop me a line to be added to class list. Meanwhile, I can't wait to create more cards with this bundle!

Here is the visual summary of the key products used on today's project for you to pin for easy reference:


You can see all of my Product and 'How To' summaries on my 'How To - Tips and Techniques' Pinterest board in case you've missed any. 

Before you reach for your ink and papers, check out what our amazing team has created to inspire you this week:

Here's a quick recap of our challenge rules:
 
1.  Create a new paper project
2.  Upload your creation to your blog with a link back to us and provide a direct link to the post featuring your challenge submission.
3.  Please link your card to no more than four challenges, TOTAL.
4.  Have FUN!

You can see all of my 'How To' summaries on my 'How To - Tips and Techniques' Pinterest board in case you've missed any. 

Enjoy your day; I am looking forward to a catch-up day today, since I've been out of action decorating for the last few days. I'm hoping to squeeze in a little crafting too so that I can be back tomorrow with another project. Until then, happy stampin'!


Stampin' Up! Supplies Used: 

Table built using Product Table Builder by The Crafty Owl - Independent Stampin' Up! Demonstrator.
 

New Online Exclusives

There are new products available exclusively in the online store from 5 November - check them out here.

Latest Kits!

Stampin Cut and Emboss

The Layered Landscapes Kit and Nature's Paintings Kit are the latest kits in the online store - get yours here!

Shop Online

Access my online shop 24 x 7, 365 days of the year:

Current November hostess code:

9NKXDTTR

Shop Online

Mini Catalogue

BROWSE THE CATALOGUE

'Tis The Season - the new Stampin' Up! Mini Catalogue is here! For more details and to download your copy click here

Scrapbooking

Stampin' Up! has introduced a new range of 12x12" scrapbooking product and kit - the full range is now available to purchase online. To download a copy of the new digital Scrapbooking Catalogue click here.

2024-25 Annual Catalogue

BROWSE THE CATALOGUE

Click on the image to download your copy of the 2024-25 annual catalogue. For a full list of current SU! supplies, go to my online store. If you would like any help or advice, please drop me a line at joanne@thecraftyowl.co.uk or give me a call on 07773 421446 - I'd be happy to help.

Join My Team

It's always a great time to join Stampin’ Up! New team members can get £130 worth of products for only £99 + free business supplies + free shipping + all the fun being a part of Stampin’ Up! Stampin' Up! has something for everyone: join my growing team and benefit from my support to enjoy Stampin' Up! however you choose.

If you're interested, call me for a chat to understand how I can help you realise your goals. Alternatively, if you have already decided to sign up and you just can't wait, please click here for the link to the online form where you can sign up and order your starter kit right away! 

About Me

Hi I'm Joanne and live in Northampton and when I'm not looking after my husband and two beautiful children, am an avid crafter with a passion for all things Stampin' Up!

I must confess that I have never been a big rubber stamper - until I discovered Stampin' Up! that is. I love the fact that I can get such great results with co-ordinating stamps, inks, papers and punches - the possibilities are endless! Join me on my stamping journey as I share the things I love and be inspired to create amazing things yourself!

Follow Me

Monthly Newsletter

Box Builder

Click the button above to use Box Buster to create your custom box design using the Envelope Punch Board!

Kits Collection Now Available!

Stampin Cut and Emboss

The new Kits Collection from Stampin' Up! is now available!

Click here to see the current kits available and order yours online today.

I Design For


Stampin' Up Stuff

This is my personal blog and is not endorsed by Stampin’ Up! I hope you find it a plentiful source of ideas and personal inspiration but please don't copy my designs for contest submission or use for classes, publication or sale without express permission.