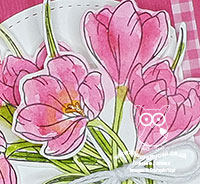
Pink Birthday Crocuses for PP484

by Joanne James29. March 2020 10:00


Today it's Sunday and time for this week's new challenge over at The Paper Players! It's my turn to host this week and as it's the fifth Sunday of the month we have a tic-tac-toe challenge for you to work with:
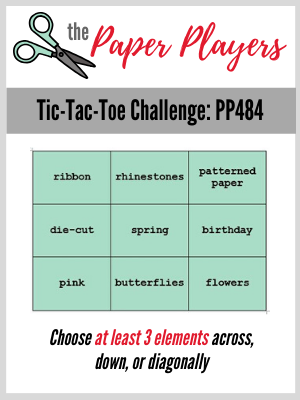
    

I'm getting used to the idea of a tic-tac-toe board; my starting point tends to be as many options as possible, so I ended up with 3 lines complete: central row - diecut, spring, birthday, and far right column - DSP, birthday, flowers and lastly the diagonal pink, spring, DSP - talk about over-achiever! I used Amy's sketch over at Freshly Made Sketches for my layout (great layout, Amy!) and decided to use one of my favourite new florals for a new purpose - take a look:
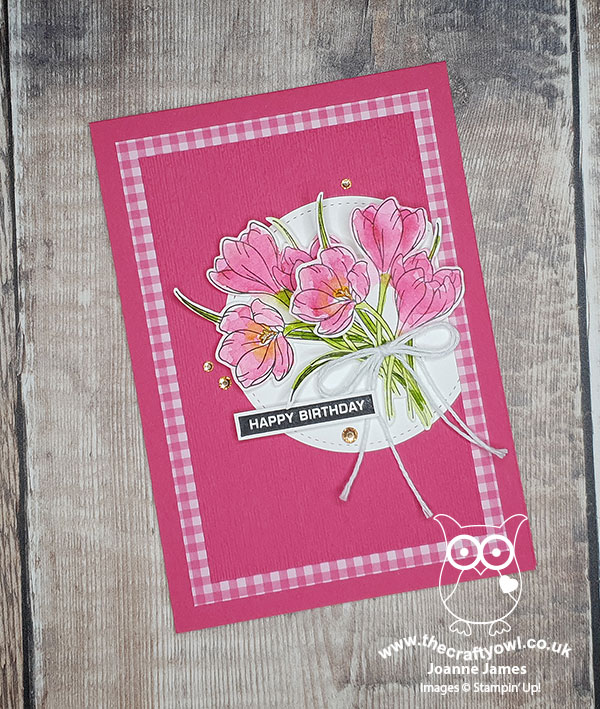
 

Here's the low-down on today's card:

Crocuses Are Not Just For Easter - I love the 'Easter Promise' stamp set and the crocus stamps. They are perfect for spring and I decided that they would make a pretty birthday card too. I chose my favourite pink, Melon Mambo, for today's card - did you know that you can actually get pink crocuses? I didn't, but Google showed me some so as my kids so often say, well it must therefore be true! I coloured and fussy cut a couple of the bunches for the front of my card, then added the row to the inside for a little extra detail:
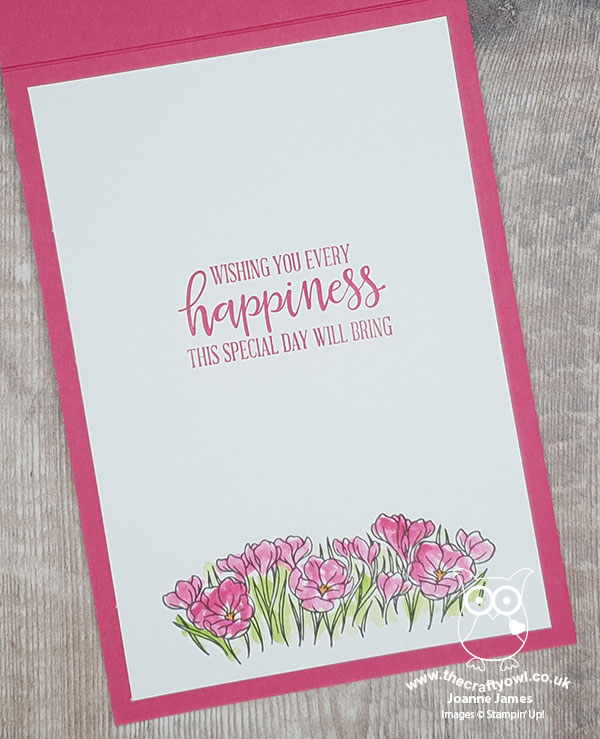
 

Label Me Bold - I used the Happy Birthday from 'Label Me Bold' on today's card; plain block sentiments are perfect for something simple where the florals are the main focus. 

Pretty In Pink Watercolour - I decided to use a rough watercolour to colour my crocuses. I stamped them in Stazon on watercolour paper and then added loose colour in layers, deliberately not keeping inside the lines (which was hard for the perfectionist in me!) and I just love the finished effect:
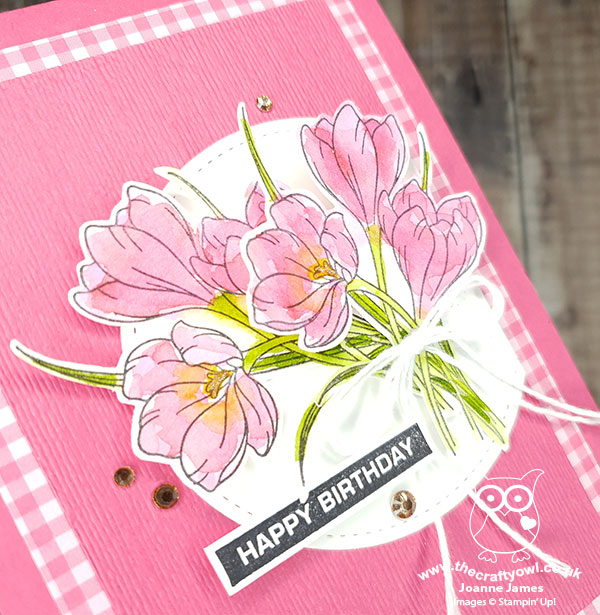
 

I added a twine bow and some champagne rhinestones to complete my card. I just LOVE this card - do you ever make a card that totally ticks all of your boxes? This is one of mine!

Here is the visual summary of the key products used on today's project for you to pin for easy reference:
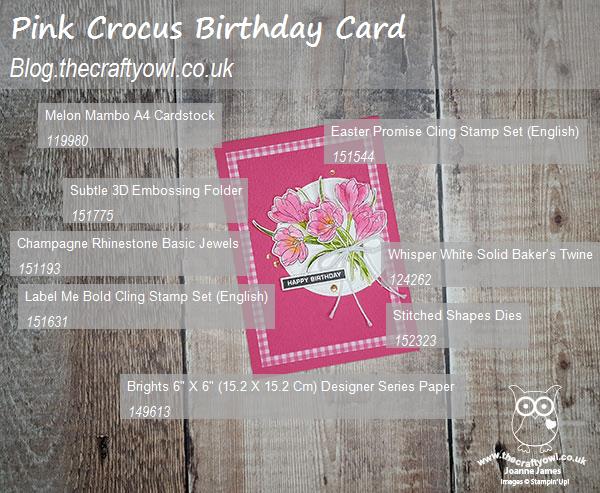
 

You can see all of my Product and 'How To' summaries on my 'How To - Tips and Techniques' Pinterest board in case you've missed any. 

Before you reach for your ink and papers, check out what our amazing team has created to inspire you this week:

Here's a quick recap of our challenge rules:
 
1.  Create a new paper project
2.  Upload your creation to your blog with a link back to us and provide a direct link to the post featuring your challenge submission.
3.  Please link your card to no more than four challenges, TOTAL.
4.  Have FUN!

You can see all of my 'How To' summaries on my 'How To - Tips and Techniques' Pinterest board in case you've missed any. 

Enjoy your day; the clocks went forward overnight so we have an hour less today, although in the grand scheme of things at the moment I'm not sure it will matter that much! We spent some time together yesterday completing a fiendishly tricky quiz that Ben has been set by school, so I think this afternoon it might be time to involve the grandparents in our endeavours! I'll be back tomorrow with another project. Until then, happy stampin'!


Stampin' Up! Supplies Used: 

Table built using Product Table Builder by The Crafty Owl - Independent Stampin' Up! Demonstrator.

Flowering Foils Metallics Birthday Card for AYSI 222

by Joanne James27. March 2020 12:00

Today I'm sharing my design team card for our new challenge over at As you See It where for this fortnight we have a fun recipe challenge for you:


I often struggle with this kind of recipe challenge, but must confess that along with Julee's Mojo Monday sketch for my layout (sketch 3) today's card came together quite easily - take a look:


Here's the low-down on today's card:

Flowering Foils - I decided to use the Flowering Foils Specialty Designer Series Paper as the basis for today's card. This is one of the second-release items that can be yours FREE with a purchase of £45 or more during the current Sale-A-Bration promotion and has been super popular with my customers, so I was keen to show them how they could use it. I used a rose-gold hatch patterned piece along with a piece of silver foil cut using my Stitched Rectangle Framelits for two of my layers, then fussy cut one of the flowers from another sheet to form the centrepiece of my card. I backed my flower with a stitched vellum circle to preserve the shape of the sketch but not detract from the detail of the bloom itself. These papers are so, so pretty and the photographs in today's post really don't do them justice - it is so difficult to photograph foil!  

Sparkle, Sparkle - To compliment the foiled papers, I decided to add lots of sparkle and shine. I used some white ribbon with a silver metallic edge for my bow, along with some silver twine behind my flower and a sprinkling of champagne rhinestone jewels and clear epoxy droplets for extra sparkle. I even added a silver (retired) tassle - then had to stop myself before I went really overboard!! 

Label Me Bold - Whilst this card would make a lovely wedding card, I have no need for one so decided instead that it would work equally well as a special birthday card. I inked up my 'Label Me Bold' stamp set for the first time to add a simple silver heat-embossed sentiment to my card. You can see that better on the photo below:


This sentiment stamp set was one of the first I bought from the new seasonal catalogue as I've been wanting a set like this for ages, but this is the first time I've inked it up. I love the clean, block font which is perfect to cut through the detail on a card like this.

So what do you think? Do you love these Flowering Foils as much as me?

Here is the visual summary of the key products used on today's project for you to pin for easy reference:


You can see all of my 'How To' summaries on my 'How To - Tips and Techniques' Pinterest board in case you've missed any. 

Before you put your creative thinking caps on, why not check out the blogs of the other As You See It team members:

Amy Jasper

Heather Cooper

Jan Clothier

Jane Knudsen

LeAnne Pugliese

Here's a summary of our challenge rules:

  • Create any card, scrapbooking page, 3D project or packaging project that fits the challenge.
  • Please include the challenge graphic and link back to the challenge in your blog post. Turn off word verification so we can leave you lots of lovely comments. Make sure you link the post not the whole blog to the Linky. Use #AYSIXXX when uploading to a public gallery.
  • If you’re unsure about ‘the rules’, check the details under the Challenge Guidelines tab on the As You See It Challenge homepage.

We look forward to seeing your creations in the AYSI gallery.

Enjoy your day and I'll be back tomorrow with another project. Until then, happy stampin'!


Stampin' Up! Supplies Used:

Table built using Product Table Builder by The Crafty Owl - Independent Stampin' Up! Demonstrator.

New Online Exclusives

There are new products available exclusively in the online store from 5 November - check them out here.

Latest Kits!

Stampin Cut and Emboss

The Perpetual Beauty Calendar Kit and Cherry Blossoms Treat Boxes Kit are the latest kits in the online store - get yours here!

Shop Online

Access my online shop 24 x 7, 365 days of the year:

Current December hostess code:

9NKXDTTR

Shop Online

Mini Catalogue

BROWSE THE CATALOGUE

'Tis The Season - the new Stampin' Up! Mini Catalogue is here! For more details and to download your copy click here

Scrapbooking

Stampin' Up! has introduced a new range of 12x12" scrapbooking product and kit - the full range is now available to purchase online. To download a copy of the new digital Scrapbooking Catalogue click here.

2024-25 Annual Catalogue

BROWSE THE CATALOGUE

Click on the image to download your copy of the 2024-25 annual catalogue. For a full list of current SU! supplies, go to my online store. If you would like any help or advice, please drop me a line at joanne@thecraftyowl.co.uk or give me a call on 07773 421446 - I'd be happy to help.

Join My Team

It's always a great time to join Stampin’ Up! New team members can get £130 worth of products for only £99 + free business supplies + free shipping + all the fun being a part of Stampin’ Up! Stampin' Up! has something for everyone: join my growing team and benefit from my support to enjoy Stampin' Up! however you choose.

If you're interested, call me for a chat to understand how I can help you realise your goals. Alternatively, if you have already decided to sign up and you just can't wait, please click here for the link to the online form where you can sign up and order your starter kit right away! 

About Me

Hi I'm Joanne and live in Northampton and when I'm not looking after my husband and two beautiful children, am an avid crafter with a passion for all things Stampin' Up!

I must confess that I have never been a big rubber stamper - until I discovered Stampin' Up! that is. I love the fact that I can get such great results with co-ordinating stamps, inks, papers and punches - the possibilities are endless! Join me on my stamping journey as I share the things I love and be inspired to create amazing things yourself!

Follow Me

Monthly Newsletter

Box Builder

Click the button above to use Box Buster to create your custom box design using the Envelope Punch Board!

Kits Collection Now Available!

Stampin Cut and Emboss

The new Kits Collection from Stampin' Up! is now available!

Click here to see the current kits available and order yours online today.

I Design For


Stampin' Up Stuff

This is my personal blog and is not endorsed by Stampin’ Up! I hope you find it a plentiful source of ideas and personal inspiration but please don't copy my designs for contest submission or use for classes, publication or sale without express permission.

DSP Special Release

Check out 3 popular designer series paper designs in fresh new colourways! Available exclusively in the online store from 3 December - check them out here