Cheerful Daisies Square Floating Frames Cards TTT218

by Joanne James20. July 2023 17:00

It's Thursday and time for a new challenge over at TicTacToe! It's the turn of Team X to host this week and our leader, the lovely Felicita, is our featured designer this week. This is the fun board that we are playing along with: 
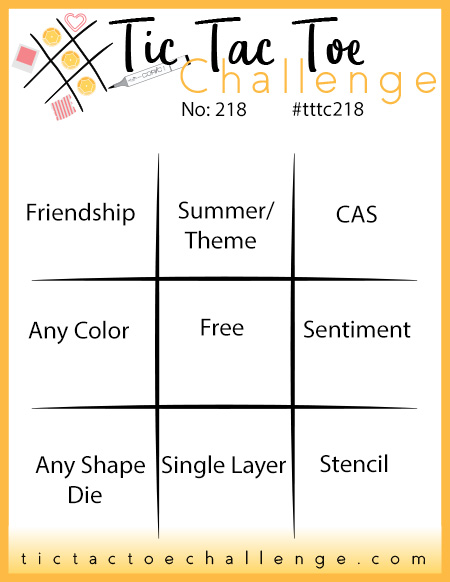
 

I went down the first column with Friendship/Any Colour/Any Shape Die and actually made two cards today, the fist one of which is for our challenge - take a look:
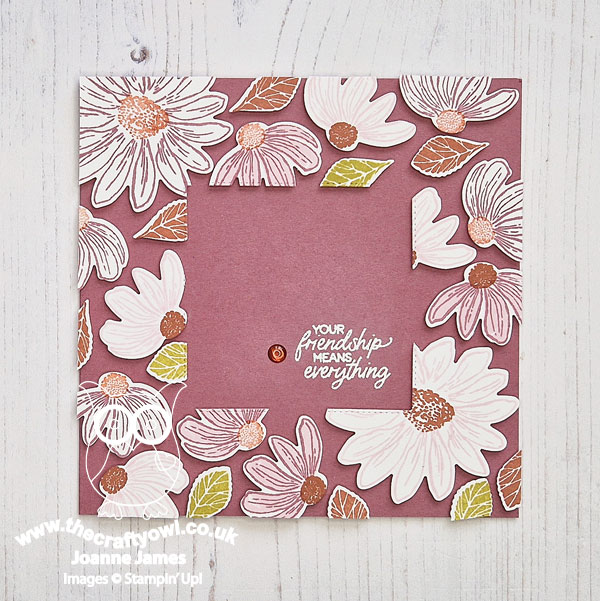
 

Here's the low-down on today's card:

Floating Frame - I haven't made a floating frame card in ages and I thought the new Cheerful Daisies bundle, with lots of differently shaped and sized pieces, would be perfect to showcase this technique. I decide to make two square cards (more on that in a moment) and stamped lots of daisies and leaves in my chosen colours, before diecutting and laying out on my craft mat to a cover a space slightly larger than my 6" card front. When I was happy that the whole area was covered with no large gaps, I adhered a sheet of Press 'n' Seal over them and ran through my diecutting machine with the largest of the square Stylish Shapes Dies, to cut out my central square. I set this to one side, then flipped over my frame and added dimensionals to each of the pieces, before flipping back over, centering and adhering to my cardfront. Once all elements were stuck down, I removed the Press 'n' Seal and trimmed any pieces that were overhanging the edge. I then added my heat-embossed sentiment and a single enamel dot to the square inside the frame I created to finish:
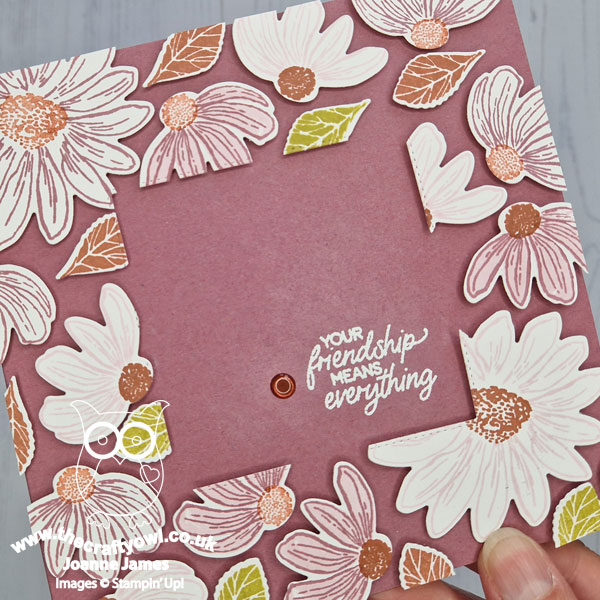
 

Isn't that something?! I love the effect of this technique. 

Sentiment Style - I still had my central square so I made a second card, this time using Bubble Bath cardstock as my card base. Here's that finished card: 
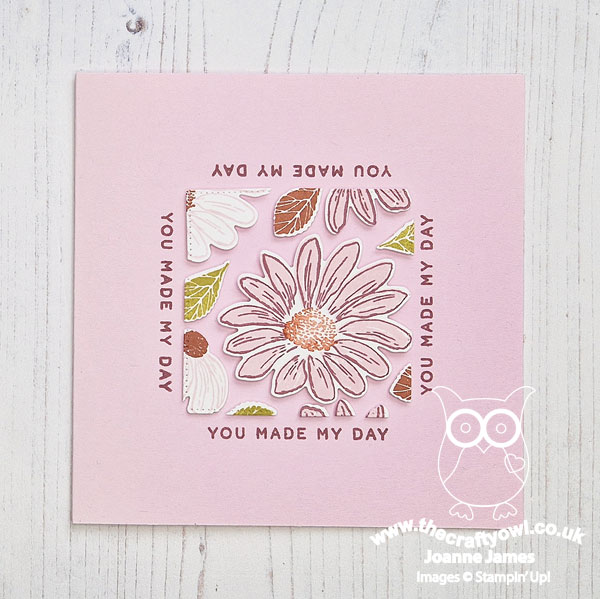
 

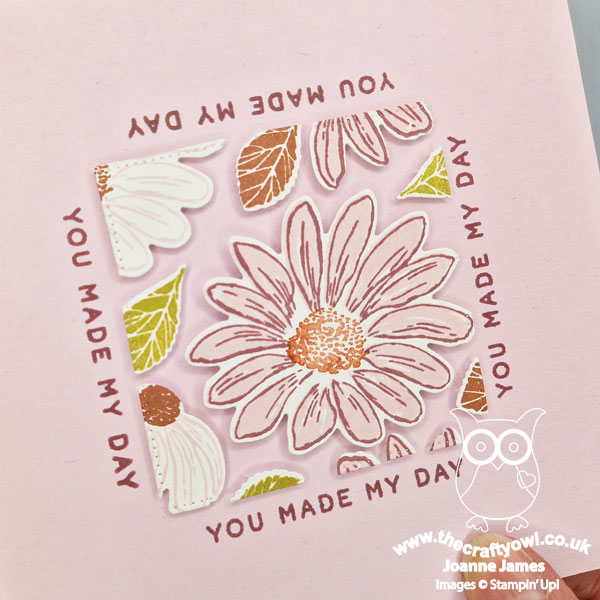
I followed the same process, adding dimensionals to the reverse and centering the square panel before removing the Press 'n' Seal. This time, I decided to make a feature of another of the sentiments in the Cheerful Daisies set and repeat it four times along each edge of my square panel - I really like this effect. If you look closely at the close up below, you can also see the stitched detail of the square die around the edges of the diecut pieces too:
 

So what do you think? Do you like this style of card - is it something you've tried, either with this set or others? If you do a search on my blog you will find several other examples where I've used this technique. Do let me know what sets you've used - I'd love to know in the comments below!

Here is the visual summary of the key products used on today's project for you to pin for easy reference:
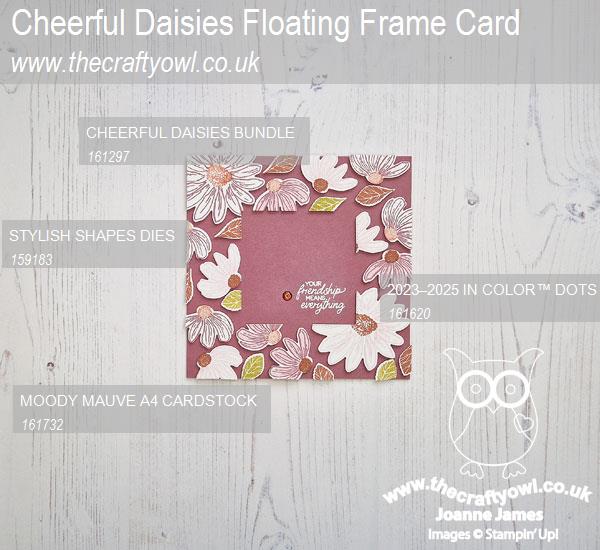
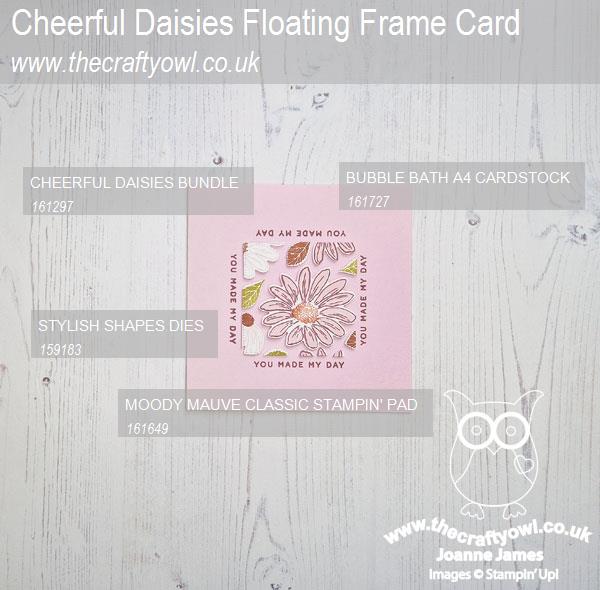


You can see all of my Product and 'How To' summaries on my 'How To - Tips and Techniques' Pinterest board in case you've missed any. 

A tictactoe board offers so many creative possibilities - how does this week's board inspire you? Why not have a go? We would love to see you in the gallery and who knows - you might be selected for Designer's Choice and be eligible to be a guest designer on a future challenge. 

Another reminder too that for more great ideas on how to make the most of the Cheerful Daisies bundle, if you purchase it from me before the end of the month (or place an order of equivalent value) you will receive a copy of the tutorial I've created with my friend Jan Clothier and access to our private Facebook group.
 

Enjoy your day; I'll be back tomorrow with another project. Until then, happy stampin'!


Stampin' Up! Supplies Used: 
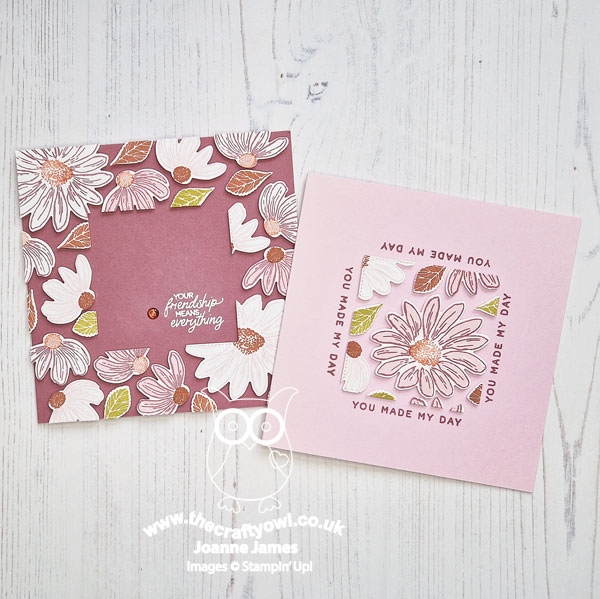
Table built using Product Table Builder by The Crafty Owl - Independent Stampin' Up! Demonstrator.

Dragonfly Garden Floating Frame Technique

by Joanne James24. May 2021 20:37

Happy Monday everyone! Today was class day so my day has been a busy one. I'm just popping in to share a couple of my class cards that I made using this week's Color Throwdown colours:

We were using the Dragonfly Garden stamp set and co-ordinating Dragonflies punch and one of the things I wanted to do today was to teach my class ladies how to create a card using the 'floating frame' technique. So this actually means I have two cards for you! Here's the first one: 


And here's the second one, featuring the outer frame element:


 Here's the low-down on today's card:

Floating Frames - The floating frame technique is really easy to create with a few basic tools: some 'Press and Seal' food wrap or similar, a framelit - I used my Rectangle Stitched Framelits Dies - and lots of dimensionals! You simply stamp and punch/diecut your images, lay them out, cover with Press and Seal, trim to frame size and cut out your central piece, before adhering dimensionals to the back of the diecut pieces and adhering to your chosen card base. Finally you remove the Press and Seal and your floating shapes remain in place. 

Dragonfly Garden - I used a combination of large punched dragonflies in the three challenge colours and interspersed them with smaller white ones to fill in the gaps. The dragonflies are a great shape and size for a floating frame as they are easily identifiable even when only partially visible:


Frame It - For the central portion, I added a rectangular border and heat-embossed sentiment:

Lastly, here's a photo of both cards together - which one do you prefer?


I think I like the one with the central detail and coloured frame best, but I like the other one too - it's a tough call!

Here is the visual summary of the key products used on today's project for you to pin for easy reference:


You can see all of my 'How To' summaries on my 'How To - Tips and Techniques' Pinterest board in case you've missed any. 

Enjoy your evening and I'll be back tomorrow with another project. Until then, happy stampin'!


Stampin' Up! Supplies Used:

Table built using Product Table Builder by The Crafty Owl - Independent Stampin' Up! Demonstrator.

A Pair of Tropical Chic Floating Frame Cards JAI480

by Joanne James29. October 2019 19:00

We are still on half term here so I have been spending time with the James Juniors this week and am resting my shoulder so have not managed much in the way of crafting. I have a quick post for you today to share a card for the current challenge over at Just Add Ink:

The ladies are asking us to 'just add a technique' so I decided to have another go at a Floating Frame Card - or rather, pair of floating frame cards. Here's the first one with contains the inside of the frame:


And here's the second one with the outer floating frame:

Here's the low-down on today's cards:

The floating frame technique is really easy to create with a few basic tools: some 'Press and Seal' food wrap or similar, a framelit - I used my Tropical Chic stamps and co-ordinating dies and Rectangle Stitched Framelits Dies - and lots of dimensionals! You simply stamp and punch/diecut your images, lay them out, cover with Press and Seal, trim to frame size and cut out your central piece, before adhering dimensionals to the back of the diecut pieces and adhering to your chosen card base. Finally you remove the Press and Seal and your floating shapes remain in place.  

Add a sentiment and you're done! These cards are quite time-consuming, but they are fun. I'm thinking I might have to have another go with some other supplies to create a festive version  - watch this space!

Here are the visual summaries of the key products used on today's projects for you to pin for easy reference:


You can see all of my 'How To' summaries on my 'How To - Tips and Techniques' Pinterest board in case you've missed any. 

Enjoy your evening and I'll be back tomorrow with another project. Until then, happy stampin'!


Stampin' Up! Supplies Used:

Table built using Product Table Builder by The Crafty Owl - Independent Stampin' Up! Demonstrator.

Balloons Floating Frame Birthday Cards

by Joanne James8. April 2019 11:30

Happy Monday everyone! Today I'm sharing a card using the sketch over at Freshly Made Sketches and the current colour palette at Fab Friday:


My card features a technique that is currently all the rage and I've been wanting to have a go at - the floating frame technique. This actually means I have two cards for you! Here's the first one:


And here's the second one, featuring the outer frame element:


Here's the low-down on today's card:

Floating Frames - The floating frame technique is really easy to create with a few basic tools: some 'Press and Seal' food wrap or similar, a framelit - I used my Rectangle Stitched Framelits Dies - and lots of dimensionals! You simply stamp and punch/diecut your images, lay them out, cover with Press and Seal, trim to frame size and cut out your central piece, before adhering dimensionals to the back of the diecut pieces and adhering to your chosen card base. Finally you remove the Press and Seal and your floating shapes remain in place. Jennifer McGuire has a fabulous video on this technique if you want to see one of these cards being made - you can see it here

Birthday Balloons - I've seen some fabulous examples of this technique, mostly using florals, but I was in need of some birthday cards and I thought the colours over at Fab Friday would be perfect for some bright and colourful balloons. I had so much fun making these cards I'm going to make a few more in alternative colour combos too - this is a great card design that would work well for both boys and girls, so makes a great storecupboard standby. I stamped my balloons with one of the stamps in the 'Happy Birthday Gorgeous' stamp set before punching them for added interest and I used one of the other balloon stamps in the set to decorate the envelope, as you can see below:

No need for a naked envelope here!

A Birthday Greeting - For my second card, I needed a larger greeting to sit inside my frame so my Well Written Framelits were the perfect choice. I also added an extra balloon for balance, tied with some white baker's twine. The same design could be used with other stamps and sentiments from this set too to make cards for other occasions - how many other combinations can you come up with? 

Here are the visual summaries of the key products used on today's projects for you to pin for easy reference:


You can see all of my 'How To' summaries on my 'How To - Tips and Techniques' Pinterest board in case you've missed any. 

Enjoy your day; we are having a kit clear-out in the playroom today. So far we've made an erupting volcano, an insect hut, a flying helicopter and two solar-powered motorised dinosaurs. You've got to love the Easter holidays! I'll be back tomorrow with another project. Until then, happy stampin'!


Stampin' Up! Supplies Used:

Table built using Product Table Builder by The Crafty Owl - Independent Stampin' Up! Demonstrator.


New Online Exclusives

There are new products available exclusively in the online store from 5 November - check them out here.

Latest Kits!

Stampin Cut and Emboss

The Layered Landscapes Kit and Nature's Paintings Kit are the latest kits in the online store - get yours here!

Shop Online

Access my online shop 24 x 7, 365 days of the year:

Current November hostess code:

9NKXDTTR

Shop Online

Mini Catalogue

BROWSE THE CATALOGUE

'Tis The Season - the new Stampin' Up! Mini Catalogue is here! For more details and to download your copy click here

Scrapbooking

Stampin' Up! has introduced a new range of 12x12" scrapbooking product and kit - the full range is now available to purchase online. To download a copy of the new digital Scrapbooking Catalogue click here.

2024-25 Annual Catalogue

BROWSE THE CATALOGUE

Click on the image to download your copy of the 2024-25 annual catalogue. For a full list of current SU! supplies, go to my online store. If you would like any help or advice, please drop me a line at joanne@thecraftyowl.co.uk or give me a call on 07773 421446 - I'd be happy to help.

Join My Team

It's always a great time to join Stampin’ Up! New team members can get £130 worth of products for only £99 + free business supplies + free shipping + all the fun being a part of Stampin’ Up! Stampin' Up! has something for everyone: join my growing team and benefit from my support to enjoy Stampin' Up! however you choose.

If you're interested, call me for a chat to understand how I can help you realise your goals. Alternatively, if you have already decided to sign up and you just can't wait, please click here for the link to the online form where you can sign up and order your starter kit right away! 

About Me

Hi I'm Joanne and live in Northampton and when I'm not looking after my husband and two beautiful children, am an avid crafter with a passion for all things Stampin' Up!

I must confess that I have never been a big rubber stamper - until I discovered Stampin' Up! that is. I love the fact that I can get such great results with co-ordinating stamps, inks, papers and punches - the possibilities are endless! Join me on my stamping journey as I share the things I love and be inspired to create amazing things yourself!

Follow Me

Monthly Newsletter

Box Builder

Click the button above to use Box Buster to create your custom box design using the Envelope Punch Board!

Kits Collection Now Available!

Stampin Cut and Emboss

The new Kits Collection from Stampin' Up! is now available!

Click here to see the current kits available and order yours online today.

I Design For


Stampin' Up Stuff

This is my personal blog and is not endorsed by Stampin’ Up! I hope you find it a plentiful source of ideas and personal inspiration but please don't copy my designs for contest submission or use for classes, publication or sale without express permission.