Good evening everyone! I hope your week has started well. I've had my first technique class of the month yesterday along with both a rounders and cricket match (observing not participating, and both wins!), and a second technique class and this month's Project Life Memory Keeping class today so it's been a busy couple of days. Just time to pop in this evening and share the first of the cards from this month's technique class, featuring the Hummingbird in the 'Picture Perfect' stamp set. I used this week's sketch over at As You See It for my layout:


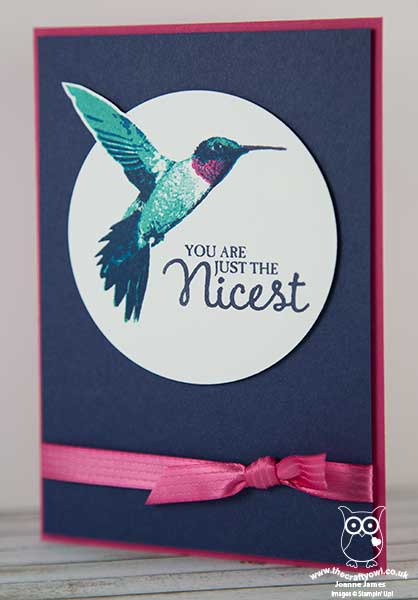
I'm also linking up with Stamp Ink Paper again this week, as their challenge is to feature one main element on your project and make it really stand out. The hummingbird is the most tricky stamp in the set to align, but when you get it right is so worth it in terms of the result. Here is my finished card:

Here's the low-down on today's card:
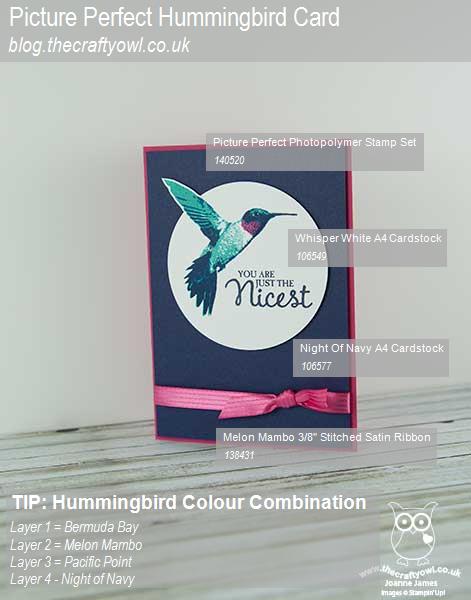
Picture Perfect Hummingbird - 'Picture Perfect' is a multi-step image stamp set, with each of the stamps having two, three or four layers. The hummingbird comes in four pieces; for my bird I stamped my first layer in Bermuda Bay, I stamped the second stamp in Melon Mambo, the third layer in Pacific Point and the fourth and final one in Night of Navy. Whilst it sounds complicated, this set is made from photopolymer which makes lining up the images really straightforward. I find it helpful to use the eye to align the images and use a piercing mat or similar foam pad as a base for your stamping for an even image. I do prefer to stamp my bird in the order that the stamps are numbered and if all else fails, a stamp-a-ma-jig will help you to align the images perfectly. It is definitely a stamp where positioning improves with practice and I must say my ladies today stamped with amazing results, each producing four perfectly stamped hummingbirds on the first attempt!
Partial Die Cutting using Circle Framelits - I stamped my bird onto a piece of Whisper White and having fussy cut his wing tip by hand, I then cut a partial circle up to the diagonal before adhering behind so that it aligned with my cut away circle on my card base. Circle Framelits are invaluable for this kind of partial diecutting, as you simply roll through the Big Shot to the desired point without cutting the whole way through. I've used this technique with this stamp before here; it adds an interesting detail to an otherwise clean and simple card.
Pop of Pink - Melon Mambo is one of my favourite pinks in the Stampin' Up! colour collections and whilst there is only the smallest amount featured on the throat of my bird, I picked up this colour in both my card base and satin knotted ribbon to give a real pop of colour to my otherwise blue card.
Here's today's visual summary of the key things needed to make today's card for easy reference:

You can see all of my 'How To' summaries on my 'How To - Tips and Techniques' Pinterest board in case you've missed any.
That's all from me today; I have another busy day tomorrow, with my Coffee and Card Drop In Session at Bell of Northampton in Kingsthorpe and I'll also be at the in-store Spring Open Evening at Bells too. you can find full details on the latter here.
Hopefully I'll squeeze in time for a quick blog post with another of my Picture Perfect class cards. Until then, happy stampin'!
Stampin' Up! Supplies Used: