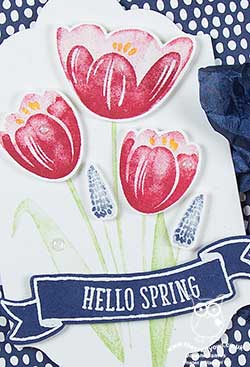
Host A Party And Get Tranquil Tulips For Free PP383

by Joanne James4. March 2018 09:00

It's Sunday and time for this week's new challenge over at The Paper Players! It's the turn of the delightful Jaydee to host this week and she has a rather timely theme challenge for you to work with:
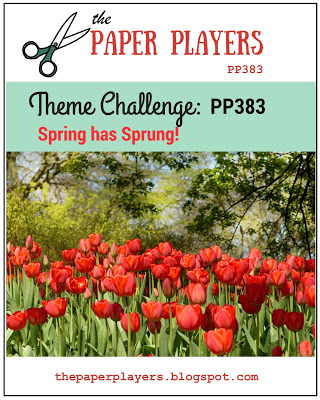
 

My card was totally inspired by the lovely inspiration photo Nance chose for Jaydee's challenge badge this week: those red tulips are just lovely so I had to feature some on my card today. We have been experiencing sub-zero temperatures here in the UK for the past week, along with significant snowfall and I for one am ready for Spring, even if only with my card today - take a look:
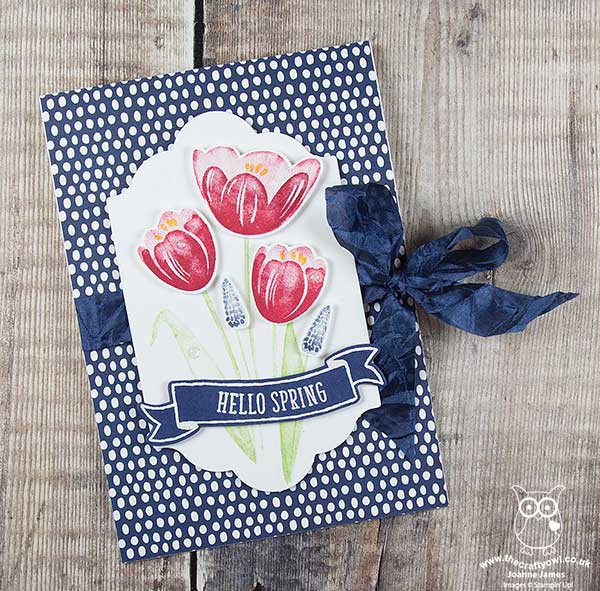
 

Here's the low-down on today's card:

Get Tranquil Tulips For Free - Tranquil Tulips is one of the hostess sets in the annual catalogue, that is available exclusive to those that host a Stampin’ Up! party or place a personal order of £150 or more. A gorgeous set with blooms that can be stamped directly or fussy cut and layered as I’ve done here. Sale-A-Bration is the best time of year to host a Stampin’ Up! party, as with qualifying sales you can earn an extra £20 in rewards on top of the usual levels. I’ve had lots of customers take advantage of this and earn this sets and lots of other free produc, whilst having a fun evening with friends into the bargain. If you would like to earn this set for free, then talk to me about hosting your own party - I still have a few slots left this month if you would like to squeeze one in before the end of the month, but you’ll have to be quick!

A Tutti Frutti Pattern - I paired my red tulips with some blue grape hyacinths and that inspired the colour scheme for the rest of my card. The background paper is from the Tutti Frutti paper stack - lots of bold fruit patterns here, but if these are not your thing there are some great patterns such as the one I’ve used today on the reverse of each sheet too.

A Spring Banner - I took the wording for my banner from the current ‘Hello Easter’ set and paired it with the banner from the Bunch of Banners set to fit my theme. Some navy crinkle seam binging ribbon finishes my card.

Here is the visual summary of the key products used on today's project for you to pin for easy reference:
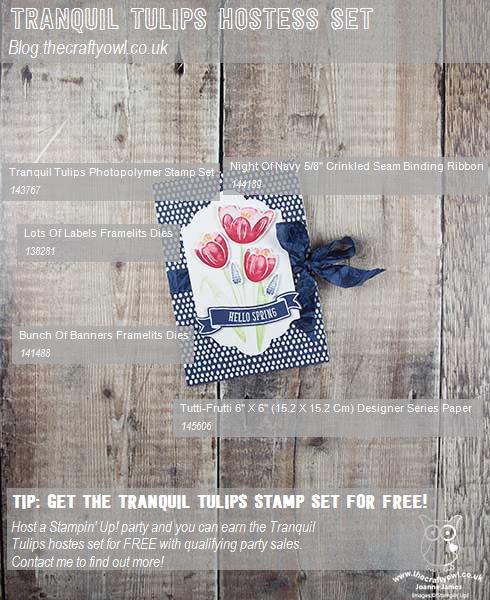
 

You can see all of my Product and 'How To' summaries on my 'How To - Tips and Techniques' Pinterest board in case you've missed any. 

Before you reach for your ink and papers, check out what our amazing team has created to inspire you this week:

Here's a quick recap of our challenge rules:
 
1.  Create a new paper project
2.  Upload your creation to your blog with a link back to us and provide a direct link to the post featuring your challenge submission.
3.  Please link your card to no more than four challenges, TOTAL.
4.  Have FUN!

I can't wait to see how you interpret this week's theme and look forward to visiting your blogs this week! Enjoy the rest of your weekend as it will be over all too quickly.

I am spending today with a bunch of lovely ladies who braved the British weather to join me for my first residential luxury crafting retreat. Yesterday was a craft-packed day and theres just as much fun in store today. Wish you were here to join in the fun too!

I'll be back tomorrow with another project; until then, happy stampin'!


Stampin' Up! Supplies Used: 

Table built using Product Table Builder by The Crafty Owl - Independent Stampin' Up! Demonstrator.

Banners For You Embossed Stars and Stripes

by Joanne James27. June 2017 14:00

Today I'm sharing a card with a patriotic vibe which is perfect for the current challenges over at Fusion and SUO Challenges:


Ben needed a card for one of his school friends who is about to leave the UK and go to live in America, so a little stars and stripes were the order of the day:


Here's the low-down on today's card:

Textured Stars and Stripes - I got my textured embossing paste out again for this card and using two retired stencils, in turn created my stars and stripes design. I love the depth the embossing paste gives to the overall finish and is really different to any of my previous patriotic designs. This is the third card featuring embossing paste I've shared in recent days and I'm having lots of fun with it. If you would like to learn more and get 'hands on' with this fun new product, it will be featuring in my upcoming technique class featuring the Oh So Eclectic Suite on 11th July - read more about it here and get in touch by the weekend if you'd like to book a place. The lovely people at Stampin' Up! have also made a short video to show easy embossing paste is to use - check it out here:

Get Glossy - I wanted a shine to contrast with the texture of my stars and stripes, so used glossy cardstock for my background and simply swiped my Real Red and Night of Navy ink pads in turn diagonally across my card base and waited for this to dry before adding the embossing paste. I love the shine this adds to the colour, although must confess it did cause the red to bleed through my embossing paste more than I would have liked, even with a second application, I think maybe because it is less absorbent than regular cardstock. 

A Banner For You - I finished my card with a two-tone double banner created with the 'Banners For You' stamp set and cut it out with the co-ordinating Bunch of Banners framelit and reversed the colours to contrast with my flag-inspired background.

Here is the visual summary of the key products used on today's project for you to pin for easy reference:


You can see all of my 'How To' summaries on my 'How To - Tips and Techniques' Pinterest board in case you've missed any. 

I'll be back tomorrow with another project. Until then, happy stampin'!


Stampin' Up! Supplies Used:

Table built using Product Table Builder by The Crafty Owl - Independent Stampin' Up! Demonstrator.

Bon Voyage Swirly Bird Boat Card

by Joanne James17. April 2017 04:00

Happy Easter Monday everyone! I hope you all enjoyed your fill of chocolate eggs yesterday - I know that we had more than our fair share here in the James household for sure! Today I'm sharing a card for this week's sketch over at Freshly Made Sketches:

I love Jen's sketch this week and knew immediately what I wanted to do with it; eventually on Saturday I managed to find some time to create - take a look:


Here's the low-down on today's card:

A Swirly Boat and Scribble - I used the edge of my wavy sea thinlit in my Swirly Scribble set to create the curved line as per in the sketch (I actually flipped my Very Vanilla piece over and used the reverse so that my wave followed the same contours as the sketch). This was the starting point for my card and everything else followed from there. I stamped my Swirly Bird boat and background splatters onto the Vanilla section, then fussy cut the sail and popped it up on a dimensional, having heat embossed the Calypso Coral sail with copper embossing powder for added shine. The Swirly Bird stamp set and co-ordinating Swirly Scribble thinlit dies are one of my favourite bundles in the current annual Stampin' Up! catalogue and I'm so pleased that they are carrying over into the new 2017-18 catalogue. The discounted bundle price won't be carrying over though, so if you want to save 10% by purchasing them together be sure to order them before the new catalogue goes live on 1st June.

By The Sea Shore - I used a layer of the retiring By The Shore paper for the bottom part of my card to provide the perfect seascape. I will be so sorry to see this paper leave us! It's still available on the retiring list whilst stocks last, so snap some up now before it's too late.

A Bon Voyage Banner - I decided to use a pair of curved sentiments from the 'Banners For You' set on my card today; they followed the contours of the curved edge perfectly and made for a fun 'Bon Vogage' type card. 

Here is the visual summary of the key products used on today's project for you to pin for easy reference:


You can see all of my 'How To' summaries on my 'How To - Tips and Techniques' Pinterest board in case you've missed any. 

Enjoy your day and I'll be back tomorrow with another project. Until then, happy stampin'!


Stampin' Up! Supplies Used:

Table built using Product Table Builder by The Crafty Owl - Independent Stampin' Up! Demonstrator.

New Online Exclusives

There are new products available exclusively in the online store from 5 November - check them out here.

Latest Kits!

Stampin Cut and Emboss

The Layered Landscapes Kit and Nature's Paintings Kit are the latest kits in the online store - get yours here!

Shop Online

Access my online shop 24 x 7, 365 days of the year:

Current November hostess code:

9NKXDTTR

Shop Online

Mini Catalogue

BROWSE THE CATALOGUE

'Tis The Season - the new Stampin' Up! Mini Catalogue is here! For more details and to download your copy click here

Scrapbooking

Stampin' Up! has introduced a new range of 12x12" scrapbooking product and kit - the full range is now available to purchase online. To download a copy of the new digital Scrapbooking Catalogue click here.

2024-25 Annual Catalogue

BROWSE THE CATALOGUE

Click on the image to download your copy of the 2024-25 annual catalogue. For a full list of current SU! supplies, go to my online store. If you would like any help or advice, please drop me a line at joanne@thecraftyowl.co.uk or give me a call on 07773 421446 - I'd be happy to help.

Join My Team

It's always a great time to join Stampin’ Up! New team members can get £130 worth of products for only £99 + free business supplies + free shipping + all the fun being a part of Stampin’ Up! Stampin' Up! has something for everyone: join my growing team and benefit from my support to enjoy Stampin' Up! however you choose.

If you're interested, call me for a chat to understand how I can help you realise your goals. Alternatively, if you have already decided to sign up and you just can't wait, please click here for the link to the online form where you can sign up and order your starter kit right away! 

About Me

Hi I'm Joanne and live in Northampton and when I'm not looking after my husband and two beautiful children, am an avid crafter with a passion for all things Stampin' Up!

I must confess that I have never been a big rubber stamper - until I discovered Stampin' Up! that is. I love the fact that I can get such great results with co-ordinating stamps, inks, papers and punches - the possibilities are endless! Join me on my stamping journey as I share the things I love and be inspired to create amazing things yourself!

Follow Me

Monthly Newsletter

Box Builder

Click the button above to use Box Buster to create your custom box design using the Envelope Punch Board!

Kits Collection Now Available!

Stampin Cut and Emboss

The new Kits Collection from Stampin' Up! is now available!

Click here to see the current kits available and order yours online today.

I Design For


Stampin' Up Stuff

This is my personal blog and is not endorsed by Stampin’ Up! I hope you find it a plentiful source of ideas and personal inspiration but please don't copy my designs for contest submission or use for classes, publication or sale without express permission.