All is Calm Star Christmas Wreath

by Joanne James14. November 2014 21:36

Today I thought I would share with you the Christmas star wreath I made at my class yesterday. I used the All is Calm Speciality Designer Series Paper for my version, which looks like this:

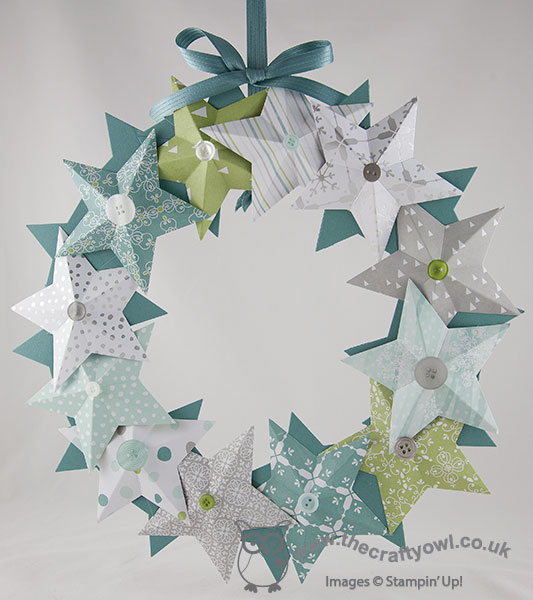
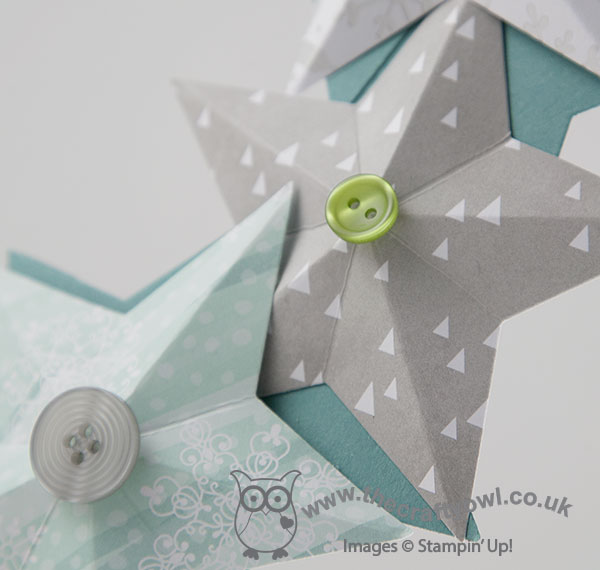
I layered a circle of Lost Lagoon flat stars, cut out with my Stars framelits, onto my wreath base, then cut 12 stars out of the All Is Calm Speciality DSP for the 3D stars. Each of these stars was scored from the point to the opposite side then pinched together to create the dimension and once glued to the wreath base, finished with a selction of Brights, Neutrals, Subtles and silver buttons:

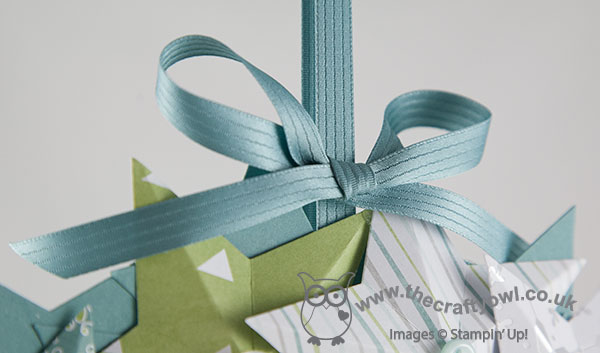
To finish, a length of the luxurious In-Colour Lost Lagoon satin ribbon to create a bow and hanging loop:

You can see another example of this wreath made with the Under The Tree Speciality DSP over on my Facebook page - it looks lovely in the kraft and more traditional, red, greens and browns, so do check it out. I have another of these classes next week where the ladies will be making them using other papers of their choice.

I hope you like today's project; this is going to be my indoor wreath as it matches my dining room colours perfectly; I have another two wreaths to share with you in coming weeks, so if home decor is your thing, keep an eye out for the other versions!

Back tomorrow with another project; until then, happy stampin'!


Stampin' Up! Supplies Used:

Table built using Product Table Builder by The Crafty Owl - Independent Stampin' Up! Demonstrator.


Tags: , , , , , , , , , ,

3D Projects | Classes

Comments (10) -

Wendie Waldman
Wendie WaldmanUnited States
15/11/2014 01:51:24 #

Absolutely beautiful!

Joanne James
Joanne JamesUnited Kingdom
15/11/2014 20:42:54 #

Thanks Wendie - so glad you like it!

Wendie Waldman
Wendie WaldmanUnited States
15/11/2014 01:53:53 #

What did you use for your wreath base?

Joanne James
Joanne JamesUnited Kingdom
15/11/2014 20:42:29 #

I used a 10" flat wire florist's wreath Wendie and used a hot glue gun to attach the stars to it. I first attach the stars from the front temporarily using glue dots, then when I'm happy with the positioning and am sure they completely cover the wreath frame, I turn it over and attach permanently using a hot glue gun from the back. Hope that helps!

Wendie Waldman
Wendie WaldmanUnited States
15/11/2014 23:46:32 #

Thank you so very much, Joanne.  I've made my wreath for the year, but your design will be on my list for next year!  

Pauline A
Pauline AUnited Kingdom
16/11/2014 17:40:44 #

Adorable, love it x

Claire Broadwater
Claire BroadwaterUnited States
16/11/2014 20:18:32 #

FABULOUS!!!!!!!  You are just so creative, Joanne!  I love this!  XX

Hayley's Paper Garden
Hayley's Paper GardenCanada
17/11/2014 14:32:58 #

WOW!!! This is gorgeous Joanne Smile I have been inspired!!!

Kathy James
Kathy JamesUnited Kingdom
17/11/2014 16:43:46 #

Beautiful - I love the colours.

Misty
MistyUnited States
11/07/2016 17:50:49 #

I love this wreath!  Are there stars glued to both sides or did you cover the wire with flat stars before adhering the dimensional stars?

Comments are closed

Mini Catalogue

BROWSE THE CATALOGUE

The mini catalogue is now live! Read and download your copy here.

Shop Online

Access my online shop 24 x 7, 365 days of the year:

Current March hostess code:

S9F2XJJW

Shop Online

Join My Team

It's always a great time to join Stampin’ Up! New team members can get £130 worth of products for only £99 + free business supplies + free shipping + all the fun being a part of Stampin’ Up! Stampin' Up! has something for everyone: join my growing team and benefit from my support to enjoy Stampin' Up! however you choose.

If you're interested, call me for a chat to understand how I can help you realise your goals. Alternatively, if you have already decided to sign up and you just can't wait, please click here for the link to the online form where you can sign up and order your starter kit right away! 

Latest Kit!

Stampin Cut and Emboss

The Rock Legend Kit has all you need to make 8 cards with coordinating envelopes. Along with the new Panda Friends Kit, both are available from January 4th for just £14 each - get yours here!

2023-24 Annual Catalogue

BROWSE THE CATALOGUE

Click on the catalogue for a full list of current SU! supplies - if you would like to order any of the items featured, please drop me a line at [email protected] or give me a call on 07773 421446 - I'd be happy to help.

New Online Exclusives

There will be new products available exclusively in the online store from 5 March - check them out here.

About Me

Hi I'm Joanne and live in Northampton and when I'm not looking after my husband and two beautiful children, am an avid crafter with a passion for all things Stampin' Up!

I must confess that I have never been a big rubber stamper - until I discovered Stampin' Up! that is. I love the fact that I can get such great results with co-ordinating stamps, inks, papers and punches - the possibilities are endless! Join me on my stamping journey as I share the things I love and be inspired to create amazing things yourself!

Follow Me

Monthly Newsletter

Box Builder

Click the button above to use Box Buster to create your custom box design using the Envelope Punch Board!

Kits Collection Now Available!

Stampin Cut and Emboss

The new Kits Collection from Stampin' Up! is now available!

Click here to see the current kits available and order yours online today.

I Design For


Stampin' Up Stuff

This is my personal blog and is not endorsed by Stampin’ Up! I hope you find it a plentiful source of ideas and personal inspiration but please don't copy my designs for contest submission or use for classes, publication or sale without express permission.