Delicate Ornament Embossed Impression Christmas Card

by Joanne James24. November 2016 08:05

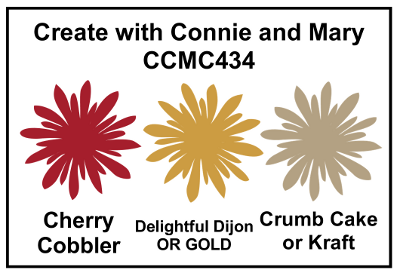
Today it's time for a new challenge over at Create With Connie and Mary and this week we have a colour combination for you:


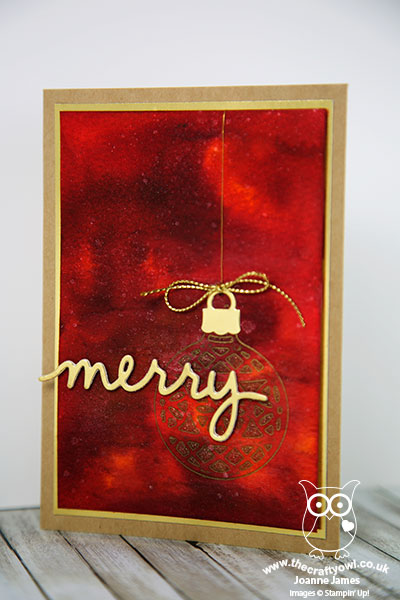
So I toyed with going with a thank you card today, as it is Thanksgiving in the USA - happy Thanksgiving to my fellow team members and any other US followers today! In the end I decided to go with something a little different from me; I watched this video here by Jennifer McGuire recently and have been keen to try the embossed impressions technique; these colours were perfect for what I had in mind. Here's my card:


Here's the low-down on today's card:

Rich Red Watercolour - I created a watercolour background for my central panel using Delightful Dijon and Cherry Cobbler inks and my aquapainter. I also spritzed my card with a mix of alcohol and clear Wink of Stella to give an all-over subtle shimmer and allowed it to dry thoroughly before moving on the next step.

Embossed Impression - To create my ornament feature, I used the round bauble from my Delicate Ornament Thinlits, inked it with Versamark then placed the thinlit onto the watercolour paper and rolled it carefully through my Big Shot. The Big Shot sandwich here is key: multi purpose platform open to Tab 2, acrylic plate, silicon mat, watercolour paper, thinlit die then lastly the final acrylic plate. This allows the die to create an inked impression on the watercolour paper, without it cutting. I then heat embossed this with gold embossing powder to give a fine line of gold detailing. I then used my gold Wink of Stella pen to highlight each of the detailed sections on the bauble for added sparkle - the close up below does show some of the detail, but I can assure you in real life it's gorgeous (even if I say so myself!):


Touches of Gold - I finished my card with a gold foil mat and a gold foil bauble hook, hung by a piece of gold thread with bow detail along with a gold foil 'merry' sentiment cut with my Christmas Greetings Thinlits and mounted on a few additional layers to add some depth. As for the kraft - I used it for my cardbase; the neutral tone really allowed my watercoloured shimmery panel to take centre stage.

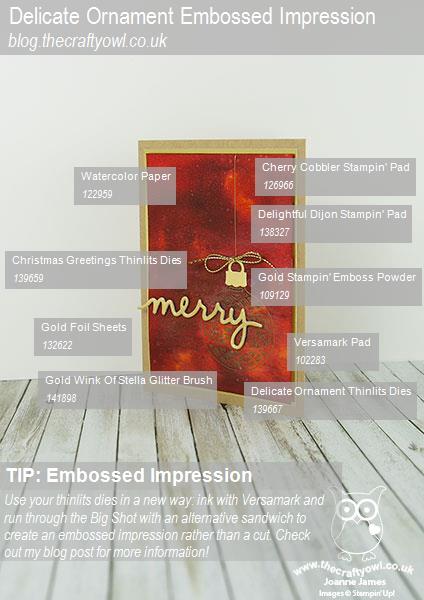
Here is the visual summary of the key products used on today's project for you to pin for easy reference:


I did manage to get myself very inky making this card, however I'm quite pleased with the results and am looking forward to trying this technique with other thinlits dies.

You can see all of my 'How To' summaries on my 'How To - Tips and Techniques' Pinterest board in case you've missed any. 

Do visit the other Design Team members to see what they did with this week's colours; there's lots of inspiration over on their blogs too! This will be my last week as a designer on the Connie and Mary Thursday team; family demands have led me to have to scale back my commitments and as such I am stepping down. I have enjoyed my time with the team; this has always been one of my favourite challenges and will still play along when I can.

That's all from me; I'll be back tomorrow with another project. Until then, happy stampin'!


Stampin' Up! Supplies Used:

Table built using Product Table Builder by The Crafty Owl - Independent Stampin' Up! Demonstrator.

Comments (8) -

Kathy James
Kathy JamesUnited Kingdom
24/11/2016 09:54:42 #

I really like this, so unusual, yet subtle and chic!   The background card is amazing.

I definitely think this idea could be used in a technique class Joanne - love it!

Samantha
SamanthaUnited Kingdom
24/11/2016 18:46:16 #

Wow Joanne what a stunning card.

Jenny Engelke
Jenny EngelkeUnited States
25/11/2016 14:30:41 #

Wow, that background!!!! I was so excited to read your post to find out if it was created by you or a piece of designer paper. I was pleased to know you created it! It's stunning! And the embossing techie is so awesome! I watched Jennifer's video a while back, too but haven't yet tried the technique. Yours turned out awesome! Very, very elegant looking!

Lisa Martz
Lisa MartzUnited States
27/11/2016 21:01:04 #

The background is over the top!  Very classy!  Love this background in these colors...perfect!

Tracy may
Tracy mayUnited Kingdom
28/11/2016 07:11:57 #

Wow I love the richness of your water coloured background Joanne. It's stunning! What a fun technique too! Must give that a go! Fabulous card!

Sharon Burkert
Sharon BurkertUnited States
29/11/2016 05:50:03 #

Your card wowed me.  I love the rich background you created.  Wait!! I just re-read your post and say it isn't so!  I am going to miss seeing your creations and I hope you will play along as often as you can.  It has been an hour being on the team with you and you will be missed!

Jenny Engelke
Jenny EngelkeUnited States
14/12/2016 15:12:57 #

I missed the part in this post about you stepping down from the design team. I am so happy to have had the chance to be on the team with you. Best wishes to you!

Tracy may
Tracy mayUnited Kingdom
16/12/2016 10:05:30 #

I missed the part about you stepping down Joanne. Sorry to see you go. It's been a pleasure being on the team with you. Take care. Will hopefully see you at OnStage sometime

Comments are closed

Mini Catalogue

BROWSE THE CATALOGUE

The mini catalogue is now live! Read and download your copy here.

Shop Online

Access my online shop 24 x 7, 365 days of the year:

Current March hostess code:

S9F2XJJW

Shop Online

Join My Team

It's always a great time to join Stampin’ Up! New team members can get £130 worth of products for only £99 + free business supplies + free shipping + all the fun being a part of Stampin’ Up! Stampin' Up! has something for everyone: join my growing team and benefit from my support to enjoy Stampin' Up! however you choose.

If you're interested, call me for a chat to understand how I can help you realise your goals. Alternatively, if you have already decided to sign up and you just can't wait, please click here for the link to the online form where you can sign up and order your starter kit right away! 

Latest Kit!

Stampin Cut and Emboss

The Rock Legend Kit has all you need to make 8 cards with coordinating envelopes. Along with the new Panda Friends Kit, both are available from January 4th for just £14 each - get yours here!

2023-24 Annual Catalogue

BROWSE THE CATALOGUE

Click on the catalogue for a full list of current SU! supplies - if you would like to order any of the items featured, please drop me a line at [email protected] or give me a call on 07773 421446 - I'd be happy to help.

New Online Exclusives

There will be new products available exclusively in the online store from 5 March - check them out here.

About Me

Hi I'm Joanne and live in Northampton and when I'm not looking after my husband and two beautiful children, am an avid crafter with a passion for all things Stampin' Up!

I must confess that I have never been a big rubber stamper - until I discovered Stampin' Up! that is. I love the fact that I can get such great results with co-ordinating stamps, inks, papers and punches - the possibilities are endless! Join me on my stamping journey as I share the things I love and be inspired to create amazing things yourself!

Follow Me

Monthly Newsletter

Box Builder

Click the button above to use Box Buster to create your custom box design using the Envelope Punch Board!

Kits Collection Now Available!

Stampin Cut and Emboss

The new Kits Collection from Stampin' Up! is now available!

Click here to see the current kits available and order yours online today.

I Design For


Stampin' Up Stuff

This is my personal blog and is not endorsed by Stampin’ Up! I hope you find it a plentiful source of ideas and personal inspiration but please don't copy my designs for contest submission or use for classes, publication or sale without express permission.