Nothing's Better Than Coffee And Cocktails AYSI276

by Joanne James3. June 2022 12:00

Today I'm sharing my design team card for our new challenge over at As you See It where it's time for a theme challenge:


I was tempted to do something with lemons, as I love the bright yellow of the lemons against the blue in our inspiration photo today, however I have had a rainbow-themed idea percolating in my head for a little while so decided to try that out instead. As a result, I ended up wtih not one but two cards for you today - take a look:


Here's the low-down on today's cards:

Rainbow Pastels Coffee - I started off with this card that was inspired by the pastel rainbow colours over at Fusion (you can see them on the badge at the bottom of this post). I stamped and diecut a collection of coffee cups using the Nothing's Better Than stamp set and Love You More Than co-ordinating dies, and adhered them across the centre of my slimline card. I added a simple stamped sentiment either side, with the diecut 'coffee' added on top using adhesive foam sheet:


 I carried the sentiment and coffee cup theme through to the inside (and did the same with my second card too):


 I was going for a clean and simple card with lots of white space and could have stopped there, but decided that it would be fun to add a selection of sequins from my stash that co-ordinated with my rainbow colours around the cups for a little extra sparkly detail - it's also a nod to the round plates in the Fusion photo. Check out how pretty they shine:


Rainbow Brights Cocktails - Having completed this card, I thought it would be fun to make another card with the same idea, this time using the cocktail glass in the Nothing's More Than set. I changed up my rainbow of colours from pastels to brights (I was thinking more of a day to night vibe!) for my second card:


The cocktail glasses are larger than the coffee cups, so I went for a more uniform positioning across the centre of the card and placed my stamped sentiments to either side for better balance. I wanted to preserve my white space so didn't add as many sparkles this time; I still couldn't resist a few iridescent rhinestones to add to my cocktail party feel though!


So which are you - Team Coffee of Team Cocktails? Today it's a Bank Holiday here in the UK to celebrate Her Majesty The Queen's Platinum Jubilee - 70 years on the throne, wow! I think this means I'll be doing both as the day progresses; any excuse to raise a glass, ma'am!

Here is the visual summary of the key products used on today's project for you to pin for easy reference:


You can see all of my 'How To' summaries on my 'How To - Tips and Techniques' Pinterest board in case you've missed any. 

Here's a summary of our challenge rules:

  • Create any card, scrapbooking page, 3D project or packaging project that fits the challenge.
  • Please include the challenge graphic and link back to the challenge in your blog post. Turn off word verification so we can leave you lots of lovely comments. Make sure you link the post not the whole blog to the Linky. Use #AYSIXXX when uploading to a public gallery.
  • If you’re unsure about ‘the rules’, check the details under the Challenge Guidelines tab on the As You See It Challenge homepage.
We look forward to seeing your creations in the AYSI gallery.

Enjoy your day and I'll be back tomorrow with another project. Until then, happy stampin'!


Stampin' Up! Supplies Used:

Table built using Product Table Builder by The Crafty Owl - Independent Stampin' Up! Demonstrator.


Beautiful Wings Happy And Heartfelt Congratulations Card

by Joanne James13. May 2022 08:00

Today I have a second post for you in addition to my Festive Friday post: this time with a card for the new challenge over at CAS on Friday where I am the Guest Designer this week following my previous win in their sketch challenge (here's that winning card if you missed it). The theme for the new challenge is 'butterflies'; take a look at what I came up with:


Here's the low-down on today's card:

Beautiful Wings - I haven't featured butterflies on a card for some time, however the Beautiful Wings Dies have been sitting on my shelf for some time so this was the perfect opportunity to get them opened for their first outing! There are a ton of dies in this set, both for individual detailed diecuts like the one on today's card but also one single die that cuts out all of the stamped images in one go from the co-ordinating 'Butterfly Brilliance', along with a number of dies that are great for adding diecut splatter and brick detail. If you're thinking of adding butterflies to you collection, the Beautiful Wings Dies are worth a look!

Colour Inspiration - I took inspiration for the layout for today's card from this week's Global Design Project sketch #GDP342 but the colours for my 1cm vertical strips (I added two pieces of each colour for subtle additional depth) were inspired by something else entirely: the new Glossy Dots Assortment on page 143 of the new Stampin' Up! Annual Catalogue. Always a fan of an enamel dot (or three!), I couldn't resist adding these to my shopping basket. Each pack contains the four colours on today's card, and includes dots in three sizes, which you can see more closely on the photo below:


Isn't that shine just gorgeous?! I can see many more packs of these in my crafting future ;-)

Heartfelt Congratulations - Finally, the sentiment on today's card comes from the 'Happy & Heartfelt' stamp set in the January-June mini catalogue. Featuring lots of sentiments in this fun, handwritten-style font, it was perfect for a final touch of whimsy to today's card.

Here is the visual summary of the key products used on today's project for you to pin for easy reference:


You can see all of my 'How To' summaries on my 'How To - Tips and Techniques' Pinterest board in case you've missed any. 

Enjoy your day; mine will be full of chores unfortunately but they have to be done at some point, right?! I'll be back tomorrow with another project. Until then, happy stampin'!


Stampin' Up! Supplies Used:

Table built using Product Table Builder by The Crafty Owl - Independent Stampin' Up! Demonstrator.


Days To Remember CAS Birthday Card

by Joanne James29. April 2022 09:00

Today I have a second post for you in addition to my Festive Friday post: this time with a card for the new challenge over at CAS on Friday where I am the Guest Designer this week following my previous win in their stencil challenge (here's that winning card if you missed it). The theme for the new challenge is 'numbers'; take a look at what I came up with:


Here's the low-down on today's card:

Days To Remember - I decided to break out my unused 'Days To Remember' stamp set to create a fun calendar birthday reminder card. This is a great set that enables you to easily create any day/date/month combo in calendar format - I decided to make a birthday card with a tear-off calendar sheet showing a birthday circled, highlighted with a fun sentiment and trio of ombre glimmer balloons for decoration. I also added another couple of sentiments from the set to the inside of my card:


Perfect Perforations - Do you spot the new product I used on my calendar piece? That fun border edging is courtesy of a die that is in the new Blossoming Happiness Dies set - I thought it made the perfect tear-off border detail. 

A New Old Favourite - I used another item from the upcoming new annual catalogue on my card today - did you notice that stitched banner that outlines the sentiment? My regular readers know how much I missed the Stitched Shapes Dies when they retired. Well now they're back - stitched circles and squares and new banner shapes too! Take a closer look on the photo below:

In case you're wondering - the birthday on my card is mine :-) No vanity here though; when the day comes around, this card will actually be headed to a friend of mine - can you believe that I actually know two other people that share the same birthday?! A quirky coincidence for sure!

Here is the visual summary of the key products used on today's project for you to pin for easy reference:


You can see all of my 'How To' summaries on my 'How To - Tips and Techniques' Pinterest board in case you've missed any. 

I also used the current sketch over at Try Stamping on Tuesday (squished to fit my landscape design :-) ) as the inspiration for my layout today. 

Enjoy your day and I'll be back tomorrow with another project. Until then, I have a super busy day ahead so need to crack on; happy stampin'!


Stampin' Up! Supplies Used:

Table built using Product Table Builder by The Crafty Owl - Independent Stampin' Up! Demonstrator.

Happy And Heartfelt CAS Friendship Card

by Joanne James10. March 2022 09:00

Today I have two posts for you! First up I'm sharing a card inspired by a few challenges:


The team over at Just Us Girls have 'lucky' as their word of the week. When I think 'lucky', four-leaf clovers and black cats come to mind, so I'm also entering today's clean and simple card over at Addicted To CAS where their codeword is 'feline', with green and gold being the only colours to feature outside of the black and white neutrals - perfect for my second entry over at Color Hues, this time with the colour scheme they originally intended for the current challenge. I also used the sketch and silhouette combo over at AAA Cards for my layout. That sounds like a lot of inspiration, but my card actually came together really easily - take a look:


Here's the low-down on today's card:

I went on a hunt through my current stamps for a four leaf clover as I often do at this time of year, and when I came across my 'Flowers of Friendship' set I had a flash of inspiration: I could use the co-ordinating Flowers & Leaves Punch to make a stencil! I think I am becoming a little stencil-obsessed of late!! Anyway, I made a couple of small stencils using both this punch and a tiny four-leafed retired Itty Bitty Punch, cutting out stems by hand. I masked off a circular shape and then stencilled my clovers in randomly using a sponge dauber and some Just Jade ink. I added a punched black cat silhouette on dimensionals and added a gold twine bow detail:

My 'lucky me' sentiment is from the 'Happy and Heartfelt' stamp set and completes on the inside of the card with 'I have you'. A clean and simple card to let a friend know how lucky I am to have them! How does the word 'lucky' inspire you? Do let me know in the comments below - I'd love to hear your thoughts!

Here is the visual summary of the key products used on today's project for you to pin for easy reference:


You can see all of my 'How To' summaries on my 'How To - Tips and Techniques' Pinterest board in case you've missed any. 

Enjoy your day; I have lots of jobs to do today so mine will be a busy one! I'll be back later though with my card for the new challenge over at TicTacToe this week. Until then, happy stampin'!


Stampin' Up! Supplies Used:

Table built using Product Table Builder by The Crafty Owl - Independent Stampin' Up! Demonstrator.

A Clean and Simple Celebration

by Joanne James9. March 2022 16:41

Happy hump day! Today I'm sharing a card I made with a few challenges in mind:


The team over at Less Is More are looking for a single word sentiment on a one layer card and I combined this with the current code word of 'hat' over at CASology this month. I was also inspired by Time Out's 8th Birthday celebrations where I used the colours from their badge too for my clean and simple birthday card. Although I'm too late to link up there, I thought you might like to see the badge and colours - my favourite purples! This is the card I came up with - take a look:


Here's the low-down on today's card:

I went with a super-simple 'Celebrate' from the 'Create With Friends' stamp set in Gorgeous Grape and added a party hat coloured with Stampin' Write markers at a jaunty angle to the C - this little gem is to be found in the 'Turtle Friends' set. The two-tone confetti is courtesy of the retired stamp set 'Praiseworthy Prose', which also gave me the perfect greeting for the inside of my card:


And that's my card - stamps, ink and paper, #simplestamping at its best!

Here is the visual summary of the key products used on today's project for you to pin for easy reference:


You can see all of my 'How To' summaries on my 'How To - Tips and Techniques' Pinterest board in case you've missed any. 

Enjoy your day and I'll be back tomorrow with another couple of projects. Until then, happy stampin'!


Stampin' Up! Supplies Used:

Table built using Product Table Builder by The Crafty Owl - Independent Stampin' Up! Demonstrator.

Your Last Chance To Sale-A-Brate With Awesome Otters!

by Joanne James26. February 2022 20:00

I've spent a lovely day outside in the fresh air today watching back-to-back hockey matches, still chilly but with glorious sunshine - at last! So I've a super quick post today to share a clean and simple card that uses the colours over at Sunday Stamps and the sketch challenge over at AAA Cards:


I went for the middle rectangle of the nine grid split and chose a cute party-going otter as my favourite animal (of the moment!) as he won't be around for much longer - take a look:


Here's the low-down on today's card:

The Sunday Stamps challenge is entitled 'Winter Blues' but there's nothing sad about today's card! This cute little otter is from the 'Awesome Otters' stamp set: I stamped him and added a party hat from the same set and coloured him with a selection of Stampin' Blends markers (added below, plus a retired Coastal Cobana set) before finishing with a simple sentiment:


The 'Awesome Otters' stamp set is one of a number of items that can be yours FREE with a £45 purchase during Stampin' Up!'s current Sale-A-Bration promotion. If it's still on your wish list, you have until next Monday when the promotion ends to order yours before it's gone forever. Just click on the links below to go to my online store to get yours - remember to add the current host code for a special thank you from me.

Here is the visual summary of the key products used on today's project for you to pin for easy reference:


You can see all of my 'How To' summaries on my 'How To - Tips and Techniques' Pinterest board in case you've missed any. 

Enjoy your evening and I'll be back tomorrow with another project. Until then, happy stampin'!


Stampin' Up! Supplies Used:

Table built using Product Table Builder by The Crafty Owl - Independent Stampin' Up! Demonstrator.

More Love CAS Watercoloured Notecards

by Joanne James5. February 2022 18:00

Today I'm sharing a couple of clean and simple cards that I made for the current AAA Cards Challenge where they are looking for no layers and an optional big sentiment. Both of my cards were also inspired by the photo over at The Card Concept and I'm also linking up over at CASology where clean and simple 'affection' is the order of the day and at Just Add Ink where the theme is minimalism:


I love a good no-layer card, especially if it features a single sentiment. I couldn't wait to get my hands on the 'More Love' stamp set in the Stampin' Up! mini catalogue as it is the perfect 'one and done' stamp and whilst it could be used for Valentine's, I think it's a lovely set to send to someone as a gesture of more general love and affection. I love the bright green of the foliage on the Card Concept's inspiration photo, and as I was rummaging through one of my drawers came across some retired notecards that had a pre-watercoloured base in green that I thought would make a nice easy, yet interesting background for my stamp. So this was the first card I made:


I heat-embossed my sentiment in gold, then coloured the flowers in with Melon Mambo and Granny Apple Green Blends, in a nod to the pretty florals on that floral heart:


I really liked the texture of the watercolour paper and the green, but it was definitely a different take for me. I wasn't sure about my experiment so decided to revert much more to my clean-and-simple comfort zone and recreate my card onto a basic thick white cardbase:


On this card I used watercolour pencils to colour my flowers, as I didn't want my Blends to bleed through to the reverse, since my card was a no-layer:


My CAS-loving heart feels much better about this card, and the white base is more fitting with both the background in the Card Concept inspiration photo and my general approach to CAS card making. Either way, a simple card base, single stamp and a simple-yet wow impact from the metallic heat embossing with just a little colour is about as minimalist as I get!

I am linking up the white version of my card for the above challenges, but I'd be really interested to know which one you prefer - do leave me a comment below, I would love to hear your thoughts. Here's a side-by-side photo for comparison:

I really like this stamp and haven't seen many examples of it being used in blogland, so maybe I'm in the minority! Either way, I will be sending some of these to some special people this week to let them know they are in my thoughts.

Here is the visual summary of the key products used on today's project for you to pin for easy reference:


You can see all of my 'How To' summaries on my 'How To - Tips and Techniques' Pinterest board in case you've missed any. 

Enjoy your day and I'll be back tomorrow with a special project for this week's Paper Player's theme challenge - you won't want to miss it! Until then, happy stampin'!


Stampin' Up! Supplies Used:

Table built using Product Table Builder by The Crafty Owl - Independent Stampin' Up! Demonstrator.

Sunshine And Rainbows Clean And Simple PP575

by Joanne James23. January 2022 09:00

Today it's Sunday and time for this week's new challenge over at The Paper Players! It's the turn of the fabulous Jaydee to host this week and she has my favourite, a sketch, challenge for you to work with:


I love Jaydee's sketch this week and could have made a ton of different cards with it! Having seen the lovely Jaydee's card before I made mine, I noticed she had focused on the top portion with her design. I was naturally drawn to filling the bottom section, so decided to take my inspiration from Jaydee's interpretation of the sketch and instead focus on creating detail on the top portion of my card. This is what I came up with:


Here's the low-down on today's card:

I decided to use a piece of the Sale-A-bration Sunshine & Rainbows designer paper to decorate the top portion of my card, and then the rainbow border die to edge my white panel below. I paper-pieced my rainbows across my border edge and then added a sentiment using the rainbow-topped diecut that also features in the Brilliant Rainbows Dies pack. In addition to paper-piecing a larger rainbow on the top of my sentiment tab, I added a sentiment from the 'Rainbow of Happiness' stamp set and added a trio of clouds and a tiny resin heart that I coloured pink using my Magenta Madness Blends marker:

I didn't set out to make a clean and simple card this week, but I really love the end result! I am linking my card up with the lovely ladies over at SUO Challenges too as they are focusing on clean and simple cards for their current challenge.

Here is the visual summary of the key products used on today's project for you to pin for easy reference:


You can see all of my Product and 'How To' summaries on my 'How To - Tips and Techniques' Pinterest board in case you've missed any. 

Before you reach for your ink and papers, check out what our amazing team has created to inspire you this week:

Here's a quick recap of our challenge rules:
 
1.  Create a new paper project
2.  Upload your creation to your blog with a link back to us and provide a direct link to the post featuring your challenge submission.
3.  Please link your card to no more than four challenges, TOTAL.
4.  Have FUN!

Enjoy your day; we are having a quiet day and I'm hoping to squeeze in a little crafting so that I'll have something to share with you tomorrow. Until then, happy stampin'!


Stampin' Up! Supplies Used: 

Table built using Product Table Builder by The Crafty Owl - Independent Stampin' Up! Demonstrator.

Nature's Beauty In Winter Clean and Simple PP574

by Joanne James16. January 2022 09:00

Today it's Sunday and time for this week's new challenge over at The Paper Players! It's the turn of the fabulous Claire to host this week and she has a seasonal clean and simple challenge for us to work with:
          

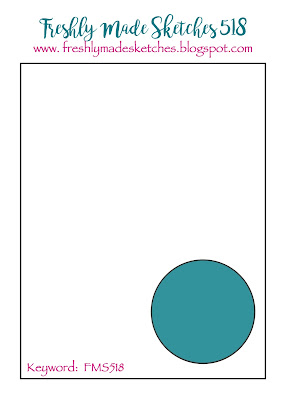
Winter animals - so many options! I decided to dig out a rather neglected stamp set of late and using Judy's sketch over at Freshly Made Sketches and very much inspired by the snow and blue tones over at AAA Cards  set to work on my clean and simple card - take a look:
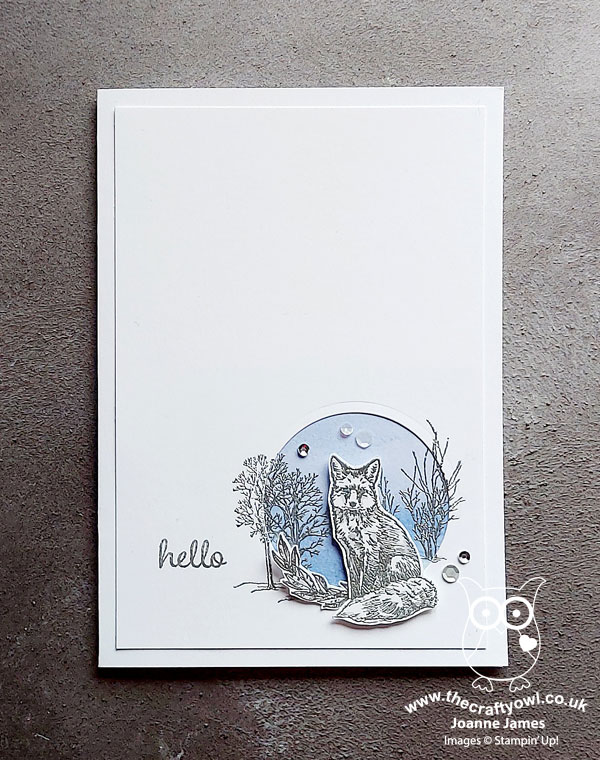
 

Here's the low-down on today's card:

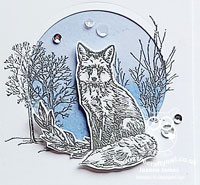
 I diecut a circle from my white cardfront and added a piece of Beauty of the Earth paper with a watercoloured blue behind and stamped some bushes and twigs in Versamark across the aperture and heat embossed them in silver. I then also stamped and fussy cut a leaf branch and arctic fox, heat embossed them both in silver then added some shading with my Smoky Slate Blends, before finishing with a sentiment from 'timeless Tulips' and a sprinkling of sequins. You can see the detail on the fox and the shine of the metallic slightly better below:
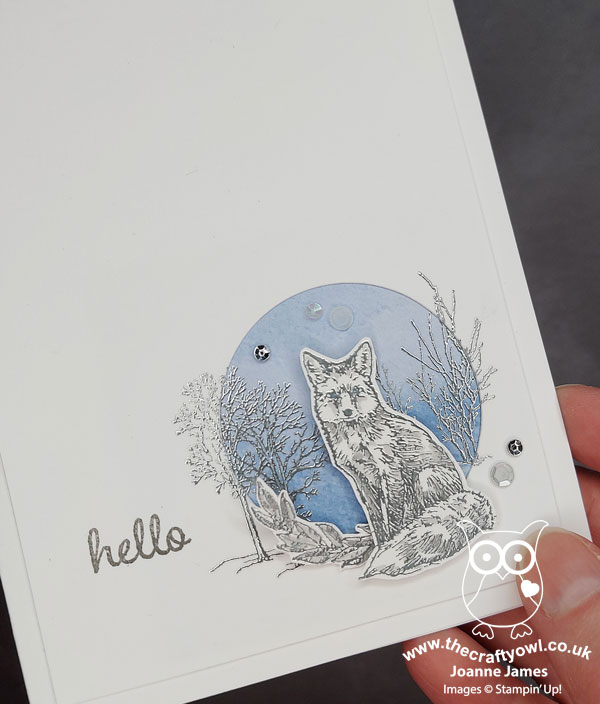
 

A quick reminder to all of you playing along over at The Paper Players this week, in addition to the theme of winter animals, it is more importantly 'clean and simple' week. What does this mean?

  • minimal layers and embellishments
  • clean, white space

 I liked this card so much I made another one, mirroring the sketch and using the arctic rabbit as the focal point:
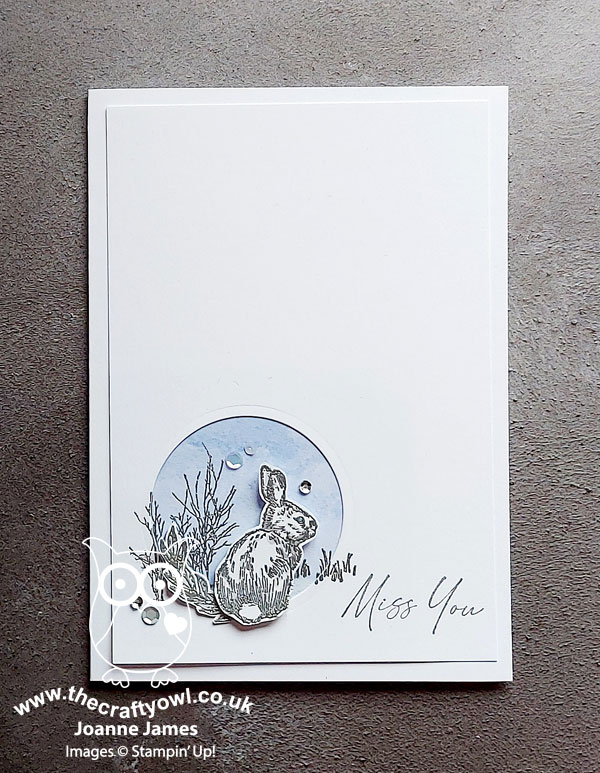
 

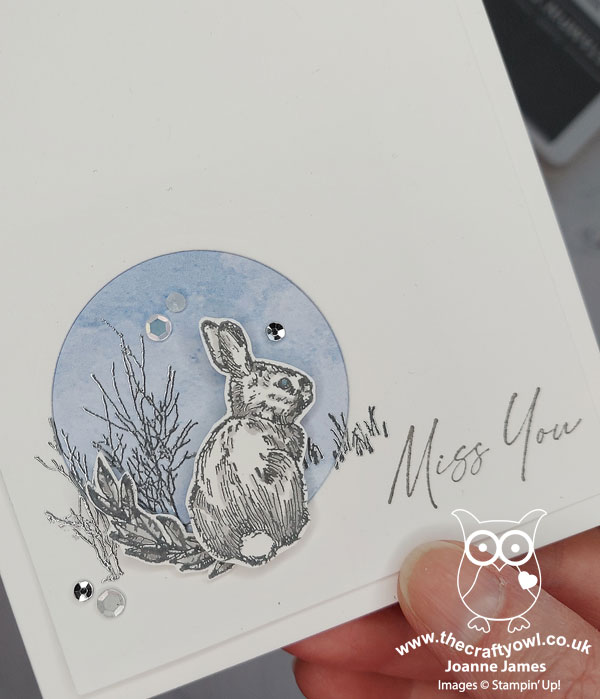
 I used a different sentiment on this one - this one comes from the new 'Honeybee Home' set - but I like this card just as much as the fox. Again, you can see the shine and detail slightly better below:
 

Since my second card also uses this week's colours over at Just Us Girls of white, silver and light blue, I'll be linking it up there.
Here is the visual summary of the key products used on today's project for you to pin for easy reference:
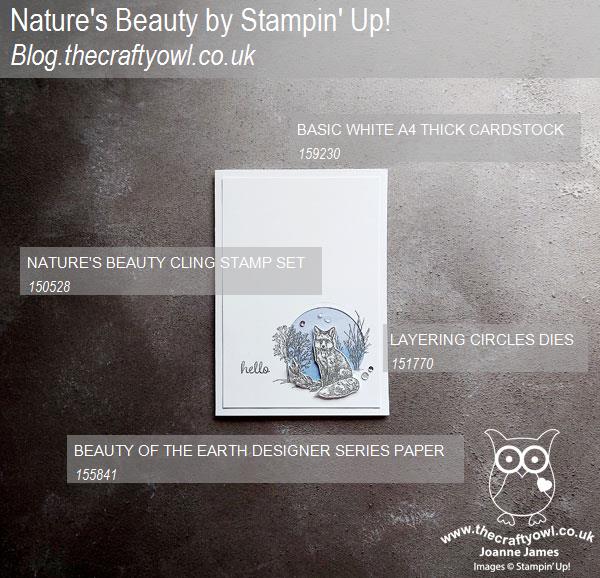
 

You can see all of my Product and 'How To' summaries on my 'How To - Tips and Techniques' Pinterest board in case you've missed any. 

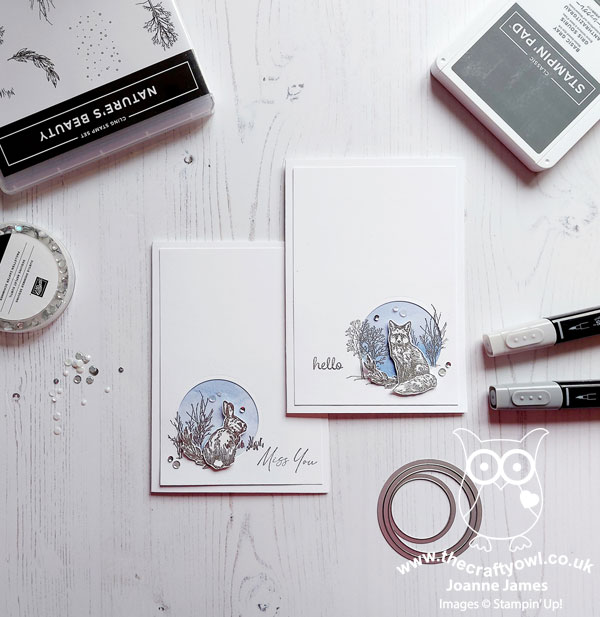
And one last photo of both cards together - which one do you prefer? I like them both and it was nice to give this stamp some love again.
Before you reach for your ink and papers, check out what our amazing team has created to inspire you this week:

Here's a quick recap of our challenge rules:
 
1.  Create a new paper project
2.  Upload your creation to your blog with a link back to us and provide a direct link to the post featuring your challenge submission.
3.  Please link your card to no more than four challenges, TOTAL.
4.  Have FUN!

Enjoy your day; having spent yesterday outside in the freezing fog watching the oldest of the James Juniors play hockey whilst hubby went to watch the youngest do the same (fun games and wins all round, so that helped!), we are all looking forward to a day indoors enjoying the warmth today! I'll be back tomorrow with another project. Until then, happy stampin'!


Stampin' Up! Supplies Used: 

Table built using Product Table Builder by The Crafty Owl - Independent Stampin' Up! Demonstrator.
 
Edit: Kim chose my card for Princess of Clean for FMS518 - yay!
See the source image

Giving Gifts CAS Ombre Snowflakes FF00099 and AYSI265

by Joanne James10. December 2021 09:00

This week I've managed to combine both my card for the new challenge over at Festive Friday and my design team card for our new challenge over at As you See It and also used the idea I had brewing for my entry  over at AAA Cards too:


The challenge that we are celebrating this week at Festive Friday is 'New Year's Day' which is on 1st January and at As You See it we are ending the year on a timely speed stamping challenge with the theme of 'snowflakes'. Remember at Festive Friday you do not need to actually celebrate the occasion; your goal is to simply use three or more items from the inspiration list on your project. I don't usually send cards to celebrate New Year; this week I used sparkle, rhinestones and diecuts from the FF inspo list and this is what I came up with:


Here's the low-down on today's card:

Giving Gifts Of Snowflakes - If you read Wednesday's blog post (if you didn't, you can see it here) you will recognise the snowflake border on my card. This was actually the first card in this pair that I made - clever positioning of these dies makes it easier to create this fun snowflake border detail. In keeping with the clean and simple feel of my card, I added a simple sentiment from the 'Snowflake Wishes' stamp set in Night of Navy and positioned it in the centre of my panel. I also had time for some quick stamping on the inside of my card too:


Blue Ombre Sparkle - I am having something of a love affair with the Night of Navy blue ombre glimmer paper at the moment - I could do with a whole pack of this colour on its own! I think it works really well when balanced against lots of white for a touch of festive sparkle, especially when paired with snowflakes (you can see another example of that here) so I couldn't resist using it for the inset panel behind my snowflakes. Check out the sparkle:


The Need For Speed - This card was super quick to put together: I finished at 6 minutes and 5 seconds and was feeling pretty pleased with my self in meeting my AYSI brief. It was at this point that I realised that having used diecuts and sparkle, I only needed one more thing from the Festive Friday inspo list and I would meet both briefs and save myself even more time, so I spent another 20 seconds adding some blue faceted gems (aka blue rhinestones!) to my snowflake centres and managed at 6 minutes 25 seconds to meet the AYSI speed brief using three things from the FF inspo list whilst still meeting the AAA Cards CAS brief, and with the option of snow too! Just 6 products, 3 challenges and less that 10 minutes - I'd say that's a result at this super-busy time of year!

Here is the visual summary of the key products used on today's project for you to pin for easy reference:


You can see all of my 'How To' summaries on my 'How To - Tips and Techniques' Pinterest board in case you've missed any. 

We all need to save a little time at this time of year, so I hope you are inspired to create something speedy today - or maybe even get a head start on your New Year cards too!

For more inspiration, be sure to visit the rest of the  Festive Friday Challenge Design team:

Ann Schach
Beth McCullough
Sharon Hashimoto Burkert
Melanie Hungerford
Helen Jennings
Stephanie Lanzalotto
Melva Peters
Jaydee
Diane Evans
Joanne James

And here's a summary of the As You See It challenge rules:

  • Create any card, scrapbooking page, 3D project or packaging project that fits the challenge.
  • Please include the challenge graphic and link back to the challenge in your blog post. Turn off word verification so we can leave you lots of lovely comments. Make sure you link the post not the whole blog to the Linky. Use #AYSIXXX when uploading to a public gallery.
  • If you’re unsure about ‘the rules’, check the details under the Challenge Guidelines tab on the As You See It Challenge homepage.
  • In a speed stamping challenge, please time yourself and say in your post how long your card took to complete. 
We look forward to seeing your creations in the FF and AYSI galleries.

Enjoy your day; I am interrupting my usual day of Friday chores with a coffee with a friend I haven't seen in a super long time and my pre-Christmas haircut, so it's all happening here!! I'll be back tomorrow with another project. Until then, happy stampin'!


Stampin' Up! Supplies Used:

Table built using Product Table Builder by The Crafty Owl - Independent Stampin' Up! Demonstrator.

2025-26 Annual Catalogue

BROWSE THE CATALOGUE

Click on the image to download your copy of the 2025-26 annual catalogue. For a full list of current SU! supplies, go to my online store. If you would like any help or advice, please drop me a line at joanne@thecraftyowl.co.uk or give me a call on 07773 421446 - I'd be happy to help.

Shop Online

Access my online shop 24 x 7, 365 days of the year:

Shop Online

Join My Team

It's always a great time to join Stampin’ Up! Between 6-31 May, new team members can get £170 worth of products for only £99 + free business supplies + free shipping + all the fun being a part of Stampin’ Up! That's an extra £40 of product - FREE! Stampin' Up! has something for everyone: join my growing team and benefit from my support to enjoy Stampin' Up! however you choose.

If you're interested, call me for a chat to understand how I can help you realise your goals. Alternatively, if you have already decided to sign up and you just can't wait, please click here for the link to the online form where you can sign up and order your starter kit right away! 

Latest Kits!

Stampin Cut and Emboss

The Sending A Smile Kit and The Beautiful Blues Kit are the latest kit additions to the online store - get yours here!

New Online Exclusives

There are new products available exclusively in the online store from 6 May - check them out here.

About Me

Hi I'm Joanne and live in Northampton and when I'm not looking after my husband and two beautiful children, am an avid crafter with a passion for all things Stampin' Up!

I must confess that I have never been a big rubber stamper - until I discovered Stampin' Up! that is. I love the fact that I can get such great results with co-ordinating stamps, inks, papers and punches - the possibilities are endless! Join me on my stamping journey as I share the things I love and be inspired to create amazing things yourself!

Follow Me

Monthly Newsletter

Box Builder

Click the button above to use Box Buster to create your custom box design using the Envelope Punch Board!

Kits Collection Now Available!

Stampin Cut and Emboss

The new Kits Collection from Stampin' Up! is now available!

Click here to see the current kits available and order yours online today.

I Design For


Stampin' Up Stuff

This is my personal blog and is not endorsed by Stampin’ Up! Stampin' Up! is a registered trademark of Stampin' up! Inc. I hope you find my blog a plentiful source of ideas and personal inspiration but please don't copy my designs for contest submission or use for classes, publication or sale without express permission.