Hippo Happiness and Wishing You A Warm and Toasty Cool Yule

by Joanne James23. November 2020 11:00


Today it's Monday and the start of a new week! I've had a Paper Pumpkin craft along with some of my lovely customers, putting together our 'Joy To The World' kits already this morning and now it's time for today's creative post! I'm sharing a couple of cards for a couple of challenges. The first of these is a card using Narelle's cute sketch over at Freshly Made Sketches and the colours at CAS Colours and Sketches:


The CAS Colours & Sketches colours intrigued me and I made my card in a landscape format to accommodate my slightly longer sentiment and took a short break from creating Christmas cards to make a  quick birthday card - take a look:


Here's the low-down on today's card:

I kept it simple and used block colours for my background squares and stamped a little hippo from the 'Hippo Happiness' stamp set in Basic Grey on the central one with a stamped flower that I fussy cut and added behind her ear. I then added a sentiment and finished my card with an equally punny sentiment inside:


Here is the visual summary of the key products used on today's project for you to pin for easy reference:


You can see all of my 'How To' summaries on my 'How To - Tips and Techniques' Pinterest board in case you've missed any. 


My second card uses the colours over at Color Throwdown and the current layout over at CAS(E) This Sketch:


After last Friday's post where I declared that I find myself avoiding Rich Razzleberry as a colour these days, I saw it was one of the trio in the Color Throwdown colours this week and loved the combination with aqua and vanilla, so reached for it to create another Christmas card - take a look:


Here's the low-down on today's card:

A bold banner of purple and a rather snazzy hat and scarf combo to adorn my skating polar bear, but the real star of this card is the lovely snowflake-embossed Pool Party Panel that sits behind him and adds a lovely element of texture:


I fussy cut the polar bear to finish, but that is no real hardship - it's quite easy to do with some sharp paper snips.

Here is the visual summary of the key products used on today's project for you to pin for easy reference:


You can see all of my 'How To' summaries on my 'How To - Tips and Techniques' Pinterest board in case you've missed any. 

I'll be back again shortly with another post with notice of the 'Merry and Bright' 24 hour flash sale that starts at 10.50pm tonight, so check back for that - you won't want to miss it! Until then, happy stampin'!


Stampin' Up! Supplies Used - Card 1:

Table built using Product Table Builder by The Crafty Owl - Independent Stampin' Up! Demonstrator.
 
 
Stampin' Up! Supplies Used - Card 2:
 
Table built using Product Table Builder by The Crafty Owl - Independent Stampin' Up! Demonstrator.

Snowman Season Embossed Snowflakes and A Bright Pine Tree Plaid Tidings Christmas

by Joanne James16. November 2020 16:20

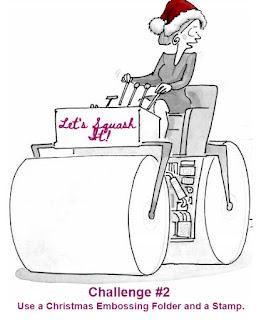
Happy Monday everyone! Today I have a couple of cards for you - hence my somewhat random blog title! The first for the current colour challenge over at Color Throwdown, using the sketch over at TGIF Challenges and with a stamp and embossed background that also fits the bill over at Christmas Kickstart who are partnering with a new-to-me challenge Squash It this time around:


That is a fairly hefty set of linkups, but when you look at my card it's super easy to see how each and every one inspired my project - take a look:
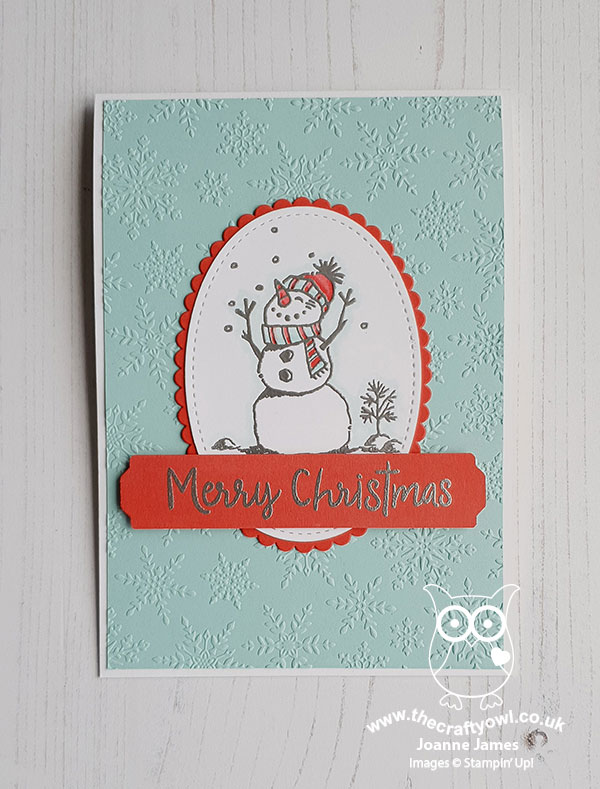
 

Here's the low-down on today's card:

Snowman Season - When I saw those Color Throwdown colours, I immediately thought 'snowman' and was delighted that they gave me an excuse to break out one of my much-loved stamp sets from last year, 'Snowman Season'. This set was carried over into the annual catalogue, but hasn't seen any love from me yet this season, with so many new stamp sets taking precedence! Today's card rectifies that though - how adorable is this chap, heat embossed in silver and carefully coloured with Pool Party and Poppy Parade Blends? 

Oval Centrepiece - The sketch over at #TGIFC290 was just perfect to showcase my snowman and it also encouraged me to use another shape I don't naturally gravitate towards - ovals! I went with a stitched oval to frame my snowman and added a Poppy Parade scallop-edged oval background mat, to allow it to pop against the Pool Party embossed background. 

Winter Snow - Lastly, to the embossed background! I ran my Pool Party layer through Stampin' Up!'s Winter Snow embossing folder to create a pretty background of delicately embossed snowflakes, which I felt complimented my snowman perfectly. Check out the detail on the angled shot below:
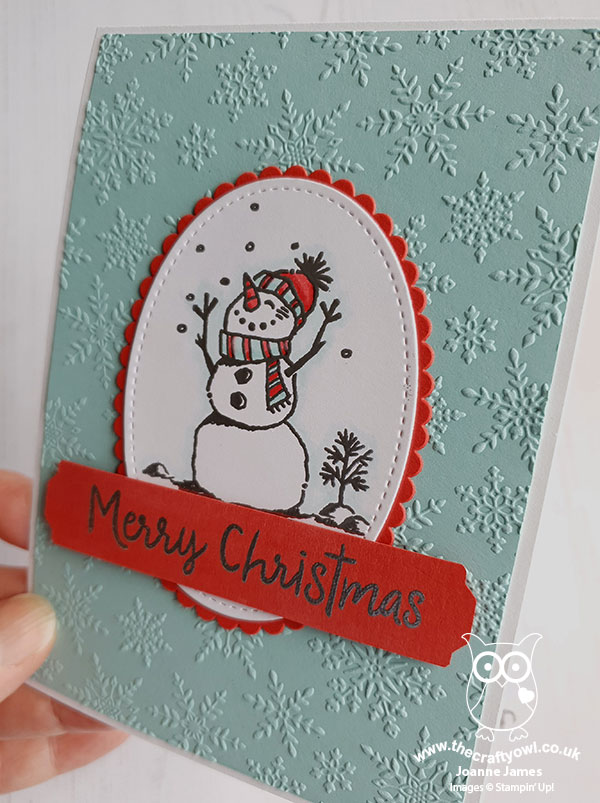
 

I love that something old can pair so well with something new - it's almost as if they were meant for each other!

Here is the visual summary of the key products used on today's project for you to pin for easy reference:
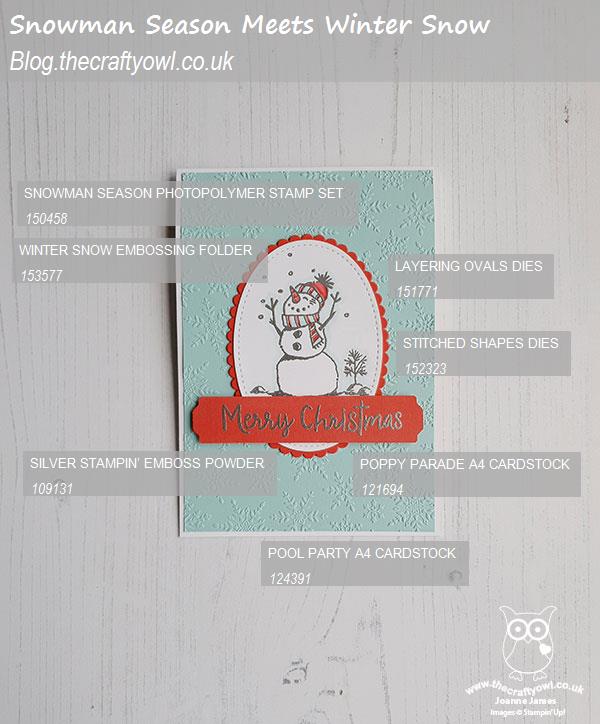
 

You can see all of my 'How To' summaries on my 'How To - Tips and Techniques' Pinterest board in case you've missed any. 

And for my second card today I am playing along with this week's Freshly Made Sketches challenge and the photo inspiration over at Just Add Ink:


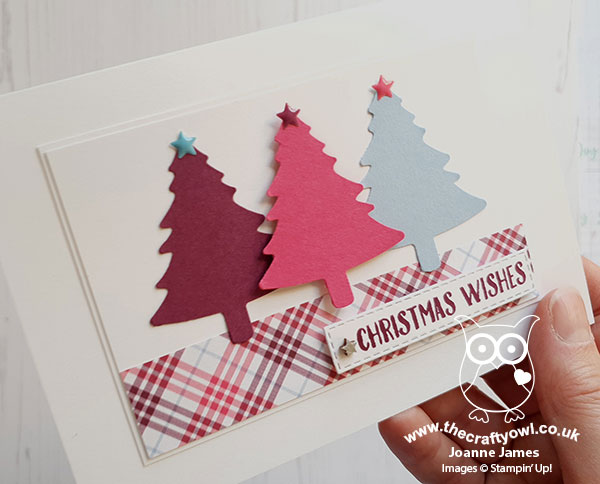
Karren's FMS sketch is a real go-to for me (if you search my blog you'll see lots of cards with this layout) so I thought I would challenge myself to rotate the sketch and work with it in the horizontal orientation and, inspired by those brightly coloured trees in the JAI photo, I created an unconventionally coloured Christmas card, again pairing something old with something new - take a look:
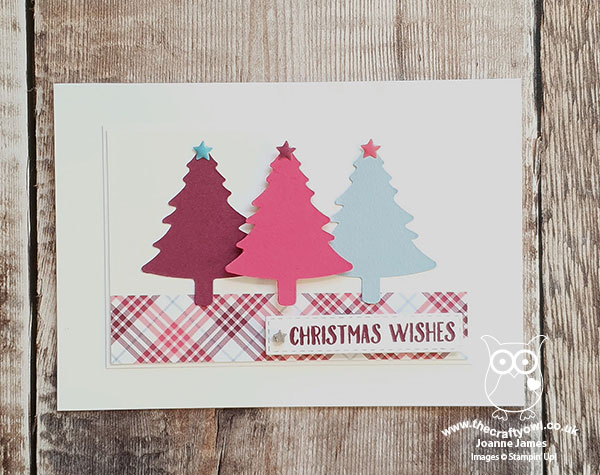
 

Here's the lowdown on this card:

Pine Tree Punch - I decided to use my Pine Tree Punch to create some bold block-colour Christmas trees, and went with a layered white background to allow the colours to really pop. I used a single (retired) enamel star in an alternating colour to top each one.

Plaid Tidings - In the absence of any dotty paper like the background trees in the inspiration photo, I decided to take inspiration for my bright colour combination from the trio of colours featured in my chosen design of Plaid Tidings designer series paper: Rich Razzleberry, Melon Mambo and Seaside Spray. I love that this paper pack contains some unusual plaid colours and whilst unconventional, I like the effect of these colourful trees.

Banner Year Sentiments - The sentiment on my card is from the 'Banner Year' sentiment set, embellished with a silver-painted (retired) wooden star from my stash, and finishes inside my card as follows:
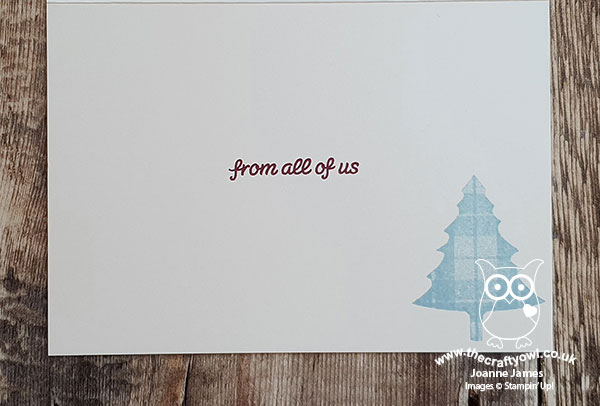
 

I really like the way this card turned out - unconventional colours on Christmas cards really change things up and I'm pleased I managed to stretch my use of this great layout too.

Here is the visual summary of the key products used on today's project for you to pin for easy reference:
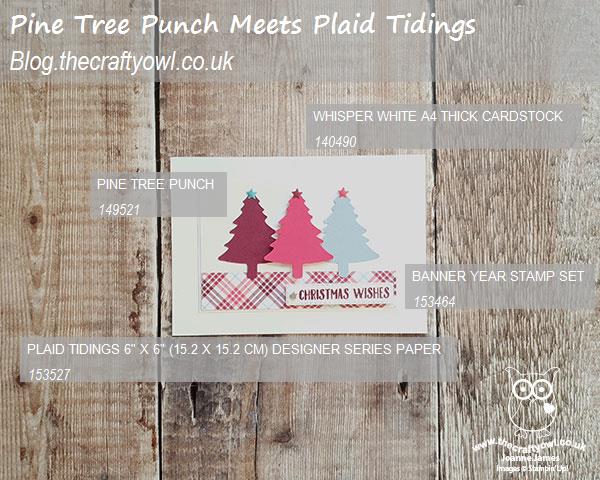
 

You can see all of my 'How To' summaries on my 'How To - Tips and Techniques' Pinterest board in case you've missed any. 

That's me done for today! Enjoy your evening and I'll be back tomorrow with another project. Until then, happy stampin'!
 

Stampin' Up! Supplies Used - Card 1:

Table built using Product Table Builder by The Crafty Owl - Independent Stampin' Up! Demonstrator.


Stampin' Up! Supplies Used - Card 2:

Table built using Product Table Builder by The Crafty Owl - Independent Stampin' Up! Demonstrator.

CASEing The Catalogue With Snowflake Splendor PP506

by Joanne James30. August 2020 09:00

Today it's Sunday and time for this week's new challenge over at The Paper Players! It's the fifth week of the month and the turn of the amazing Ann to host this week with a fun TicTaToe challenge board for you to work with:


My cards today feature lots of products from the Snowflake Splendor Suite in the Autumn-Winter mini catalogue. Take a look:


Here's the low-down on today's card:

TicTacToe - I love a tic tac toe board - they offer such a wealth of creative possibility and always result in an interesting gallery. I went along the diagonal bottom left to top right - diecut, embossing and patterned paper - for my card today, but realised afterwards it also works for the middle horizontal row of ribbon, embossing and gems - check out the sparkly blue faceted gem I used to centre my diecut layered snowflake:


CASEing The Catalogue - Does the layout I chose for today's card look familiar? The team over at SUO Challenges are challenging us to CASE (Copy And Share Everything or Copy And Selectively Edit, you choose) either of the cards featuring the 'Whale Done' Suite on page 94 of the catalogue:

I often use my Stampin' Up! catalogue for inspiration in terms of colours or layouts and this was a fun challenge to show how you can take inspiration from the catalogue to create something fresh and new. I actually made both of the cards I'm sharing today live in a Zoom demonstration with the ladies in my Online Classes Facebook Group during last week's session, as I wanted to explain my process and encourage them not to discount pages that featured products that might not be of interest to them, but instead look to see what other inspiration they could take. My card uses the same layout as the one on page 94 and includes all of the same elements: patterned paper, a central banner with contrasting stamping, a feature diecut image, diecut vellum pieces behind the banner and an embossed sentiment backed with ribbon - yet my card looks quite different to the one on page 94 as it uses a completely different product suite.

Snowflake Splendor Times Two - Having made this card, I then went on to CASE the second card on this page, that highlights an inked embossing folder technique:


I used the Winter Snow embossing folder and instead of a stamped panel, used a couple of pieces of contrasting designer series paper for the feature panel, embellished with some rhinestones and Whale of a Time sequins, along with a sentiment created from stamping two of the greetings from the 'Peace And Joy' stamp set next to each other to create a single one; this one is slightly different in layout to the catalogue sample, yet the similarities in layout still make it recognisable. 

Here's both of my CASEd cards together: 


Here is the visual summary of the key products used on today's project for you to pin for easy reference:


You can see all of my Product and 'How To' summaries on my 'How To - Tips and Techniques' Pinterest board in case you've missed any. Do you ever use layouts from the catalogue as a starting point for your card making? Do let me know in the comments below - I'd love to hear what inspires you to create! Equally, if you would like to watch the video of me making both of these cards, do get in touch for more details on how to join my Online Classes group - I would love to have you join me.

Before you reach for your ink and papers, check out what our amazing team has created to inspire you this week:

Here's a quick recap of our challenge rules:
 
1.  Create a new paper project
2.  Upload your creation to your blog with a link back to us and provide a direct link to the post featuring your challenge submission.
3.  Please link your card to no more than four challenges, TOTAL.
4.  Have FUN!

You can see all of my 'How To' summaries on my 'How To - Tips and Techniques' Pinterest board in case you've missed any. 

Enjoy your day; my day today will be a busy one, for a Sunday. Rebecca is back to hockey for the first time in 6 months for pre-season training so is very excited about that and I have hours of content to catch up on from Stampin' Up!'s Leader Summit this past few days, much of which I didn't do live because we were otherwise engaged as a family celebrating young Master James' finishing of prep school. Thank heavens for online recordings and catch-up - where would we be without it?! I also have a mound of raspberries to make into jams, jellies and more - the weather here these last few days has been positively autumnal so I have some very soft and squishy fruit that has been rather battered by the high winds! I'll be back tomorrow with another project. Until then, happy stampin'!


Stampin' Up! Supplies Used: 

Table built using Product Table Builder by The Crafty Owl - Independent Stampin' Up! Demonstrator.


New Online Exclusives

There are new products available exclusively in the online store from 5 November - check them out here.

Latest Kits!

Stampin Cut and Emboss

The Layered Landscapes Kit and Nature's Paintings Kit are the latest kits in the online store - get yours here!

Shop Online

Access my online shop 24 x 7, 365 days of the year:

Current November hostess code:

9NKXDTTR

Shop Online

Mini Catalogue

BROWSE THE CATALOGUE

'Tis The Season - the new Stampin' Up! Mini Catalogue is here! For more details and to download your copy click here

Scrapbooking

Stampin' Up! has introduced a new range of 12x12" scrapbooking product and kit - the full range is now available to purchase online. To download a copy of the new digital Scrapbooking Catalogue click here.

2024-25 Annual Catalogue

BROWSE THE CATALOGUE

Click on the image to download your copy of the 2024-25 annual catalogue. For a full list of current SU! supplies, go to my online store. If you would like any help or advice, please drop me a line at joanne@thecraftyowl.co.uk or give me a call on 07773 421446 - I'd be happy to help.

Join My Team

It's always a great time to join Stampin’ Up! New team members can get £130 worth of products for only £99 + free business supplies + free shipping + all the fun being a part of Stampin’ Up! Stampin' Up! has something for everyone: join my growing team and benefit from my support to enjoy Stampin' Up! however you choose.

If you're interested, call me for a chat to understand how I can help you realise your goals. Alternatively, if you have already decided to sign up and you just can't wait, please click here for the link to the online form where you can sign up and order your starter kit right away! 

About Me

Hi I'm Joanne and live in Northampton and when I'm not looking after my husband and two beautiful children, am an avid crafter with a passion for all things Stampin' Up!

I must confess that I have never been a big rubber stamper - until I discovered Stampin' Up! that is. I love the fact that I can get such great results with co-ordinating stamps, inks, papers and punches - the possibilities are endless! Join me on my stamping journey as I share the things I love and be inspired to create amazing things yourself!

Follow Me

Monthly Newsletter

Box Builder

Click the button above to use Box Buster to create your custom box design using the Envelope Punch Board!

Kits Collection Now Available!

Stampin Cut and Emboss

The new Kits Collection from Stampin' Up! is now available!

Click here to see the current kits available and order yours online today.

I Design For


Stampin' Up Stuff

This is my personal blog and is not endorsed by Stampin’ Up! I hope you find it a plentiful source of ideas and personal inspiration but please don't copy my designs for contest submission or use for classes, publication or sale without express permission.