by Joanne James27. November 2015 21:48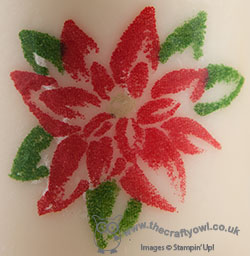
Yay - it's Friday - always a good day! I've had a busy one with a few errands, appointments and a pleasant afternoon watching Ben play rugby. Not much time for crafting today (I did help a friend make good progress on some Christmas bunting, but we still have a few finishing touches to make so I'll share that another time!) so I'm sharing a home decor project I made in a class with a lovely group of ladies last week. We decided to decorate a pillar candle and make a table centre, using the Festive Flower Punch and the Spiral Flower Originals Die to make a wreath of flowers around the base.
Here's my finished project, in Real Red with Very Vanilla roses:
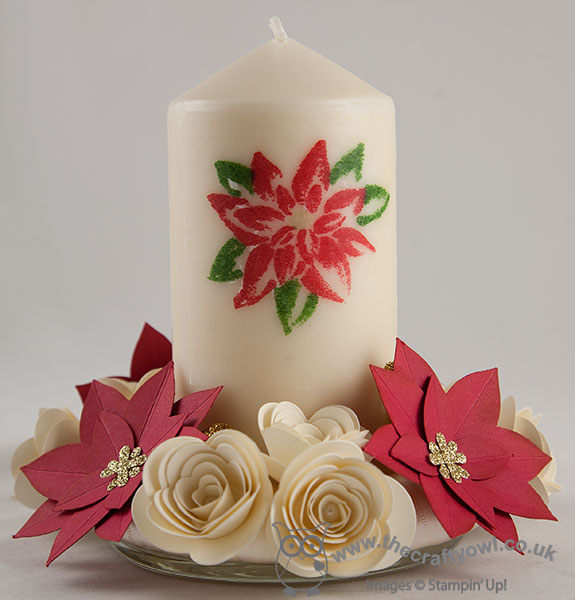
I stamped the flower from 'Reason to the Season' on filter paper and melted it into the candle to set it, then covered a small polystyrene wreath with Very Vanilla satin ribbon before adhering my flower to it. A few gold glimmer and pearl flower centres and some loops of gold glitter ribbon interspersed in between completes the project.
The ladies in my class made their arrangements in a variety of colours; you can see their creations on my Facebook page here (feel free to give me a 'like' whilst your there!) for more colour inspiration. This was such a fun project to make and another way to show the versatility of the 'Reason for The Season' stamp set and co-ordinating Festive Flower Punch - this is one bundle that just keeps on giving, so many creative possibilities! The new Spring-Summer catalogue also offers another stamp set that co-ordinates with this useful punch - watch this space!
I'm linking up with the lovely ladies over at SUO Challenges too who are working with your favourite holiday colours - my traditional colour scheme remains a favourite, even though it's sometimes nice to step out of the creative comfort zone (see next Sunday's post for an example of that!) That's all from me today; back tomorrow with another project. Until then, happy stampin'!
Stampin' Up! Supplies Used:
1538a919-9b29-4077-8406-ebb92874c7f2|1|5.0|96d5b379-7e1d-4dac-a6ba-1e50db561b04
Tags: 3D Projects, Big Shot, Reason For the Season, Festive Flower Builder Punch, Shop Stampin' Up online, Shop online, Stampin' Up Supplies, Stampin' Up Card ideas, Stampin' Up Card, Stampin' Up, Spiral Flower Originals Die
3D Projects | Shop Online | Stamping
by Joanne James23. March 2014 18:16This morning I held one of my weekend project classes. They generally last longer than my monthly card classes and are a great opportunity to do something different and a little more involved. Following a successful class last December to make festive Christmas banners (you can read more about that and see our wonderful creations here), at the request of a few of the ladies who attended I decided to hold one to make a Spring/Easter banner with the other half of our banner kits. I chose a colour scheme that would compliment that of the Burlaps and Blooms wreaths that several of us made at my last weekend project class - you can see my finished wreath here. So here is my completed banner:

I chose to feature the word 'Spring' on my banner, as I am intending to leave it up to decorate for a while, but some of the ladies in my class made one that featured the word 'Easter'. We stencilled our backgrounds and letters using the now retired Build a Banner stencil kit in Daffodil Delight, Tangerine Tango and Pool Party with lettering in Smoky Slate.
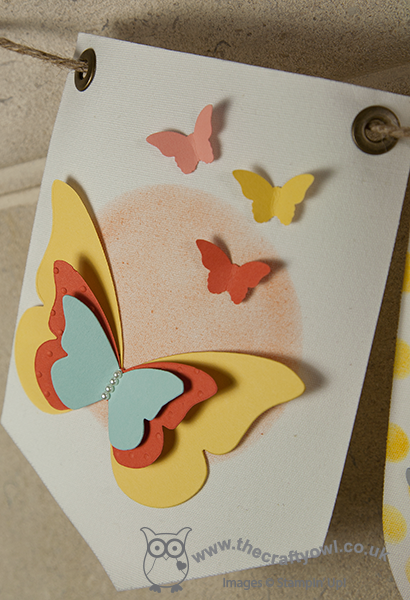
The banner is decorated with flowers made with the Spiral Flower Originals Die and punched and die-cut butterflies. Here are some close ups of the individual banner pieces - this is the first piece, with a layered butterfly with a lightly embossed layer and some tiny ones punched out with the Itty Bitty Butterfly punch:
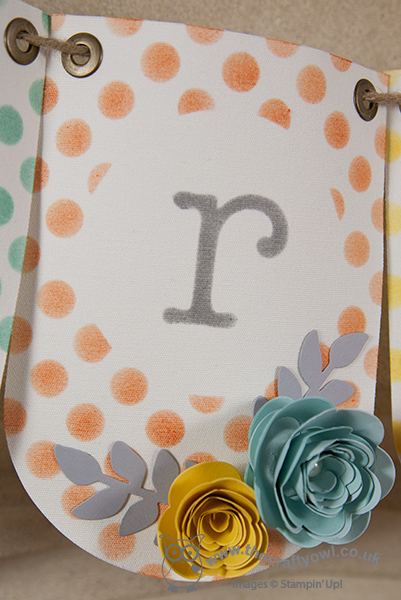
Here's a close-up of one of the letters, along with a couple of the spiral flowers; a single yellow flower and a two-tone blue flower, finished with some Smoky Slate leaves cut out with the Secret Garden framelits:
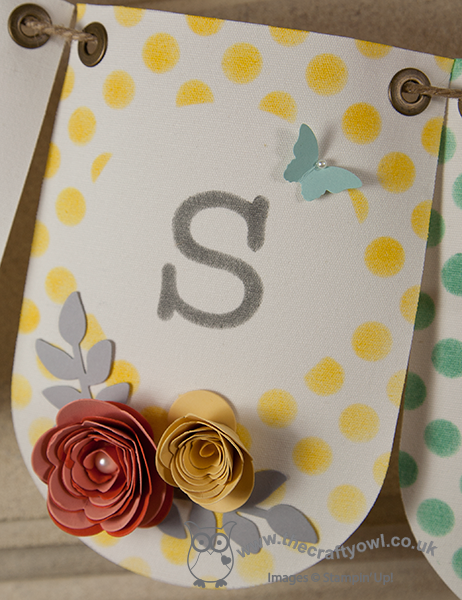
This one has a So Saffron single flower and a two-tone one in Tangerine Tango and Crisp Cantaloupe, finished with an extra-large pearl, along with a bitty blue butterfly:
My banner simply served as inspiration and as is often the way with this kind of class, everyone makes theirs slightly differently and adds their own unique touch. If you hop on over to my Facebook page, you will be able to see the finished banner that Julie, one of the lovely ladies who attended the class made - different to mine, yet equally gorgeous!
If you live in Northampton and would like to join any of my card or project classes, check out my schedule of forthcoming classes here or contact me for more information.
Back tomorrow with a card to share; until then, happy stampin'!
Stampin' Up! Supplies Used:
18734ef9-f47f-4512-85c9-0769a33a3f56|1|3.0|96d5b379-7e1d-4dac-a6ba-1e50db561b04
Tags: 3D Projects, Big Shot, Bitty Butterfly Punch, Butterflies, Classes, Decorative Dots Textured Impressions Embossing Folder, Easter, Home Décor, Secret Garden Framelits, Shop online, Spiral Flower Originals Die, Stampin' Up, Stampin' Up Card, Stampin' Up Card ideas, Stampin' Up Supplies, Stencilling, Beautiful Butterflies Bigz Die
3D Projects | Classes | Stamping
by Joanne James16. February 2014 20:50I've had a busy but productive day today exhibiting at the Budget Bride Live Wedding Fair at Diana's Health and Fitness Club in Wellingborough. Thank you to all of the lovely brides to be that came to say 'hello' to me in the Ruby lounge today - it was lovely to meet you all and I'm really looking forward to chatting with you again soon to begin the process of turning your stationery dreams into reality. Today I'm sharing one of the table decorations that I made for my exhibition display that received lots of positive feedback today - a birdcage decorated with flowers made with the new Spiral Flower Die:
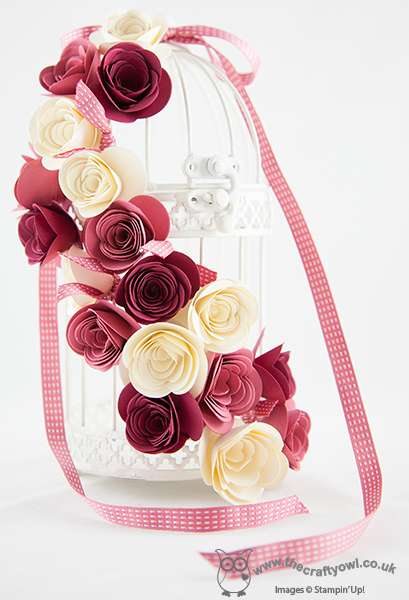
I made these flowers in three co-ordinating colours of cardstock and finished the centre of each flower with a pearl, then added some satin stitched ribbon to finish. You could make something similar in any colour to tie in with your chosen wedding colour scheme - it would make a lovely table centre.
That's all from me today; I am crafting at a children's birthday party tomorrow so will share one of the projects we are doing with you in tomorrow's post.
Until then, happy stampin'!
Stampin' Up! Supplies Used: