Father's Day Captain America Hero Card

by Joanne James14. June 2016 14:45

I'm back again! Apologies for yesterday's lack of blog post; at this time of year the last few weeks of the academic year are always busy, so it sometimes means my daily blog schedule is disrupted. Do bear with me - it's often not for want of things to share and more the time to write the posts, in amongst other commitments to my family, customers and team. There will always be posts to coincide with my design team commitments; there just might be the odd day when I don't make it to the laptop! Anyway today I do have a fun share that uses this week's colours over at The Paper Players again and the sketch layout at CAS Colours and Sketches:


My fellow Paper Player LeAnne, who chose this week's colours, also chose to use this sketch for her Sunday card (you can check it out along with the other Paper Player Team cards here) and whilst I was working on my team card, I also came up with this one that would make a fun last-minute Father's Day card:
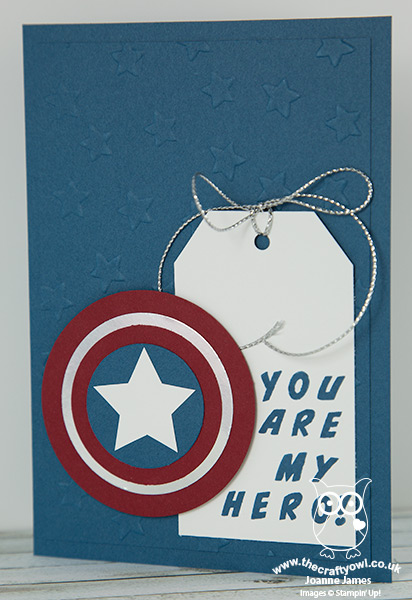
 

I am using a few retired products on today's card, but you could quite easily substitute these with other similar products such as the scalloped tag topper punch, layered circle thinlits and an alternative alphabet stamp set such as the new Labeler Alphabet. Here's the low-down on today's card:

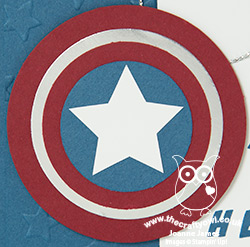
My Hero Captain America - The layered circle element on my card is inspired by the shield belonging to that all-American superhero Captain America. I used my circle framelits and the challenge colours, with a circle of silver foil card, to create my shield. I decided to make this card into a Father's Day card, but the sentiment could also be adapted for a younger boy's birthday card, which given the popularity of Marvel comic book heroes with my 8 year old and his friends currently is something I definitely need to look into!

Calling All Heroes - I used the Retired 'Calling All Heroes' stamp set for my custom sentiment on my tag; this comic book script adds just the right feel for my card. For my UK readers who might be thinking 'what set?' this set was available only in the USA. I was sent a set by the lovely LeAnne (thank you again!) and I knew that I would get lots of use from it with its fun comic book and superhero images. I also used other images from the set to decorate the inside of my card. For me it's a keeper!

It's In The Stars - Lastly, I punched a white star for the centre of my shield using the medium star punch and embossed the background panel for my cardfront using the Lucky Stars embossing folder to add texture and interest and tie in with my overall theme. 

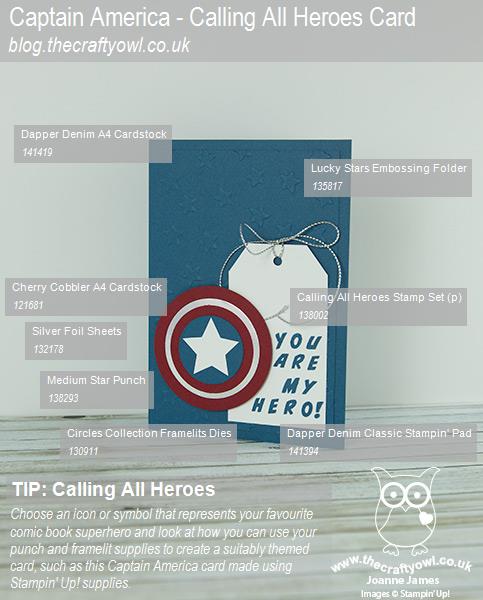
Here is the visual summary of the key products used on today's project for you to pin for easy reference:
 

You can see all of my 'How To' summaries on my 'How To - Tips and Techniques' Pinterest board in case you've missed any. 

Enjoy your evening. I'm off to bake and ice some cupcakes for a very special birthday girl who will be celebrating tomorrow. I'll be back then with another project; until then, happy stampin'!


Stampin' Up! Supplies Used:

Table built using Product Table Builder by The Crafty Owl - Independent Stampin' Up! Demonstrator.

Make a Wish Simple Pop-up Card

by Joanne James19. May 2014 19:19

I haven't had any time for crafting today, so I'm going to share with you a simple pop up card designed by Monica Gale that I made at our quarterly training session last month and that I made with my ladies at our recent Fresh Prints All Day Craft Event - here is the outside of the card:

I added a few layers of Fresh Prints papers onto a Coastal Cabana card base, then stamped the 'Make a Wish' stamp from the Perfect Pennants set in Crumb Cake and punched out with a 2 3/8" Scalloped Circle punch layered onto a 2 1/2" circle out of Real Red cardstock, The banner was cut from a scrap of DSP and the 'a' stamped on red card and punched out and popped on a dimensional for added dimension. To decorate, I stamped a star from 'Simply Stars' in Real Red on Whisper White cardstock, added a DSP star using the Merry Minis star punch and secured with a gold glimmer brad with a twist of gold threaded baker's twine behind for a little added sparkle.

Inside the card there is a really simple little pop up made by cutting two short horizontal slits in the liner, which is made out of a notelet:

A few more stars and a simple birthday greeting and it's done - a fun little pop card suitable for either gender. I'm hoping to get into my craft room tomorrow and catch up on my crafting, although there is a big basket of ironing competing for my attention, so might need to get that out of the way first!

Either way, back tomorrow with another project; until then, happy stampin'!


Stampin' Up! Supplies Used:

Table built using Product Table Builder by The Crafty Owl - Independent Stampin' Up! Demonstrator.


Congratulations Stars - The Paper Players #183

by Joanne James21. February 2014 19:46

I've had a very crafty day today and managed to make a few quick cards to catch up on some of this week's challenges. I'm just in time to get in my entry for this week's challenge at The Paper Players, where LeAnne's challenge this week is CAS Clean and Simple with Stars:

I decided to go with a gold and blue theme and used the sketch over at CAS Colours & Sketches this week for my layout (too late to enter for the challenge, but I liked the unusual layout) - here is my card:

I stamped my stars with the gold metallic ink pad, then heat-embossed the 'Congratulations' stamp from the Ronald McDonald set on gold and set this on a mat of gold foil so that it really stood out. I cut out the label using the co-ordinating framelit and cut the foil mat freehand, using the outside edge of the framelit as a guide. This card will be on it's way to one of my team members - two of them have recently gained promotions, so along with a new team member this week, there's plenty to celebrate!

Back soon with another of my 'makes' today; until then, happy stampin'!


Stampin' Up! Supplies Used:

Table built using Product Table Builder by The Crafty Owl - Independent Stampin' Up! Demonstrator.


Tags: , , , , , , , ,

Cards | Join My Team | Stamping

My Super Duper Swimmer! FMS122

by Joanne James9. February 2014 20:01

Today's post has been somewhat hijacked! I know I told you yesterday that this was an ordinary weekend and whilst that still holds true, something special happened today that I want to share with you. So, Rebecca went for her swim squad training this morning as usual but, unbeknown to me, she was given the option post warm-up to attempt her final distance badge - 1 mile (1.6km). Her previous distance badge achieved was for 1000m some 18 months ago, so I was confident she could do it, but 1 mile - it's still a long way, right? Well, she achieved it and was clearly so pleased with herself she phoned me from the car to tell me. As I turned to share with Ben the good, news, he promptly announced "Right Mum, let's go and make a card quickly before she gets home!" So with about 15 minutes to go, we set to work and this is what we came up with:

I followed this week's sketch layout at Freshly Made Sketches for my card and made a larger than usual 5 1/2" x 5 1/2" square card to accommodate my journaling tag. I rounded the corners of all my layers using my Envelope Punch Board (love that you can do this!) to echo the shape of the squares on the tag and co-ordinating Retro Fresh DSP. Ben was keen to incorporate swimming into the card (a challenge at short notice!) so we compromised at embossing the Coastal Cabana band with the Chevron Embossing Folder to give the illusion of waves and movement (in an abstract kind of way!) Lastly, I stamped and fussy cut a star and adhered to the corner of the tag with a dimensional because, well, Rebecca is my star! Ben insisted on finishing off by writing a message of congratulations inside in his best joined-up handwriting and we were just finishing up as Rebecca came through the front door.

She loved her card, which seems perfect recognition for such an achievement; I'm not sure I could swim a mile now, let alone when I was 8 years old!

Back tomorrow with the card that would have been posted today, but was deservedly 'bumped'; until then, happy stampin'!


Stampin' Up! Supplies Used:

Table built using Stampin' Up! Product Table Builder from The Crafty Owl.


New Online Exclusives

There are new products available exclusively in the online store from 5 November - check them out here.

Latest Kits!

Stampin Cut and Emboss

The Layered Landscapes Kit and Nature's Paintings Kit are the latest kits in the online store - get yours here!

Shop Online

Access my online shop 24 x 7, 365 days of the year:

Current November hostess code:

9NKXDTTR

Shop Online

Mini Catalogue

BROWSE THE CATALOGUE

'Tis The Season - the new Stampin' Up! Mini Catalogue is here! For more details and to download your copy click here

Scrapbooking

Stampin' Up! has introduced a new range of 12x12" scrapbooking product and kit - the full range is now available to purchase online. To download a copy of the new digital Scrapbooking Catalogue click here.

2024-25 Annual Catalogue

BROWSE THE CATALOGUE

Click on the image to download your copy of the 2024-25 annual catalogue. For a full list of current SU! supplies, go to my online store. If you would like any help or advice, please drop me a line at joanne@thecraftyowl.co.uk or give me a call on 07773 421446 - I'd be happy to help.

Join My Team

It's always a great time to join Stampin’ Up! New team members can get £130 worth of products for only £99 + free business supplies + free shipping + all the fun being a part of Stampin’ Up! Stampin' Up! has something for everyone: join my growing team and benefit from my support to enjoy Stampin' Up! however you choose.

If you're interested, call me for a chat to understand how I can help you realise your goals. Alternatively, if you have already decided to sign up and you just can't wait, please click here for the link to the online form where you can sign up and order your starter kit right away! 

About Me

Hi I'm Joanne and live in Northampton and when I'm not looking after my husband and two beautiful children, am an avid crafter with a passion for all things Stampin' Up!

I must confess that I have never been a big rubber stamper - until I discovered Stampin' Up! that is. I love the fact that I can get such great results with co-ordinating stamps, inks, papers and punches - the possibilities are endless! Join me on my stamping journey as I share the things I love and be inspired to create amazing things yourself!

Follow Me

Monthly Newsletter

Box Builder

Click the button above to use Box Buster to create your custom box design using the Envelope Punch Board!

Kits Collection Now Available!

Stampin Cut and Emboss

The new Kits Collection from Stampin' Up! is now available!

Click here to see the current kits available and order yours online today.

I Design For


Stampin' Up Stuff

This is my personal blog and is not endorsed by Stampin’ Up! I hope you find it a plentiful source of ideas and personal inspiration but please don't copy my designs for contest submission or use for classes, publication or sale without express permission.