Rings Of Love Welcome To Your New Home TTT174

by Joanne James11. August 2022 18:00

It's Thursday and time for a new challenge over at TicTacToe! It's the turn of Team X to host this week and I am the featured designer this week. This is the fun board that we are playing along with: 


I went down the middle column with house, patterned paper and tree/wood and using the sketch layout over at SUO Challenges decided to make a 'welcome to your new home' card - take a look:


Here's the low-down on today's card:

I used one of the house pattern sheets from the Rings of Love designer series paper (free during Sale-A-Bration with a £45 purchase) and added a panel to my Mint Macaron cardbase, whilst fussy cutting another house to form the centre of my clustered focal point. I used the Label Me Lovely punch to punch a piece of white cardstock and added my welcome greeting, then tucked this behind a layered tree ring. You can't fully see the detail on this card, but I just love the new Tree Rings hybrid embossing folder and co-ordinated dies - so much texture and detail! I added some branches cut using other dies in this set that I watercoloured, along with some trees cut using the Tree Lot Dies which I watercoloured to mimic the loose colouring of the DSP and layered all of the elements together:

The papers in this pack are great and I think this is one of my favourite designs; it's just perfect for a 'new home' card. Oh, and did I mention it's FREE?! Gotta love Sale-A-Bration!

Here is the visual summary of the key products used on today's project for you to pin for easy reference:


You can see all of my Product and 'How To' summaries on my 'How To - Tips and Techniques' Pinterest board in case you've missed any. 

A tictactoe board offers so many creative possibilities - how does this week's board inspire you? Why not have a go? We would love to see you in the gallery and who knows - you might be selected for Designer's Choice and be eligible to be a guest designer on a future challenge. 

Enjoy your day; I'll be back tomorrow with another project for our new challenge over at As You See It. Until then, happy stampin'!


Stampin' Up! Supplies Used: 

Table built using Product Table Builder by The Crafty Owl - Independent Stampin' Up! Demonstrator.

Home Life New Home Congratulations Card TTT162

by Joanne James19. May 2022 18:00

It's Thursday and time for a new challenge over at TicTacToe! It's the turn of Team X to host this week and the lovely Betty is our featured designer this week. This is the fun board that we are playing along with: 
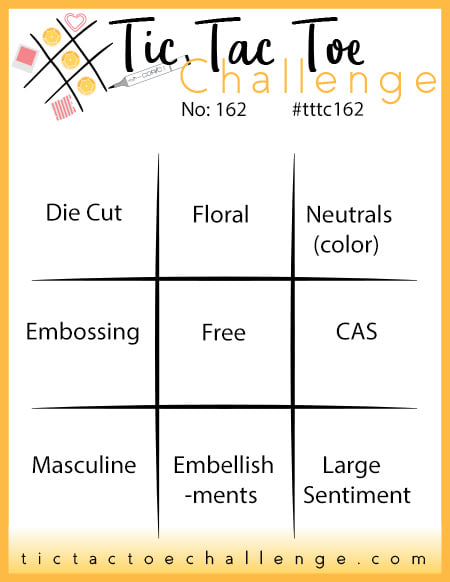
 

I have needed a few 'new home' cards lately so I went down the middle column with flowers/free/embellishments to create a new home congratulations card with a difference - take a look:
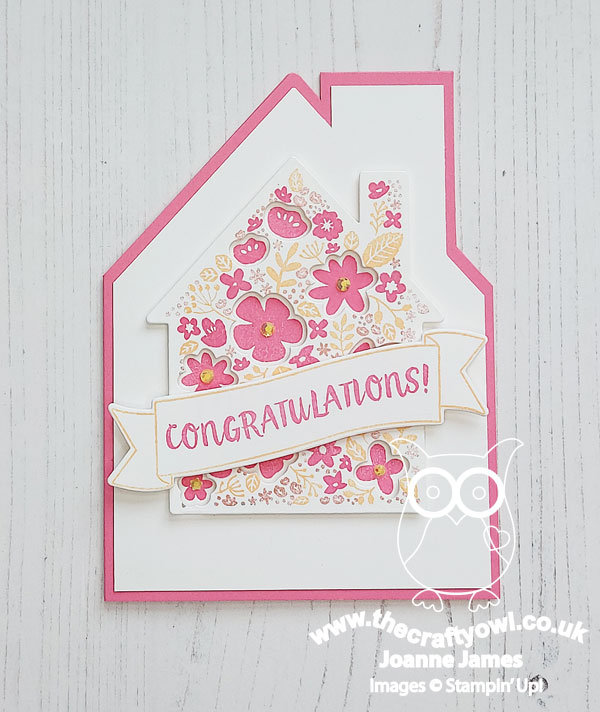
 

Here's the low-down on today's card:

A Golden Oldie - When I made my new home card for our challenge over at The Paper Players this week (you can see that card here if you missed it), I realised how few current stamps I have that work for a new home card. This had given me cause to rummage through the retired shelf and I came across the retired 'Home Life' stamp set with the co-ordinating Welcome Home Dies (also retired) so decided to use them for today's card. 

Fresh FloralsThis is a 3 step layered photopolymer stamp and the layers can be used separately or together, as I've done here, to create a house packed with florals. I paired my retired stamps with Blushing Bride and two of the 2021-23 In colours, Polished Pink and Pale Papaya, for a fresh new look. I accented the centres of some of the larger pink flowers with some of last year's in-color jewels for a touch of sparkle too.

Shape It - The house die in the Welcome Home Dies set fits the front of a standard card perfectly, but I thought it would be fun to follow the contours of the die to create a card that was actually shaped like a house. It was really straightforward to do and just required a little extra measuring and slicing with my trimmer to achieve the desired result:
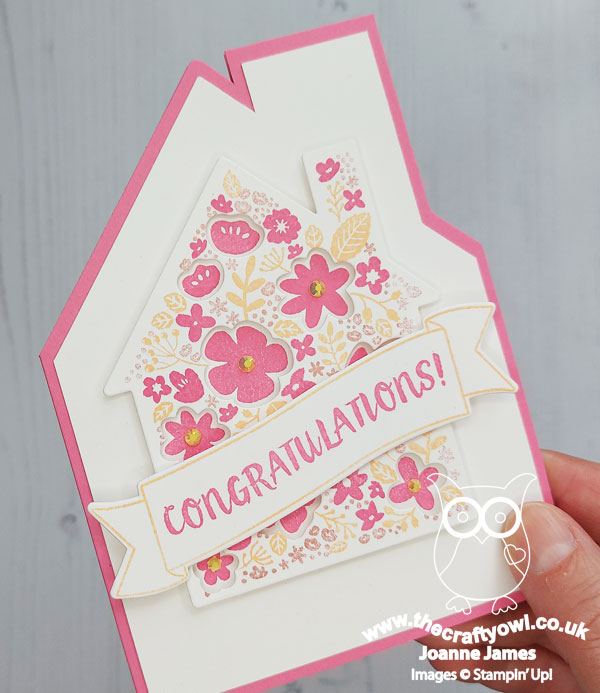
The card hinges on the left and opens conventionally and I simple added a shaped insert to the inside too. Do you ever create shaped cards? Leave me a comment below and let me know - I'd love you to share your favourite tips too.

Here is the visual summary of the key products used on today's project for you to pin for easy reference:
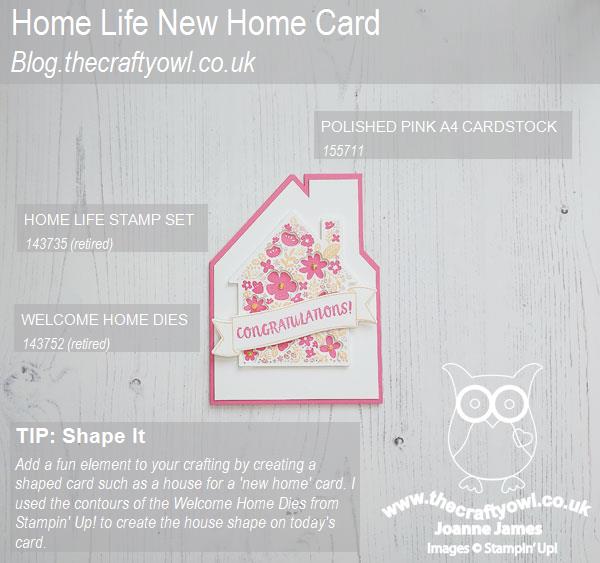
 

You can see all of my Product and 'How To' summaries on my 'How To - Tips and Techniques' Pinterest board in case you've missed any. 

A tictactoe board offers so many creative possibilities - how does this week's board inspire you? Why not have a go? We would love to see you in the gallery and who knows - you might be selected for Designer's Choice and be eligible to be a guest designer on a future challenge.

Challenges: I'm also entering today's card over at Just Us Girls where it's trend week and they are looking for shaped cards and at The Card Concept where my clean and layered card was inspired by the flowers in the vase and the soft pink and peach tones of their colour palette this week. I'm also linking up over at Retro Rubber Challenge where the challenge is 'flowers' - my 'Home Life' stamp is definitely retro, dating back to 2017.
      RRCB 182

Enjoy your evening; I'll be back tomorrow with another project, this time for our new challenge over at As You See It - and it's recipe week. Until then, happy stampin'!


Stampin' Up! Supplies Used: 
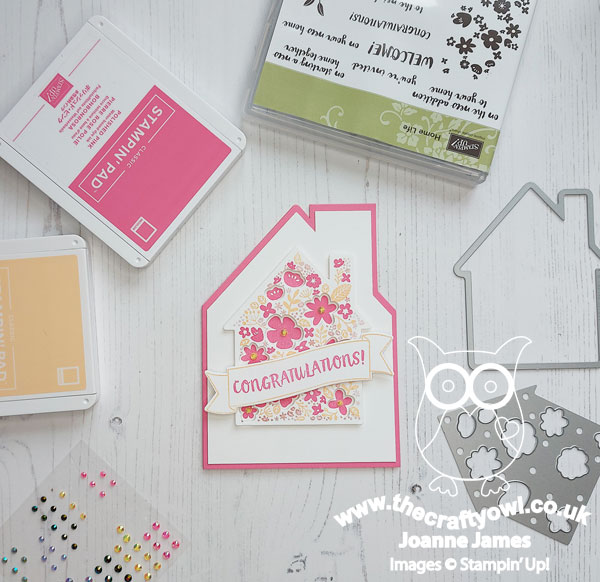
Table built using Product Table Builder by The Crafty Owl - Independent Stampin' Up! Demonstrator.

On The Horizon CAS New Home Card PP591

by Joanne James15. May 2022 08:00

Today it's Sunday and time for this week's new challenge over at The Paper Players! It's the turn of the fabulous Laurie to host this week and she has a clean and simple challenge for us to work with:


I needed a couple of new home cards so I used Amy's fab sketch over at Freshly Made Sketches this week for my layout and set to work. This is what I came up with:


Here's the low-down on today's card:

On The Horizon - I have been making samples for my next class so had the Horizon Dies out on my desk and thought the trio of houses would be perfect for today's card. I combined them with a piece of green New Horizons designer paper for the horizontal element (I stacked three of the diecut house pieces for extra thickness). I diecut a circle from the same sheet of New Horizons paper and stamped the trees onto it directly in Garden Green to sit behind the houses and give depth to my simple scene.

Stitched Detail -  The stitched detail on my circle and banner are courtesy of the new Stylish Shapes Dies - I just love the subtle extra detail:

I also added a pink enamel heart to accent one of the houses to complete the front of my card.

New Home - The sentiment on the front of my card is also from the 'On the Horizon' stamp set and I thought it would work for a 'new home' card. I added another sentiment to the inside of my card to continue the theme, this time from the retired 'Home life' set

I think this trio of house dies are perfect for a clean and simple new home card - how about you? Leave me a comment below - I'd love to hear your thoughts.

Here is the visual summary of the key products used on today's project for you to pin for easy reference:


You can see all of my Product and 'How To' summaries on my 'How To - Tips and Techniques' Pinterest board in case you've missed any. 

Before you reach for your ink and papers, check out what our amazing team has created to inspire you this week:

Here's a quick recap of our challenge rules:
 
1.  Create a new paper project
2.  Upload your creation to your blog with a link back to us and provide a direct link to the post featuring your challenge submission.
3.  Please link your card to no more than four challenges, TOTAL.
4.  Have FUN!

Enjoy your day; the James Juniors both start end of year exams at school next week so we will be interspersing revision with a trip to the poultry centre to see the new delivery of hens that has just arrived (although the children have been warned we will not be bringing some home with us!) I'll be back tomorrow with another project. Until then, happy stampin'!


Stampin' Up! Supplies Used: 

Table built using Product Table Builder by The Crafty Owl - Independent Stampin' Up! Demonstrator.

Hearth & Home Thinlits Roman Blind Card

by Joanne James27. May 2016 08:00

Happy Friday everyone! Today I'm sharing a card that I made in my shaker card technique class that featured the Hearth & Home Thinlits at the back end of last year:


So long ago I know, and whilst some of the products on this card are retiring (namely the flower and bird punches, the Alphabet Rotary Stamp and the ribbon), the Hearth & Home Thinlits are staying so it's still worth a share! Not only that, but the new Foam Adhesive Strips that are coming in the new catalogue will make this kind of card a breeze. 

This one isn't a shaker card; I made a little video tutorial to show how I created my colourful roman blind window treatment and have finally got around to editing it, so here it is:


I'm so glad the Hearth & Home Thinlits are staying, they really are so useful. I'm looking forward to seeing what new ribbons are coming our way to see how I can give my next window a makeover!

Here is the visual summary of the key products used on today's project for you to pin for easy reference:


You can see all of my 'How To' summaries on my 'How To - Tips and Techniques' Pinterest board in case you've missed any. 

That's all from me today; back tomorrow with another project. Until then, happy stampin'!


Stampin' Up! Supplies Used: 

Table built using Product Table Builder by The Crafty Owl - Independent Stampin' Up! Demonstrator.

Welcome Words - Welcome To Our Street

by Joanne James2. March 2016 19:15

Today I have a card to share for the current challenge over at Fab Friday, where they have a great sketch to play along with:

I decided to use a set that I haven't previously inked up for my card today - the lovely 'Welcome Words' - to make a card that I've always wanted a sentiment for. Take a look and you'll see what I mean:


This stamp can be used for all kinds of welcomes - new homes, new team members, new babies, new year - and also to welcome new neighbours to your street, an idea that I just love! For my card I decided to use the horizontal panel for my 'welcome' and create a custom background by repeat stamping the little trio of houses across my background panel in Memento Black and then colouring them with my Stampin' Write markers. I was somewhat inspired by the colourful houses of Tobermory in Scotland - here's a photo of them, image courtesy of the Cafe Fish that you can see on the right of the picture:

Image courtesy of: www.thecafefish.com

I love those houses painted in bright, primary colours and whilst it's nothing like the houses in my street, decided that this would make a bright and cheerful welcome card for a new neighbour. I added a retired speech bubble paperclip for my embellishment with a little red heart punched from my Confetti Border Punch in the centre. Similarly, I used some retired scraps of Brights designer series paper for the banner flags and I used a metallic doily for the semi-circular element. The colourful outside is then continued onto the inside of my card to complete the sentiment:


This stamp set is one that could be easily overlooked in the current seasonal catalogue, but actually has lots of creative possibilities and is especially useful for clean and simple cards. I especially love the bright primary colours of this card - very me!

Here's today's visual summary for easy reference:


That's all from me today; I've had a day of housework and errands today so am having a quiet evening before getting back to it all again tomorrow. Back then with a card for this week's new challenge over at Create With Connie and Mary where we have a fun colour challenge in store for you. until then, happy stampin'!


Stampin' Up! Supplies Used:

Table built using Product Table Builder by The Crafty Owl - Independent Stampin' Up! Demonstrator.


Tags: , , , , , , ,

Cards | Shop Online | Stamping

New Online Exclusives

There are new products available exclusively in the online store from 5 November - check them out here.

Latest Kits!

Stampin Cut and Emboss

The Layered Landscapes Kit and Nature's Paintings Kit are the latest kits in the online store - get yours here!

Shop Online

Access my online shop 24 x 7, 365 days of the year:

Current November hostess code:

9NKXDTTR

Shop Online

Mini Catalogue

BROWSE THE CATALOGUE

'Tis The Season - the new Stampin' Up! Mini Catalogue is here! For more details and to download your copy click here

Scrapbooking

Stampin' Up! has introduced a new range of 12x12" scrapbooking product and kit - the full range is now available to purchase online. To download a copy of the new digital Scrapbooking Catalogue click here.

2024-25 Annual Catalogue

BROWSE THE CATALOGUE

Click on the image to download your copy of the 2024-25 annual catalogue. For a full list of current SU! supplies, go to my online store. If you would like any help or advice, please drop me a line at joanne@thecraftyowl.co.uk or give me a call on 07773 421446 - I'd be happy to help.

Join My Team

It's always a great time to join Stampin’ Up! New team members can get £130 worth of products for only £99 + free business supplies + free shipping + all the fun being a part of Stampin’ Up! Stampin' Up! has something for everyone: join my growing team and benefit from my support to enjoy Stampin' Up! however you choose.

If you're interested, call me for a chat to understand how I can help you realise your goals. Alternatively, if you have already decided to sign up and you just can't wait, please click here for the link to the online form where you can sign up and order your starter kit right away! 

About Me

Hi I'm Joanne and live in Northampton and when I'm not looking after my husband and two beautiful children, am an avid crafter with a passion for all things Stampin' Up!

I must confess that I have never been a big rubber stamper - until I discovered Stampin' Up! that is. I love the fact that I can get such great results with co-ordinating stamps, inks, papers and punches - the possibilities are endless! Join me on my stamping journey as I share the things I love and be inspired to create amazing things yourself!

Follow Me

Monthly Newsletter

Box Builder

Click the button above to use Box Buster to create your custom box design using the Envelope Punch Board!

Kits Collection Now Available!

Stampin Cut and Emboss

The new Kits Collection from Stampin' Up! is now available!

Click here to see the current kits available and order yours online today.

I Design For


Stampin' Up Stuff

This is my personal blog and is not endorsed by Stampin’ Up! I hope you find it a plentiful source of ideas and personal inspiration but please don't copy my designs for contest submission or use for classes, publication or sale without express permission.