Heart Happiness Valentine PP380

by Joanne James11. February 2018 09:00

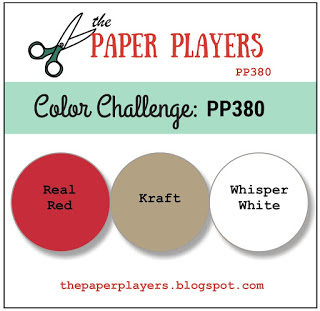
It's Sunday and time for this week's new challenge over at The Paper Players! It's the turn of the wonderful Laurie to host this week and she has a fun colour challenge for you to work with:
       

I debated about where to take these colours and when I saw the current inspiration photo over at Inspired By All The Little Things I decided another Valentine's card was in order. All those red and white hearts, the love and even the bicycle against the neutral background - take a look:
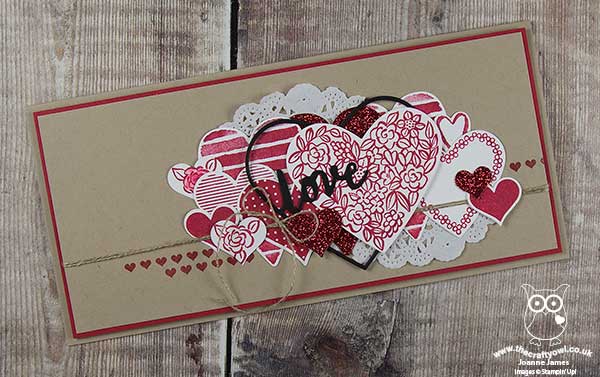
 

Here's the low-down on today's card:

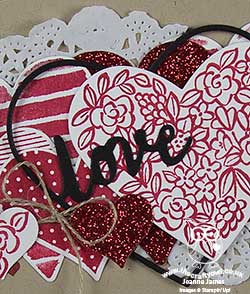
Heart Happiness - Today's card like last week's features hearts-a-plenty: I stamped a whole bunch of hearts from the 'Hearts Happiness' stamp set in Real Red onto Whisper White cardstock, diecut them with the Sweet & Sassy Framleits, along with a few additional red glimmer ones, and arranged them across my cardfront, along with a couple of doilies and some linen thread.

Love(ly Words) - Whilst I didn't use a bicycle on my card, I was inspired by the bike in the Inspired By photo to add my 'love' sentiment in black amongst my plethora of hearts. The thin frame of my love heart, like the thin frame of the bicycle, was made using the 'lovely' diecut from the Lovely Words framelits set - I snipped the sentiment between the 'e' and the 'ly' to make 'love' and tucked it in between my other hearts so that only 'love' was visible. 

A Custom Sentiment - Whilst this card could be used as a Valentine, it is also my wedding anniversary next week and so I actually made this card for my husband with that in mind. Inside I stamped two of the sentiments from the Petal Palette stamp set, but customised one of them with another stamp in the same set to change the meaning - take a look:
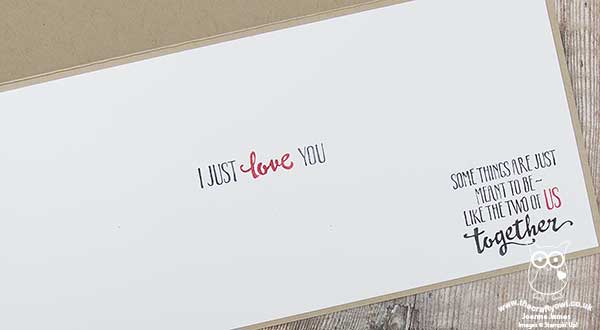
 

I altered the wording from 'you' to 'us' on the sentiment in the bottom right-hand corner  - a great way to make this sentiment appropriate for a partner rather than another couple; I used the 'US' from the sentiment I used in the centre of my card. Here are the stamps circled so you can see how they look before they were altered:


I hope you like my clever trick - yet another way to make the most of this fabulous set!

Here is the visual summary of the key products used on today's project for you to pin for easy reference:
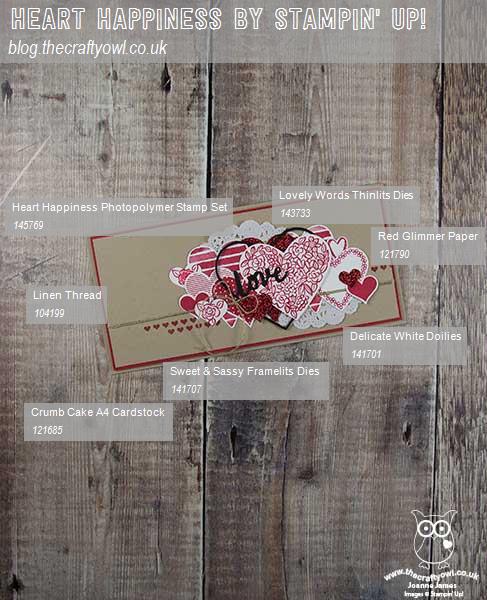
 

You can see all of my Product and 'How To' summaries on my 'How To - Tips and Techniques' Pinterest board in case you've missed any.  I'm also linking up today's card with the team over at CAS-ual Fridays - it is after all hearts, hearts and more hearts!

Before you reach for your ink and papers, check out what our amazing team has created to inspire you this week:

Here's a quick recap of our challenge rules:
 
1.  Create a new paper project
2.  Upload your creation to your blog with a link back to us and provide a direct link to the post featuring your challenge submission.
3.  Please link your card to no more than four challenges, TOTAL.
4.  Have FUN!

I can't wait to see what you create with this week's colours and look forward to visiting your blogs this week! Enjoy the rest of your weekend as it will be over all too quickly. I'm off to the swimming pool today for the County Championships with one of my James Juniors - wish us luck! I'll be back tomorrow with another project; until then, happy stampin'!


Stampin' Up! Supplies Used: 

Table built using Product Table Builder by The Crafty Owl - Independent Stampin' Up! Demonstrator.

Oh So Eclectic 2017-18 Stampin' Up! Annual Catalogue Cover Stepped Up CASE

by Joanne James21. July 2017 06:00

Today I have another Oh So Eclectic card from this month's technique class which is the second CASE from the front cover of the current 2017-18 Annual Stampin' Up! catalogue.

As I mentioned in my previous post, the eye-catching front cover was in part what attracted my ladies to the Oh So Eclectic Bundle in the first place, so it seemed only right that we should make some of the cards showcased. This card is so very detailed though even for a technique class and I'm sure at one point my ladies were wondering what they had let themselves in for! Here is my version of the card:

Here's the low-down on today's card:

Step It Up - This cover card embodies for me, a rather clean and layered kind of gal, what is the ultimate in stepped-up cards. It uses the Oh So Eclectic suite of products to the full and whilst its roots are in the Oh So Eclectic stamp set, it also utilises a number of other tools, accessories and techniques in its construction, including:

  • Naturally Eclectic Designer Series Paper
  • Die Cutting using the Eclectic Layers Thinlits and the Lovely Words Thinlits
  • Dry embossing using the Eclectic Layers Thinlits
  • Textured background using embossing paste and the Pattern Party Decorative Masks
  • Heat embossing using Versamark and white embossing powder for the sentiment
  • Rock and roll ink technique for the flower centre
  • Lot of accessories including gold foil, mini sequin trim, Berry Burst Crinkled Seam Binding Ribbon and wooden Touches of Nature Elements.

That's a lot of activity for one card and whilst time-consuming to create, results in a beautiful, multi-layered card that in addition to needing a box rather than an envelope to send it, also creates something with so much detail you can spend ages looking at it and truly admiring the level of skill that has gone into it.

We had a lot of fun making this card in our extended class and everyone was justly proud of the end result. 

Join A Class - If you are local to me and would like to know more about my classes, you can find details here on my website or here under 'events' on my Crafty Owl Facebook business page.


My next technique class is on Tuesday 1st August and features the Beautiful Bouquet Bundle, followed by one the following week on Monday 7th August featuring the Eastern Palace Suite. Booking for my Beautiful Bouquet class closes next Monday and there are still a couple of spaces available - why not join me?

Here is the visual summary of the key products used on today's project for you to pin for easy reference:


You can see all of my 'How To' summaries on my 'How To - Tips and Techniques' Pinterest board in case you've missed any. 

I'll be back soon with another card featuring the versatile Oh So Eclectic product suite. Until then, happy stampin'!


Stampin' Up! Supplies Used:

Table built using Product Table Builder by The Crafty Owl - Independent Stampin' Up! Demonstrator.

Lovely Words Thinlits Dip Embossed Friend Card

by Joanne James30. June 2017 07:00

Before I share today's project, I just want to give you a reminder that today is the final day for the 'We <3 Hosts' promotion where you can earn an extra £30 of rewards with an order of £300 or more. If you would like to refresh your memory on the details, you can find them here. You can place your order online or alternatively feel free to call me if you'd like to place your order over the phone. It's also the final day for this month's hostess code - if you are placing an order online for between £25 and £150, don't forget to add the code B3C3DUB6 to receive an extra thank you in the post from me.

Today I'm sharing another of the cards I designed for one of my recent team training meetings - you can see one of our other makes hereThis one features probably my favourite of the new in-colours, lemon lime twist:


Here's the low-down on today's card:

Lovely Words For A Friend - I used the Lovely Words Thinlits for the 'friend' diecut on my card, snipping it away from the oval so that I could use it standalone. These are such great thinlits with so many ways they can be used to create interest on your cards. 

CASE The Kit - The design of my card was inspired by one of the cards in the new 'Hello Friend' heat embossing product kit on page 16 of the new annual catalogue. One of the business topics we discussed at team training was how Stampin' Up!'s kits can benefit your business and our make and takes all included opportunities to practice the techniques and skills required to demonstrate with this kit effectively. There's nothing like being prepared and I'm sure my team would agree that team training is great for this kind of thing. Check out this video from the home office team that shows you the Hello Friend Kit in more detail:

Stampin' Up!'s kits are great for a crafty get-together with friends; if you're reading this and would like to arrange one with me to guide you through the fun techniques, then do get in touch. 

Copper Trim - To tie in with the dip-embossed copper of my diecut sentiment, I finished my card with a length of the new copper trim. This is a really versatile trim option for cards, home decor and gifts; silky smooth, you can use it like ribbon as it ties beautiful bows, but you can also split it and unravel it and use it like net, or even stretch it and use it as a cover for small items such as chocolates (a little like a sock!) 

Here is the visual summary of the key products used on today's project for you to pin for easy reference:


You can see all of my 'How To' summaries on my 'How To - Tips and Techniques' Pinterest board in case you've missed any. 

Enjoy your day and I'll be back tomorrow with another project. Until then, happy stampin'!


Stampin' Up! Supplies Used:

Table built using Product Table Builder by The Crafty Owl - Independent Stampin' Up! Demonstrator.

Lovely Words To A Great Friend

by Joanne James3. June 2017 20:00

Hello everyone! I hope you're enjoying your weekend; I had a 'day off' yesterday and went cycling with the rest of the James clan and have spent today creating more samples for my open house catalogue launch on Thursday - here's a reminder of those details:

I would love to see you there! One of the cards I made today uses this week's sketch over at Mojo Monday:


I've been having fun with my new goodies and have used three on my card today:


Here's the low-down on today's card:

Colour Theory - I decided to go monochrome today with the new Berry Burst in-colour balanced with white to create definition in my layers. My card features two of the contrasting crackle-glaze patterned papers from the Colour Theory DSP stack too - they add good visual interest without texture.

Lovely Words - The Lovely Words Thinlits dies set that the 'friend' centrepiece on my card comes from were one of the first things that made it into my pre-order basket. What can I say - I'm a sucker for word dies and I love that these can be used with or without the shape that they are set in and offer lots of creative possibilities for layering and using the negative space too. Expect to see lots more of these!

A Little Repetition - The Lovely Words Thinlits are available in a discounted bundle with the Lovely Inside & Out stamp set too. This is a fun set with some basic background pattern stamps along with large and small font greetings, that can be mixed and matched and used with or without the thinlits. I've used one of the sentiments to create a background panel, using my stamp-a-ma-jig to align the words to create my own DSP. It took a little time, but it was worth it for this fun effect.

Here is the visual summary of the key products used on today's project for you to pin for easy reference:


You can see all of my 'How To' summaries on my 'How To - Tips and Techniques' Pinterest board in case you've missed any. 

I'll be back tomorrow with another project for this week's new challenge over at The Paper Players. Until then, happy stampin'!


Stampin' Up! Supplies Used:

Table built using Product Table Builder by The Crafty Owl - Independent Stampin' Up! Demonstrator.

New Online Exclusives

There are new products available exclusively in the online store from 5 November - check them out here.

Latest Kits!

Stampin Cut and Emboss

The Layered Landscapes Kit and Nature's Paintings Kit are the latest kits in the online store - get yours here!

Shop Online

Access my online shop 24 x 7, 365 days of the year:

Current November hostess code:

9NKXDTTR

Shop Online

Mini Catalogue

BROWSE THE CATALOGUE

'Tis The Season - the new Stampin' Up! Mini Catalogue is here! For more details and to download your copy click here

Scrapbooking

Stampin' Up! has introduced a new range of 12x12" scrapbooking product and kit - the full range is now available to purchase online. To download a copy of the new digital Scrapbooking Catalogue click here.

2024-25 Annual Catalogue

BROWSE THE CATALOGUE

Click on the image to download your copy of the 2024-25 annual catalogue. For a full list of current SU! supplies, go to my online store. If you would like any help or advice, please drop me a line at joanne@thecraftyowl.co.uk or give me a call on 07773 421446 - I'd be happy to help.

Join My Team

It's always a great time to join Stampin’ Up! New team members can get £130 worth of products for only £99 + free business supplies + free shipping + all the fun being a part of Stampin’ Up! Stampin' Up! has something for everyone: join my growing team and benefit from my support to enjoy Stampin' Up! however you choose.

If you're interested, call me for a chat to understand how I can help you realise your goals. Alternatively, if you have already decided to sign up and you just can't wait, please click here for the link to the online form where you can sign up and order your starter kit right away! 

About Me

Hi I'm Joanne and live in Northampton and when I'm not looking after my husband and two beautiful children, am an avid crafter with a passion for all things Stampin' Up!

I must confess that I have never been a big rubber stamper - until I discovered Stampin' Up! that is. I love the fact that I can get such great results with co-ordinating stamps, inks, papers and punches - the possibilities are endless! Join me on my stamping journey as I share the things I love and be inspired to create amazing things yourself!

Follow Me

Monthly Newsletter

Box Builder

Click the button above to use Box Buster to create your custom box design using the Envelope Punch Board!

Kits Collection Now Available!

Stampin Cut and Emboss

The new Kits Collection from Stampin' Up! is now available!

Click here to see the current kits available and order yours online today.

I Design For


Stampin' Up Stuff

This is my personal blog and is not endorsed by Stampin’ Up! I hope you find it a plentiful source of ideas and personal inspiration but please don't copy my designs for contest submission or use for classes, publication or sale without express permission.