Love For You Trifold Valentines Card PP625

by Joanne James29. January 2023 08:00

Today it's Sunday and time for this week's new challenge over at The Paper Players! It's my turn to host this week and I have my favourite, a sketch challenge, for you to work with:


I took my inspiration from the pink and red hearts and flowers in the top right corner of the Hand Stamped Sentiments inspiration board and decided to make a slightly fancier card for a loved one today featuring the Love For You bundle - take a look:


Here's the low-down on today's card:

Today's card is a trifold card. I wanted to use the Love For You layered dies in a different way, so decided to make a two-colour tri fold card and cut each piece out of the alternating layers. I cut the largest aperture from the front section, then cut the second aperture from the second flap, having first added a piece of gingham to the centre of the panel:


 The last skinny set of diecuts were adhered to the inside of the card, with the 'so much love' being adhered with foam sheets for added dimension. I also added a small stamped sentiment and a sprinkle of hearts. The card has a double ribbon bow tie closure, tied through a couple of diecut slits. Here's another photo of the front that shows the detail of the layering, depth and dimension, along with the the pretty stamped pearl-centred flowers and diecut leaves that I used to accent my focal sentiment:


 A few hearts and a sprinkle of in-colour dots complete my card. I love the layered effect of these dies and the trifold really steps it up, yet is easy to achieve. What do you think? I'd love to hear your thoughts - do leave me a comment below.

Here is the visual summary of the key products used on today's project for you to pin for easy reference:


You can see all of my Product and 'How To' summaries on my 'How To - Tips and Techniques' Pinterest board in case you've missed any. 

Before you reach for your ink and papers, check out what our amazing team has created to inspire you this week:

Here's a quick recap of our challenge rules:
 
1.  Create a new paper project
2.  Upload your creation to your blog with a link back to us and provide a direct link to the post featuring your challenge submission.
3.  Please link your card to no more than four challenges, TOTAL.
4.  Have FUN!

Enjoy your day; I'll be back tomorrow with another project. Until then, happy stampin'!


Stampin' Up! Supplies Used: 

Table built using Product Table Builder by The Crafty Owl - Independent Stampin' Up! Demonstrator.

Abigail Rose Thank You Card PP601

by Joanne James24. July 2022 08:00

Today it's Sunday and time for this week's new challenge over at The Paper Players! It's the turn of the fabulous LeAnne to host this week and she has my favourite, a sketch challenge for us to work with:
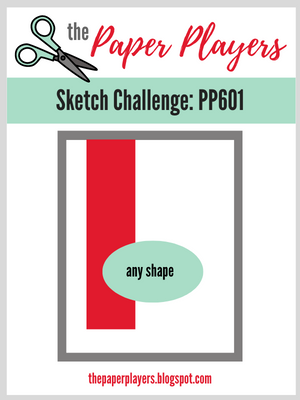
    

I wasn't sure how to tackle today's sketch initially, but I thought the focal point 'any shape' might lend itself to some fussy cutting, so I decided to reach for some of my designer papers and see where the mood took me! I settled on the lovely browns and neutrals of the Abigail Rose Suite and ended up creating a 'kitchen sink' of a focal point - take a look:


Here's the low-down on today's card:

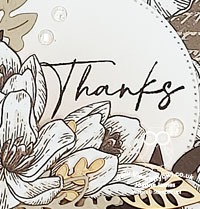
I decided to use this bold pattern of white florals on a brown scripted background for my base, then fussy cut more of the flowers and used those as the basis for the decoration for my focal point. I used a stitched circle for my base, blending some inks to create an ombre effect and then layering a selection of leafy diecuts in shades of browns, along with some (retired) wooden leaves and sprigs and my trio of fussy cut flowers for decoration. I added a touch more colour to my fussy cut flowers using my Stampin' Blends, to give them a little more definition and added some Elegant Faceted Gems for a touch of sparkle:
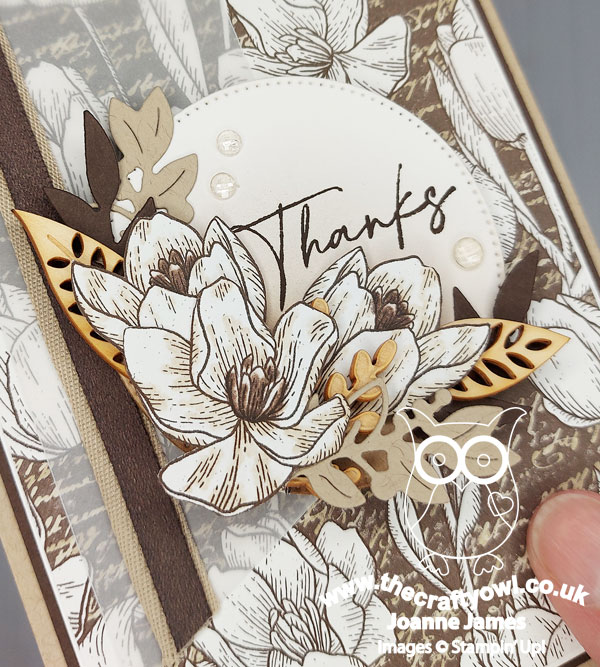
I just kept layering and adding in bits and pieces until I felt happy with the way the decoration framed my sentiment (taken from the 'Hand Penned' stamp set) - hence my 'kitchen sink' reference! I decided to make my vertical banner element from vellum, so that it didn't obscure too much of the pattern beneath it. I also added some layered ribbon for detail and texture and to pick up the colour scheme (the Crumb Cake ribbon I used is retired but I've included a link below to a suitable current alternative). 

Very little stamping on today's card and just like my last one another card with lots of bits and pieces, but actually easy to recreate - the paper definitely does the 'heavy lifting' and I love the way the fussy cut flowers tie in with the base below. I'm also linking my card up with the ladies over at TGIF Challenges who are crafting with their favourite things this week - anyone who knows me well can attest to my love of designer series paper - I love it all, any pattern, any size and this card is definitely a showcase of that!

Here is the visual summary of the key products used on today's project for you to pin for easy reference:
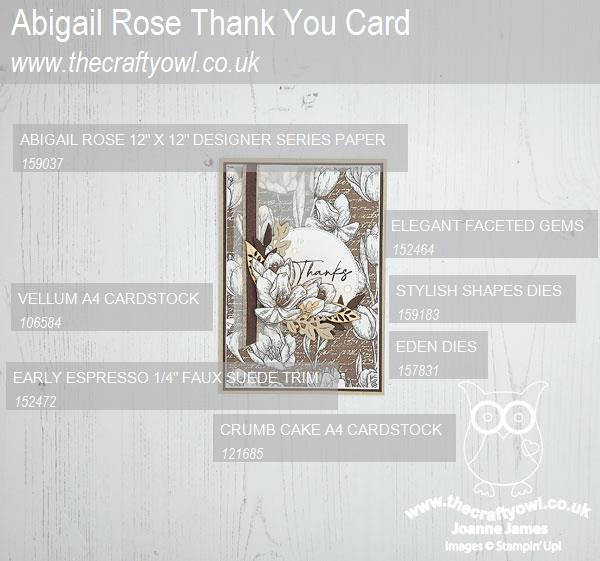
 

You can see all of my Product and 'How To' summaries on my 'How To - Tips and Techniques' Pinterest board in case you've missed any. 

Before you reach for your ink and papers, check out what our amazing team has created to inspire you this week:

Here's a quick recap of our challenge rules:
 
1.  Create a new paper project
2.  Upload your creation to your blog with a link back to us and provide a direct link to the post featuring your challenge submission.
3.  Please link your card to no more than four challenges, TOTAL.
4.  Have FUN!

Enjoy your day; not much going on here 'chez James' this weekend - just enjoying a relaxing weekend in the garden, hopefully with a little crafty time thrown in now things have cooled down a little. I'll be back tomorrow with another project. Until then, happy stampin'!


Stampin' Up! Supplies Used: 
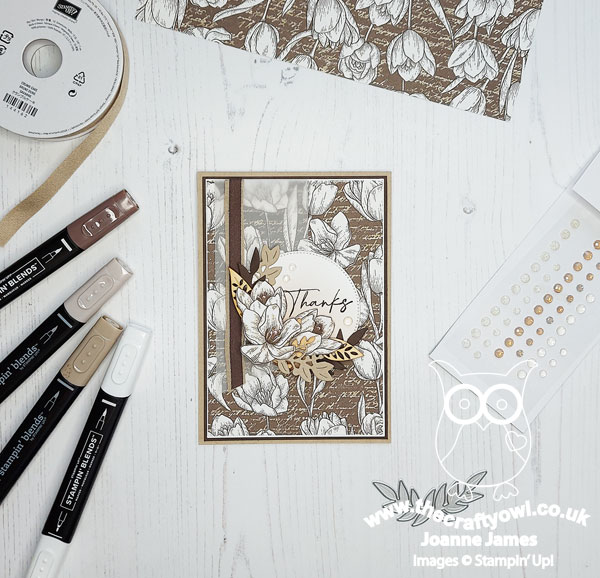
Table built using Product Table Builder by The Crafty Owl - Independent Stampin' Up! Demonstrator.

Banner Year With Grateful Heart Thank You Card PP566

by Joanne James7. November 2021 08:00

Today it's Sunday and time for this week's new challenge over at The Paper Players! It's the turn of the fabulous Claire to host this week and she has a timely theme challenge for you to work with:


With Thanksgiving just around the corner, Claire's theme is a timely one although it's fair to say that there is plenty to be thankful for all year round so a card that gives thanks is always a useful one to have on hand. I couldn't resist another card with Jen M's layout over at Freshly Made Sketches this week (this layout is definitely a 'go to' for me!). No wreath this time though, instead totally inspired by the current challenge photo over at The Card Concept - take a look:


Here's the low-down on today's card:

I loved the colours and foliage and pumpkin elements in the Card Concept photo, along with the striking black and white tablescape, complete with gingham napkins and I incorporated all of these elements into my clean and layered card. I used black and white mats, layers and some gingham paper from the Pattern Paper hostess DSP pack, and layered a variety of foliage around one edge of a (retired) stitched circle onto which I heat-embossed my sentiment from the stamp set 'Banner Year'. I added some of the yellow decorative matt dots to my berry sprigs for a little extra dimension and detail which I really love:

Another trio of Evening Evergreen decorative matt dots onto my base complete my card. My foliage elements were taken from various die sets - all listed in the supplies list below. This is one of those cards that turned out exactly as I intended, first time - and I love it! I often spend ages procrastinating whilst card making, so it feels like a bonus when ideas translate exactly how you envisaged, don't you think?

Here is the visual summary of the key products used on today's project for you to pin for easy reference:


You can see all of my Product and 'How To' summaries on my 'How To - Tips and Techniques' Pinterest board in case you've missed any. 

Before you reach for your ink and papers, check out what our amazing team has created to inspire you this week:

Here's a quick recap of our challenge rules:
 
1.  Create a new paper project
2.  Upload your creation to your blog with a link back to us and provide a direct link to the post featuring your challenge submission.
3.  Please link your card to no more than four challenges, TOTAL.
4.  Have FUN!

You can see all of my 'How To' summaries on my 'How To - Tips and Techniques' Pinterest board in case you've missed any. 

Enjoy your day; we had a busy day of sport yesterday so nothing special happening here today, but I'm not complaining. The next few weekends are super busy, so I'll take the calm before the storm! I'll be back tomorrow with another project. Until then, happy stampin'!


Stampin' Up! Supplies Used: 

Table built using Product Table Builder by The Crafty Owl - Independent Stampin' Up! Demonstrator.
 
Edit: This card was Jen T's choice for Princess of Clean for FMS510 - yay!
 

Forever Fern Friendship Card TTT106

by Joanne James25. March 2021 17:00

Firstly, if you didn't see yesterday's post about the list of products that will be retiring with the current annual catalogue, please go and check it out here - the retiring lists are worth a look with big discounts to be had, long whilst supplies last! Then come back and read today's post too!

It's Thursday and time for a new challenge over at TicTacToe! It's the turn of Team X to host this week and the lovely LeAnne is our featured designer this week. This is the fun board that we are playing along with: 


I went down the last column with leaves, green and diecut for my card today with another card using those lovely Forever Greenery papers - take a look:


Here's the low-down on today's card:

Forever Greenery -  Today's card just like this one that I shared earlier this week features lots of elements from the Forever Greenery Suite. The Forever Greenery paper was once again the starting point for today's card. These papers have some beautiful patterns featuring lush greenery and today I chose a subtle background design combined with a busy foliage-filled designs, and layered them and used them as the inspiration for my foliage sprig. 

Forever Fern - I stamped similar pieces of leaf foliage from the Forever Fern stamp set in the same colours as those that feature on the papers and diecut it with the corresponding Forever Flourishing Dies. The detail on these stamps really is amazing - they are another of the Distinktive range that appear almost 3-dimensional when stamped. So pretty! 

Touches of Gold - I used some gold foil for a border and tiny foliage pieces, along with gold twine to embellish my card but the star of the show is the gold hoop embellishment that frames my sentiment - such a wow in real life:


I have really enjoyed working with this set this week and am so glad that it is carrying over to the new annual catalogue, even though the papers and gold elements in the suite aren't; it will give me lots more opportunity to play for sure.

Here is the visual summary of the key products used on today's project for you to pin for easy reference:


You can see all of my Product and 'How To' summaries on my 'How To - Tips and Techniques' Pinterest board in case you've missed any. 

A tictactoe board offers so many creative possibilities - how does this week's board inspire you? Why not have a go? We would love to see you in the gallery and who knows - you might be selected for Designer's Choice and be eligible to be a guest designer on a future challenge. 

Enjoy your evening; I'll be back tomorrow with another project. Until then, happy stampin'!


Stampin' Up! Supplies Used: 

Table built using Product Table Builder by The Crafty Owl - Independent Stampin' Up! Demonstrator.

A Forever Greenery Hello in Just Jade and Soft Sea Foam

by Joanne James22. March 2021 18:40

As promised, I had a little extra crafty time at the weekend so I have another card to share today, this time using the current Fab Friday sketch and this week's colour palette over at The Color Throwdown:


As I was pondering two shades of green with gold and white, I was drawn to a suite from the annual catalogue that I've had for some time but barely used - take a look:


Here's the low-down on today's card:

Forever Greenery - Today's card features lots of elements from the Forever Greenery Suite. The Forever Greenery paper was the starting point for today's card. These papers have some beautiful patterns featuring lush greenery and I chose one of the simpler designs, a washed Just Jade paper with a single repeating Soft Sea Foam leaf stem. 

Forever Fern - I stamped a similar piece of leaf foliage from the Forever Fern stamp set in Just Jade onto Soft Sea Foam cardstock and diecut it with the corresponding Forever Flourishing Dies. The detail on these stamps is amazing - they are another of the Distinktive range that appear almost 3-dimensional when stamped. So pretty! 

Forever Gold - I paired my stamped stem with a couple of decorative stems from the Forever Gold laser-cut paper that is also part of the suite. I used one outline and one solid leaf stem for contrast. Along with a sprinkling of gilded gems, I think they really lift the detail in this corner of the card:

A simple 'hello' sentiment and a piece of Just Jade ribbon finish my card. I love greens and must confess that having made this card I wondered to myself why I hadn't used it more. Not that you need to restrict yourself to greens with this set; my dear friend Jan Clothier in New Zealand has made many a fabulous card with the Forever Fern stamp set and many of them in colours other than green; you can check out her Thinking Stamping blog here if you'd like to see some of her Forever Fern creations. That said, I hope you've enjoyed my greens today, as I've another card featuring this suite to share with you later this week!

Here is the visual summary of the key products used on today's project for you to pin for easy reference:


You can see all of my 'How To' summaries on my 'How To - Tips and Techniques' Pinterest board in case you've missed any. 

this is me done for today; enjoy your evening and I'll be back tomorrow with another project for our new challenge over at CAS Colours and Sketches. Until then, happy stampin'!


Stampin' Up! Supplies Used:

Table built using Product Table Builder by The Crafty Owl - Independent Stampin' Up! Demonstrator.

New Online Exclusives

There are new products available exclusively in the online store from 5 November - check them out here.

Latest Kits!

Stampin Cut and Emboss

The Layered Landscapes Kit and Nature's Paintings Kit are the latest kits in the online store - get yours here!

Shop Online

Access my online shop 24 x 7, 365 days of the year:

Current November hostess code:

9NKXDTTR

Shop Online

Mini Catalogue

BROWSE THE CATALOGUE

'Tis The Season - the new Stampin' Up! Mini Catalogue is here! For more details and to download your copy click here

Scrapbooking

Stampin' Up! has introduced a new range of 12x12" scrapbooking product and kit - the full range is now available to purchase online. To download a copy of the new digital Scrapbooking Catalogue click here.

2024-25 Annual Catalogue

BROWSE THE CATALOGUE

Click on the image to download your copy of the 2024-25 annual catalogue. For a full list of current SU! supplies, go to my online store. If you would like any help or advice, please drop me a line at joanne@thecraftyowl.co.uk or give me a call on 07773 421446 - I'd be happy to help.

Join My Team

It's always a great time to join Stampin’ Up! New team members can get £130 worth of products for only £99 + free business supplies + free shipping + all the fun being a part of Stampin’ Up! Stampin' Up! has something for everyone: join my growing team and benefit from my support to enjoy Stampin' Up! however you choose.

If you're interested, call me for a chat to understand how I can help you realise your goals. Alternatively, if you have already decided to sign up and you just can't wait, please click here for the link to the online form where you can sign up and order your starter kit right away! 

About Me

Hi I'm Joanne and live in Northampton and when I'm not looking after my husband and two beautiful children, am an avid crafter with a passion for all things Stampin' Up!

I must confess that I have never been a big rubber stamper - until I discovered Stampin' Up! that is. I love the fact that I can get such great results with co-ordinating stamps, inks, papers and punches - the possibilities are endless! Join me on my stamping journey as I share the things I love and be inspired to create amazing things yourself!

Follow Me

Monthly Newsletter

Box Builder

Click the button above to use Box Buster to create your custom box design using the Envelope Punch Board!

Kits Collection Now Available!

Stampin Cut and Emboss

The new Kits Collection from Stampin' Up! is now available!

Click here to see the current kits available and order yours online today.

I Design For


Stampin' Up Stuff

This is my personal blog and is not endorsed by Stampin’ Up! I hope you find it a plentiful source of ideas and personal inspiration but please don't copy my designs for contest submission or use for classes, publication or sale without express permission.