by Joanne James25. May 2017 06:00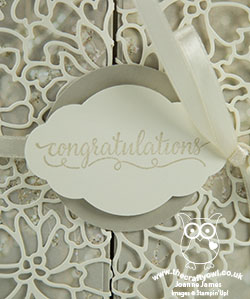
Today I'm sharing a card from this month's technique class which featured the So In Love bundle and the beautiful Falling In Love designer series paper - take a look:
Here's the low-down on today's card:
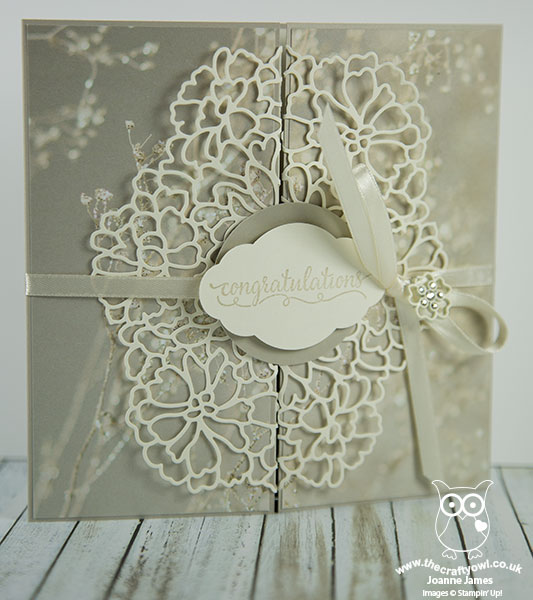
So Detailed Thinlits - The main feature on the front of these cards is the pair of diecut panels cut using the Big Shot and the largest of the So Detailed Dies. They really are so beautiful! I backed them with some of the Falling In Love designer series paper - these papers have some lovely subtle images, some of them photographic, that make a perfect background for these detailed diecuts. Unfortunately both of these items are now sold out here in the UK - I love this card though and just had to share it so hopefully for those of you who already have these items this will still serve as useful inspiration.
So In Love - I used the So In Love stamp set to stamp my greeting on my label wrap and to decorate the inside of my card. This card is larger than usual at 6" square and opens in a concertina style - this really shows the diecuts off to full advantage.
A New Favourite - Yes, it's here again - I used the Pretty Label Punch for my sentiment panel on the front of my card, backed with a pinched circle - can you tell how much I LOVE this new punch?!
This card is subtle in colour, using only Very Vanilla and Sahara Sand - perfect for a wedding that doesn't have a strong colour scheme. It would work well and could be adapted as an invitation too, so lots of creative possibilities and it really is the Big Shot that does all the work on this one (a die brush is essential to poke all those little pieces out cleanly!)
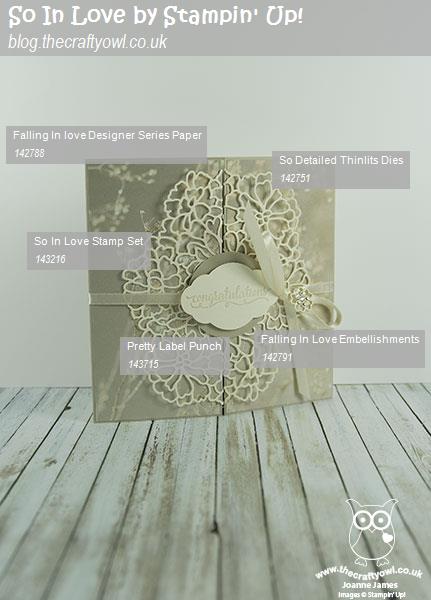
Here is the visual summary of the key products used on today's project for you to pin for easy reference:
You can see all of my 'How To' summaries on my 'How To - Tips and Techniques' Pinterest board in case you've missed any.
Enjoy your day and I'll be back tomorrow with another project. Until then, happy stampin'!
Stampin' Up! Supplies Used:
6887dda9-a7a4-40f5-b3a5-71e0db59f937|0|.0|96d5b379-7e1d-4dac-a6ba-1e50db561b04
Tags: Falling In Love, Shop Stampin' Up online, Shop Stampin' Up! Online, Shop online, So In Love, So Detailed Thinlits, Stampin' Up, Stampin' Up Card, Stampin' Up Card ideas, Stampin' Up Supplies, Weddings, Wedding invitations, Engagement, Classes
Cards | Classes | Shop Online | Shop Stampin' Up! Online | Stamping | Weddings
by Joanne James22. June 2015 09:09Good morning everyone - it's Monday! I am saying that with more optimism than I feel, but as usual there is lots to achieve this week so I'd best get on! Today I'm here with a card that I made for the challenge over at TGIF Challenge! this week, however firstly a big thank you to James Weber and the TGIF Team for choosing me as their TGIF Fave for my Build a Birthday card last week:

If you missed it, you can see my winning card here. I am honoured to be a fave pick of this talented bunch of designers; I also got a shout out for my rule-breaking card for the TGIF Throwdown challenge; you can see my card here. There is still the rest of the month to enter this one, so watch this space for my bona fide entry which is still to come! Meanwhile onto today's card which is as mentioned for this week's TGIF Challenge where the theme is 'Togetherness', so weddings, anniversaries and the like; I also used this week's Colour Q colour palette and the sketch over at Pals Paper Arts as inspiration for my card:


Without further ado, let me get to today's card:
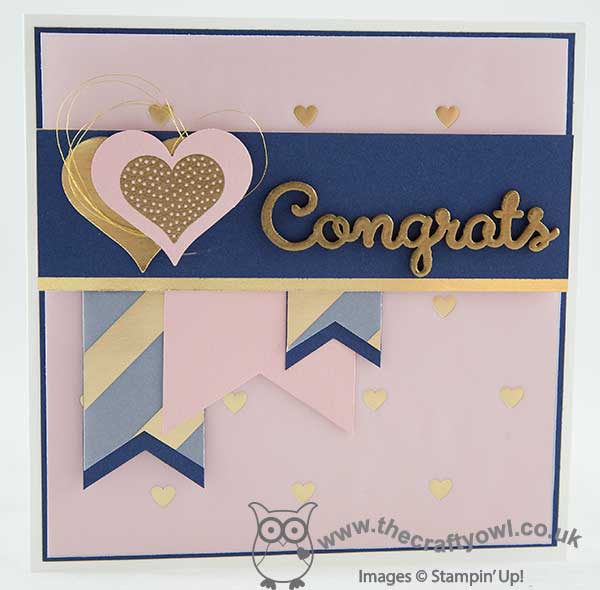
I saw the Colour Q colours this week and thought they would work really well for a wedding or engagement card and I was particularly inspired by the inspiration photo of those patterned straws, which immediately took me to my gold Fancy Foil Designer Vellum. I used the new Whisper White Thick cardstock for my base (p. 149 of the catalogue with the speciality cardstocks in case you missed it) - did I tell you already how much I LOVE this cardstock? It makes such great card bases and is beautifully thick for one layer cards. I used a mat of Night of Navy and another of Blushing Bride, before adhering a layer of heart-embossed gold foil vellum over the top. This mutes the pink slightly and creates a real feeling of luxury, which I think is important for a wedding or celebratory card. I layered my banners, all punched with the new triple banner punch, again layering vellum over the navy ones, this time in gold stripes and leaving the bottoms visible for contrast. My cross panel is Night of Navy layered on a piece of Gold Foil Sheet, with two offset layered hearts - one gold foil, one Blushing Bride with one of the heart stamps from the 'Hello Life' set embossed in gold in the centre and some of the lovely new gold metallic thread wound in between. To finish, I added my sentiment which is the thing I probably love most on this card: it's one of the new Expressions Natural Elements wooden diecuts, which I decided to double heat-emboss in gold to tie in with the rest of my card. I love these in their natural wood finish, but they are fun to jazz up too!
This is one of those cards that I didn't have a clear idea about when I started work and it sort of evolved as I went along. I love it though - I just need someone to announce their engagement or get married so that I can send it now!
I hope you like today's card' I'll be back tomorrow with another project, so stay tuned. Until then, happy stampin'!
Stampin' Up! Supplies Used:
by Joanne James17. March 2015 10:29Today I'm sharing a card that I'm entering in a couple of challenges:
.jpg)
I'm not normally one for such pastel colours unless it's a baby card, however I thought I would combine this week's colour palette over at Pals Paper Arts with the great sketch over at CAS(E) This Sketch this week and create a card suitable for a wedding or engagement. Take a look:
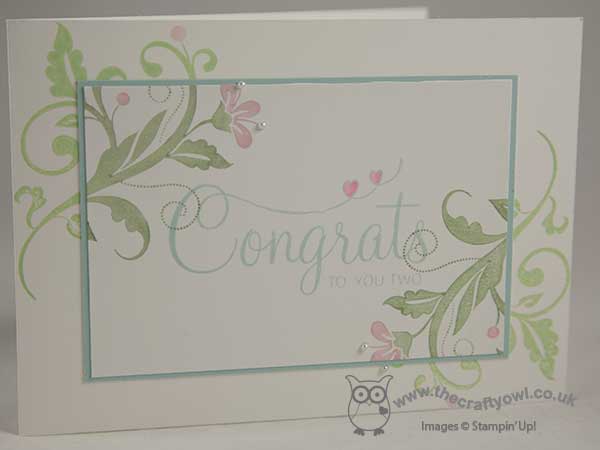
I decided to feature the Congratulations sentiment from 'Your Perfect Day' as the centrepiece for my card, adorned with a couple of the floral flourishes from the 'Flowering Flourishes' set in each corner. I turned the sketch on its side as I needed my card to be landscape in order to fit my sentiment on. I stamped the sentiment in Soft Sky and coloured the flourishes with my Stampin' Write markers in each of the challenge colours, adding a few tiny pearls to the flower stamens. I used a piece of Soft Sky for my mat and stamped the whole card on Whisper White; this card looks more vibrant in real life - I find predominantly white cards so tricky to photograph.
Short and sweet from me today - lots to do before attending an Easter Concert this afternoon where both James Juniors are singing and performing piano recitals. I will be back shortly with news of some additional Sale-A-Bration items that will be available free with a £45 spend until the end of the month. until then, happy stampin'!
Stampin' Up! Supplies Used: