Sale-A-Bration Any Occasion Baby Cards

by Joanne James30. March 2017 19:30

Today I'm sharing a couple of cards that I made for my last Sale-A-Bration class using Stampin' Up!s precut notelets and envelopes - take a look:


These cards would be great for a note to welcome a new baby boy or girl and would also make nice birth announcement cards. I made a video showing how I put these together - here it is if you would like to see just how quick and easy they are to make:

This stamp set contains lots of fun bits and pieces - I'm sure there are lots of similar combinations you could make for well, any occasion! 

Here is the visual summary of the key products used on today's project for you to pin for easy reference:


You can see all of my 'How To' summaries on my 'How To - Tips and Techniques' Pinterest board in case you've missed any. 

The links to my online store for the supplies to make today's cards are included below, but bear in mind you only have until 10.50pm GMT tomorrow evening to snap up your own 'Any Occasion' stamp set before we say goodbye to Sale-A-Bration for another year.

I'll be back tomorrow with another project. Until then, happy stampin'!


Stampin' Up! Supplies Used:


Table built using Product Table Builder by The Crafty Owl - Independent Stampin' Up! Demonstrator.


Clean And Simple Cake Crazy Birthday Card

by Joanne James19. February 2017 09:00

It's Sunday and time for this week's new challenge over at The Paper Players! It's the turn of the lovely Laurie to host this week and she has a clean and simple challenge for us to work with:


So I have a slight confession: if you read my blog post on Friday you may have been expecting something else today! I had a moment of inspiration for a sentiment-based card on Friday and was so pleased with myself when it was finished. All was well until I came to load it up onto the Paper Players blog and I remembered this week was 'clean and simple' week and my card definitely wasn't! So I will share that card with you another day and in the meantime I took the opportunity to make another card using one of the great sentiment-based sets in the current Spring-Summer catalogue - take a look:


Here's the low-down on today's card:

Cake Crazy - The Cake Crazy stamp set is a fun cake-building stamp set with lots of words. I made my cake stack entirely out of words, coloured to co-ordinate with my side strips of designer series paper for a fun, unisex birthday card.

Party With Balloons - I used some balloon-patterned Party Animal Designer Series Paper to border the edges of my central panel and tie in with my Emerald Envy baker's twine and fun balloon embellishment. After all, what's a party without balloons?

Add A Banner - I added a little stepped banner in Pacific Point to my card to top off my cake - whilst not designed to co-ordinate, the photopolymer stamp sits perfectly into the banner shape for easy co-ordination. 

Here is the visual summary of the key products used on today's project for you to pin for easy reference:


You can see all of my Product and 'How To' summaries on my 'How To - Tips and Techniques' Pinterest board in case you've missed any. 

Before you reach for your ink and papers, check out what our amazing team has created to inspire you this week:

The Paper Players Design Team
 
 
Here's a quick recap of our challenge rules:
 
1.  Create a new paper project
2.  Upload your creation to your blog with a link back to us and provide a direct link to the post featuring your challenge submission.
3.  Please link your card to no more than four challenges, TOTAL.
4.  Have FUN! 


I look forward to seeing your clean and simple creations in the gallery this week. Enjoy the rest of your weekend as it will be over all too quickly; we have basketball this morning (riding high on last week's regional-qualifying tournament win!) and then a social lunch with the swim squad - should be fun. I'll be back tomorrow with another project; until then, happy stampin'!


Stampin' Up! Supplies Used: 

Table built using Product Table Builder by The Crafty Owl - Independent Stampin' Up! Demonstrator.

Swirly Scribbles Flower Wreath Thank You

by Joanne James1. September 2016 08:05

This is my second post of the the day; if you missed my earlier post that tells you all about the new Stampin' Up! Autumn-Winter Seasonal Catalogue that launches today, click here. Today it's time for a new challenge over at Create With Connie and Mary and this week we have a colour combination for you:


These colours are not quite autumnal and to be honest I'm still firmly in summer mode as far as the weather is concerned, but I decided they would make a nice wreath. Here's my card:

Here's the low-down on today's card:

Swirly Scribbles Wreath - I used the largest 'scribble' in Sahara Sand for my wreath and backed it with some linen thread to break up the coral panel behind. I just love these thinlits - they are so versatile!

Swirly Bird Flowers - I stamped the three different flower designs in the other two challenge colours and used them to decorate the edge of my rustic wreath. I added some in-colour DSP in Peek-a-boo Peach to my card base too, as it really compliments the flowers.

A Thoughtful Banner -  I balanced my wreath with a sentiment from Thoughtful Banners, punched out with the Duet Banner Punch. I actually punched two of the banners so that I could pop up the central section for a little added dimension. A peach ribbon bow finishes my card.

I found this quite a challenging colour combination, as I'm not a big lover to orange on my cards, yet I really like how this one turned out. Ironic that the neutral was the colour I used the least of - go figure!

Here is the visual summary of the key products used on today's project for you to pin for easy reference:


You can see all of my 'How To' summaries on my 'How To - Tips and Techniques' Pinterest board in case you've missed any. 

Do visit the other Design Team members to see what they did with this week's colours; there's lots of inspiration over on their blogs too!

Enjoy your day; I'm having a little break at the seaside but will be back with a post for the new challenge over at The Paper Players on Sunday, if not before (it all depends on my wifi!) Until then, happy stampin'!


Stampin' Up! Supplies Used:

Table built using Product Table Builder by The Crafty Owl - Independent Stampin' Up! Demonstrator.

Touches of Texture Dragonfly Card

by Joanne James8. August 2016 08:00

Happy Monday everyone! Today I have the first of this month's technique classes featuring the 'Touches of Texture' stamp set and I'm sharing one of the cards that we will be making, that is based on this week's Paper Craft Crew Challenge sketch:

Welcome to the Paper Craft Crew Sketch Challenge 205 hosted by Pam Staples, SunnyGirlScraps.  #papercraftcrew #sunnygirlscraps #challengeblog #papercrafts  Play along at www.papercraftcrew.com #papercraftcrew #sketch

Here is my card:


Here's the low-down on today's card:

Touches of Texture - Touches of Texture is one of a number of stamp sets in the annual catalogue that are all about artistic expression. The stamp set features three outline florals, a bee, a dragonfly and then a number of textured stamps that can be used in lots of creative ways. It's a great stamp set for a beginner, as there are no real rights or wrongs; no need to align the stamps precisely and you can achieve a different look each time. For this card I used the large flower head and infilled it with Cajun Craze, having added a little Early Espresso to the flower centre with a sponge dauber before stamping. I used the fine splatter behind the flower on my punched circle in Delightful Dijon, the more dense splatter in Emerald Envy on my card base for some tone-on-tone texture and lastly the dragonfly, which I fussy cut and added a little clear Wink of Stella to its wings. 

A Touch of Morocco - The ladies that attended my Moroccan Nights class last month really enjoyed using the papers and colours of the product suite and rediscovering the use of washi tape in their cardmaking, so I've continued the theme this month with similar colours and using some of the Moroccan Designer Series Paper behind my flower and some of the co-ordinating washi tape for the vertical stripe and to decorate the inside of my card and the envelope. 

Thoughtful Banners - I make more thank you cards than any other and today's card features the sweet thank you from the Thoughtful Banners stamp set, set inside a stamped banner and punched out with the co-ordinating Duet Banner punch. Another of the great bundled pairs to be found in the annual catalogue, with a saving of 10% if you buy both items together - yay!

Here is the visual summary of the key products used on today's project for you to pin for easy reference:


You can see all of my 'How To' summaries on my 'How To - Tips and Techniques' Pinterest board in case you've missed any. 

I'm off to the cinema with the James Juniors this afternoon to watch the BFG; enjoy your day and I'll be back tomorrow with another project. Until then, happy stampin'!


Stampin' Up! Supplies Used:

Table built using Product Table Builder by The Crafty Owl - Independent Stampin' Up! Demonstrator.

Patriotic Stars and Stripes Thoughtful Banners Card

by Joanne James12. June 2016 09:00

It's Sunday and time for a new challenge over at The Paper Players! It's the turn of my dear friend LeAnne to host our challenge this week and she has a great colour combination for you to play along with:
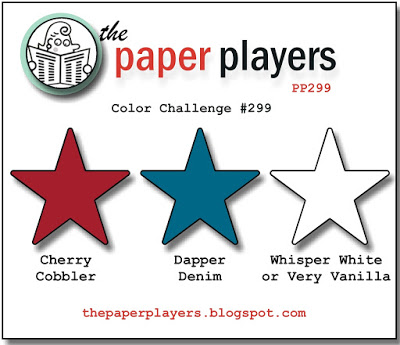
    

I thought these colours were calling out for a patriotic red, white and blue card. I toyed with creating something in honour of HM Queen Elizabeth II who is celebrating her official 90th birthday this weekend, but in the end decided to go with something more appropriate for American Independence day as 4th July is not that far away. This is what I came up with:
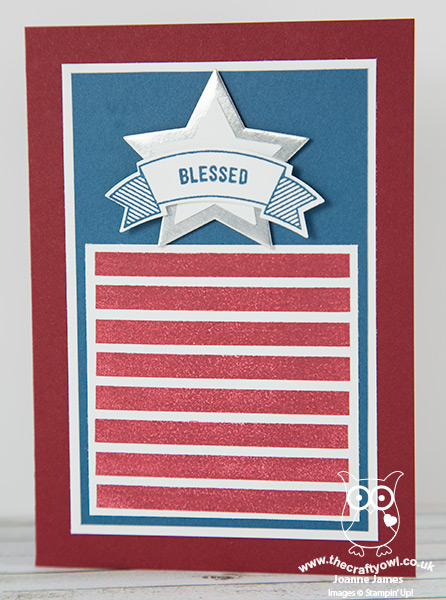
 

Here's the low-down on today's card:

Thoughtful Banners - I used the new 'Thoughtful Banners' stamp set to create my abstract stars and stripes card today. This set is all about the sentiments, with many combinations to choose from. It also has a useful stripe stamp, that can be used with or without the words and banners to create a striped pattern, as I've done here. This is a photopolymer stamp set too which makes it easy to line up without the need for a stamp-a-ma-jig - bonus! 

Duet Banner Punch - I could have used so many of the stamps in this set on my card today, however when I thought about independence and the armed forces both here in the UK and abroad, the one word that summed up how I felt was 'blessed' - blessed that so many men and women are prepared to serve our countries and protect the rights and freedoms we so often take for granted, so this was the word I chose to feature on the banner of my card. A banner that was easily created with the co-ordinating Duet Banner Punch. Buy this with the Thoughtful Banners stamp set as a bundle and save 10%; don't mind if I do!

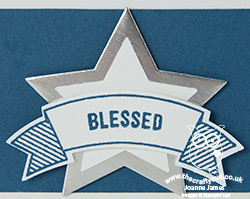
Shine Like A Star - I backed my sentiment banner with a layered star, cut from silver foil with the Star Framelits and centred with a smaller one in Whisper White. 

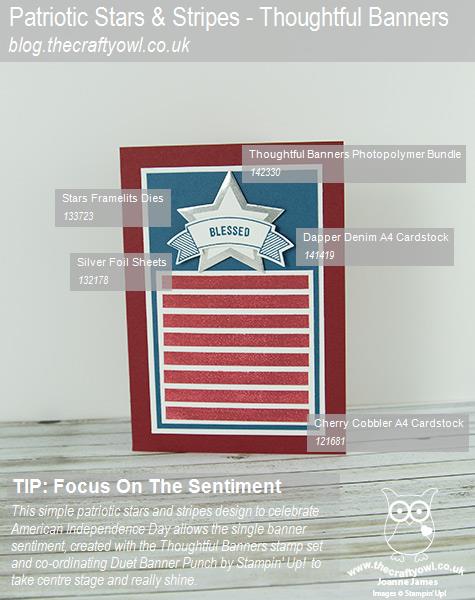
Here is the visual summary of the key products used on today's project for you to pin for easy reference:
 

You can see all of my 'How To' summaries on my 'How To - Tips and Techniques' Pinterest board in case you've missed any. 

I hope this card is a fitting tribute to those who give of themselves in order to protect the freedoms of us all, for whom we should all feel truly blessed.

I'm linking up with the ladies over at SUO Challenges today where their current challenge is Summer Celebrations.

Before you reach for your ink and papers, check out what our amazing team has created to inspire you this week:

The Paper Players Design Team
 
 
Here's a quick recap of our challenge rules:
 
1.  Create a new paper project
2.  Upload your creation to your blog with a link back to us and provide a direct link to the post featuring your challenge submission.
3.  Please link your card to no more than four challenges, TOTAL.
4.  Have FUN! 


I look forward to seeing what you create with our colour palette this week. We have basketball this morning then an afternoon of music practice for Rebecca who is singing in a concert on Monday evening, along with more practice of her lines in readiness for her stage performance as Dorothy in her school production of the Wizard of Oz in just a few short weeks time. 

Back tomorrow with another project; until then, happy stampin'!


Stampin' Up! Supplies Used:

Table built using Product Table Builder by The Crafty Owl - Independent Stampin' Up! Demonstrator.

New Online Exclusives

There are new products available exclusively in the online store from 5 November - check them out here.

Latest Kits!

Stampin Cut and Emboss

The Layered Landscapes Kit and Nature's Paintings Kit are the latest kits in the online store - get yours here!

Shop Online

Access my online shop 24 x 7, 365 days of the year:

Current November hostess code:

9NKXDTTR

Shop Online

Mini Catalogue

BROWSE THE CATALOGUE

'Tis The Season - the new Stampin' Up! Mini Catalogue is here! For more details and to download your copy click here

Scrapbooking

Stampin' Up! has introduced a new range of 12x12" scrapbooking product and kit - the full range is now available to purchase online. To download a copy of the new digital Scrapbooking Catalogue click here.

2024-25 Annual Catalogue

BROWSE THE CATALOGUE

Click on the image to download your copy of the 2024-25 annual catalogue. For a full list of current SU! supplies, go to my online store. If you would like any help or advice, please drop me a line at joanne@thecraftyowl.co.uk or give me a call on 07773 421446 - I'd be happy to help.

Join My Team

It's always a great time to join Stampin’ Up! New team members can get £130 worth of products for only £99 + free business supplies + free shipping + all the fun being a part of Stampin’ Up! Stampin' Up! has something for everyone: join my growing team and benefit from my support to enjoy Stampin' Up! however you choose.

If you're interested, call me for a chat to understand how I can help you realise your goals. Alternatively, if you have already decided to sign up and you just can't wait, please click here for the link to the online form where you can sign up and order your starter kit right away! 

About Me

Hi I'm Joanne and live in Northampton and when I'm not looking after my husband and two beautiful children, am an avid crafter with a passion for all things Stampin' Up!

I must confess that I have never been a big rubber stamper - until I discovered Stampin' Up! that is. I love the fact that I can get such great results with co-ordinating stamps, inks, papers and punches - the possibilities are endless! Join me on my stamping journey as I share the things I love and be inspired to create amazing things yourself!

Follow Me

Monthly Newsletter

Box Builder

Click the button above to use Box Buster to create your custom box design using the Envelope Punch Board!

Kits Collection Now Available!

Stampin Cut and Emboss

The new Kits Collection from Stampin' Up! is now available!

Click here to see the current kits available and order yours online today.

I Design For


Stampin' Up Stuff

This is my personal blog and is not endorsed by Stampin’ Up! I hope you find it a plentiful source of ideas and personal inspiration but please don't copy my designs for contest submission or use for classes, publication or sale without express permission.