by Joanne James10. July 2019 20:00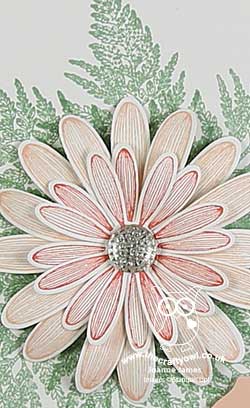
Today I'm sharing another of the cards I designed for my Daisy Lane class earlier this week that is perfect for the current colour challenge over at Hand Stamped Sentiments where they have a pretty subtles colour palette for inspiration:

I wanted to remind my ladies of a technique that I demonstrated to them previously using a template to create a wreath or uniform pattern using their Stamparatus and the Daisy Lane set was perfect for this - take a look at my card:
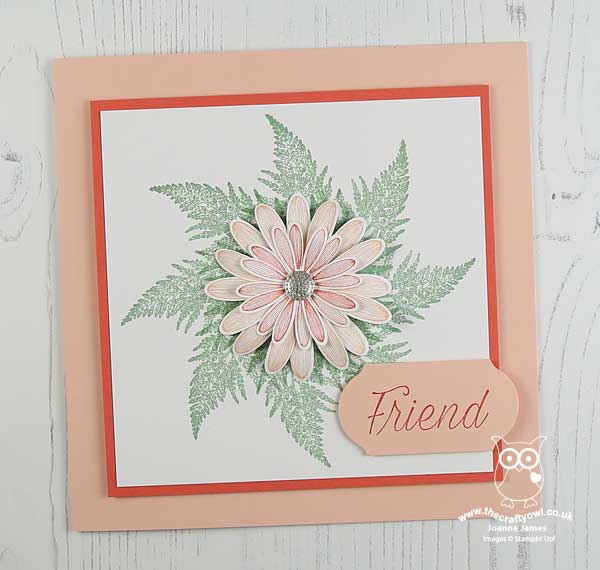
Here's the low-down on today's card:
A Layered Daisy - Today's card features more stamped and punched daisies - this time layered to create a full flower: two large stamped and punched daisies in Petal Pink, with two smaller stamped and punched daisies in Calypso Coral layered on top. Lots of petal curling with a bone folder adds dimension and the appearance of fullness.
A Starburst Fern And A Fun Stamparatus Technique - I wanted to use the fern on this card and it was the perfect size and shape to revise a fun technique using the Stamparatus. We had previously looked at how you can use a template to help you create a symmetrical wreath using leaves and small flowers; this time we used the same template, but instead used it to create an almost flower-shaped starburst of ferns to back our punched daisy. This was perfect for my daisy focal point and a neat way to ring the changes with a square card too.
A Touch of Sparkle - On this card, I finished my daisy with a clear faceted dot for a neutral touch of sparkle.
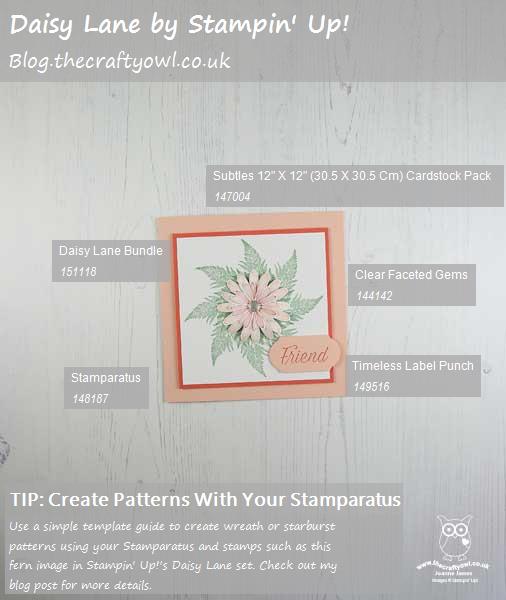
Here is the visual summary of the key products used on today's project for you to pin for easy reference:
You can see all of my 'How To' summaries on my 'How To - Tips and Techniques' Pinterest board in case you've missed any.
Enjoy your evening and I'll be back tomorrow with another project. Until then, happy stampin'!
Stampin' Up! Supplies Used:
f0b893b6-e37d-4797-8b89-96ae0327727f|0|.0|96d5b379-7e1d-4dac-a6ba-1e50db561b04
Tags: Shop Stampin' Up! Online, Stamping Shop Stampin' Up online, Shop online, Stampin' Up, Stampin' Up Card ideas, Stampin' Up Supplies, Stampin' Up Card, Daisy Lane, Daisy Punch, Medium Daisy Punch, Stamparatus
Cards | Shop Online | Shop Stampin' Up! Online | Stamping
by Joanne James9. July 2019 16:00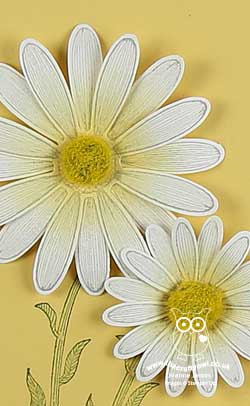
No post yesterday as I had a class and one James Junior to get ready for her German student exchange trip with the other to swim training and I simply ran out of time! So I'm sharing my planned card today which is perfect for the current challenge over at Just Us Girls where the cue word is 'Smile':

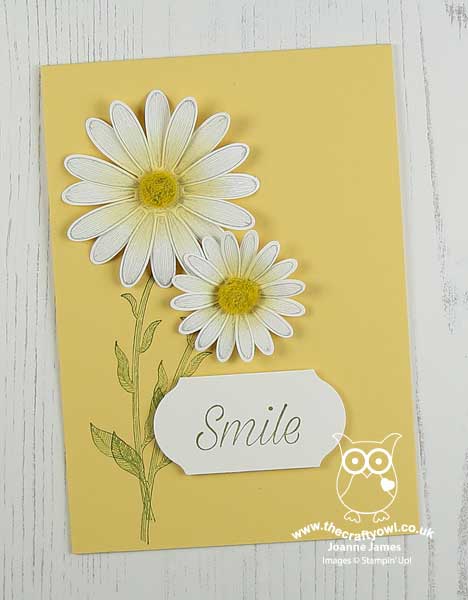
My class yesterday featured the new Daisy Lane stamp set and Medium Daisy Punch and this is one of the cards we made - take a look:
Here's the low-down on today's card:
There's A New Daisy In Town - Daisy Lane is a new Stampin' Up! stamp set that features that perennial favourite - the daisy. Definitely more wild flower than weed, today's card features two daisies from the new set, stamped in Smoky Slate with some So Saffron added to the centres with a sponge dauber before punching the larger one out with the existing Daisy Punch and then the smaller one with the Medium Daisy Punch and added to the stems that were stamped directly onto the card base.
Feeling Fuzzy - What makes these daisies stand out though, are the little fuzzy yellow centres. These Perennial Essence Floral Centres are part of the Perennial Essence Suite but they make great daisy centres too. They have little self-adhesive backs so are easy to attach to punched flowers to give them added interest. I can see me using lots more of these!
A Timeless Label - The 'smile' sentiment is also from the Daisy Lane set and to give it a little more emphasis I punched it out with the new Timeless Label Punch which is the perfect size for both the 'smile' and 'friend' sentiments in this set and lots more besides. This is another of those super-useful punch shapes that is a good basic for your crafting arsenal.
Here is the visual summary of the key products used on today's project for you to pin for easy reference:
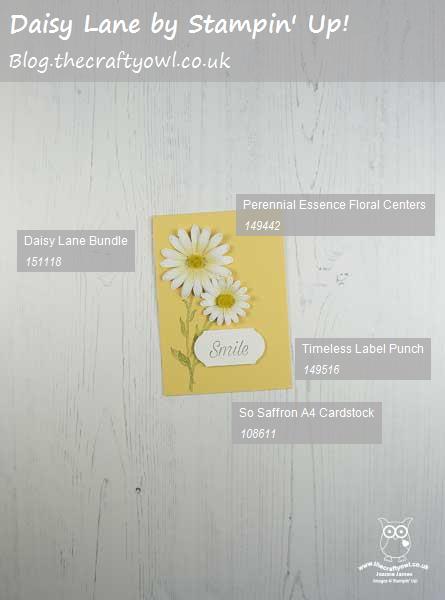
You can see all of my 'How To' summaries on my 'How To - Tips and Techniques' Pinterest board in case you've missed any.
Enjoy your day and I'll be back tomorrow with another project. Until then, happy stampin'!
Stampin' Up! Supplies Used:
by Joanne James7. June 2017 07:00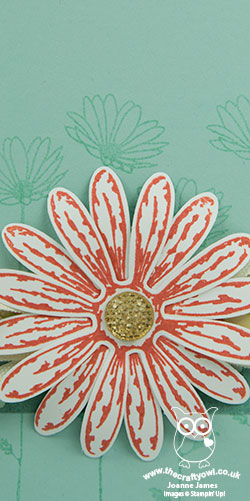
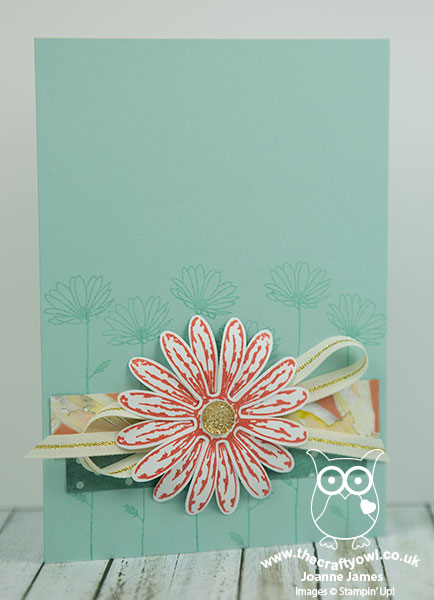
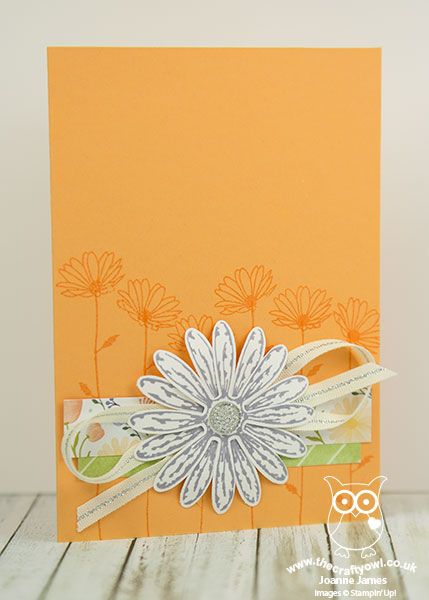
Today I've a couple more daisy cards for you - both the same design, just using alternative colourways. Here's the first one, featuring Pool Party, Calypso Coral, Emerald Envy and Gold:
Here's the second card I created using exactly the same stamps and layout, simply changing the colour palette - this time Peekaboo Peach, Wisteria Wonder, Old Olive and Silver:
Here's the low-down on today's card:
Take A Strip Of Paper - Believe it or not, today's cards started out as a few designer series paper offcuts; literally leftovers from another project! I had been busy creating a bunch of customer thank you cards with full size cardfronts featuring the gorgeous patterns in the Delightful Daisies designer series paper packs to go out with this month's customer orders, and had a whole bunch of narrow strips leftover. I could have thrown them away - instead I used them to create the horizontal lines for my punched flower to rest on and to inspire the colour combinations for the rest of my card. Waste not, want not and all that!
Buy The Bundle - As my blog post title suggests, you could but the Daisy Punch alone - why would you though when you can get the Daisy Delight stamp set with it as a bundle with 10% off into the bargain? For me the bundle really is a no brainer: it has this lovely daisy stamp that I've used here to add detail and colour to your daisy petals and centres and it also comes with a number of other pretty florals that can be coloured or used for a tone-on-tone look as I have here to create my background. There's a couple of thank you sentiment combinations too. So many more creative possibilities and a great price point at £27.75.
Add A Gem - In addition to some ribbon, I've also added one of the new faceted gems to the centre of each of my daisies - I love the sparkle these add to a card!
Here is the visual summary of the key products used on today's project for you to pin for easy reference:
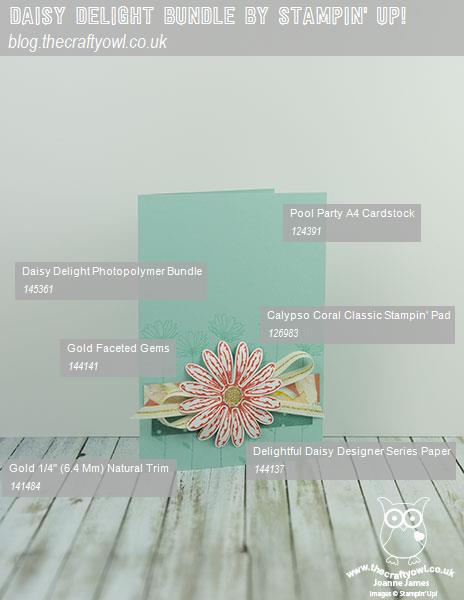
You can see all of my 'How To' summaries on my 'How To - Tips and Techniques' Pinterest board in case you've missed any.
Enjoy your day and I'll be back tomorrow with another project. Until then, happy stampin'!
Stampin' Up! Supplies Used:
by Joanne James6. June 2017 20:00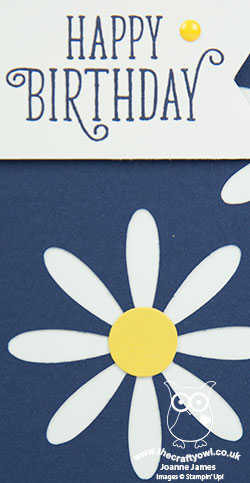
I've been busy preparing samples for my forthcoming open house using one of my favourite suites from the new catalogue: the Delightful Daisies Suite. Today I'm sharing two clean and simple cards featuring the new Daisy Punch and just two of the ways it can be used.
My first card was inspired by one made recently by Mary Fish - you can see her original card here - a simple trio of punched daisies with banner sentiment greeting from the Happy Birthday Gorgeous stamp set:
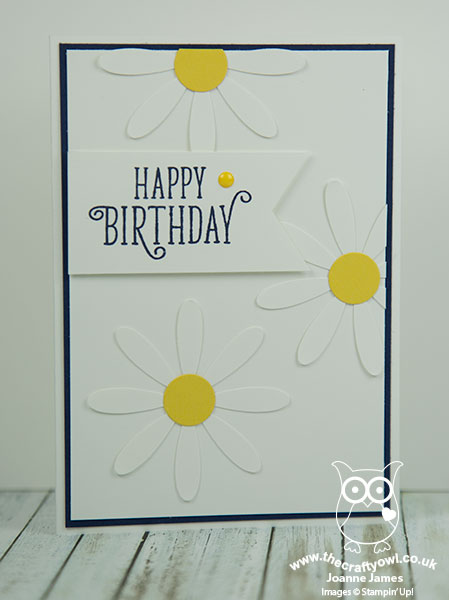
I chose to use Night of Navy for my accent colour - I love how the simple yellow middles of the daisies - punched with a 1/2" circle punch - really pop with this crisp, fresh colour combination. My second card uses the daisy punch to make a feature of the negative space:
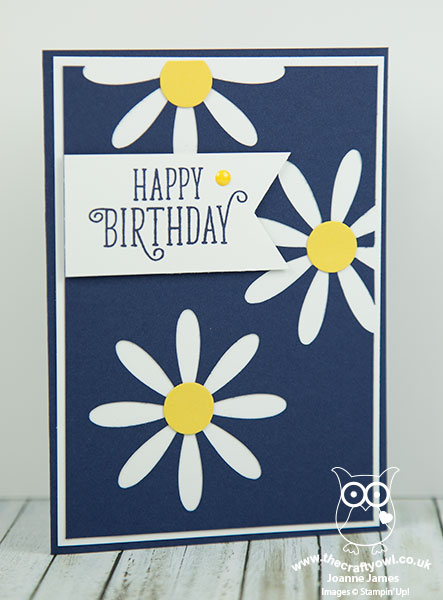
Here the daisies still take centre stage, however this time instead of punching out the flowers and attaching them to the cardfront, I punched the flowers out of my topmost navy card layer to 'reveal' the white daisies in the negative space below, then I added my yellow flower centres to each negative flower. I am a big fan of using negative space to make your punches and framelits work harder for you and I love the contrast that using the negative space provides with this classic colour combination.
Here is the visual summary of the key products used on today's project for you to pin for easy reference:
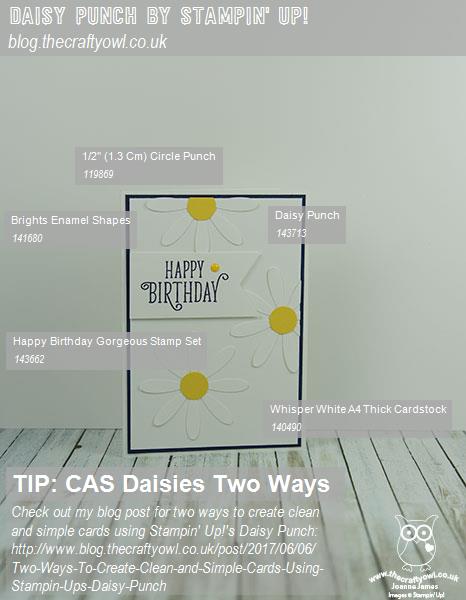
You can see all of my 'How To' summaries on my 'How To - Tips and Techniques' Pinterest board in case you've missed any.
Enjoy your evening and I'll be back tomorrow with another project. Until then, happy stampin'!
Stampin' Up! Supplies Used:
by Joanne James28. April 2017 20:15
Today I've a quick post to share some sneak peeks with you for some lovely new products that are appearing in the new Stampin' Up! annual catalogue that is due out on the 1st June - 6 in fact! Take a look:
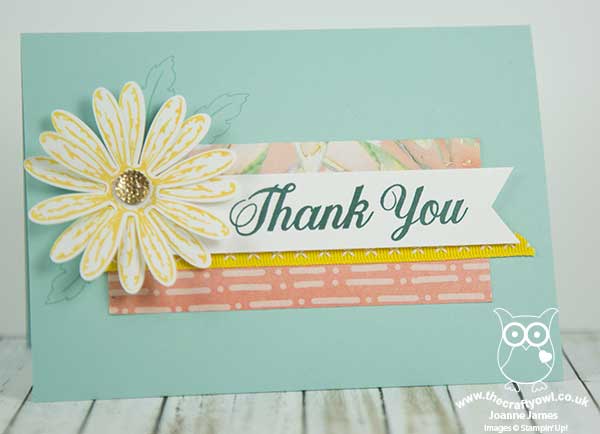
Today's card features some great new products from the Delightful Daisy Suite, featuring some delicate and elegant florals, including:
- A pretty new stamp set, Daisy Delight
- A co-ordinating Daisy Punch
- Delightful Daisy Designer Series Paper
- 1/4" Daffodil Delight Double-Stitched Ribbon
- Faceted Gems
It also features one of the new in-colours - the sentiment, also from the Daisy Delight stamp set, is stamped in Tranquil Tide.
This is such a pretty set - I'm really looking forward to creating more with it. I can't wait to share the new catalogue with you; if you are a customer of mine that has purchased from me within the last 6 months you will automatically receive an annual catalogue from me. If you haven't purchased from me within the last six months but would like to receive a copy of the new catalogue and don't already have a Stampin' Up! demonstrator, then please get in touch with me here to reserve your copy.
Here is the visual summary of the key products used on today's project for you to pin for easy reference:
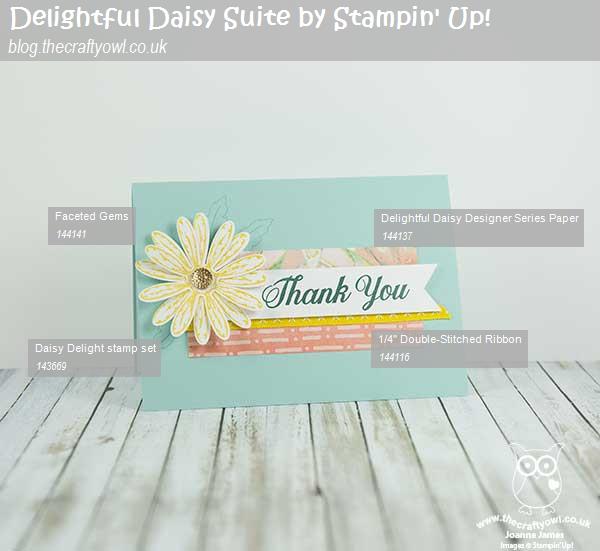
You can see all of my 'How To' summaries on my 'How To - Tips and Techniques' Pinterest board in case you've missed any.
I'll be back tomorrow with another project. Until then, happy stampin'!
1caeb626-7bac-4c3b-a76a-9567873996e1|0|.0|96d5b379-7e1d-4dac-a6ba-1e50db561b04
Tags: Daisy Delight, Daisy Punch, Delightful Daisy, 2017 Annual Catalogue, Shop online, Shop Stampin' Up online, Shop Stampin' Up! Online, Stampin' Up, Stampin' Up Card, Stampin' Up Card ideas, Stampin' Up Supplies
Cards | Catalogues | Shop Online | Stamping