Party Emoji Teenager Birthday Card

by Joanne James21. April 2021 07:00

Today I'm sharing a card for a couple of challenges:


Whilst I loved Laurel's floral bouquets in the Inspired By photo this week, it was the theme of World Laughter Day over at Festive Friday that really got me going - and my idea was just perfect for the Inspired By sketch so I still got to play there too! Today's card is all about punch art - take a look:


Here's the low-down on today's card:

So today's card uses a ton of retired products I'm afraid: 2 1/2", 1", 3/4" and 1/2" Circle Punches, Classic Label Punch, along with the retired stamp sets '@SoSocial' and '#Hello', but when you need to create an emoji, punches are the absolute go-to and just because they've retired, these craft-room staples will never leave my collection! I decided to go with 'emoji, yellow, red, lips' from the Festive Friday inspo list and to recreate a 'party emoji' for a birthday card for a certain James Junior from his big sister - his birthday is not until August, but there's nothing like being prepared!! A quick Google gave me a layout and colour scheme to work from and so I set to work. In addition to my trusty circle punches, I've discovered the new Ice Cream Cone Builder Punch is also super useful for this type of card; I used the cone section for my emoji's party hat and the ice-cream scoop formed the basis of my lips (I punched a scoop then fashioned the lips from two of the three small 'bubble' shapes along the bottom edge):


A sprinkling of retired enamel candy dots for confetti (I wanted to go with sequins but didn't have the requisite bright colours) and my on-trend sentiments complete my card. What do you think? Would you recognise my punch art party emoji? Thanks to the Festive Friday team for a great source of inspiration this week - I'm not sure I would even have attempted this card without this challenge, yet I really quite like it and am sure it will tick the box with my social media-savvy son - who knows, he might even put it on Instagram for me!

Here is the visual summary of the key products used on today's project for you to pin for easy reference:


You can see all of my 'How To' summaries on my 'How To - Tips and Techniques' Pinterest board in case you've missed any. 

Whilst I am fairly knowledgeable as far as basic emojis are concerned, I had my children in stitches recently as I was musing over the dinner table at why the local NHS Sexual Health Clinic advertising that I'd passed earlier that day used an aubergine - of all the vegetables that could be used, I didn't think this was the one that would have broadest appeal to the youth of today, and besides I was struggling to see the link to healthy eating. Once my children had stopped laughing, they pointed out that the aubergine had nothing to do with healthy eating and was really depicting another meaning that is often associated with that emoji; apparently the same applies to cherries, tomatoes and more! I am now fully clued-up and if you are wondering what I'm talking about too, a quick Google search of 'aubergine emoji' will fill you in! Meal times are never dull in the James household, that's for sure!

Enjoy your day and I'll be back tomorrow with another project. Until then, happy stampin'!


Stampin' Up! Supplies Used:

Table built using Product Table Builder by The Crafty Owl - Independent Stampin' Up! Demonstrator.

A Darling Donkey Triangle Trio For PP523

by Joanne James10. January 2021 09:00

Today it's Sunday and time for this week's new challenge over at The Paper Players! It's the turn of the fabulous Ann to host this week and she has an interesting colour challenge for us to work with:
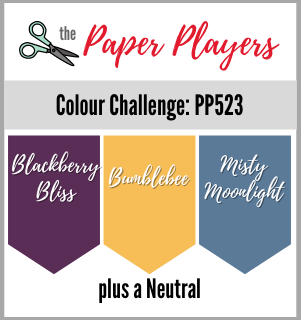
       

Now I know I said Ann had an 'interesting' colour challenge for us this week ... what I really meant to say was 'incredibly difficult'!! Or at least, it was for me this week! Whilst I don't mind any of these colours in their own, or even paired, as a trio I struggled with them. All three are featured in the new Dandy Garden designer series paper, and usually DSP would be my first port of call for a colour challenge, but the truth is I am not a fan of this pack! Or at least, I should qualify that by saying I'm not a fan of the sides with mixed colours - the monochromatic patterns in this pack are just lovely! Anyway, I had to call in help for this one, both in the form of this week's Paper Craft Crew sketch and a certain James Junior - take a look at what we came up with:
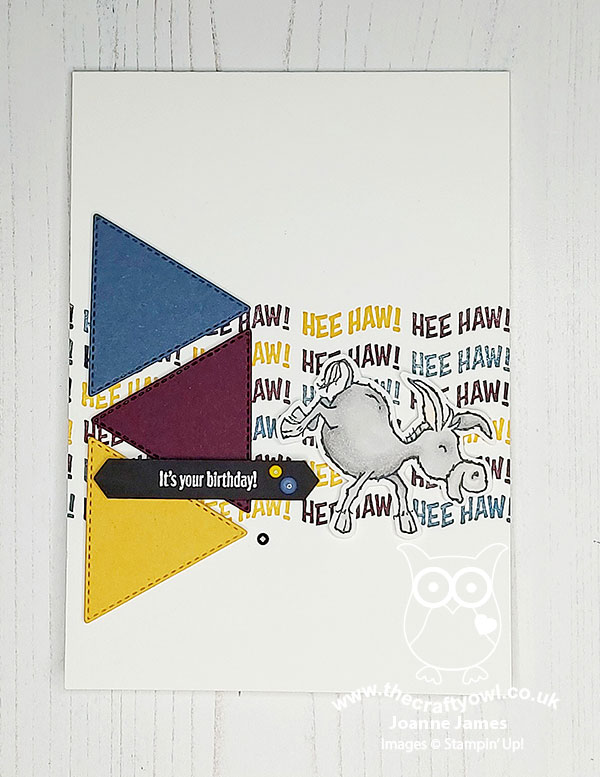
 

Here's the low-down on today's card:

A Trio Of Triangles - I was drawn to this week's PCC sketch with its three triangles, as I had been having a team chat this week with one of my team who has been using her stitched triangles as part of an ongoing challenge and I mentioned that I had bought these before Christmas but not yet used them and I thought the sketch would be a good way to remedy that. The trio would also enable me to work in this week's colours, so provided a great starting point.

A Darling Donkey - I then needed to decide upon my neutral colour; this is where Rebecca, the self-confessed 'brains' behind today's card, suggested I go with grey and a donkey from the super cute 'Darling Donkeys' stamp set, one of the sets that can be yours free with a £45 spend during Sale-A-Bration. So I coloured one of the funny kicking donkeys and fussy cut it out - perfect!

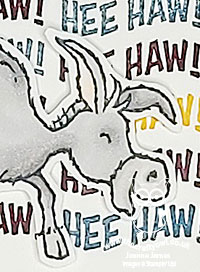
Hinge-Step HeeHaw - Finally, I just had to work out what to do use for the horizontal background panel. I decided to go with a tri-colour sentiment block, made up of alternating colours of 'heehaw!', one of the sentiments in the Darling Donkeys set. I used my Stampuratus and moved the plates up and down the hinge to perfectly space my words to create a seamless flow across the page. The Stamparatus made light work of the stamping, although 'the hands' (Rebecca's reference to my contribution!) were definitely not working as quickly as 'the brain' (apparently, since it was all her idea!!) I finished my card with a birthday sentiment and a trio of enamel dots. 

Despite my initial reservations about this week's colours, I'm actually pretty pleased with the end result. What do you think? Did Team James pull it off?! Do leave me a comment below - I'd love to hear your thoughts. I'll be linking today's card up over at SUO Challenges too where they have 'Designer's Choice' themes this week.

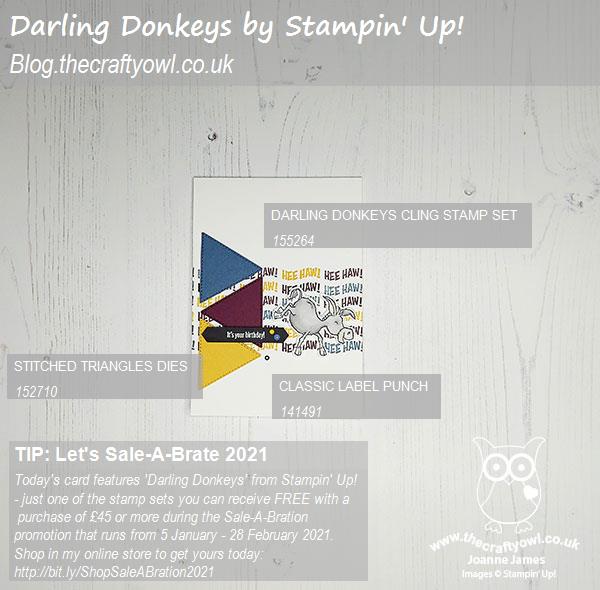
Here is the visual summary of the key products used on today's project for you to pin for easy reference:
 

You can see all of my Product and 'How To' summaries on my 'How To - Tips and Techniques' Pinterest board in case you've missed any. 

Before you reach for your ink and papers, check out what our amazing team has created to inspire you this week:

Here's a quick recap of our challenge rules:
 
1.  Create a new paper project
2.  Upload your creation to your blog with a link back to us and provide a direct link to the post featuring your challenge submission.
3.  Please link your card to no more than four challenges, TOTAL.
4.  Have FUN!

You can see all of my 'How To' summaries on my 'How To - Tips and Techniques' Pinterest board in case you've missed any. 

Enjoy your day; I'm hoping to do a little crafting and maybe wrap up and brave the elements for a brisk walk - but I'll see what the temperatures are like first! I'll be back tomorrow with another project. Until then, happy stampin'!


Stampin' Up! Supplies Used: 

Table built using Product Table Builder by The Crafty Owl - Independent Stampin' Up! Demonstrator.

A Rare Dad For TTT64

by Joanne James14. May 2020 09:00

It's Thursday and time for a new challenge over at TicTacToe! It's the turn of Team X to host this week and I am the featured designer this week. This is the fun board that we are playing along with: 


I had another crack at Brian's CAS(E) This Sketch layout today and my card also uses the colours over at The Card Concept, and whilst I have stripes they aren't of the patriotic kind - take a look:


I chose the right-hand column of Punny Sentiment - Masculine - Punched Shape for my card today and this is how I achieved it:

Punny Sentiment - I love a punny sentiment and the 'Outdoor Barbeque' set in the current Spring-Summer catalogue has a few of them! I especially love this one with the picture of a steak - I mean, who puts a steak on a card, right?! This is perfect for the Dad of the James household - this is exactly how he likes his steak cooked and he is a rare breed indeed (read into that what you may!) I finished the sentiment inside my card with this stamp from the 'A Wish For Everything' set:

Masculine - I'm not sure many females would relish a juicy streak on the front of a card - I'm more a hearts and flowers girl myself! - so that definitely puts this card into male territory. Besides, our Dad is most definitely the king of the BBQ - a very masculine domain! That's where my blue striped paper comes in too; it's from the now retired Come Sail Away DSP but on my card serves as a nod to my husband's navy and white butcher-striped BBQ apron.

Punched Shape - Lastly, I used the Classic Label Punch to punch out the sentiment on the front of my card and pop it up on dimensionals; I cut a long thin strip of cardstock to stamp my sentiment on then fed it into each end of my punch in turn, as the punch was too short to get it in one go. 

Here is the visual summary of the key products used on today's project for you to pin for easy reference:


You can see all of my Product and 'How To' summaries on my 'How To - Tips and Techniques' Pinterest board in case you've missed any. 

A tictactoe board offers so many creative possibilities - how does this week's board inspire you? Why not have a go? We would love to see you in the gallery and who knows - you might be selected for Designer's Choice and be eligible to be a guest designer on a future challenge. 

Enjoy your day; my day today revolves around laundry, craft, CE revision - the usual! I am also expecting visit number 2 from the oven repair man (my oven is actually in bits on the kitchen floor as we speak - it seems no other Neff oven has experienced the same fault as mine, go figure!!) and a socially distanced interaction with one of my friends and neighbours, who excitedly called me yesterday to say she had managed to get her hands on some plain four and would be bringing some round for me - sometimes the little things are so exciting and this will undoubtedly be the highlight of my day today! I'll be back tomorrow with another project. Until then, happy stampin'!


Stampin' Up! Supplies Used: 

Table built using Product Table Builder by The Crafty Owl - Independent Stampin' Up! Demonstrator.

Happiness Blooms birthday Card for PP434

by Joanne James24. March 2019 09:00

Today it's Sunday and time for this week's new challenge over at The Paper Players! It's my turn to host this week and I have my favourite challenge, a sketch, for you to work with:


I chose something with layers and whilst the uppermost layer with the sentiment on is arrow-shaped, any horizontal shape would work in this space. I actually have a couple of cards to share with you today. Firstly the card I actually made for today's challenge using my favourite papers for the Spring-Summer catalogue - take a look:


Here's the low-down on today's card:

A Well Written Tag - I made the top layer of my card into a tag using my Scalloped Tag Topper Punch and used it as the focal point for my main greeting cut using the Well Written Framelits, finished with a tiny bit of stamping that I punched out and shortened with my Classic Label Punch. I added a few flowers from the same set, finished with some Bitty Blooms punched leaves and some navy enamel dot centres.

Happiness Blooms - The gorgeous bold and bright florals of the Happiness Blooms Designer Series Paper set the tone and colour scheme for my card today. I resisted the urge to use my favourite navy pattern in this set and instead chose the gorgeous Calypso Coral/Night Of Navy/Call Me Clover/ Whisper White combo, with a contrasting striped design for my second layer of pattern. I finished off the inside of my card and envelope with another sentiment from the 'Well Said' stamp set and some stamped flowers using 'Bloom by Bloom'. Such a colourful and cheerful card - very me! 

My Original Inspiration - I actually designed this sketch before Christmas and used it for a card in one of my monthly technique classes. I realised during an exchange of messages with my fellow PP teamie the lovely Claire that I hadn't actually blogged that card, and whilst the papers that I used (Festive Farmhouse) are no longer available, the Merry Christmas Thinlits Dies and Merry Christmas To All stamp set are on carryover from the Autumn-Winter catalogue and still available, so I thought I would share with you too so that you can see how it looks with an alternative product set:


So two for one today! Which one do you prefer? I'd love you to leave a comment below.

Here is the visual summary of the key products used on today's project for you to pin for easy reference:


And for the Christmas version:

You can see all of my Product and 'How To' summaries on my 'How To - Tips and Techniques' Pinterest board in case you've missed any. 

Before you reach for your ink and papers, check out what our amazing team has created to inspire you this week:

Here's a quick recap of our challenge rules:
 
1.  Create a new paper project
2.  Upload your creation to your blog with a link back to us and provide a direct link to the post featuring your challenge submission.
3.  Please link your card to no more than four challenges, TOTAL.
4.  Have FUN!

You can see all of my 'How To' summaries on my 'How To - Tips and Techniques' Pinterest board in case you've missed any. 

I'm looking forward to visiting your blogs to see what you make of my sketch this week. Enjoy your day; I will be packing up the youngest of the James Juniors in readiness for a week-long school trip tomorrow and preparing for the imminent arrival of a German exchange student who is visiting to spend time improving her English language skills with the other one! I'll be back tomorrow with another project. Until then, happy stampin'!


Stampin' Up! Supplies Used:

Table built using Product Table Builder by The Crafty Owl - Independent Stampin' Up! Demonstrator.
 
 
Table built using Product Table Builder by The Crafty Owl - Independent Stampin' Up! Demonstrator.

New Online Exclusives

There are new products available exclusively in the online store from 5 November - check them out here.

Latest Kits!

Stampin Cut and Emboss

The Layered Landscapes Kit and Nature's Paintings Kit are the latest kits in the online store - get yours here!

Shop Online

Access my online shop 24 x 7, 365 days of the year:

Current November hostess code:

9NKXDTTR

Shop Online

Mini Catalogue

BROWSE THE CATALOGUE

'Tis The Season - the new Stampin' Up! Mini Catalogue is here! For more details and to download your copy click here

Scrapbooking

Stampin' Up! has introduced a new range of 12x12" scrapbooking product and kit - the full range is now available to purchase online. To download a copy of the new digital Scrapbooking Catalogue click here.

2024-25 Annual Catalogue

BROWSE THE CATALOGUE

Click on the image to download your copy of the 2024-25 annual catalogue. For a full list of current SU! supplies, go to my online store. If you would like any help or advice, please drop me a line at joanne@thecraftyowl.co.uk or give me a call on 07773 421446 - I'd be happy to help.

Join My Team

It's always a great time to join Stampin’ Up! New team members can get £130 worth of products for only £99 + free business supplies + free shipping + all the fun being a part of Stampin’ Up! Stampin' Up! has something for everyone: join my growing team and benefit from my support to enjoy Stampin' Up! however you choose.

If you're interested, call me for a chat to understand how I can help you realise your goals. Alternatively, if you have already decided to sign up and you just can't wait, please click here for the link to the online form where you can sign up and order your starter kit right away! 

About Me

Hi I'm Joanne and live in Northampton and when I'm not looking after my husband and two beautiful children, am an avid crafter with a passion for all things Stampin' Up!

I must confess that I have never been a big rubber stamper - until I discovered Stampin' Up! that is. I love the fact that I can get such great results with co-ordinating stamps, inks, papers and punches - the possibilities are endless! Join me on my stamping journey as I share the things I love and be inspired to create amazing things yourself!

Follow Me

Monthly Newsletter

Box Builder

Click the button above to use Box Buster to create your custom box design using the Envelope Punch Board!

Kits Collection Now Available!

Stampin Cut and Emboss

The new Kits Collection from Stampin' Up! is now available!

Click here to see the current kits available and order yours online today.

I Design For


Stampin' Up Stuff

This is my personal blog and is not endorsed by Stampin’ Up! I hope you find it a plentiful source of ideas and personal inspiration but please don't copy my designs for contest submission or use for classes, publication or sale without express permission.