Happy Monday everyone! Today is a special day - not one, but two, yes both of the James Juniors are back to school! There was much excitement in the James household this morning and whilst it's only for a couple of weeks, and for one it's only for a couple of days each week, the excitement at seeing friends and teachers face to face again was palpable! The house is now eerily silent, but it does mean that I am racing through my jobs today and am getting my blog post in early too! Today I'm sharing a card that I made inspired by the lovely Amy's sketch over at Freshly Made Sketches:
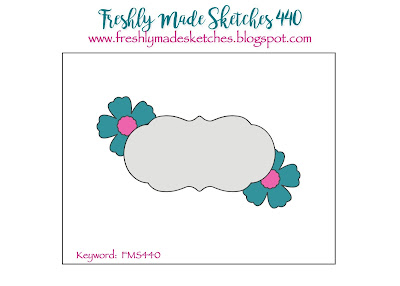
A super versatile sketch I'm sure you'll agree and I decided to get snipping for my floral creation today - take a look:
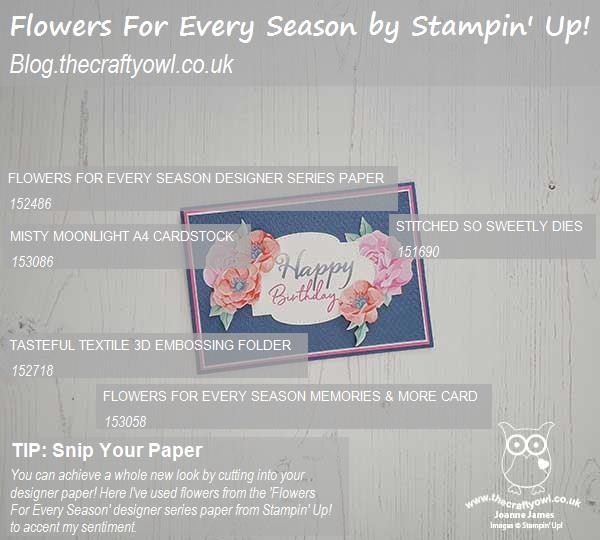
Here's the low-down on today's card:
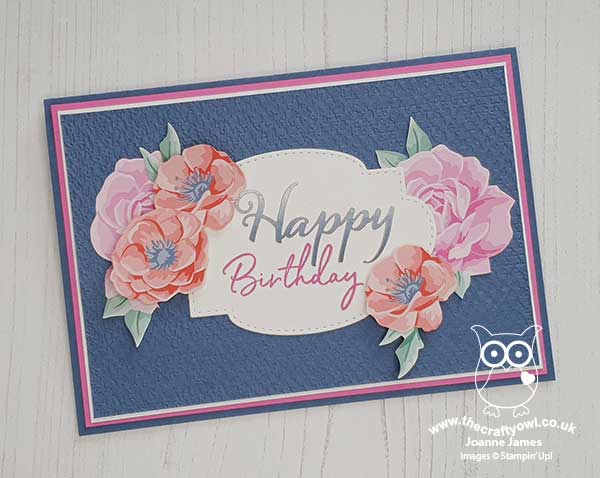
Flowers For Every Season - Whilst flowers are by no means mandatory for this sketch, I initially reached for my Flowers For Every Season Memories and More cards as I wanted to incorporate the adhesive sentiments into my card. I couldn't find any flowers that worked for me though, so I reached for my co-ordinating papers and decided to get fussy cutting! I wanted to create some layering with my flowers, with some behind and some in front of my label, so separated the flowers to make this work.
A Sweet Label - My sentiment label is from the Stitched So Sweetly Die set - such a great set for labels with a good variety of shapes and sizes.
Textile Texture - I added some texture to the top layer of my Misty Moonlight cardstock using the new Textile Texture embossing folder which is lovely for a little extra detail.
This card was simple to put together once the fussy cutting was completed. I used another leftover edge piece of DSP to decorate the inside of my card too:
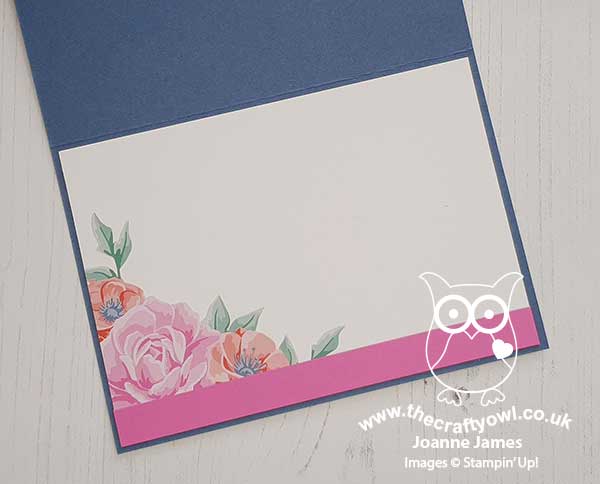
Waste not, want not and all that!
Here is the visual summary of the key products used on today's project for you to pin for easy reference:
You can see all of my 'How To' summaries on my 'How To - Tips and Techniques' Pinterest board in case you've missed any.
Enjoy your day. I'm racing through my jobs before early school pick up. I'll be back tomorrow with another project. Until then, happy stampin'!
Stampin' Up! Supplies Used: