Playing In The Rain AYSI 309

by Joanne James6. October 2023 12:00

Today I'm sharing my design team card for our new challenge over at As you See It where it's time for an interesting colour challenge:


I say 'interesting' because I really like this week's colour combination - but I really struggled to make it work! I played around with a few different ideas and eventually decided to go with something clean and simple using a set that hasn't seen ink in a while, using Narelle's layout over at Freshly Made Sketches this week as the basis for my design. This is what I came up with: 


Here's the low-down on today's card:

Colour Conundrum - Having discounted florals for today's card (sorry Narelle - I know you love them!) I decided that Copper Clay would be the perfect colour for some fox fur, so I grabbed my 'Playing in the Rain' stamp set and started to play. I then discovered that Copper Clay Blends were the only ones I didn't have in my collection (in short - a different colour ordered by mistake!) so I coloured the fox fur with my Stampin' Write marker and the Misty Moonlight clothes and umbrella with my Blends as usual. It gives less definition, but I figured it would be a good way to show that a) nobody's perfect and b) enable you to see the difference in both marker types on one project (well that's my story, and I'm sticking to it!!) 

A Circle Trio - I knew my card would end up being clean and simple, because I didn't have many colours to play with. I decided that the three circular elements of the FMS sketch would work really well, enabling me to have my fox represent one element, then use the additional two circles to highlight both some stamped raindrops (I chose Smoky Slate as my neutral of choice) and some stamped puddles on the lower Misty Moonlight one. I layered my circles slightly different to the sketch in order to fit in my sentiment banner and to give balance. All I needed to complete my card was a trio of Misty Moonlight tinsel gems for a touch of raindrop-like sparkle.


An Inside Tip - I wanted to share with you a little tip for decorating the inside of your cards when you are colouring onto a white cardbase. As you know, if you colour with Stampin' Blends they do give the best finish but have the disadvantage of bleeding through and being seen on the reverse of your card. To combat this, I stamped another of the images in the set directly onto my cardbase and coloured the puddle with my Stampin' Write marker only. I then stamped the same image onto an additional piece of cardstock, coloured it with my Stampin' Blends, diecut it with my Playing In The Rain Dies, then pieced it into place onto the cardbase - problem solved! 

And yes, I know there's a hint of pink and a Calypso Coral jacket on my bunny, but since it's on the inside of my card I'm not breaking the rules ;-).

Here is the visual summary of the key products used on today's project for you to pin for easy reference:


You can see all of my 'How To' summaries on my 'How To - Tips and Techniques' Pinterest board in case you've missed any. 

Here's a summary of our challenge rules:

  • Create any card, scrapbooking page, 3D project or packaging project that fits the challenge.
  • Please include the challenge graphic and link back to the challenge in your blog post. Turn off word verification so we can leave you lots of lovely comments. Make sure you link the post not the whole blog to the Linky. Use #AYSIXXX when uploading to a public gallery.
  • If you’re unsure about ‘the rules’, check the details under the Challenge Guidelines tab on the As You See It Challenge homepage.
  • In a colour challenge, black or other neutral can be used in outlines and sentiments but no other colours should be included. Stampin’ Up colours are used for reference but colours that are a close match are welcome.
We look forward to seeing your creations in the AYSI gallery.

Enjoy your day. I am meeting one of my oldest friends for lunch and it looks like it's turning into an unusually warm and sunny day, so that should be nice. I'll be back tomorrow with another project. Until then, happy stampin'!


Stampin' Up! Supplies Used:

Table built using Product Table Builder by The Crafty Owl - Independent Stampin' Up! Demonstrator.

A Silly Goose Clean And Simple Birthday Card CCS522

by Joanne James3. October 2023 12:00

It's Tuesday and time for a new challenge over at CAS Colours & Sketches. Lucy is hosting this month and our first challenge is a colour challenge: 


What a pretty trio of colours! For my card today I grabbed an old favourite, the 'Silly Goose' stamp set, along with the Just Add Ink sketch (which I love!) and set to work. This is what I came up with:


Here's the low-down on today's card:

I used pops of these colours to highlight the details of my birthday goose with my Stampin' Blends and picked out the Fresh Freesia with a strip of (retired) Dandy Designs designer paper for some extra detail to the other side of my twine bow:

I cut out my panel using the largest square in the Stylish Shapes Dies, making it a rectangle by extending it and running it through my die cutting machine a second time.

Here is the visual summary of the key products used on today's project for you to pin for easy reference:


You can see all of my 'How To' summaries on my 'How To - Tips and Techniques' Pinterest board in case you've missed any. 

As a reminder, for our colour challenges, you must use all of the stated challenge colours. You may also use neutral colours; however, the challenge colours should be the most noticeable ones featured on your card. We use Stampin' Up! colour names for reference, but you are welcome to use any other companies' products as long as you match the challenge colours as closely as possible.

Enjoy your day and I'll be back tomorrow with another project. Until then, happy stampin'!


Stampin' Up! Supplies Used:

Table built using Product Table Builder by The Crafty Owl - Independent Stampin' Up! Demonstrator.

A Fabulous 35 Anniversary Joining Offer And new Christmas Kits

by Joanne James3. October 2023 09:00

It's the start of October and there's lots of news to share with you! A fantastic joining offer and two new Christmas-themed kits launch today. First up:


Stampin' Up! wants to celebrate our 35th anniversary in style! From 3 to 31 October, anyone who joins our fun crafting community as a new demonstrator can choose either 35% OFF the cost of their Starter Kit or get 35% MORE product with their Starter Kit! What a deal! 

New demonstrators can choose one of the following options for their Starter Kit:

Option 1: Get 35% OFF the normal cost of a Stampin’ Up! Starter Kit. Those who select this option will receive £130 worth of product for only £64.35!

Option 2: Get 35% MORE product with their Starter Kit. Those who select this option will receive £175.50 worth of product by spending £99!

No matter which option new demonstrators choose for your Starter Kit, both provide you with free business supplies and free shipping on your Starter Kit—not to mention all the fun that comes with being part of Stampin’ Up!

If that wasn't enough - it gets better! Those who sign up for a Starter Kit during this offer will also be automatically registered for FREE to our virtual OnStage@Home event on 11 November—an event that has a £72 value! At this virtual, one-day event, we’ll celebrate our 35th Stampin’ Up! anniversary, watch lots of presentations, and view new products in action from the January–April 2024 Mini Catalogue and Sale-A-Bration Brochure. In fact, attendees will be able to order brand new products for the Craft Along Experience where they’ll follow along and create crafts from the comfort of their own homes!

Joining offers like this one don't come along often, so whether you're looking for friendship, a hobby, a business or lots more besides, there really is no better time to consider joining Stampin' Up! If you would like more information or help in deciding which option suits you best, do get in touch with me - I would love to chat to you about the benefits of being a part of our stamping community. If you've read this far and have already decided you want to be a part of it - click here to join my awesome Stampin' Up! team.

In addition to this month's joining offer, there are also two new kits that are available from today in the online store:

Celebrate Christmas with everyone, everywhere with the Christmas Everywhere Kit by Stampin’ Up! It comes with everything you need to create 9 Christmas cards in 3 festive designs featuring trees from around the world. Get an early start on your Christmas crafting and send some festive cheer to friends and loved ones wherever they are! Here's a couple of additional images of the kit in more detail:


Here'a a link to the unboxing video for this kit:

The second kit released today is the Rustic Christmas Countdown Kit. This kit has all you need to make a rustic, 25 day paper advent calendar. What a great way to bring a classic, cosy Christmas feeling to your home this season! 


Here's a couple of additional images of the kit in more detail:


Here'a a link to the unboxing video too:

Aren't they just great?! Both of these kits are available right now by placing an order with me or in my online store by clicking on either of the links below - remember to add the current host code (see the box on the right hand side of my blog) for a thank you from me:

Table built using Product Table Builder by The Crafty Owl - Independent Stampin' Up! Demonstrator.

Lots to think about in this post! Back later with today's creative project - until then, happy shopping - or maybe even joining! 

All About Autumn Pumpkin Thanks TT228

by Joanne James28. September 2023 15:00

It's Thursday and time for a new challenge over at TicTacToe! It's the turn of Team X to host this week and the lovely Felicita is our featured designer this week. This is the fun board that we are playing along with: 


Our board has a distinctly Halloween feel this week, but since I don't have any current Halloween product and I wanted to use more of the lovely All About Autumn papers that I featured on yesterday's card (you can see that card here if you missed it), I went on the diagonal from top left with free/orange/embossing for a card that is still in keeping with the season - take a look:


Here's the low-down on today's card:

Pumpkins! I thought this fabulous pumpkin-filled patterned paper would be perfect to play along with the 'pumpkin patch' theme over at TGIF Challenges this week. I'm not usually a big fan of photographic designs, but many of those in the All About Autumn pack are amazing! So much colour and texture - these papers are too good to cover up for sure. I decided to use the Try Stampin On Tuesday layout above so that much of my patterned paper remained visible, adding a contrasting horizontal piece and a pop of bright colour with the Pumpkin Pie banner and a simple copper-embossed thank you sentiment from the 'Something Fancy' stamp set to pick up on the copper tones in the paper:

A couple of brushed copper metallic dots complete my card. My own pumpkin patch doesn't have such a variety of pumpkins, but I can report that we managed to grow 5 bright orange pumpkins this year, 3 of which were rather decent in size too. They are already in storage in the garage, ready for carving. I have new young neighbours that were fascinated by my ever-expanding pumpkin patch this year, having never seen it before, and took great delight in checking on progress on a regular basis. They have challenged me to turn at least one of the pumpkins into Cinderella's coach for Halloween, so watch this space - I will share the results at the end of October!

Here is the visual summary of the key products used on today's project for you to pin for easy reference:


You can see all of my Product and 'How To' summaries on my 'How To - Tips and Techniques' Pinterest board in case you've missed any. 

A tictactoe board offers so many creative possibilities - how does this week's board inspire you? Why not have a go? We would love to see you in the gallery and who knows - you might be selected for Designer's Choice and be eligible to be a guest designer on a future challenge. 

Enjoy your day; I'll be back tomorrow with another project for our new challenge over at Festive Friday. Until then, happy stampin'!


Stampin' Up! Supplies Used: 

Table built using Product Table Builder by The Crafty Owl - Independent Stampin' Up! Demonstrator.

Summer Sunshine and Autumn Leaves

by Joanne James27. September 2023 11:45

Today I'm sharing a couple of cards - the first one is a quick clean and simple card for the current challenges over at CAS on Friday where the theme is 'SUNSHINE' and Inkspirational where they are all about clean and simple:

 The weather is decidedly autumnal here in the UK now, but I couldn't resist the opportunity to flirt with the last of the summer sun - take a look:


 I grabbed a retired What A Year Memories & More card for my base, then added a stamped and diecut sun and a couple of pink sequins to highlight my sentiment. Isn't this card just so, well, sunny?!


A couple of well-chosen embellishments are enough to elevate this CAS card without spoiling the clean feel. This card will be winging its way to my very own ray of sunshine, by daughter, who is very much enjoying her new university life. My second card, much more in keeping with the weather outside my window, was inspired by the nature photo over at Time Out:

So many interesting things in this photo; I took my inspiration from the tall trees with their autumn leaves reflecting the low autumn sun and decided to feature one of the beautiful photographic papers from the All About Autumn designer series paper pack:


I really wanted the trees to take centre stage, so added little more than a simple border (this is actually the reverse of the photographic image) and a little copper foil, along with one of my favourite sentiments for this kind of card, which is from the retired stamp set 'Lighthearted Leaves'. The sentiment is square but I stamped it on a diecut rectangle from the Nested Essentials Dies so that I could recreate the border detail from my main panel:


I think this adds to the cohesiveness of the design. And that's all there is to it!

Here is the visual summary of the key products used on my second card for you to pin for easy reference:


You can see all of my 'How To' summaries on my 'How To - Tips and Techniques' Pinterest board in case you've missed any. 

Enjoy your day and I'll be back tomorrow with another project, featuring another of the designs in the All About Autumn pack, so stay tuned! Until then, happy stampin'!


Stampin' Up! Supplies Used:

Table built using Product Table Builder by The Crafty Owl - Independent Stampin' Up! Demonstrator.


Gorgeously Made Clean and Simple Hello FMS604

by Joanne James25. September 2023 14:01

Today I'm squeaking in a card for this week's challenge over at Freshly Made Sketches that was also inspired by the lovely greens and nature theme over at Just Add Ink:


I couldn't resist the chance to rediscover my 'inner Cecile' (her style is so fabulous!) and decided to go uber-clean and simple with my Gorgeously Made Bundle - take a look:


Here's the low-down on today's card:

I added a couple of swathes of green using the textured stamp (I masked it to shorten the stamped image and flipped it for the second colour to reverse the shape) then added my favourite leaf stem, which I diecut 3 times and stacked if for a chunky stem with depth:


A simple stamped 'hello' completes my card. I just love Cecile's style so it's always fun to use it as a jumping off point; the additions of the monochromatic greens gives the card a nice serene, peaceful quality too I think - and is also perfect for the 'M is for Monochromatic' challenge over at The Alphabet Challenge blog.

Here is the visual summary of the key products used on today's project for you to pin for easy reference:


You can see all of my 'How To' summaries on my 'How To - Tips and Techniques' Pinterest board in case you've missed any. 

Enjoy your day; a short post from me as I'm off to brave the school run! I'll be back tomorrow with another project. Until then, happy stampin'!


Stampin' Up! Supplies Used:

Table built using Product Table Builder by The Crafty Owl - Independent Stampin' Up! Demonstrator.

Joy Of Noel Shining Brightly Christmas Card AYSI308

by Joanne James22. September 2023 12:00

Today I'm sharing my design team card for our new challenge over at As you See It where it's time for a sketch challenge chosen by Heather H:


I love a good sketch and since I've been playing with my 'Joy of Noel' set this week putting the finishing touches to projects for next month's 'Create With Joanne & Jan' tutorial set, which I collaborate on with my AYSI teamie Jan Clothier, I thought this sketch lent itself to another Christmas card featuring this versatile bundle - take a look:


Here's the low-down on today's card:

Shining Brightly - Instead of pairing the bundle with the papers in the suite, I decided to use one of the navy and gold patterns in the 'Shining Brightly' Specialty paper pack for the vertical panel. Along with the gold and vanilla patterns in the pack, these papers are truly stunning - and popular! They have been out of stock for a few weeks, but are due back in sometime next week. I will be ordering another pack for sure so if you are also wanting to add these papers to your collection, be sure to let me know so that I can notify you as soon as they come in -  I have a growing list!

Joyous Noel - I just love the sentiments in the 'Joy of Noel' set, especially the NOEL letters. Each one is individual, but since they stamp and diecut in this square pattern, I decided to use them backed with a square of gold foil for my next layer and overlay them with 'Joyous' for the last bit of my sentiment, which I fussy cut by hand. 

Going For Gold - I stamped and heat-embossed the letters in gold onto Night of Navy cardstock before diecutting them, to create a seamless look. This card is quite shiny but you can see the detailing on the stamped image below:

A trio of (retired) gold gems complete my card. This card is actually quite simple to recreate, although I did spend ages procrastinating first time around! I just love the simple elegance - this is most definitely a 'me' card!

Here is the visual summary of the key products used on today's project for you to pin for easy reference:


You can see all of my 'How To' summaries on my 'How To - Tips and Techniques' Pinterest board in case you've missed any. 

Here's a summary of our challenge rules:

  • Create any card, scrapbooking page, 3D project or packaging project that fits the challenge.
  • Please include the challenge graphic and link back to the challenge in your blog post. Turn off word verification so we can leave you lots of lovely comments. Make sure you link the post not the whole blog to the Linky. Use #AYSIXXX when uploading to a public gallery.
  • If you’re unsure about ‘the rules’, check the details under the Challenge Guidelines tab on the As You See It Challenge homepage.
  • In a sketch challenge, you are welcome to rotate or flip a sketch. You can replace shapes used such as substituting a circle panel for a square panel. However, we must be able to still see the basis of the original sketch in your finished product.
We look forward to seeing your creations in the AYSI gallery.

Enjoy your day; I am hoping to get a little extra crafting done this weekend so will hopefully be back tomorrow with another project. Until then, happy stampin'!


Stampin' Up! Supplies Used:

Table built using Product Table Builder by The Crafty Owl - Independent Stampin' Up! Demonstrator.

Meadow Dies Silhouette CCS521

by Joanne James19. September 2023 12:00

It's Tuesday and time for a new challenge over at CAS Colours & Sketches. Have you missed me? I have been rather absent from my blog in recent weeks - with the eldest of the James Juniors having left to begin university life, it hasn't left much time or opportunity for crafting. This week should see normal blog service resume, starting with this post! This week's challenge is a sketch challenge and Rachel has asked that we add three connected shapes and a sentiment:


Feel free to flip or rotate the sketch when making your card. For my card today I did just that - take a look:


Here's the low-down on today's card:

Ordinarily this is the kind of sketch that would lead me to use three uniform shapes and probably a little designer paper too, but coming to my desk fresh for the first time in a couple of weeks, I went in a completely different direction! I decided to rotate the sketch through 90 degrees and use the vertical as a flower/grass stem, which I stencilled using a stencil made using one of the Meadow Dies onto a loose column of ombre colour that I created first using inks and blending brushes. I then added a simple stamped sentiment from the 'Season of Chic' stamp set and a trio of diecut butterflies that I diecut from Basic Black cardstock and popped up on dimensionals:


Before adding my butterflies, I used a dry brush to add a fine splatter of white frost shimmer paint to my ombre panel; it adds a subtle shimmer, albeit one that is difficult to see in the photographs. 

Here is the visual summary of the key products used on today's project for you to pin for easy reference:


You can see all of my 'How To' summaries on my 'How To - Tips and Techniques' Pinterest board in case you've missed any. 

As a reminder, for our colour challenges, you must use all of the stated challenge colours. You may also use neutral colours; however, the challenge colours should be the most noticeable ones featured on your card. We use Stampin' Up! color names for reference, but you are welcome to use any other companies' products as long as you match the challenge colours as closely as possible.

Today's card was inspired by the challenge to create a silhouette over at SUO Challenges and the beautiful ombre night sky above the houses on the left of the Inkspirational inspo photo and I'm also linking up over at Just Add Ink where they are asking us to 'just add wildlife' - I think my butterflies qualify.


Enjoy your day and I'll be back tomorrow with another project. Until then, happy stampin'!


Stampin' Up! Supplies Used:

Table built using Product Table Builder by The Crafty Owl - Independent Stampin' Up! Demonstrator.

Crafting With You Times Two AYSI307

by Joanne James8. September 2023 12:00

Today I'm sharing my design team card for our new challenge over at As you See It where it's time for a fun speed challenge chosen by Heather C:
 

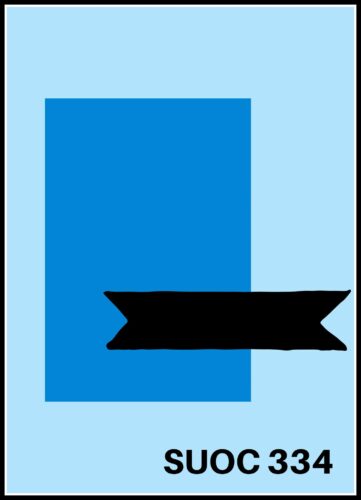
Hobbies - what a fun theme this week and so many options, even when working against the clock! My hobbies include running, playing piano, cross stitch and stamp collecting (the postal kind although my rubber stamp collection is extensive too!) to name but a few, but I'm sure that my choice of crafting for my card today won't surprise you at all!  - Since we are against the clock with no more than 10 minutes at our disposal, quick cards are the order of the day! I ended up making two cards during my crafting session and each came in well within the time limit, so I thought I'd share both since each uses a different approach to saving time! Both cards feature the 'Crafting With You' bundle and the first card I created uses the sketch layout over at SUO Challenges - take a look:
 

 Here's the low-down on today's card:

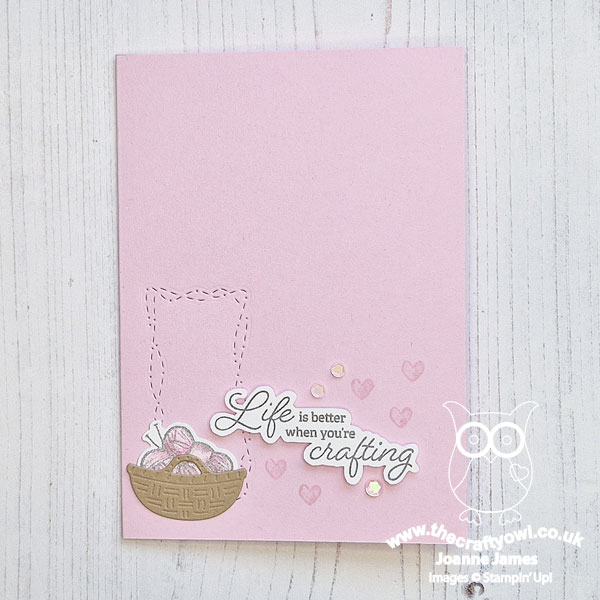
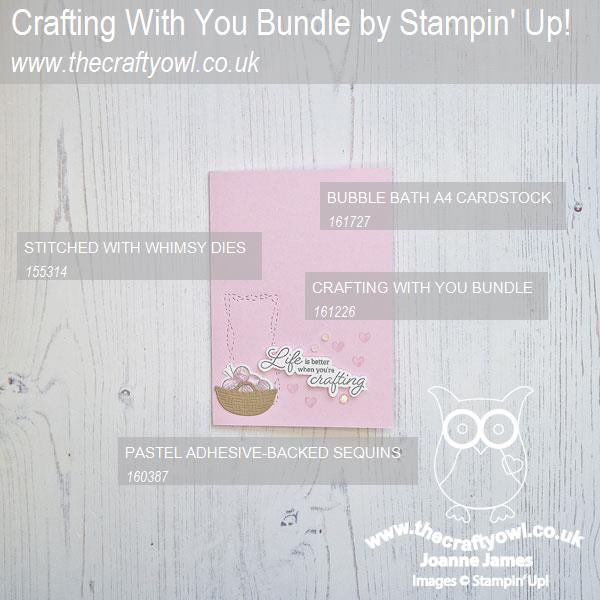
Preparation Is Key - The key to a quick card is preparation. You can gather your materials before you start the clock, so knowing exactly what I was going to create I gathered my Bubble Bath card base, offcuts of white and Crumb Cake cardstock, mounted the stamps I was going to use onto blocks and placed them in front of the open ink pads in the correct colours, selected the dies I needed, the necessary tools and gathered together any other supplies such as ribbon and sequins that I had in Bubble Bath in case I wanted to add some final embellishments. Then I pressed start on my stopwatch!

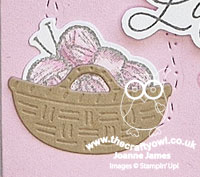
Monochrome Makes Easy - This first card sticks to a simple monochrome pink colour scheme, with just a little grey for the sentiment and outline. This is another good way to save time when you need to make a quick card - keeping colours to a minimum requires much less co-ordination. I stamped and fussy cut the sentiment, stamped the balls of wool and coloured them, then diecut them along with the basket and the stitched frame (I don't know why, but this frame always reminds me of unravelled wool so I thought it would work well with my knitting theme) in one pass through the diecutting machine to save time. I added all of the elements to my card base, then added some tone-on-tone stamped hearts and a trio of self-adhesive sequins to complete my card:
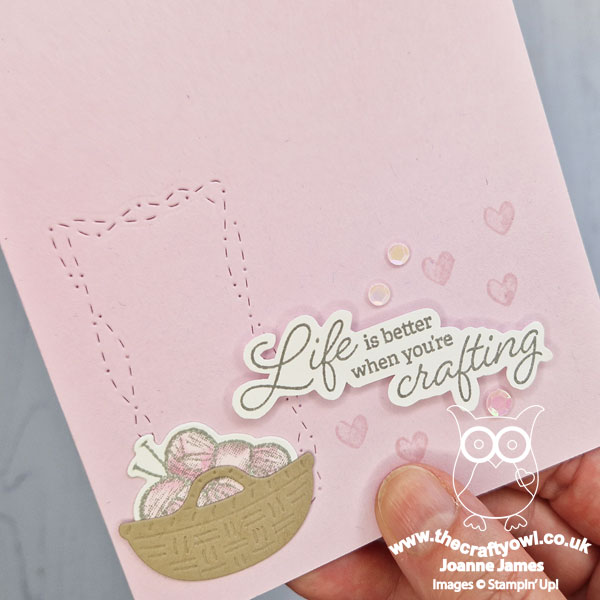
 

Time taken? Just 6 minutes and 29 seconds!

 

I even surprised myself at how quickly this came together, especially as one of the biggest time savers - no diecutting - is something I often struggle with. This card just shows though that so long as you are smart about it and at least minimise it or run as much through in one go as possible, you can make it work. I'm also linking this card up over at Less Is More where the current challenge is 'anything goes' - as long as it's clean and simple!

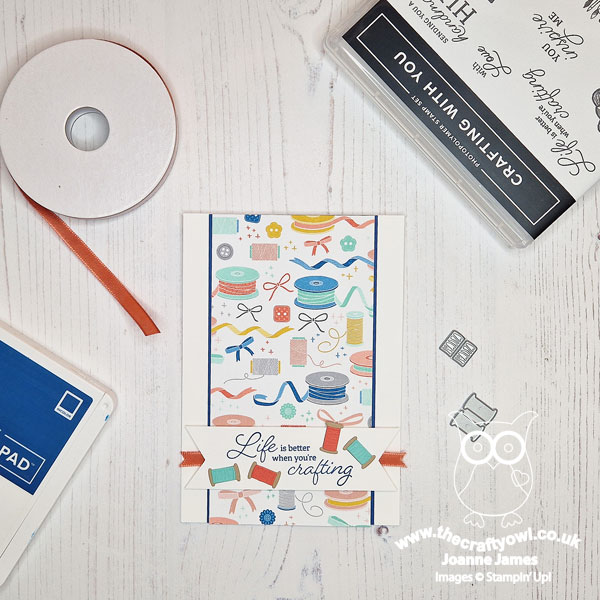
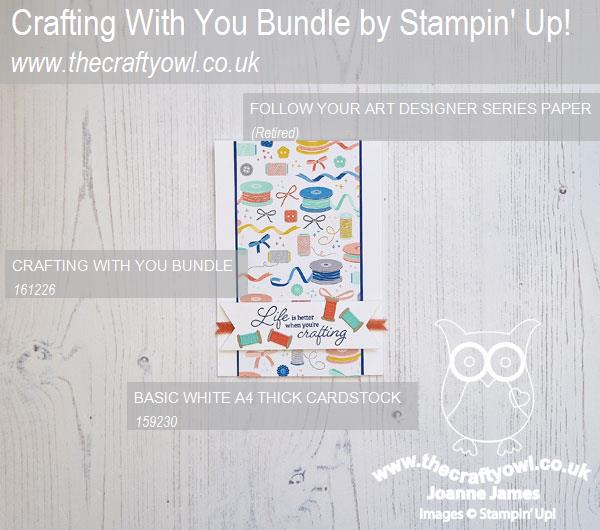
The Ultimate Speed Hack - Having cleaned my stamps and cleared away the debris from my first card, I thought I'd have a go at a second version, this time using the current sketch layout over at Atlantic Hearts Sketch Challenge, for a second card using my favourite speed hack of all: designer series paper! Designer paper is a great way to maximise pattern and detail with minimal time and effort and I knew I had some of this fabulous, albeit retired, Follow Your Art designer series paper in my stash and I have been itching to pair it with the current 'Crafting With You' bundle, so this was the perfect opportunity. This was the card that I created:
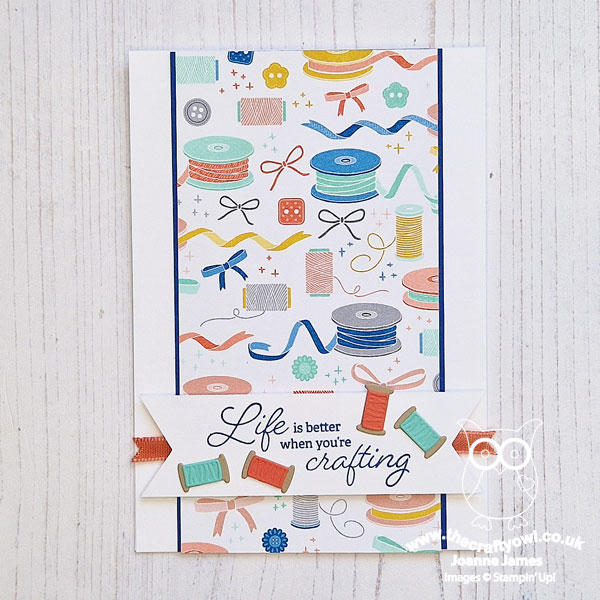
 

Still simple in design: the vertical panel of DSP does much of the work, with a simple banner sentiment that I decorated with a piece of (retired) Calypso Coral ribbon and 4 cotton reels that I diecut using some co-ordinating scraps of cardstock:
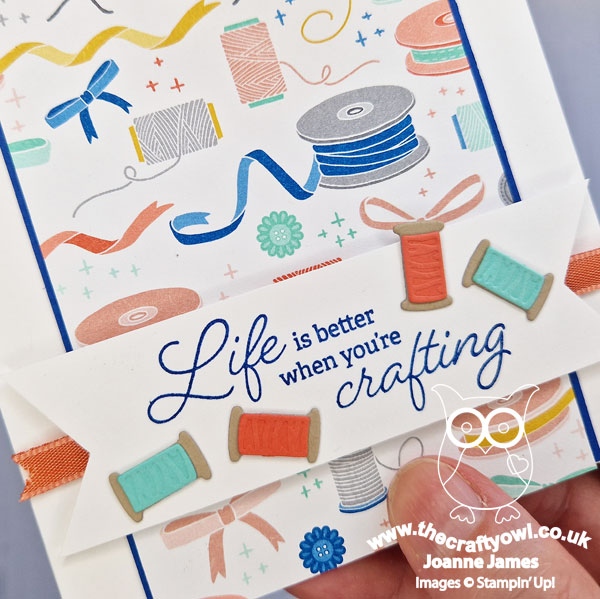
 

This card took slightly longer at 7 minutes and 16 seconds (no photo I'm afraid, I accidentally reset my stopwatch before I could grab a photo so you'll just have to take my word for it!) - whilst those cotton reels were all cut in a single pass, as there are 4 dies in the set, they are small and fiddly to glue. I also had OCD on those banner ends for the cardstock and ribbon, so allowed myself time to get them even. I think this card is my favourite of the two - hence me using it as my ASYI card. I hope you found my tips and tricks useful for creating cards in a hurry - why not make a card celebrating one of your hobbies and join us for our current challenge?

Here is the visual summary of the key products used on today's projects for you to pin for easy reference:


You can see all of my 'How To' summaries on my 'How To - Tips and Techniques' Pinterest board in case you've missed any. 

Here's a summary of our challenge rules:

  • Create any card, scrapbooking page, 3D project or packaging project that fits the challenge.
  • Please include the challenge graphic and link back to the challenge in your blog post. Turn off word verification so we can leave you lots of lovely comments. Make sure you link the post not the whole blog to the Linky. Use #AYSIXXX when uploading to a public gallery.
  • If you’re unsure about ‘the rules’, check the details under the Challenge Guidelines tab on the As You See It Challenge homepage.
  • In a speed stamping challenge, please time yourself and say in your post how long your card took to complete. 
We look forward to seeing your creations in the AYSI gallery.

Enjoy your day. We are expecting another day of glorious sunshine here so I will be making the most of it! I'll be back tomorrow with another project. Until then, happy stampin'!


Stampin' Up! Supplies Used:
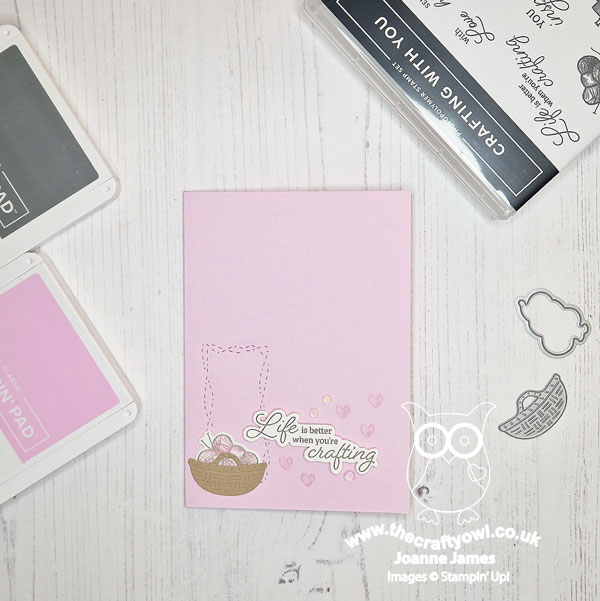
Table built using Product Table Builder by The Crafty Owl - Independent Stampin' Up! Demonstrator.


Sailboat Builder Welcome New Baby Card CCS520

by Joanne James5. September 2023 12:00

It's Tuesday and time for a new challenge over at CAS Colours & Sketches. Rachel is hosting for the month of September and our first challenge is a colour challenge: 


For my card today I paired these lovely summery colours with the sketch over at Try Stamping on Tuesday and the 'choose 2' challenge over at Just Add Ink (I chose tearing and twine) to make a baby card for the challenge over at CAS on Friday:


Here's the low-down on today's card:

My card is a pretty straightforward combination of elements and it was something of a happy accident that it worked for each of the challenges that I'm linking up with today. Let me explain! So I started with Rachel's summery colours and combined with the late return of summer sunshine here in the UK I was inspired to look through summery sets on my shelf. I happened upon my Sailboat Builder Punch, which has been neglected of late now that the co-ordinating stamp set has retired, so I pulled it off the shelf to give it some love. I am not a big one for tearing paper as my regular readers will know but when I saw Lou Kitzleman's card over at Just Add Ink this week I totally fell in love with it (you can see her fabulous card here) and whilst I will undoubtedly CASE her card another time for fun, I wanted to use the idea of the torn strips on my card today. In order to preserve my 'white space' I used the sketch over at Try Stamping on Tuesday (love their layouts!) and created a corner detail of torn cardstock using some old Coastal Cabana coloured coredinations cardstock from my stash to give the feeling of waves. I punched out my sailboat using a scrap of Starry Sky cardstock and another of Lemon Lolly striped Bright & Beautiful designer series paper for the sails and finished with a sentiment from the 'Sweet Songbirds' stamp set. I added everything to my card and finished my sailboat with a twine bow:


I just love these bright colours for a slightly less traditional new baby card and I'm so pleased with how this card came together.

Here is the visual summary of the key products used on today's project for you to pin for easy reference:


You can see all of my 'How To' summaries on my 'How To - Tips and Techniques' Pinterest board in case you've missed any. 

What will you make with this week's colours? As a reminder, for our colour challenges, you must use all of the stated challenge colours. You may also use neutral colours; however, the challenge colours should be the most noticeable ones featured on your card. We use Stampin' Up! colour names for reference, but you are welcome to use any other companies' products as long as you match the challenge colours as closely as possible.

Enjoy your day and I'll be back tomorrow with another project. Until then, happy stampin'!


Mini Catalogue

BROWSE THE CATALOGUE

The mini catalogue is now live! Read and download your copy here.

Shop Online

Access my online shop 24 x 7, 365 days of the year:

Current April hostess code:

VDKNV7BH

Shop Online

Join My Team

It's always a great time to join Stampin’ Up! New team members can get £130 worth of products for only £99 + free business supplies + free shipping + all the fun being a part of Stampin’ Up! Stampin' Up! has something for everyone: join my growing team and benefit from my support to enjoy Stampin' Up! however you choose.

If you're interested, call me for a chat to understand how I can help you realise your goals. Alternatively, if you have already decided to sign up and you just can't wait, please click here for the link to the online form where you can sign up and order your starter kit right away! 

Latest Kit!

Stampin Cut and Emboss

The Rock Legend Kit has all you need to make 8 cards with coordinating envelopes. Along with the new Panda Friends Kit, both are available from January 4th for just £14 each - get yours here!

2023-24 Annual Catalogue

BROWSE THE CATALOGUE

Click on the catalogue for a full list of current SU! supplies - if you would like to order any of the items featured, please drop me a line at [email protected] or give me a call on 07773 421446 - I'd be happy to help.

New Online Exclusives

There are new products available exclusively in the online store from 5 March - check them out here.

About Me

Hi I'm Joanne and live in Northampton and when I'm not looking after my husband and two beautiful children, am an avid crafter with a passion for all things Stampin' Up!

I must confess that I have never been a big rubber stamper - until I discovered Stampin' Up! that is. I love the fact that I can get such great results with co-ordinating stamps, inks, papers and punches - the possibilities are endless! Join me on my stamping journey as I share the things I love and be inspired to create amazing things yourself!

Follow Me

Monthly Newsletter

Box Builder

Click the button above to use Box Buster to create your custom box design using the Envelope Punch Board!

Kits Collection Now Available!

Stampin Cut and Emboss

The new Kits Collection from Stampin' Up! is now available!

Click here to see the current kits available and order yours online today.

I Design For


Stampin' Up Stuff

This is my personal blog and is not endorsed by Stampin’ Up! I hope you find it a plentiful source of ideas and personal inspiration but please don't copy my designs for contest submission or use for classes, publication or sale without express permission.