Sweet Symmetry Hey Friend Card

by Joanne James27. May 2021 10:33

Today I'm sharing a card that uses more of my new product stash so is perfect for the challenge over at TGIF Challenges this week where they are all about the new:

I could have linked up any of my 'Expressions In Ink' cards this week (and heads up - I have another one of those for you tomorrow!) but instead took a break to play with some of the new stamps and paper from the Sweet Symmetry Suite that you can find on page 112 of the new annual catalogue - take a look:


Here's the low-down on today's card:

Sweet Symmetry - The starting point for today's card is the gorgeous Sweet Symmetry designer series paper. Bright colours and bold, graphic designs make this a set of papers that won't appeal to everyone, but I have to say I love the retro fee of the patterns in this set and bright colours always tick my creative box! I chose one of my favourite repeating patterns and used that for the panel that covers two-thirds of my card front. 

In Symmetry - I decided to create a focal point flower that I stamped using the co-ordinating 'In Symmetry' stamp set and as I wanted the design to echo the papers, I stamped the flower several times in a variety of colours then fussy cut the sections and pieced them together. There are no framelits for this set - a very useful symmetrical stems punch instead that I didn't use today - but the uniform shape of the various floral elements meant this was easy to accomplish. You can see the detail of my layered flower more closely below:


Same Layout, Different Card - You may be wondering if there is something familiar about today's card; whilst the product I'm using I am sharing for the first time, the layout is the same as the one I used for my Paper Players card on Sunday (if you missed it you can see that card here). I liked Jaydee's sketch so much I thought I'd change things up and use it with a different set. Both cards look completely different, yet the sketch does give them a synergy that would otherwise be missing. Same layout, different card - I love that!

Here is the visual summary of the key products used on today's project for you to pin for easy reference:


You can see all of my 'How To' summaries on my 'How To - Tips and Techniques' Pinterest board in case you've missed any. 

That's all from me today; I have jobs to do and need to crack on! Enjoy your day and I'll be back tomorrow with another project and yes - it features Expressions in Ink! Until then, happy stampin'!


Stampin' Up! Supplies Used:

Table built using Product Table Builder by The Crafty Owl - Independent Stampin' Up! Demonstrator.

Artistically Inked CAS Thank You Card CCS421

by Joanne James25. May 2021 13:00

It's Tuesday and time for a new challenge over at CAS Colours & Sketches. This week's challenge is a sketch challenge and Samantha has asked that we feature a non-geometrical shape on our cards: 


Feel free to flip or rotate the sketch when making your card.

For my card today I had to make another card using items from the 'Expressions In Ink' Suite - take a look:


Here's the low-down on today's card:

Artistically Inked - The main feature on today's card is a gold foil leaf branch cut with my Artistic Dies and a trio of Polished Pink blooms that I've stamped and diecut and tucked in amongst the leaves.  The flowers in this set are so pretty and they are so easy to stamp - perfect for clean and simple cards.

A Distinktive Inking Tip - As beautiful as they are, there is no patterned paper from the suite on today's card. Instead, I added a 'hint of pink' both behind my floral stem and in the opposing corner beneath my sentiment. Instead of inking the stamp directly, or even stamping off, I added ink to the stamp using my blending brush; this gave perfect coverage with no harsh lines and allowed the detail of the distinktive stamp to show through, but with just a hint of colour:


I really like this effect, so soft and subtle.

Finishing Touches - A gold heat-embossed sentiment and a trio of gold gilded gems finish today's card. Just enough bling to make it special without breaking too many CAS rules!

Here is the visual summary of the key products used on today's project for you to pin for easy reference:


You can see all of my 'How To' summaries on my 'How To - Tips and Techniques' Pinterest board in case you've missed any. 

It's still freezing cold and blowing a gail here in the UK today, although mercifully the torrential rain has stopped for the time being. Summer, oh summer - where are you??!

Enjoy your day and I'll be back tomorrow with another project. Until then, happy stampin'!


Stampin' Up! Supplies Used:

Table built using Product Table Builder by The Crafty Owl - Independent Stampin' Up! Demonstrator.

Dragonfly Garden Floating Frame Technique

by Joanne James24. May 2021 20:37

Happy Monday everyone! Today was class day so my day has been a busy one. I'm just popping in to share a couple of my class cards that I made using this week's Color Throwdown colours:

We were using the Dragonfly Garden stamp set and co-ordinating Dragonflies punch and one of the things I wanted to do today was to teach my class ladies how to create a card using the 'floating frame' technique. So this actually means I have two cards for you! Here's the first one: 


And here's the second one, featuring the outer frame element:


 Here's the low-down on today's card:

Floating Frames - The floating frame technique is really easy to create with a few basic tools: some 'Press and Seal' food wrap or similar, a framelit - I used my Rectangle Stitched Framelits Dies - and lots of dimensionals! You simply stamp and punch/diecut your images, lay them out, cover with Press and Seal, trim to frame size and cut out your central piece, before adhering dimensionals to the back of the diecut pieces and adhering to your chosen card base. Finally you remove the Press and Seal and your floating shapes remain in place. 

Dragonfly Garden - I used a combination of large punched dragonflies in the three challenge colours and interspersed them with smaller white ones to fill in the gaps. The dragonflies are a great shape and size for a floating frame as they are easily identifiable even when only partially visible:


Frame It - For the central portion, I added a rectangular border and heat-embossed sentiment:

Lastly, here's a photo of both cards together - which one do you prefer?


I think I like the one with the central detail and coloured frame best, but I like the other one too - it's a tough call!

Here is the visual summary of the key products used on today's project for you to pin for easy reference:


You can see all of my 'How To' summaries on my 'How To - Tips and Techniques' Pinterest board in case you've missed any. 

Enjoy your evening and I'll be back tomorrow with another project. Until then, happy stampin'!


Stampin' Up! Supplies Used:

Table built using Product Table Builder by The Crafty Owl - Independent Stampin' Up! Demonstrator.

Dragonfly Garden Meadows and Bees TTT114

by Joanne James20. May 2021 17:00

It's Thursday and time for a new challenge over at TicTacToe! It's the turn of Team X to host this week and I am your featured designer this week! This is the fun board that I came up with for us to play along with: 


So many ways that I could have gone with my board this week, but I eventually settled with the first column and wings/leaves/nature as the basis for my card. I was also inspired by the wonderful inspiration photo over at The Card Concept this week in more ways than one - more on that below! Firstly, here's the card I came up with - take a look:


Here's the low-down on today's card:

Dragonfly Garden - I have a class with the Dragonfly Garden bundle next week so have been working a lot with this set in recent weeks and I thought it would be perfect to create a meadow-style background for my beehive today. I stamped the long florals in a repeating pattern and then blended a trio of yellow inks across my panel, before tearing my edges and adding some additional colour to the flowers with my Stampin' Blends, reflecting the yellow black-eyed susans and the purple florals in the Card Concept photo (leaves and nature on the TTT grid - check!). I also added some outline blooms and a little ink blending to the inside of my card:


A Skep For A Bee - In addition to the florals, I was draw to the skep and the bee-decorated plates in the inspiration photo. Skeps are traditionally made of straw, so I used a retired die from the Detailed Bee Dies set to create an outline, covered it in a self-adhesive sheet then took some retired jute twine and created my very own rustic-looking skep. Of course I couldn't have a skep without a bee - and a beautiful gold bumblebee trinket was the perfect finishing touch (and gave me 'wings' for my grid)! Whilst bee skeps are often seen in kitchen/ceramic/artistic designs, did you know in many countries it's actually illegal to keep bees in skeps? This is because the bees cement their combs inside their skeps and they can't be removed and inspected for diseases. In addition, when the beekeeper removes the honey the bees are either killed or made homeless, which isn't the case with more modern box hives; so keeping skeps as a decorative feature seems much more sensible!


A Change In Style - My regular readers will now that this card is something of a departure from my usual clean and layered style. The ink blending, torn edges, textured dimensional skep and bee make my card much more 'shabby chic' (there are some great design definitions over on the Card Concept website which I highly recommend you check out if you're interested in this kind of thing). So what do you think - did I pull it off? Whilst this is a little different for me, I did have a lot of fun working outside of my comfort zone for a little while.

Here is the visual summary of the key products used on today's project for you to pin for easy reference:


You can see all of my Product and 'How To' summaries on my 'How To - Tips and Techniques' Pinterest board in case you've missed any. 

A tictactoe board offers so many creative possibilities - how does this week's board inspire you? Why not have a go? We would love to see you in the gallery and who knows - you might be selected for Designer's Choice and be eligible to be a guest designer on a future challenge. 

Enjoy your evening; I'll be back tomorrow with another project. Until then, happy stampin'!


Stampin' Up! Supplies Used: 

Table built using Product Table Builder by The Crafty Owl - Independent Stampin' Up! Demonstrator.
 
I got Top 3 Honourable Mention for this card over at The Card Concept!

Lots of Hearts Scalloped Heart Floral Thank You CCS 420

by Joanne James18. May 2021 12:00

It's Tuesday and time for a new challenge over at CAS Colours & Sketches. Samantha is hosting this month and this week we have a colour challenge: 


For my card today I also chose to use the sketch and thank you theme over at Fusion and made another card with my Lots of Hearts bundle that was out on my desk when I made Sunday's card - take a look:


Here's the low-down on today's card:

Lots of Heart - Today's card features a scalloped heart overlaid with the floral heart die that also comes in the Many Hearts Dies set. I picked up this set long after Valentine's, but I like how although it features hearts it is a great 'all year round' set and has some lovely sentiments too.

A Colour Conundrum - As I often find when I'm faced with a trio of colours, two become dominant and the third takes something of a back seat. That absolutely played out on today's card: I used some Soft See Foam and Highland Heather DSP to compliment the colours of the diecut flowers and leaves, and given the muted tones of my pastels, I was struggling to incorporate either Blushing Bride ink or cardstock without it overpowering the other elements of my card. I solved my problem by using it really sparingly - I found some retired Blushing Bride enamel dots in my stash and used them to accent the centre of my open flowers - problem solved!

You're All Heart - As I mentioned above, there are some great generic sentiments in the 'Lots of Heart' set; to accompany the 'thank you' on the outside of my card, I stamped this one on the inside of my card, complete with a stamped-off Blushing Bride pink heart:

I actually really like this card and think the soft pastels are really pretty - so looking forward to seeing what you make of these colours this week!

Here is the visual summary of the key products used on today's project for you to pin for easy reference:


You can see all of my 'How To' summaries on my 'How To - Tips and Techniques' Pinterest board in case you've missed any. 

As a reminder, for our colour challenges, you must use all of the stated challenge colours. You may also use neutral colours; however, the challenge colours should be the most noticeable ones featured on your card. We use Stampin' Up! color names for reference, but you are welcome to use any other companies' products as long as you match the challenge colours as closely as possible.

Enjoy your day and I'll be back tomorrow with another project. Until then, happy stampin'!


Stampin' Up! Supplies Used:

Table built using Product Table Builder by The Crafty Owl - Independent Stampin' Up! Demonstrator.

Pansy Petals Birthday Card

by Joanne James15. May 2021 19:00

Today I've a quick post to share a card using Julee's current Mojo Monday sketch:


I couldn't resist another pansy card - take a look:


Here's the low-down on today's card:

My paper choices were not where I started out with today's card, but I ended up being drawn again to the bold designs in the Pansy Petals pack as they seemed to compliment my Calypso Coral/Pale Papaya pansy perfectly. My diecut pansy was the starting point for today's card - the layering and embossed detailing is so pretty, and some additional sponged colour to the edges of the petals and leaves makes them even more defined:


A sentiment from the Pansy Patch stamp set completes my card front.

Here is the visual summary of the key products used on today's project for you to pin for easy reference:


You can see all of my 'How To' summaries on my 'How To - Tips and Techniques' Pinterest board in case you've missed any. 

Enjoy your evening and I'll be back tomorrow with another project. Until then, happy stampin'!


Stampin' Up! Supplies Used:

Table built using Product Table Builder by The Crafty Owl - Independent Stampin' Up! Demonstrator.

Stepped Up Pansy Petals For the Avid Crafter AYSI 250

by Joanne James14. May 2021 12:00

Today I'm sharing my design team card for our new challenge over at As you See It where it's time for a seasonal 'fill in the blank' challenge:


Jane chose our theme this week and whilst ordinarily daffodils, followed by tulips, are most definitely the flowers I most look forward to the arrival of in Spring, the first flower of spring in my garden is always the pansy; they are one of the few flowers that I ever manage to over-winter and are a most welcome sight before the bulbs flower, so I couldn't resist another card with my new pansy suite - take a look:


Here's the low-down on today's card:

Pansies For The Avid Crafter - The eagle-eyed amongst you will notice that this card uses the same layout as the clean and simple 'hello' pansy card that I shared with you earlier this week. I liked the idea of the mini-slimline card so much that I thought I would take the opportunity to create another card using the same layout, this time a birthday card (so I'm also linking up over at Global Design Project #GDP291) and stepping things up to create a card for the avid crafter. I chose to showcase another new in colour, Fresh Freesia on today's card and still diecut my pansies from the Pansy Petals designer paper, but this time I added leaves too. I also added some ink splatter using my Blackberry Bliss Stampin' Write marker to my scalloped rectangle background along with some loops of the new Fresh Freesia open weave ribbon that I had split lengthways, along with a sprinkle of the new in-colour jewels - these are so pretty!


The Inside Detail - I added a stamped pansy to the inside of my card, along with another of the sentiments from the Pansy Patch set; there are a great mix and size/style of sentiment in this set:


Casual or Avid? - I thought you might like to see both Tuesday's clean and simple card and today's stepped-up version alongside it so that you could see both the similarities and differences. Which one do you prefer?


I really like both but am quite partial to today's card as it features one of my favourite colours - purple. I am also really liking this min-slimline design too - sometimes even just changing the style of a card freshens things up I think.

Here is the visual summary of the key products used on today's project for you to pin for easy reference:


You can see all of my 'How To' summaries on my 'How To - Tips and Techniques' Pinterest board in case you've missed any. 

Here's a summary of our challenge rules:

  • Create any card, scrapbooking page, 3D project or packaging project that fits the challenge.
  • Please include the challenge graphic and link back to the challenge in your blog post. Turn off word verification so we can leave you lots of lovely comments. Make sure you link the post not the whole blog to the Linky. Use #AYSIXXX when uploading to a public gallery.
  • If you’re unsure about ‘the rules’, check the details under the Challenge Guidelines tab on the As You See It Challenge homepage.
  • In a Fill in the Blank challenge, complete the sentence in the Challenge Banner with the phrase that is true for you and create your project using the words you used. Tell us what you said in your blog or on your site.
We look forward to seeing your creations in the AYSI gallery.

In other news: Fridays are always busy in the James household and today is no exception. The weather has been so wet here in the UK this week that the tumble dryer has also been brought back into full service, since the washing line outside is once again a lost cause and I am playing Widow Twanky (a classic pantomime reference for my overseas readers!) On the bright side though, Friday is also Food & Nutrition day for young Master James, and today he is making fresh coleslaw and spicy potato wedges in class to accompany hot dogs or burgers. There may be no opportunity to cook those on the BBQ given the forecast but I am thankful that dinner has been taken care of by someone other than me, so no complaints here! Enjoy your day and I'll be back tomorrow with another project. Until then, happy stampin'!


Stampin' Up! Supplies Used:

Table built using Product Table Builder by The Crafty Owl - Independent Stampin' Up! Demonstrator.

Pansy Petals CAS Hello Card CCS 419

by Joanne James11. May 2021 12:00

It's Tuesday and time for a new challenge over at CAS Colours & Sketches. This week's challenge is a sketch challenge and Samantha has asked that we create a mini slimline card measuring 3.5" x 6.25" using the following layout: 


Feel free to flip or rotate the sketch when making your card.

So slimline cards are truly 'in vogue' at the moment, but I haven't yet made one in this mini slimline size. For my card today I went with the new in-colour Polished Pink and some pansies - take a look:


Here's the low-down on today's card:

This card was super simple to put together: a base of Polished Pink and an extended scalloped stitched rectangle in white, with a strip of Melon Mambo onto which I heat-embossed my sentiment. I then used my Pansy Dies to diecut a large and small pink pansy from the Pansy Petals designer paper and added a trio of clear faceted gems to finish. 

I added a little extra stamped pansy to finish off the inside of my card:


Here is the visual summary of the key products used on today's project for you to pin for easy reference:


You can see all of my 'How To' summaries on my 'How To - Tips and Techniques' Pinterest board in case you've missed any. 

I really like this mini-slimline card size - I need to make some custom envelopes now to fit!

Enjoy your day and I'll be back tomorrow with another project. Until then, happy stampin'!


Stampin' Up! Supplies Used:

Table built using Product Table Builder by The Crafty Owl - Independent Stampin' Up! Demonstrator.

Zany Zebras Circles Boy Birthday Card TTT112

by Joanne James6. May 2021 17:00

It's Thursday and time for a new challenge over at TicTacToe! It's the turn of Team X to host this week and the lovely Betty is our featured designer this week. This is the fun board that we are playing along with: 


I went down the third column with Heat Embossing/Diecuts/Circles and made another boy's birthday card with my now retired 'Zany Zebras' stamp set that I used on my Paper Players card earlier this week (if you missed it, you can see that card here) - take a look:


Here's the low-down on today's card:

I used a ton of retired product on my card today: Zany Zebras, Playing with Patterns paper, Stitched Shapes Dies, enamel stars and Large Dot embossing folder to name but a few, but I think they were totally fitting for the grid and they combine to make a fun birthday card for a boy. Check out the hat on my zebra with oversized tassle too:

I also added some words and another fun zebra to the inside of my card:


No visual summary of the key products used on today's project today or supplies list as so much came from the storecupboard!

A tictactoe board offers so many creative possibilities - how does this week's board inspire you? Why not have a go? We would love to see you in the gallery and who knows - you might be selected for Designer's Choice and be eligible to be a guest designer on a future challenge.

I'm also linking today's card up over at the Festive Friday Challenge where I chose red, blue and emboss as my 3 (I realise I also have stitching too with my circle!) and am making another entry over at SUO Challenges for their 'animals' theme.

Enjoy your evening; I'll be back tomorrow with another project. Until then, happy stampin'!

This card was a Festive Faves Winner for #FF0083

FF#001 Festive Friday Faves

2021-22 Stampin' Up! Annual Catalogue Paper Shares Are Here

by Joanne James4. May 2021 12:05


The new Stampin' Up! Annual Catalogue goes live today and it's time to announce my new Product Shares!

You know that feeling - you want it all, but your budget just doesn't stretch that far? Well shares are the perfect answer! You get a little bit of everything, without having to purchase a full pack. A share can also act as a 'try before you buy' - you get to see papers, ribbons, buttons and accessories 'up close and personal' before deciding which ones you like the most and would like to purchase as a full pack.

Shares work really easily: you decide which shares and how many you would like to take part in. You place your order by emailing me at [email protected] and I will invoice you and arrange payment. Once the closing date for the first round of shares is reached, I collate the orders, place an order with Stampin' Up! for the product, then once I receive it, I package the papers and send them out to you. Simple!

So much to choose from! I am currently focusing on paper shares and have two different shares on offer:


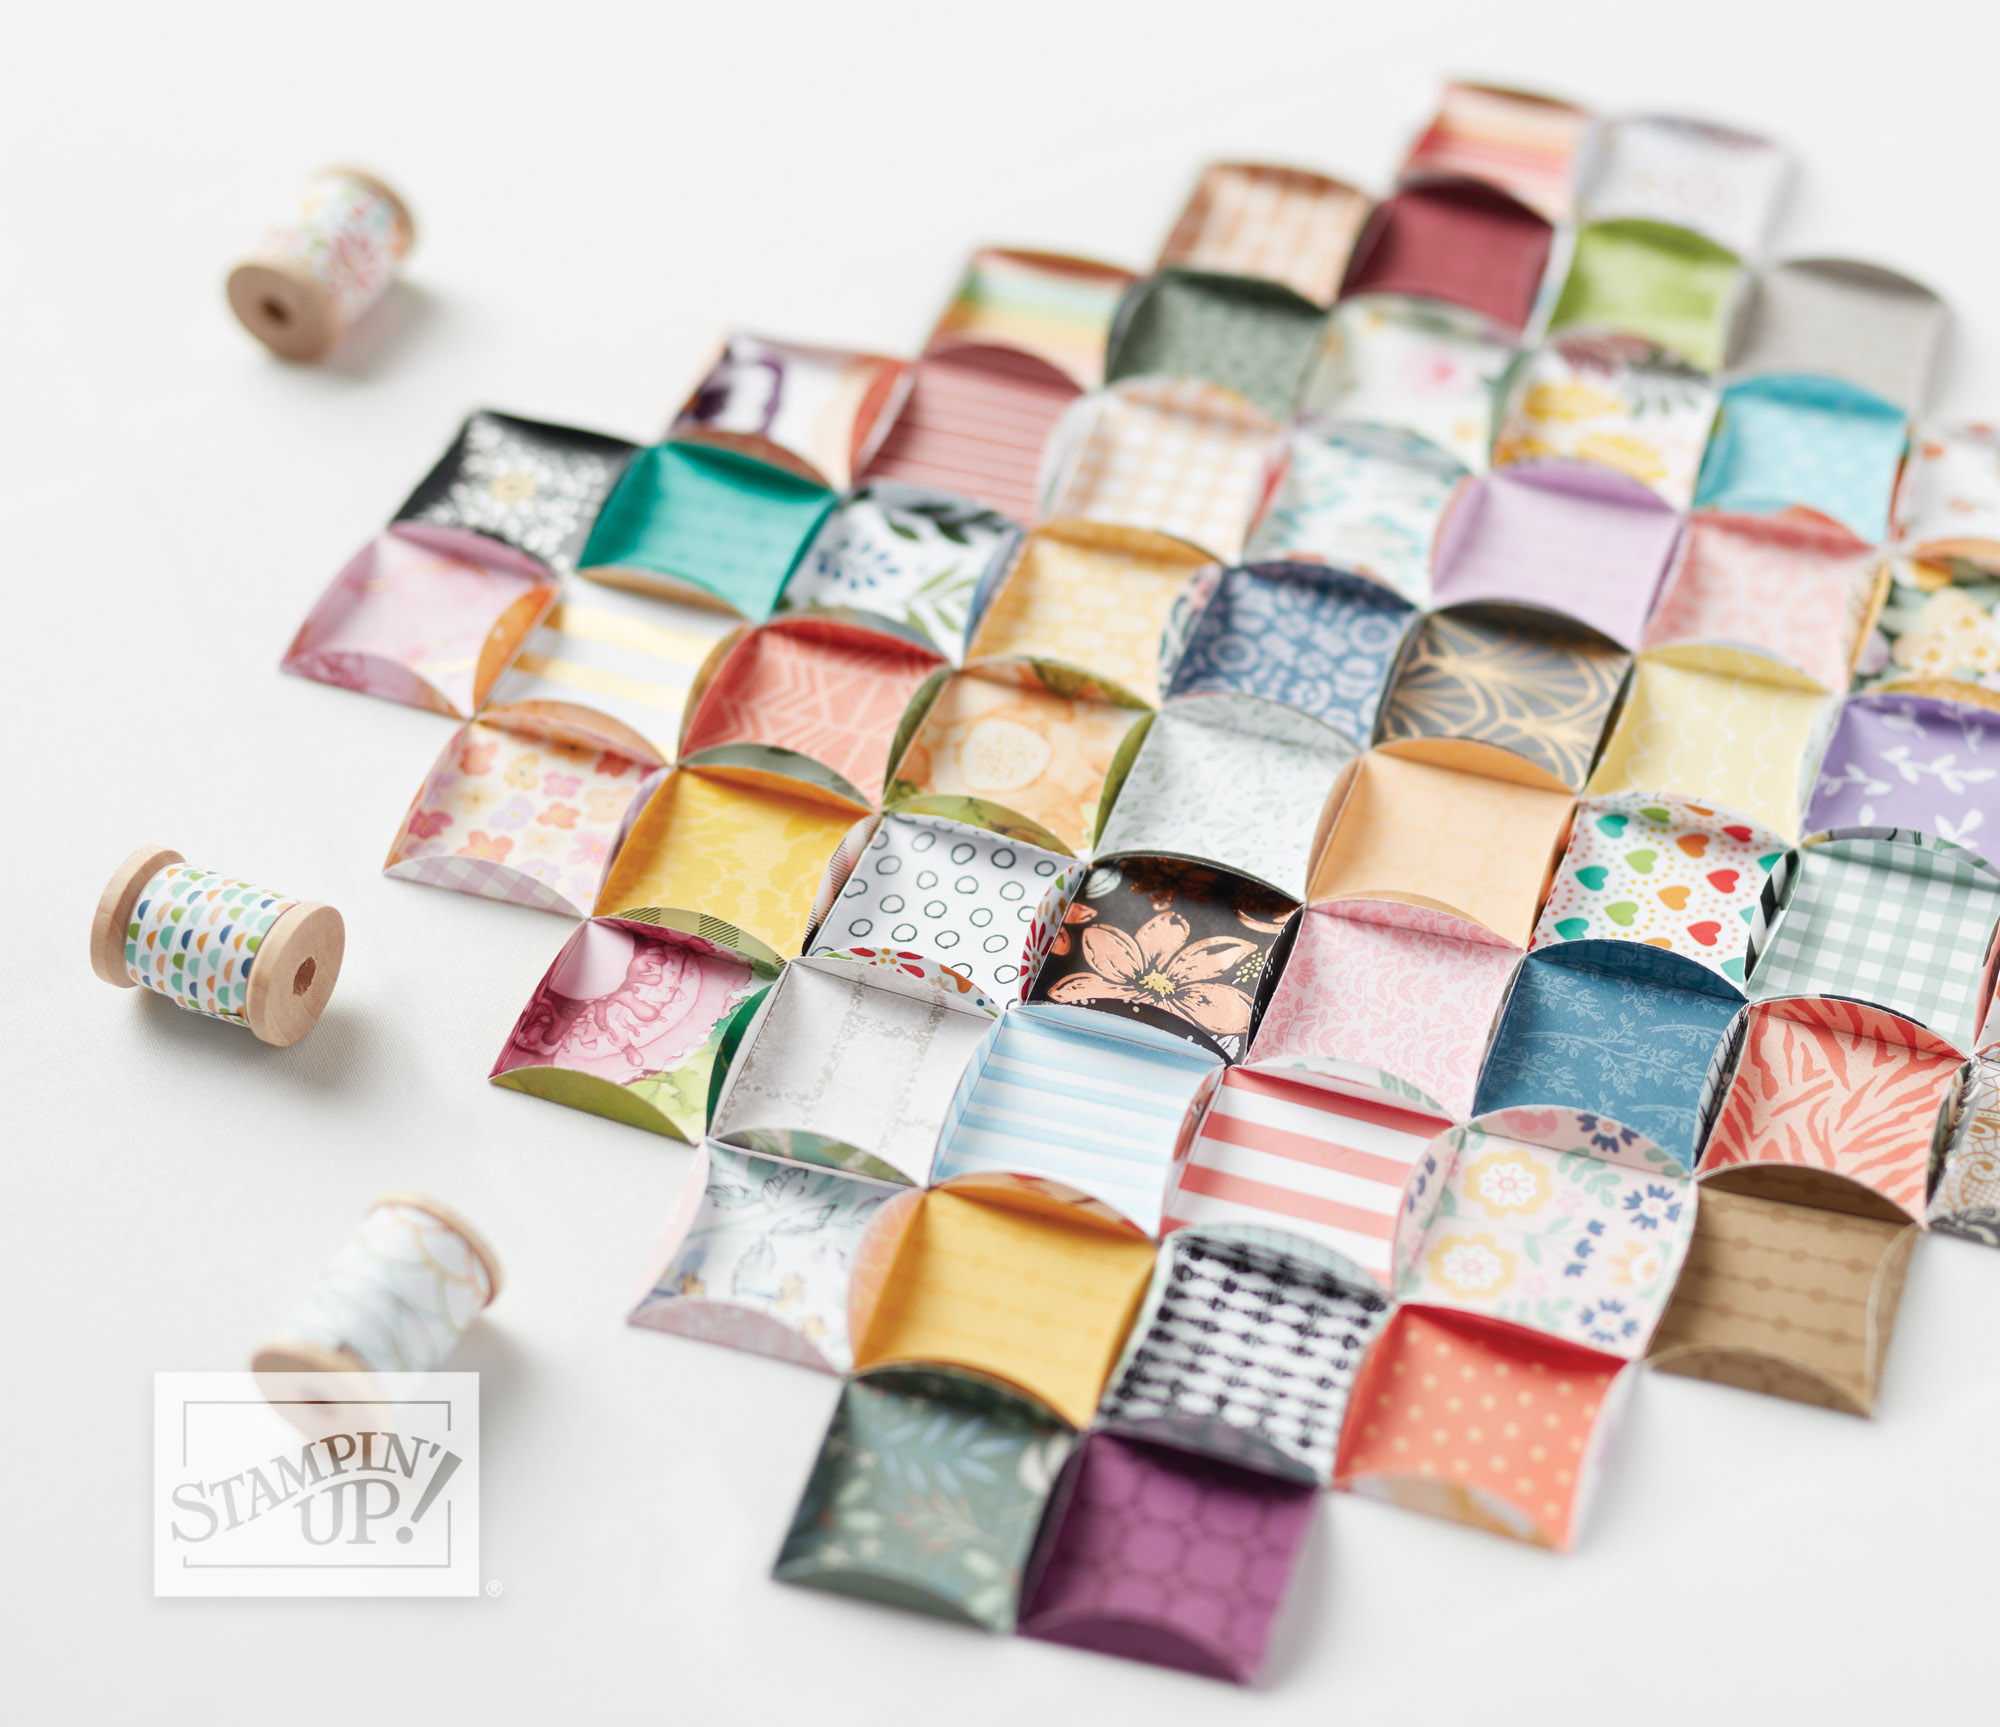
New Annual Catalogue Designer Series Paper Share - all sheets measure 6" x 6" - £28.50 plus £3 P&P

  • Beauty of the Earth – 12
  • Bloom Where You're Planted – 12
  • Expressions in Ink – 12
  • Hand Penned - 12
  • In The Wild – 12
  • Pansy Petals – 12
  • Simply Elegant – 12
  • Sweet Symmetry – 12
  • Tidings of Christmas – 12
  • You're A Peach – 12

In all you'll receive 120  6"x 6" sheets of Designer Series Paper! You can check out the details of the papers in the online catalogue here.

BRIGHTS 6" X 6" (15.2 X 15.2 CM) DESIGNER SERIES PAPER

New Colour Family Paper Share - all sheets measure 6" x 6" - £21.50 plus £3 P&P

  • Brights – 20
  • Neutrals – 20
  • Regals – 20
  • Subtles – 20 

In this share you will receive a total of 80 sheets of paper. 

Want It All? £50 - and you'll get shares of all the new Designer Series Papers and the new colour family Designer Series Paper Stacks, and that includes postage & packaging! If you choose this option, I will also include a sample of the new Pattern Party hostess papers for FREE!

If you would like double or more shares of any particular thing, then that's fine too. I will cut your paper shares into 6" x 12" sheets where possible to give you more crafting flexibility (for the DSP stacks you will simply get double the number of sheets since they are already pre-cut to 6" x 6").

All postage & packaging quoted is for UK only - if you would like a cost for shipping to Europe, then please email me for a separate quotation.

The deadline to sign up to the first round of shares is Friday 7th May at 9am GMT

If you live local to me and would like to save on postage and packaging costs, please email me with your requirements and I will happily place your order, to be ready for doorstep collection on delivery. If you have any questions, just email me at [email protected] or give me a call!

Shop Online

Access my online shop 24 x 7, 365 days of the year:

Current May hostess code:

3NR3FB9W

Shop Online

2024-25 Annual Catalogue

BROWSE THE CATALOGUE

Click on the image to download your copy of the 2024-25 annual catalogue. For a full list of current SU! supplies, go to my online store. If you would like any help or advice, please drop me a line at [email protected] or give me a call on 07773 421446 - I'd be happy to help.

Join My Team

It's always a great time to join Stampin’ Up but during May it's even better! New team members can get £78.25 of new In Color products for FREE! That's in addition to another £130 worth of products of your choice for only £99 + free business supplies + free shipping + all the fun being a part of Stampin’ Up! Stampin' Up! has something for everyone: join my growing team and benefit from my support to enjoy Stampin' Up! however you choose.

If you're interested, call me for a chat to understand how I can help you realise your goals. Alternatively, if you have already decided to sign up and you just can't wait, please click here for the link to the online form where you can sign up and order your starter kit right away! 

Latest Kits!

Stampin Cut and Emboss

The City Sights Kit has all you need to make 8 cards with coordinating envelopes for £20. Along with the new Happy Hollyhocks Kit, a no stamping kit including 9 cards for just £14, both are available from May 1st - get yours here!

New Online Exclusives

There are new products available exclusively in the online store from 5 March - check them out here.

About Me

Hi I'm Joanne and live in Northampton and when I'm not looking after my husband and two beautiful children, am an avid crafter with a passion for all things Stampin' Up!

I must confess that I have never been a big rubber stamper - until I discovered Stampin' Up! that is. I love the fact that I can get such great results with co-ordinating stamps, inks, papers and punches - the possibilities are endless! Join me on my stamping journey as I share the things I love and be inspired to create amazing things yourself!

Follow Me

Monthly Newsletter

Box Builder

Click the button above to use Box Buster to create your custom box design using the Envelope Punch Board!

Kits Collection Now Available!

Stampin Cut and Emboss

The new Kits Collection from Stampin' Up! is now available!

Click here to see the current kits available and order yours online today.

I Design For


Mini Catalogue


The next mini catalogue will be live in September! 

Stampin' Up Stuff

This is my personal blog and is not endorsed by Stampin’ Up! I hope you find it a plentiful source of ideas and personal inspiration but please don't copy my designs for contest submission or use for classes, publication or sale without express permission.