Today it's Sunday and time for this week's new challenge over at The Paper Players! It's the turn of the fabulous Jaydee to host this week and she has a timely theme challenge for us to work with:
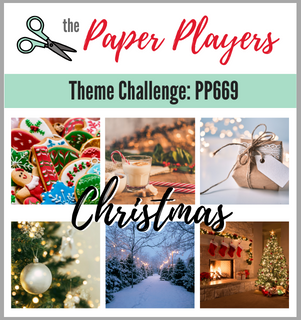
It's beginning to look a lot like ... Christmas! It is indeed, so Jaydee has chosen the perfect theme this week! At the start of December I like to make those 'special' cards for friends and family - those over-the-top, fancy ones that you hand deliver. I set aside my usual clean-and-layered self and throw caution to the wind, so I thought I'd share one of those cards with you today - take a look:
Here's the low-down on today's card:
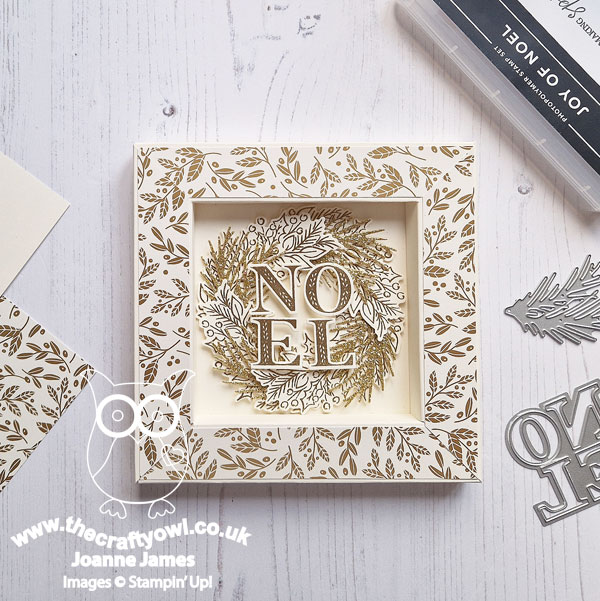
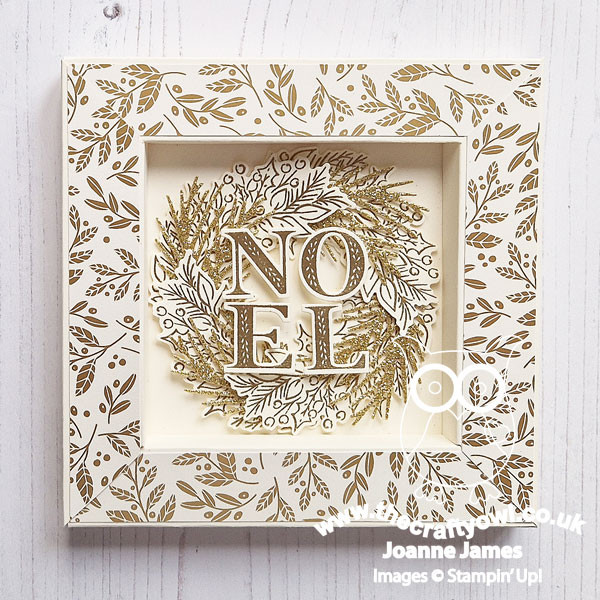
A Fancy Shadow Box - Today's card is part card, part home decor. Measuring 5 3/4" square by 1/2" deep, the front of the card comprises a shadow box frame, with the main design in the centre. I've made non-festive versions of this card in a 6"x6" size that I've shared on my blog previously, but I've never made a Christmas one. This kind of card does take a little longer to make, but I think it's so worth it for a special occasion, don't you? It's also great for those who like to keep their cards and bring out year after year, as it is as much a decoration as it is a card.
Shining Brightly - I used one of the gold and vanilla patterns from the Shining Brightly specialty designer series paper to decorate the frame of my card. Now, I know this paper is now sold out in Europe, but it's been in and out of stock all season due to its popularity, so I'm hoping that for those of you who stocked up, you appreciate a project that shows it in all its glory. Given that my shadow box card has depth, I need to create a box 'envelope' to send it in and I used more of this paper for the lid. You can see my box in the photo below:
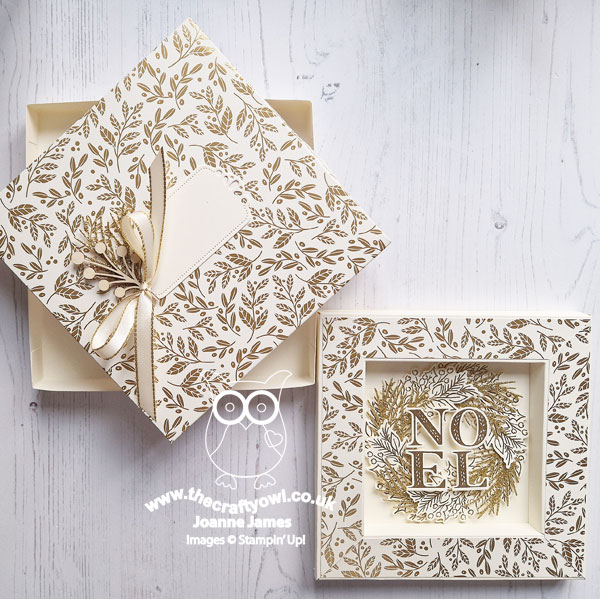
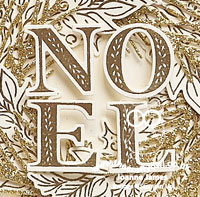
Joy of Noel - The real star of the show is the 'Joy of Noel' bundle that features in the centre of my frame. By far and away my favourite bundle from this year's mini catalogue, it really is fabulous. This bundle is still available and if you purchase it from me, you will receive a free copy of the 'Join in With Joanne & Jan' Joy of Noel tutorial that I created with my talented friend Jan Clothier. I combined gold embossed foliage and gold glitter pine needles with a gold embossed NOEL for the centrepiece - the foiling and glimmer paper add so much beautiful festive sparkle, don't you think?
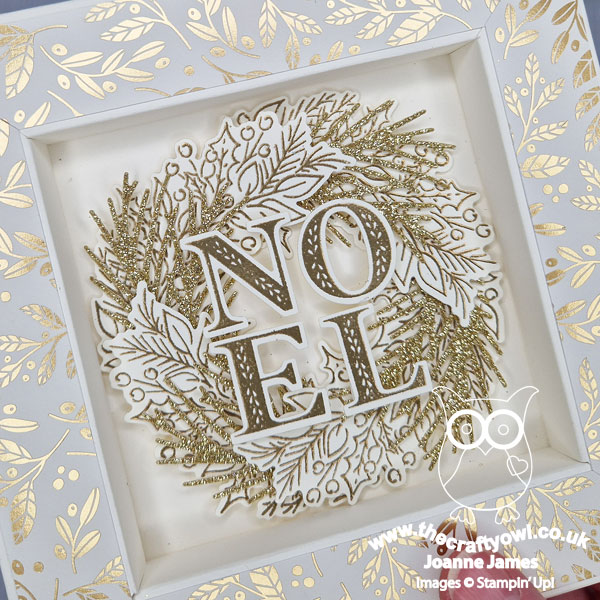
A gold embossed sentiment inside completes my fancy card. What do you think? Do you like to make fancy cards for the special people in your life? Do leave me a comment below - I'd love to hear what you think.
I'm also playing along with a few challenges: My card follows the sketch at 52 Christmas Card Throwdown (I hope they'll forgive me the sentiment placement), it's a glitter entry over at Inkspirational and finally I've been saving this one for my entry over at SUO Challenges - my favourite holiday catalogue product, actually products with the bundle and paper!!


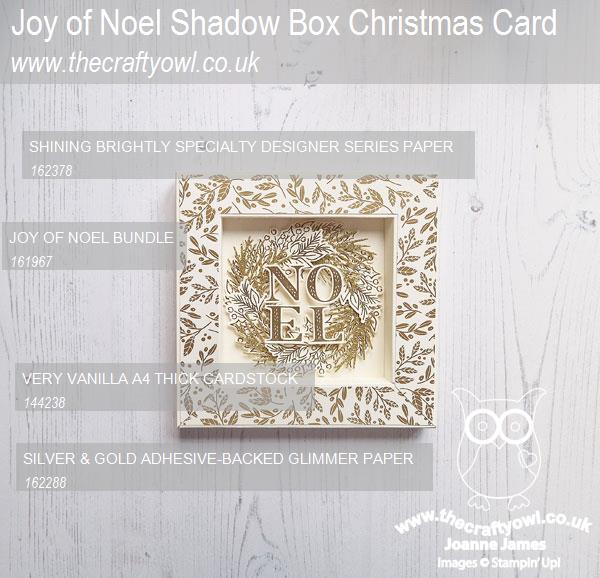
Here is the visual summary of the key products used on today's project for you to pin for easy reference:
You can see all of my Product and 'How To' summaries on my 'How To - Tips and Techniques' Pinterest board in case you've missed any.
Before you reach for your ink and papers, check out what our amazing team has created to inspire you this week:
The Paper Players Design Team
Here's a quick recap of our challenge rules:
1. Create a new paper project
2. Upload your creation to your blog with a link back to us and provide a direct link to the post featuring your challenge submission.
3. Please link your card to no more than four challenges, TOTAL.
4. Have FUN!
Enjoy your day; I will be spending mine with more Christmas preparations and getting ready for an upcoming vacation - more about that in a future post! I'll be back tomorrow with another project. Until then, happy stampin'!
Stampin' Up! Supplies Used: