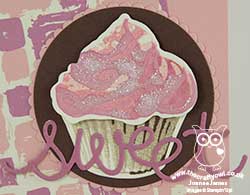
Label Me Pretty Sweet Cupcake Card

by Joanne James28. October 2017 19:00

It's the weekend - hurrah! It's always nice when the weekend rolls around, although I must confess this week has been a little easier than usual in terms of my usual activity schedule, with both James Juniors being on their half term holiday break. We have been enjoying time with friends, indoor climbing and outdoor play, making the most of the mild autumnal weather. I need to make the most of this weekend as that is all-change again come Monday with one of them at least back to school.

So, today I have a change from Christmas! I'm sharing a card for this week's challenge over at Just Add Ink where the challenge is all about cake:

 My card features cake two ways - take a look:


Here's the low-down on today's card:

A Neat Trick With Birthday Friends - The little girl holding the cupcake on my card has come straight from the Birthday Memories designer series paper (currently available as part of the 'buy3, get 1 free' paper promotion) but I didn't have to fussy-cut her; one of the framelits in the Birthday Friends Framelits set fits her shape perfectly. I simply lined them up on the big Shot, ran them through and voila - one little girl, complete with cupcake, and not a paper snip in sight!  

A Co-ordinated Background - I wanted to add some detail to my background without detracting from my sentiment or sweet little girl, so decided to continue the 'cake' theme with some tone-on-tone stamping in Blushing Bride using the cupcake in the 'Sweet Cupcake' stamp set to create a subtle background wallpaper.

From My Kitchen - I think the little girl has a slightly mischievious look about her and certainly looks like she is peeking around the side of something. I decided to make a feature of the sentiment and this one from the 'Label Me Pretty' stamp set is the perfect fit. 

All in all a sweet card - all I need now is a home-baked cupcake to go with it!

Here is the visual summary of the key products used on today's project for you to pin for easy reference:


You can see all of my 'How To' summaries on my 'How To - Tips and Techniques' Pinterest board in case you've missed any. 

So tomorrow it will be back to Christmas with my card for this week's new challenge over at The Paper Players, however in the meantime I would really like to hear your thoughts: I'm mindful that I have been sharing a lot of Christmas projects lately as it is often what I'm making at this time of year, but as my readers how do you feel about this? Are you happy to get as much Christmas inspiration as possible, or would you prefer a mix of projects? Do leave me a comment below - I'd really love to hear your thoughts on this. 

Until tomorrow - happy stampin'!


Stampin' Up! Supplies Used:

Table built using Product Table Builder by The Crafty Owl - Independent Stampin' Up! Demonstrator.

You're The Icing On My Cupcake ... Or The Jam In My Jelly Roll!

by Joanne James22. August 2016 21:38

Happy Monday everyone! I've had a long day of school uniform shopping today but just have time to squeeze in another cupcake card, altogether more clean and simple to yesterday's; I had some leftover bits and pieces and wanted to use the colour scheme over at CAS Colours and Sketches which is almost identical:

Here's my card:

I went with a layered border so that I could leave lots of all-important 'white space' on the centre of my card and stamped my cupcake base directly onto the vanilla mat (using a couple of other neutrals for my case), then cut out the frosting top with my framelits and just popped it on a few dimensionals.

A super-simple card, although for me the funniest thing about this card is the sentiment: if there are any Lethal Weapon movie fans out there, every time I read it I think of the scene where Delores is hunting down Sergeant Murtaugh and says "Well you tell him he's the jam in my jelly roll!" You're the icing on my cupcake just doesn't seem to have the same ring to it!

Back with a Christmas card for you tomorrow - a seasonal 'sneak peek' :-) Until then, happy stampin'!


Stampin' Up! Supplies Used:

Table built using Product Table Builder by The Crafty Owl - Independent Stampin' Up! Demonstrator.

The Best Things In Life Are Sweet

by Joanne James21. August 2016 10:00

It's Sunday and time for a new challenge over at The Paper Players! It's the super-talented Sandy's turn to host this week and she has a fun theme for you to work with:
    

I also used this week's sketch over at Freshly Made Sketches for my layout. Ok, so first up - a confession! I was so excited to have some child-free craft time to make my card earlier this week, that I did go a little crazy with my layering and so my card is not maybe as CAS as it should be. That said, I love it too much not to share :-) So - here's my card:
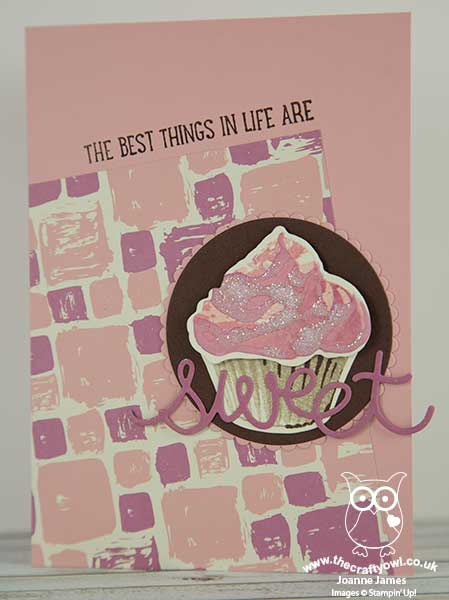
 

Here's the low-down on today's card:

A Sweet Cupcake - What's sweeter than a cupcake? This delicious triple-time stamped number is so easy to create with the Sweet Cupcake stamp set. The photopolymer stamps make lining up the images a piece of cake (yes, pun intended!) and having mounted my card on a couple of layered circles I used the 'sweet' from the co-ordinating Cupcake Cutouts Framelits to finish my sentiment, which I brushed with clear Wink of Stella for a little shimmer.

Sugar Frosting - Those of you who attended Onstage in April or follow the Facebook page of the Stampin' Up! CEO, Sara Douglas, will have seen her demonstrate this set and finish with some textured frosting. I decided to get creative with my cupcake and give it a go! It was really easy to make - I've included the recipe on my 'How To - Tips and Techniques' image below - an adds an interesting texture and dimension to the third layer of frosting. I went one step further and whilst wet sprinkled my frosting with Dazzling Diamonds to create a really sparkling sugary finish - yum! The photo below shows the dimension of the frosting in more detail:
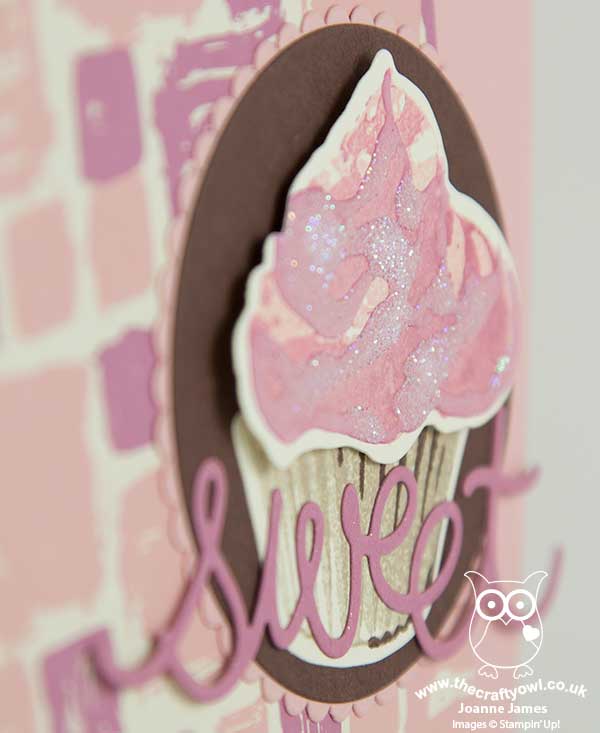
Almost good enough to eat! Thank you Sara for this fun suggestion to step up our cupcake creations!

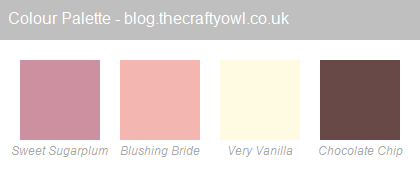
Playful Palette-inspired Colour Combo - I used one of the patterns in the Playful Palette designer series paper stack as the starting point for my card today and paired my Sweet Sugarplum, Blushing Bride, Very Vanilla combo with Chocolate Chip - feel free to save this colour combination if it's one that appeals to you:
 

Here is the visual summary of the key products used on today's project - including the recipe to create your own frosting - for you to pin for easy reference:
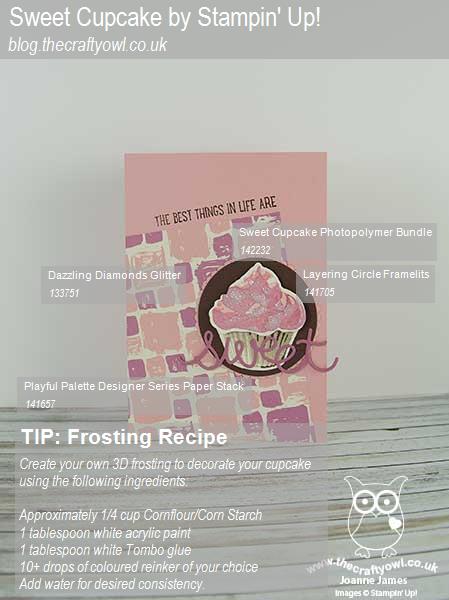
 

You can see all of my 'How To' summaries on my 'How To - Tips and Techniques' Pinterest board in case you've missed any. 

Before you reach for your ink and papers, check out what our amazing team has created to inspire you this week:

The Paper Players Design Team
 
 
Here's a quick recap of our challenge rules:
 
1.  Create a new paper project
2.  Upload your creation to your blog with a link back to us and provide a direct link to the post featuring your challenge submission.
3.  Please link your card to no more than four challenges, TOTAL.
4.  Have FUN! 


I look forward to seeing what you create with this week's theme.

Back tomorrow with another project; until then, happy stampin'!


Stampin' Up! Supplies Used:

Table built using Product Table Builder by The Crafty Owl - Independent Stampin' Up! Demonstrator.

Sweet Cupcake Double Z-Fold Card

by Joanne James23. June 2016 08:05

Today it's time for a new challenge over at Create With Connie and Mary and this week we have a colour combination for you:


I am on a total new product kick this week and decided that today's colours were perfect for a fun fold and a sweet cupcake - take a look:

Here's the low-down on today's card:

A Fancy Fold - Today's card is called a double z-fold card and is really easy to create. My card measures 5 1/2" x 5 1/2" square and was made out of one sheet of A4 Watermelon Wonder cardstock (I could have used my offcut for my strip across the front, but I didn't on this occasion as I wanted this to be a different colour, Whisper White). You can make this card using any size base: just choose your desired finished card height and width, cut your card base to the required height (e.g. 5 1/2") then if your desired width is 5 1/2", you will need a piece of cardstock 11" wide, and scored at a quarter of the width, so 2 3/4" and at the halfway point at 5 1/2". For your z-band, cut a piece of the same length and 1 1/2" wide, score at the same point, but fold along the scorelines in the opposite way to your card base and then rotate it through 180 degrees before adhering to your card. 

Sweet Layered Cupcake - I used all three of the challenge colours to create my delicious-looking cupcake, using triple-time stamping and the new 'Sweet Cupcake' stamp set. For the cupcake case I used Pool Party for all 3 layers, stamping off the first two stamps twice and once respectively to get layered colour. For the frosting, I stamped the first two layers in Blushing Bride, stamping off the first layer once and stamping the second layer full strength. The final layer is stamped in Watermelon Wonder, stamped off first to give a less intense finish. I then also brushed this layer with a liberal dose of clear Wink Of Stella for a sparkly shine.

Cupcake Cutouts - Sweet Cupcake is another stamp set with a co-ordinating framelit set that is available as a bundle at a 10% discount: the Cupcake Cutouts Framelits make light work of creating the perfect cupcake shape and also include other useful framelits and two very useful diecut words that can be used with the sentiments in the 'Sweet Cupcake' stamp set or on their own. Here I've used the 'sweet' overlaid on my cupcake to add a punch in Watermelon Wonder to finish my card.

Here is the visual summary of the key products used on today's project for you to pin for easy reference:


You can see all of my 'How To' summaries on my 'How To - Tips and Techniques' Pinterest board in case you've missed any. 

Do visit the other Design Team members to see what they did with this week's colours; there's lots of inspiration over on their blogs too!

Enjoy your day and I'll be back tomorrow with another project; until then, happy stampin'!


Stampin' Up! Supplies Used:

  • Sweet Cupcake Photopolymer Bundle
  • Watermelon Wonder A4 Cardstock
  • Watermelon Wonder Classic Stampin' Pad
  • Whisper White A4 Cardstock
  • Subtles Designer Series Paper Stack
  • Blushing Bride Classic Stampin' Pad
  • Pool Party Classic Stampin' Pad
  • Clear Wink Of Stella Glitter Brush

New Online Exclusives

There are new products available exclusively in the online store from 5 November - check them out here.

Latest Kits!

Stampin Cut and Emboss

The Layered Landscapes Kit and Nature's Paintings Kit are the latest kits in the online store - get yours here!

Shop Online

Access my online shop 24 x 7, 365 days of the year:

Current November hostess code:

9NKXDTTR

Shop Online

Mini Catalogue

BROWSE THE CATALOGUE

'Tis The Season - the new Stampin' Up! Mini Catalogue is here! For more details and to download your copy click here

Scrapbooking

Stampin' Up! has introduced a new range of 12x12" scrapbooking product and kit - the full range is now available to purchase online. To download a copy of the new digital Scrapbooking Catalogue click here.

2024-25 Annual Catalogue

BROWSE THE CATALOGUE

Click on the image to download your copy of the 2024-25 annual catalogue. For a full list of current SU! supplies, go to my online store. If you would like any help or advice, please drop me a line at joanne@thecraftyowl.co.uk or give me a call on 07773 421446 - I'd be happy to help.

Join My Team

It's always a great time to join Stampin’ Up! New team members can get £130 worth of products for only £99 + free business supplies + free shipping + all the fun being a part of Stampin’ Up! Stampin' Up! has something for everyone: join my growing team and benefit from my support to enjoy Stampin' Up! however you choose.

If you're interested, call me for a chat to understand how I can help you realise your goals. Alternatively, if you have already decided to sign up and you just can't wait, please click here for the link to the online form where you can sign up and order your starter kit right away! 

About Me

Hi I'm Joanne and live in Northampton and when I'm not looking after my husband and two beautiful children, am an avid crafter with a passion for all things Stampin' Up!

I must confess that I have never been a big rubber stamper - until I discovered Stampin' Up! that is. I love the fact that I can get such great results with co-ordinating stamps, inks, papers and punches - the possibilities are endless! Join me on my stamping journey as I share the things I love and be inspired to create amazing things yourself!

Follow Me

Monthly Newsletter

Box Builder

Click the button above to use Box Buster to create your custom box design using the Envelope Punch Board!

Kits Collection Now Available!

Stampin Cut and Emboss

The new Kits Collection from Stampin' Up! is now available!

Click here to see the current kits available and order yours online today.

I Design For


Stampin' Up Stuff

This is my personal blog and is not endorsed by Stampin’ Up! I hope you find it a plentiful source of ideas and personal inspiration but please don't copy my designs for contest submission or use for classes, publication or sale without express permission.