Gratitude Pumpkins

by Joanne James30. October 2023 19:36

Today I'm sharing a card that I made at the weekend that was just for fun as I wanted to play along with a few challenges:


I still had the (retired) 'Well Defined' stamp set out on my desk having made this card and another of the sentiments in the set was just perfect to make a card inspired by the current Time Out Challenges quote:

"When we focus on our gratitude, 
the tide of disappointment goes out and the tide of love rushes on"
Kristin Armstrong

I used the palette over at Color Throwdown - I love the balance of bright orange with pale blue and cream - and the pumpkin inspiration over at Just Add Ink - to create my pumpkin-packed, card full of thanks - take a look:


I saw this card by Martin Stone last week and loved the idea of a bold sentiment overlaid on a slimline card, so decided to use the same design principles for my card. I added a light stencilled houndstooth pattern in Balmy Blue to my vanilla card base, followed by a panel featuring a selection of layered stamped and diecut pumpkins and overlaid this with my bold fussy cut 'gratitude' sentiment.

I used the retired set 'Sophisticated Serifs' which is very similar in size and style to the current online exclusive 'Classic Letters' stamp set. I added the rest of my sentiment that paired with this along with a few extra pumpkins inside my card:


This card took a little while, but I love the finished look and the combination of the bold sentiment on the front and detail inside that for me really does some up what gratitude is all about. I do like to send thank you cards, so these are the kind of cards that there are never enough of and I will definitely be sending this to a worthy recipient.

Enjoy your day and I'll be back tomorrow with another project. Until then, happy stampin'!


Stampin' Up! Supplies Used:

Table built using Product Table Builder by The Crafty Owl - Independent Stampin' Up! Demonstrator.

The Big Fifty Birthday Card PP557

by Joanne James5. September 2021 08:00

Today it's Sunday and time for this week's new challenge over at The Paper Players! It's the turn of the fabulous LeAnne to host this week and she has a fun theme challenge for you to work with:


LeAnne's theme was a timely one for me this week since my 'better half' celebrates a milestone birthday early next month so this gave me the perfect opportunity to make his birthday card. I thought the colours over at Just Add Ink were perfect for a fresh, masculine card and I absolutely love Kim's sketch over at Freshly Made Sketches so I used this for my layout (albeit I created my card in a landscape orientation in order to fit all the words in! So first up - take a look at my card:


Whilst browsing the internet for birthday inspiration, I saw a pin badge that had the above phrase on it and I thought it would be perfect for a milestone birthday card and I know Jason will appreciate this kind of sideways humour. I stamped the phrase in Night of Navy using my retired 'Sophisticated Serif' stamp set with the 'F' highlighted in Coastal Cabana, which I carried through to my '50', diecut using my retired Large Number Framelits, and used for contrast on my background panels in some retired Brights DSP in a masculine argyle pattern.

Kim's sketch also features a vertical sentiment banner, which was the perfect place to add a happy birthday greeting (stamped using my retired 'Milestone Moments' stamp set) which I heat-embossed in silver on vellum so that it wouldn't obscure the message on my central panel. This was also the perfect place to add an embellishment of a trio of retired co-ordinating ribbons tied with silver twine:


My card is otherwise very clean and uncluttered, but I figured it might be a masculine card but a milestone birthday needs a little pizzazz, right?!

Before you reach for your ink and papers, check out what our amazing team has created to inspire you this week:

Here's a quick recap of our challenge rules:
 
1.  Create a new paper project
2.  Upload your creation to your blog with a link back to us and provide a direct link to the post featuring your challenge submission.
3.  Please link your card to no more than four challenges, TOTAL.
4.  Have FUN!

You can see all of my 'How To' summaries on my 'How To - Tips and Techniques' Pinterest board in case you've missed any. 

Enjoy your day; the forecast here is for a warmer day so we are hoping for one last BBQ before the James Juniors return to school and the summer well and truly leaves us for good. I'll be back tomorrow with another project. Until then, happy stampin'!


Stampin' Up! Supplies Used:

This card uses mostly retired products apart from the current colours so there is no supplies list today.

One Layer Monograms for Less Is More

by Joanne James26. June 2021 07:00

Today I'm here bright and early to share a couple of cards for the new challenge over at Less Is More where I was delighted to be asked to be Guest Designer following my recent accolade as overall winner for April. 
 

I would like to say I am delighted - although I did break into something of a cold sweat when the lovely Anita told me the challenge for the next fortnight is not only 'Monogram' but yes - ONE LAYER monograms!
 

She did give me the option to defer, but never one to shy away from a challenge I started researching - this challenge really did necessitate me getting my thinking cap on! So first things first - the definition we are using for the term 'monogram' is:

Monogram: a motif of two or more interwoven letters, typically a person's initials, used to identify a personal possession or as a logo.

A design consisting of two or more alphabetic letters combined or interlaced, commonly one's initials.

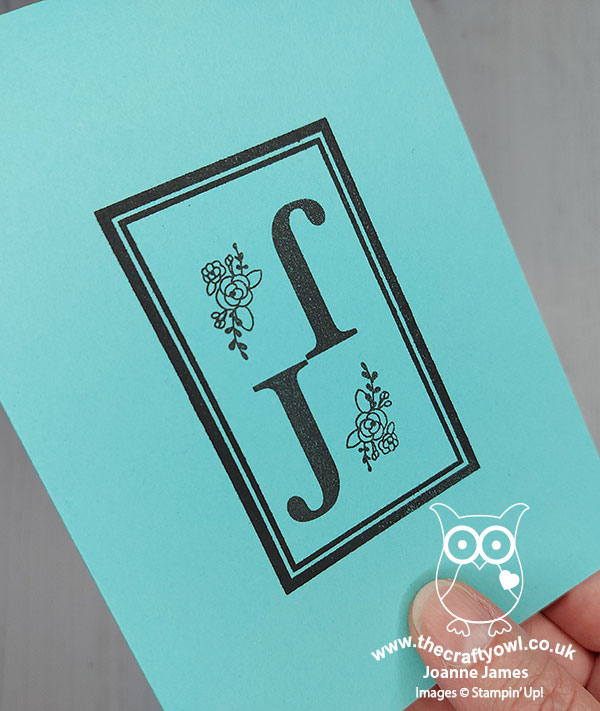
My first card uses my own initials. One of the challenges for me in creating a card to meet the brief was that it needed two or more letters. I explored various ways to combine the two Js in my name. I explored various ways of combining the letters and in the end went for a rotational pattern in a Tiffany & Co.-inspired design of black on Coastal Cabana - take a look:
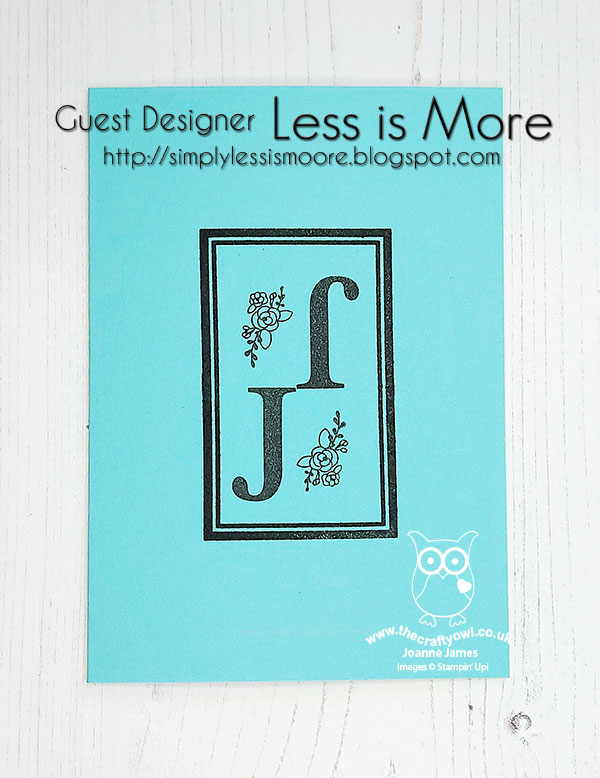
 

This card uses a long-retired set called 'Sophisticated Serifs' which I'm not sure I ever blogged with, but is a set I love for its clearly defined alphabet. I added some flowers and a strong black border to draw the eye to my monogram:
 

Once I'd started, I tried out a few other ideas too. Another way monograms are often used is to create fun patterns for wedding or anniversary cards. The thing is, both my husband and I share exactly the same initials - JLJ - so in preference to a trio of Js, which whilst quirky wasn't that interesting, I created a second card using someone else's initials to create a fun monogram - can you guess who they belong to?
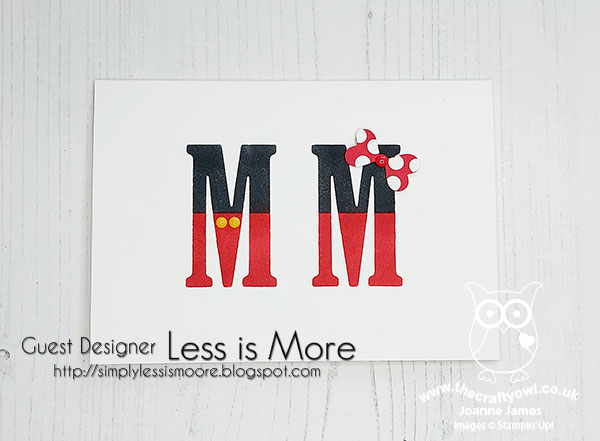
 

If you guessed Mickey and Minnie Mouse then you are as big a fan as I am! I created a couple of stencils using my retired Large Letter Die Framelits and sponged in the red and black base colours. I added some buttons for Mickey and a bow for Minnie - whilst this challenge is one layer, small embellishments are allowed in the LIM Rules (that's my story and I'm definitely sticking to it!) I thought this would make a fun anniversary card with an appropriate sentiment inside; I like the way that the colours and embellishments make the letters recognisable as a monogram because of how they are decorated:
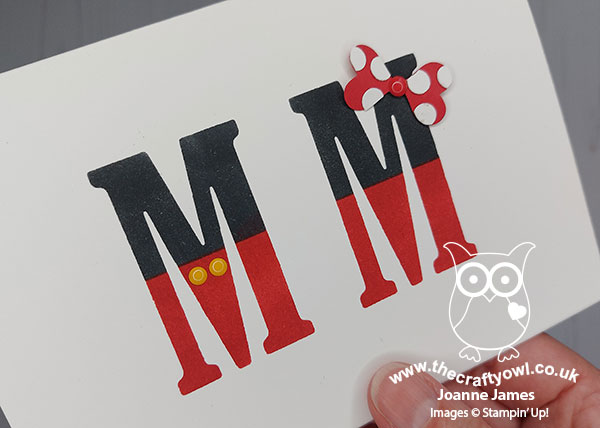
 

I considered adding an ampersand, but decided against it, given that MM could mean both 'Mickey Mouse' and 'Mickey and Minnie', with the former really being the true monogram although my decoration suggests the latter.

This turned out to be quite a fun creative diversion - you should definitely check out the LIM gallery to see what the Design Team have created! Whilst my cards today used items from my retired stash, I hope they provide you with some inspiration. I'm also linking up with the lovely gals over at SUO Challenges today where funnily enough they also have an 'initials' theme this week (it doesn't have to be one layer though!). If you decide to have fun with initials and are using Stampin' Up! products, you should go and pay them a visit too.

You can see all of my 'How To' summaries on my 'How To - Tips and Techniques' Pinterest board in case you've missed any. 

Enjoy your day and I'll be back tomorrow with another project. Until then, happy stampin'!


Current Promotions

Stampin Cut and Emboss

Save up to 30% off on all your favourite kits from 1 to 31 October! 

Click here to see the current kits available and order yours online today.

Join My Team

It's always a great time to join Stampin’ Up! During October you can get even more in your starter kit! New team members can get £160 worth of products for only £99 + free business supplies + free shipping + all the fun being a part of Stampin’ Up! Stampin' Up! has something for everyone: join my growing team and benefit from my support to enjoy Stampin' Up! however you choose.

If you're interested, call me for a chat to understand how I can help you realise your goals. Alternatively, if you have already decided to sign up and you just can't wait, please click here for the link to the online form where you can sign up and order your starter kit right away! 

Shop Online

Access my online shop 24 x 7, 365 days of the year:

Current October hostess code:

9NKXDTTR

Shop Online

Scrapbooking

Stampin' Up! has introduced a new range of 12x12" scrapbooking product and kit - the full range is now available to purchase online. To download a copy of the new digital Scrapbooking Catalogue click here.

Mini Catalogue

BROWSE THE CATALOGUE

'Tis The Season - the new Stampin' Up! Mini Catalogue is here! For more details and to download your copy click here

2024-25 Annual Catalogue

BROWSE THE CATALOGUE

Click on the image to download your copy of the 2024-25 annual catalogue. For a full list of current SU! supplies, go to my online store. If you would like any help or advice, please drop me a line at joanne@thecraftyowl.co.uk or give me a call on 07773 421446 - I'd be happy to help.

Latest Kits!

Stampin Cut and Emboss

The Christmas Ornaments Kit and Card Keeper Kit are the latest kits in the online store - get yours here!

New Online Exclusives

There are new products available exclusively in the online store from 5 November - check them out here.

About Me

Hi I'm Joanne and live in Northampton and when I'm not looking after my husband and two beautiful children, am an avid crafter with a passion for all things Stampin' Up!

I must confess that I have never been a big rubber stamper - until I discovered Stampin' Up! that is. I love the fact that I can get such great results with co-ordinating stamps, inks, papers and punches - the possibilities are endless! Join me on my stamping journey as I share the things I love and be inspired to create amazing things yourself!

Follow Me

Monthly Newsletter

Box Builder

Click the button above to use Box Buster to create your custom box design using the Envelope Punch Board!

Kits Collection Now Available!

Stampin Cut and Emboss

The new Kits Collection from Stampin' Up! is now available!

Click here to see the current kits available and order yours online today.

I Design For


Stampin' Up Stuff

This is my personal blog and is not endorsed by Stampin’ Up! I hope you find it a plentiful source of ideas and personal inspiration but please don't copy my designs for contest submission or use for classes, publication or sale without express permission.