Merriest Frames Snowy White Velvet Christmas Card

by Joanne James12. December 2022 09:00

Today I've a quick post to share a card for the current challenges over at Time Out where the theme is 'Winter/Holiday Season' and at SUO Challenges where the theme is Christmas:

    SUO Challenges -

I love to make an all-white card and I hadn't made any this year, so I decided that the theme of 'Winter' along with the sub-zero temperatures here in the UK  - and waking to snow on the ground this morning were the perfect inspiration - take a look:


Here's the low-down on today's card:

I used some retiring favourites for today's card: Snowy White velvet sheets and the Merriest Moments stamp set and hybrid embossing folder. I went with some simple layers: First I ran a piece of velvet paper through with the embossing folder, then added this to my card front. Then I used the embossing folder with the embossing die to cut the large base foliage design out of white glimmer paper and adhered it to my cardbase. I then added another diecut and embossed foliage layer, this time using the smaller detailed foliage die and Snowy White velvet paper. I cut a rectangle of white glimmer paper and used this to back a diecut stitched rectangle of white cardstock, onto which I heat-embossed my sentiment in silver: 


I added a trio of opal rounds to complete my design. This is a card of many layers and wonderful texture, but was actually quick and easy to execute. I will miss Merriest Moments for sure!

Here is the visual summary of the key products used on today's project for you to pin for easy reference:


You can see all of my 'How To' summaries on my 'How To - Tips and Techniques' Pinterest board in case you've missed any. 

Enjoy your day and I'll be back tomorrow with another project. Until then, happy stampin'!


Strawberry Builder Punch Gnome Art PP568

by Joanne James21. November 2021 08:00

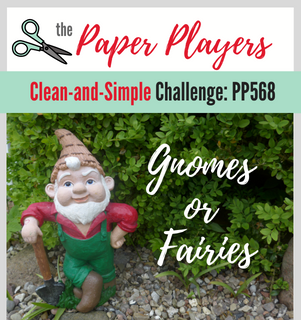
Today it's Sunday and time for this week's new challenge over at The Paper Players! It's the turn of the fabulous Laurie to host this week and she has a fun Clean and Simple challenge for you to work with:
       

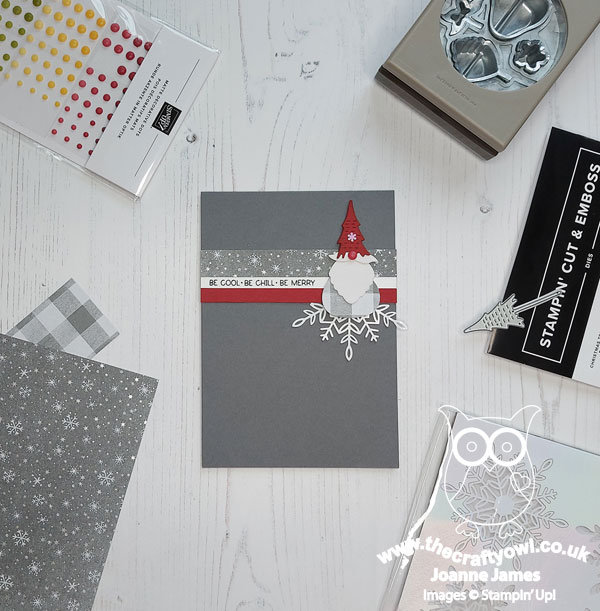
I couldn't resist another crack at Kim's fabulous layout over at Freshly Made Sketches this week and paired with the colours over at Color Dare (I added Cherry Cobbler red as my fourth colour) for today's card - take a look:
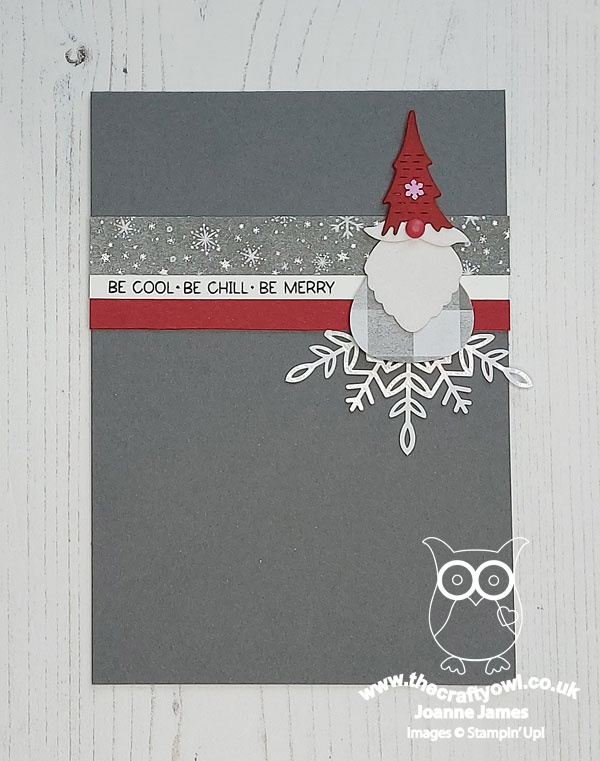
 

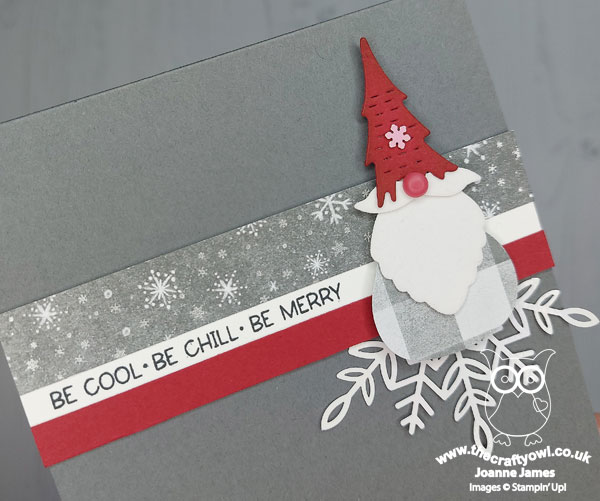
Here's the low-down on today's card:

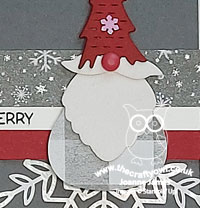
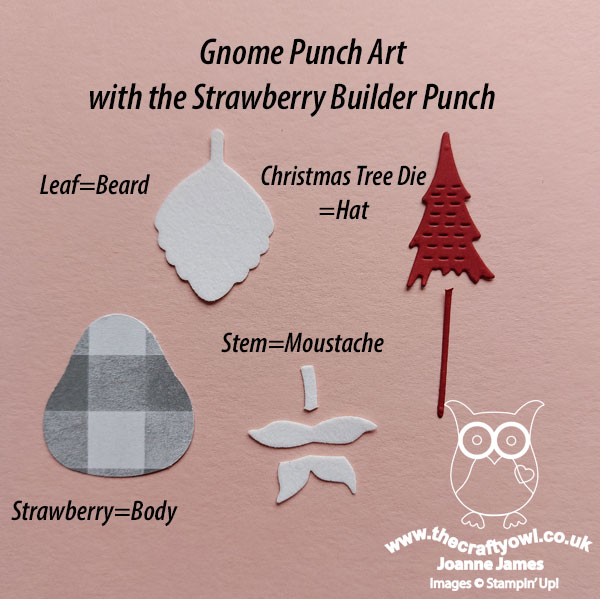
I started out planning today's card with some trepidation; whilst I still have my retired 'Gnome for the Holidays' stamp set, I have no other current gnome stamp sets. I decided though that I would rise to the challenge and embark on trying to create one using some current supplies to fashion some gnome punch art. A quick perusal of Pinterest, I chose a cute cuddly gnome to base my design on, grabbed some current supplies and tools and set to work! I used the largest of the skinny Christmas trees from the Christmas Tree Dies and my Strawberry Builder Punch to make my gnome. I used some offcuts of Peaceful Place designer paper for my gnome body and the top horizontal strip above my sentiment, along with some Snowy White Velvet Paper for his beard and moustache for some subtle texture and a matt dot for his nose. A piece of snowflake behind and a tiny one on his hat, along with a sentiment from 'Penguin Place' complete my clean and simple gnome card:
I created a basic crib sheet so that you can see the main elements of my gnome and how I trimmed them, in case you fancy having a go at making one yourself - feel free to save this for future use:
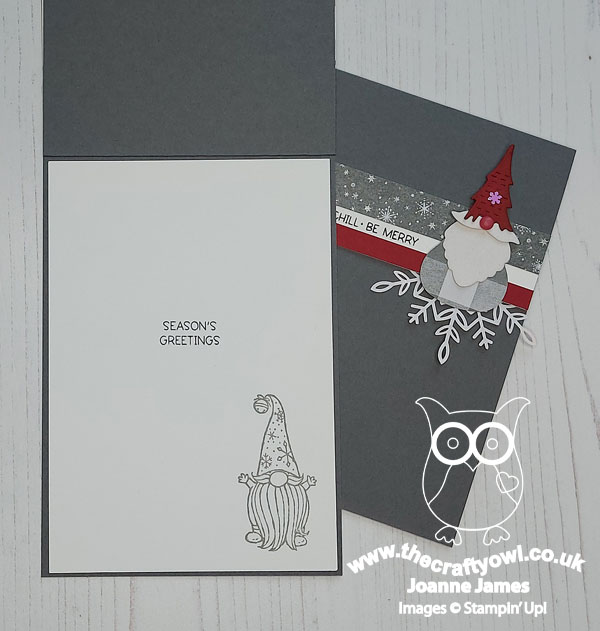
I based the design of my punch art gnome on one of the ones in the retired 'Gnome For The Holidays' stamp set, which I stamped on the inside of my card for added decoration:
 As you can see, I decided I liked this card so much I made another - I think these little gnomes are rather cute, even if I say so myself!
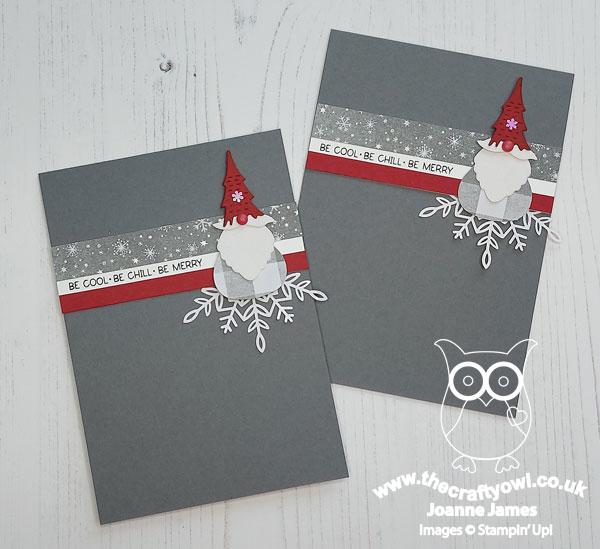
I think I did a pretty good job of meeting the 'clean and simple' brief too - remember in addition to featuring a gnome (or elf, or fairy!) on your card it should also be clean and simple:

  • minimal layers
  • little/no embellishments
  • lots of clean white space (no pattern)
Here is the visual summary of the key products used on today's project for you to pin for easy reference:
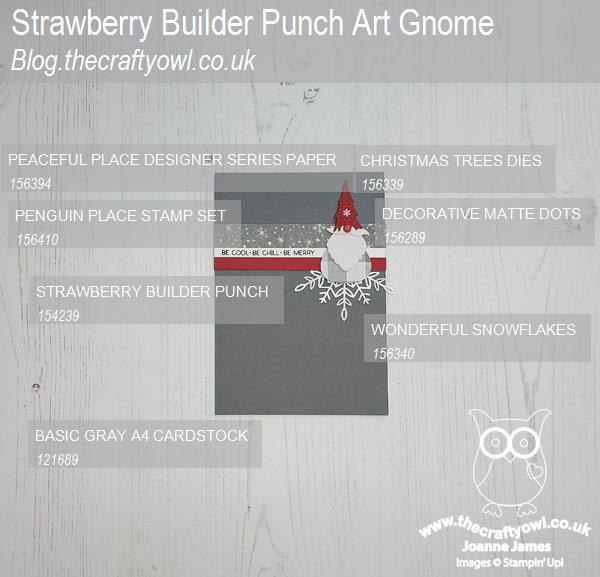
 

You can see all of my Product and 'How To' summaries on my 'How To - Tips and Techniques' Pinterest board in case you've missed any. 

Before you reach for your ink and papers, check out what our amazing team has created to inspire you this week:

Here's a quick recap of our challenge rules:
 
1.  Create a new paper project
2.  Upload your creation to your blog with a link back to us and provide a direct link to the post featuring your challenge submission.
3.  Please link your card to no more than four challenges, TOTAL.
4.  Have FUN!

You can see all of my 'How To' summaries on my 'How To - Tips and Techniques' Pinterest board in case you've missed any. 

Enjoy your day; mine is shaping up to be a rather uneventful one - here's hoping anyway! I'll be back tomorrow with another project. Until then, happy stampin'!
 

Stampin' Up! Supplies Used: 

Table built using Product Table Builder by The Crafty Owl - Independent Stampin' Up! Demonstrator.
 
Edit: This card was a WINNER! Kim chose me as her Queen of Clean for FMS512 - woohoo!
 

Merriest Moments Black, White and Blue Christmas Card

by Joanne James11. August 2021 08:00

I so enjoyed making the card I shared with you on Sunday, that I decided to make another card using the Merriest Moments bundle for the challenge over at Just Add Ink, this time inspired by the modern colour palette over at TGIF Challenges


I just loved that colour palette and thought it would work well for a modern Christmas card. I also changed the orientation for today's card - take a look:


Here's the low-down on today's card:

A chalkboard style sentiment, this time surrounded with a white frame cut from the Snowy White Velvet sheets - these are amazing! I hope you can see some of the gorgeous embossed detailing on the velvet below:


It's so pretty in real life! I used some Pattern Party patterned paper for my background, and centred my Coastal-Cabana stamped poinsettias with some of my favourite black matte dots too.


A few loops of Coastal Cabana (retired) sheer ribbon for an added pop of blue complete my card, with a little extra stamping on the inside:


Before you think I'm completely mad choosing to feature these traditionally red or cream flowers in bright blue, a quick internet search showed that blue poinsettias are actually a thing - who knew?! I absolutely love this card - I'm definitely going to make a few more in this colourway.

Here is the visual summary of the key products used on today's project for you to pin for easy reference:


You can see all of my 'How To' summaries on my 'How To - Tips and Techniques' Pinterest board in case you've missed any. 

Enjoy your day; today is the youngest of the James Juniors 14th birthday and we have a fun day of activities planned, all to be finished off with an Oreo cookie ice cream cake! I'll hopefully be back tomorrow with another project. Until then, happy stampin'!


Stampin' Up! Supplies Used:

Table built using Product Table Builder by The Crafty Owl - Independent Stampin' Up! Demonstrator.

New Online Exclusives

There are new products available exclusively in the online store from 5 November - check them out here.

Latest Kits!

Stampin Cut and Emboss

The Layered Landscapes Kit and Nature's Paintings Kit are the latest kits in the online store - get yours here!

Shop Online

Access my online shop 24 x 7, 365 days of the year:

Current November hostess code:

9NKXDTTR

Shop Online

Mini Catalogue

BROWSE THE CATALOGUE

'Tis The Season - the new Stampin' Up! Mini Catalogue is here! For more details and to download your copy click here

Scrapbooking

Stampin' Up! has introduced a new range of 12x12" scrapbooking product and kit - the full range is now available to purchase online. To download a copy of the new digital Scrapbooking Catalogue click here.

2024-25 Annual Catalogue

BROWSE THE CATALOGUE

Click on the image to download your copy of the 2024-25 annual catalogue. For a full list of current SU! supplies, go to my online store. If you would like any help or advice, please drop me a line at joanne@thecraftyowl.co.uk or give me a call on 07773 421446 - I'd be happy to help.

Join My Team

It's always a great time to join Stampin’ Up! New team members can get £130 worth of products for only £99 + free business supplies + free shipping + all the fun being a part of Stampin’ Up! Stampin' Up! has something for everyone: join my growing team and benefit from my support to enjoy Stampin' Up! however you choose.

If you're interested, call me for a chat to understand how I can help you realise your goals. Alternatively, if you have already decided to sign up and you just can't wait, please click here for the link to the online form where you can sign up and order your starter kit right away! 

About Me

Hi I'm Joanne and live in Northampton and when I'm not looking after my husband and two beautiful children, am an avid crafter with a passion for all things Stampin' Up!

I must confess that I have never been a big rubber stamper - until I discovered Stampin' Up! that is. I love the fact that I can get such great results with co-ordinating stamps, inks, papers and punches - the possibilities are endless! Join me on my stamping journey as I share the things I love and be inspired to create amazing things yourself!

Follow Me

Monthly Newsletter

Box Builder

Click the button above to use Box Buster to create your custom box design using the Envelope Punch Board!

Kits Collection Now Available!

Stampin Cut and Emboss

The new Kits Collection from Stampin' Up! is now available!

Click here to see the current kits available and order yours online today.

I Design For


Stampin' Up Stuff

This is my personal blog and is not endorsed by Stampin’ Up! I hope you find it a plentiful source of ideas and personal inspiration but please don't copy my designs for contest submission or use for classes, publication or sale without express permission.