Awash In Beauty Pretty In Pink JUGS 675

by Joanne James15. April 2023 05:00

Today I'm sharing my third card for my Guest Designer spot over at Just Us Girls. This week it's photo/moodboard week:


 So much to love about this mood board! I was inspired by all of the pretty pinks and the florals in the middle picture on the top row, and the sentiment below it, for my guest designer card this week - take a look:


Here's the low-down on today's card:

I knew that I wanted to focus on the pinks for my card this week, in particular that pretty piece of designer paper that I used for my base panel from the Awash in Beauty paper pack. I have been holding on to this for just the right opportunity and I decided this card was it! used the sketch over at Paper Craft Crew for my layout; I like the way the white horizontal strips break up the background pattern but still allow it to shine. For my focal point, I went with a sentiment from my favourite 'Simply Fabulous' stamp set in Merry Merlot - I will so miss this set when it retires! - and framed it with more pretty pink blooms that I fussy cut from the reverse side of the background paper. A sprinkle of sequins completes my card:


I really love how this card turned out - these papers are soo pretty! How does the mood board inspire you? Check out what the design team over at Just Us Girls have created this week and have a go and join us!

Here is the visual summary of the key products used on today's project for you to pin for easy reference:


You can see all of my 'How To' summaries on my 'How To - Tips and Techniques' Pinterest board in case you've missed any. 

Enjoy your day and I'll be back tomorrow with another project for this week's challenge over at The Paper Players. Until then, happy stampin'!


Stampin' Up! Supplies Used:

Table built using Product Table Builder by The Crafty Owl - Independent Stampin' Up! Demonstrator.

Happy Forest Friends Just Saying Hello for FMS580

by Joanne James10. April 2023 08:00

Happy Easter Monday everyone! Today I'm sharing a card using Jen M's layout over at Freshly Made Sketches that is also perfect for the new 'A is for Adorable' challenge over at the Alphabet Challenge Blog:

As I was making this card the other day I was pondering what to do with the pretty scene on the corner of my sheet of Happy Forest Friends designer paper, and I decided Jen's sketch would be the perfect way to showcase it - take a look:


Here's the low-down on today's card:

By carefully cutting into four pieces as per the sketch, I could keep the scene whilst presenting it in an interesting way at the same time. I mounted each one on a mat of Grey Granite cardstock and added to a white cardbase, then fussy cut a stamped sentiment from one of my favourite retiring sets 'Simply Fabulous'. This set is currently available at a 10% discount - you can buy it here in my online store whilst supplies last! I stamped it in Night of Navy and positioned it strategically at the meeting point:


Doesn't this bear look just as if he's waving hello to the butterfly as he passes on his woodland stroll? If that's not cute, I don't know what is!  That's all there is to it - super simple today, with the pretty designer paper doing all the work!

Here is the visual summary of the key products used on today's project for you to pin for easy reference:


You can see all of my 'How To' summaries on my 'How To - Tips and Techniques' Pinterest board in case you've missed any. 

Enjoy your day and I'll be back tomorrow with another project. Until then, happy stampin'!


Stampin' Up! Supplies Used:

Table built using Product Table Builder by The Crafty Owl - Independent Stampin' Up! Demonstrator.

Floral Squares Simply Fabulous Birthday Card CCS508

by Joanne James4. April 2023 13:00

It's Tuesday and time for a new challenge over at CAS Colours & Sketches. We are in April now; Valerie chose our challenges this month and our first challenge is a lovely bright colour challenge: 


For my card today I wanted to play along with the current challenge of 'Spring' over at Addicted to CAS who are back following their extended break and the layout over at Sunday Stamps was perfect for me to play with some of my favourite retired dies - take a look:


Here's the low-down on today's card:

I had my 'Simply Fabulous' stamp set out on my desk and was originally going to stamp three squares, but instead used this set just for the sentiment and used a trio of Floral Squares Dies to add some bright pops of spring colour. I added some retired Crushed Curry baker's twine that I had in my stash; these flowers are so easy to layer and great for clean and simple cards:

This card measures 4 1/2" x 8" so is slightly larger than usual, so also needed a custom envelope - long-time retired in-colour designer paper to the rescue for that one too! Can you tell that we are about to transition between catalogues? Trying to have a clear-out always results in the discovery of old favourites - I'm still hanging on to these ones though, I love them and so wish we had more designs of these! Apart from the colours, everything is either retired or on the way - the 'Simply Fabulous' stamp set is on it's way to the retired shelf, although I have a space ready for it as I'm not letting go of mine just yet!

Here is the visual summary of the key products used on today's project for you to pin for easy reference:


You can see all of my 'How To' summaries on my 'How To - Tips and Techniques' Pinterest board in case you've missed any. 

As a reminder, for our colour challenges, you must use all of the stated challenge colours. You may also use neutral colours; however, the challenge colours should be the most noticeable ones featured on your card. We use Stampin' Up! colour names for reference, but you are welcome to use any other companies' products as long as you match the challenge colours as closely as possible.

Enjoy your day and I'll be back tomorrow with another project. Until then, happy stampin'!


Stampin' Up! Supplies Used:

Table built using Product Table Builder by The Crafty Owl - Independent Stampin' Up! Demonstrator.

Loveliest Layers Coral CAS Hello Card

by Joanne James15. February 2023 18:06

It's half term week so with the kiddos around, I haven't had much time for crafting or blogging, but I am popping by today I'm sharing a card that I made for a couple of challenges that are allowing me the opportunity to indulge my new-found love of stencils:


The team at AAA Birthday are asking for birthday cards featuring stencils and the team at Inkspirational are also using stencils - with an optional addition of splatter. I went all-in and used both on my card - take a look:


Here's the low-down on today's card:

Nothing too complicated here: I stencilled my flower using the Loveliest Layers Decorative Masks in Petal Pink and Calypso Coral, with leaves in Soft Succulent, then added splatters both with a Soft Succulent marker and a mix of adhesive and water, that I then sprinkled with gold and heat embossed. You can see that detail more closely below:


I finished my card with a fussy cut gold heat-embossed sentiment that continues inside my card with 'and wishing you a happy birthday' and a trio of enamel dots. I don't usually add splatters to my clean and simple cards, but I quite like the effect for a change. 

Here is the visual summary of the key products used on today's project for you to pin for easy reference:


You can see all of my 'How To' summaries on my 'How To - Tips and Techniques' Pinterest board in case you've missed any. 

Enjoy your day and I'll be back tomorrow with another project. Until then, happy stampin'!


Stampin' Up! Supplies Used:

Table built using Product Table Builder by The Crafty Owl - Independent Stampin' Up! Demonstrator.

Sentiment Silhouette Stencilled Candles Birthday Card

by Joanne James8. February 2023 11:00

Today I've a quick post to share a card that was inspired by the pretty rainbow stencilled card over at Time Out:


I decided to keep with the layout and rainbow-coloured ink blending for my CASE of the pretty Gina K card, but wanted to try something with the candles in the Sentiment Silhouette dies that I had out on my desk. This is what I came up with:


Here's the low-down on today's card:

I adhered a collection of diecut candles to a white panel that I had masked off the edges and I adhered them with low tack adhesive (I actually used Tombo, that I allowed to dry and go 'tacky' so that my diecuts would be repositionable and removable after colour had been applied), before adding a rainbow of colour with blending brushes, then removing the diecuts to give a 'stencillled' effect. I added a heat embossed 'celebration' sentiment from 'Simply Fabulous' to complete my clean and simple card:


Simple but effective - a birthday card with universal appeal!

Here is the visual summary of the key products used on today's project for you to pin for easy reference:


You can see all of my 'How To' summaries on my 'How To - Tips and Techniques' Pinterest board in case you've missed any. 

Enjoy your day and I'll be back tomorrow with another project. Until then, happy stampin'!


Stampin' Up! Supplies Used:

Table built using Product Table Builder by The Crafty Owl - Independent Stampin' Up! Demonstrator.

Simple Stamping With Simply Fabulous CCS 493

by Joanne James25. October 2022 12:00

It's Tuesday and time for a new challenge over at CAS Colours & Sketches. This is our last challenge of the month and Michal is ending with a great sketch: 


Feel free to flip or rotate the sketch when making your card.

For my card today I thought I'd take the orange and green colours over at Color Hues and create a sunny and fresh clean and simple card using one of my all-time favourite stamp sets, 'Simply Fabulous' - take a look:


Here's the low-down on today's card:

I masked off the corner of my white card front and used Pumpkin Pie, Pale Papaya and Granny Apple Green inks to stamp flowers and leaves randomly across the corner of my card. I then removed my masking paper, and using my Take Your Pick tool, scored three lines on the reverse following the contour of my stamped panel, before finishing with a greeting from the same set:


All done - easy as that,#SimpleStamping at its best! This card would work in lots of different colour combos and with other images too - I love the way the scored lines add a finishing detail to the panel. Apologies for the rather ropey quality of today's photos - the lighting was very strange yesterday and the images are more grainy than I'd like - I think a recently re-inked Granny Apple Green ink pad might have something to do with that (oops!)

Here is the visual summary of the key products used on today's project for you to pin for easy reference:


You can see all of my 'How To' summaries on my 'How To - Tips and Techniques' Pinterest board in case you've missed any. 

Enjoy your day; it is half-term here and as one James Junior is visiting Alcatraz the other is revising a combination of Physics and 'An Inspector Calls' - delightful! It does mean that I managed to get a little extra creative time in yesterday so I have another card to share! I'll be back later with another post with that card. Until then, happy stampin'!


Stampin' Up! Supplies Used:

Table built using Product Table Builder by The Crafty Owl - Independent Stampin' Up! Demonstrator.

Simply Fabulous Stencilled Slimline Birthday Card AYSI285

by Joanne James7. October 2022 12:00

Today I'm sharing my design team card for our new challenge over at As you See It where it's time for a bold colour challenge:
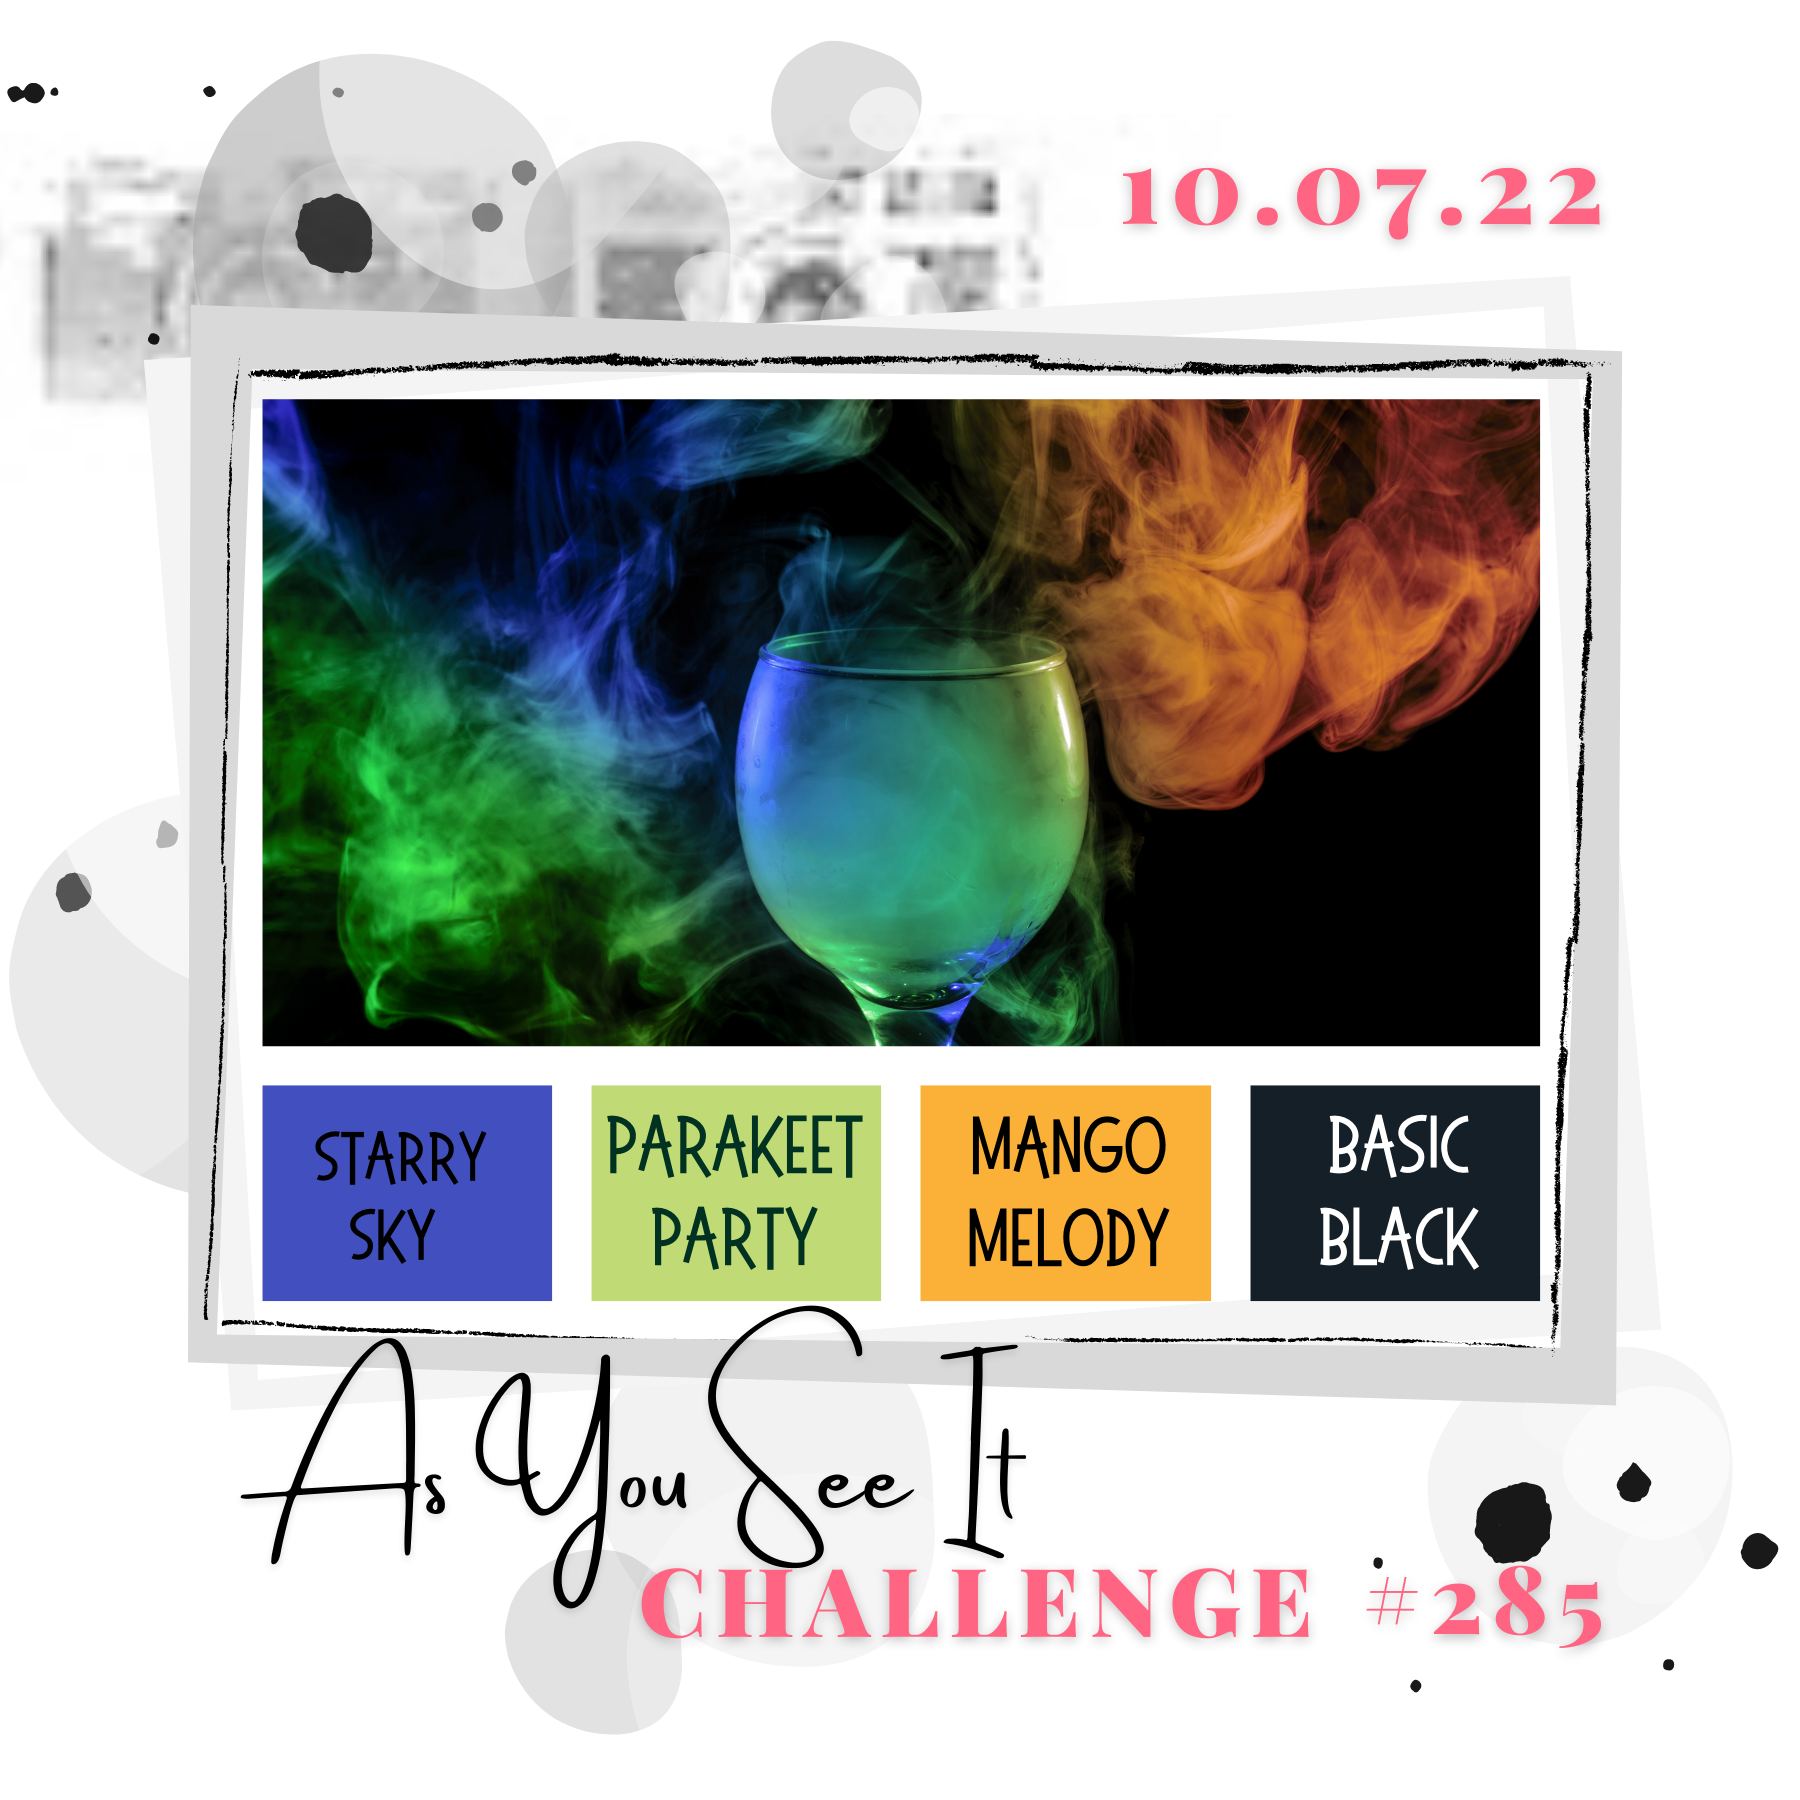
    

I love this week's colour palette, although the bold colours did mean I had to get my thinking cap on. I decided they would be perfect for me to try out an idea I've had buzzing around for a while - take a look:
 

Here's the low-down on today's card:

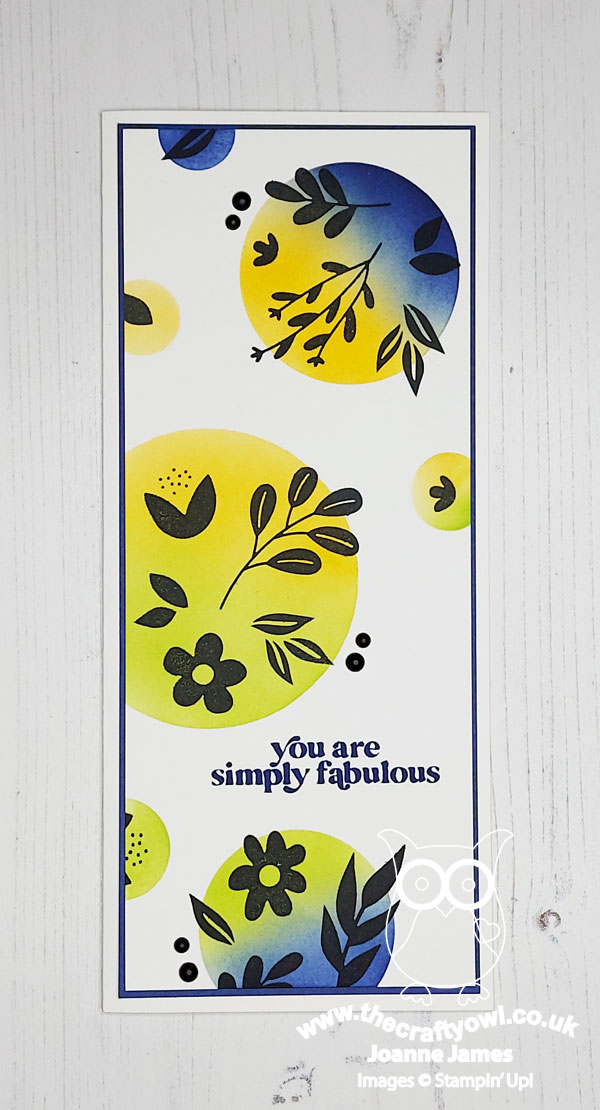
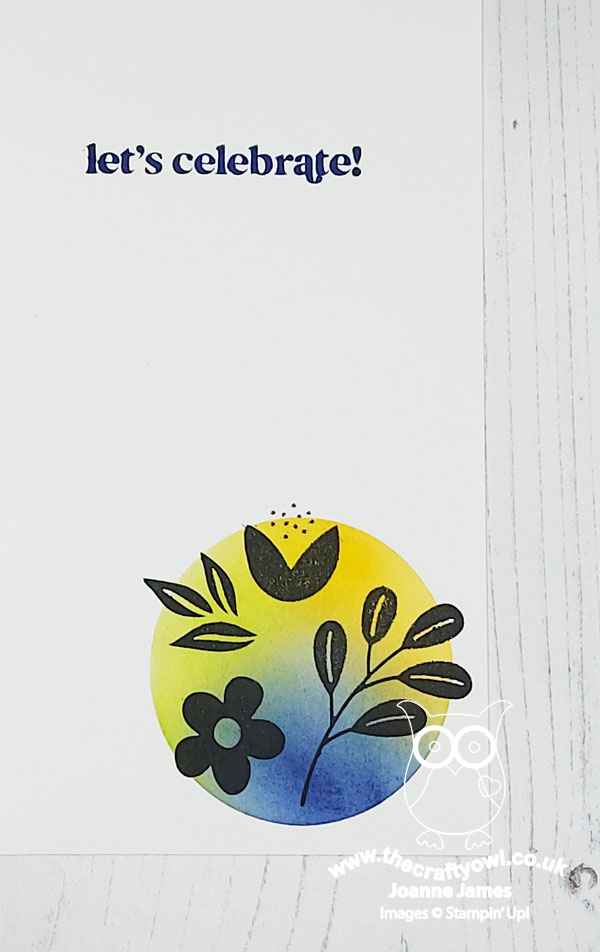
Simply Fabulous - I've made no secret of how much I love the 'Simply fabulous' stamp set - to me, it is just that! So versatile, with great sentiments and fonts and bold floral images, if you do a search you'll find lots of examples of where I've used it on other cards. Instead of stamping in colour, I wanted to see what it would look like stamped in black onto a coloured base. The images are small and easy to combine and the subtle leaf detail on some of the images mean this works really well. I used my Stamparatus to stamp clusters of images at a time, reinking to make sure I had a nice solid black image. I also added a little additional detail on the inside:
DIY Stencils - I decided that I would use some circle shapes to highlight my clusters of silhouetted images and use a combination of blended colours in each one. I made my own set of circle stencils, using some window sheet and my Layering Circles Dies, so carefully positioned them where I wanted my images, starting with the large ones and adding a few smaller ones around the edge to fill in the gaps. I used my blending brushes to add a combination of two colours to each circle. I love using stencils and don't have many in my collection, but I'm always looking at ways in which I can use my dies to create custom stencils - do you do this too? My stencilling here is simple but I think quite effective; I'm linking up with the challenge over at Inkspirational where they are asking us to use stencils this week - do check out the DT and gallery cards, there are some great examples of the way stencils can be used on your projects.


Finishing Touches - To finish my card, I added a few matte black dots to the outer borders of the larger circles as an accent:
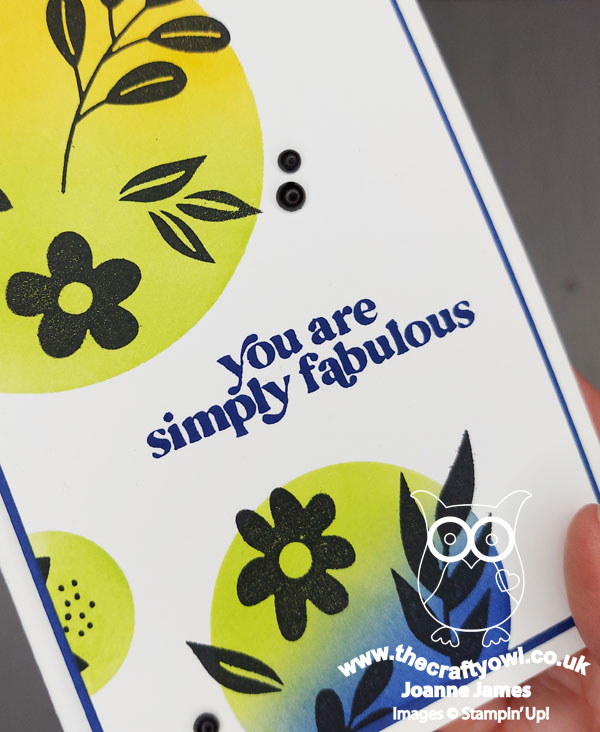
I really love this card and am glad I used a slimline design too as it meant I got more circles onto my card front. If I could change one thing, I think I would stamp my sentiment in black rather than Starry Sky; I wanted to tie it in to the mat layer, but I think black would have given a crisper finish. I'll save that for my next one! 

Here is the visual summary of the key products used on today's project for you to pin for easy reference:
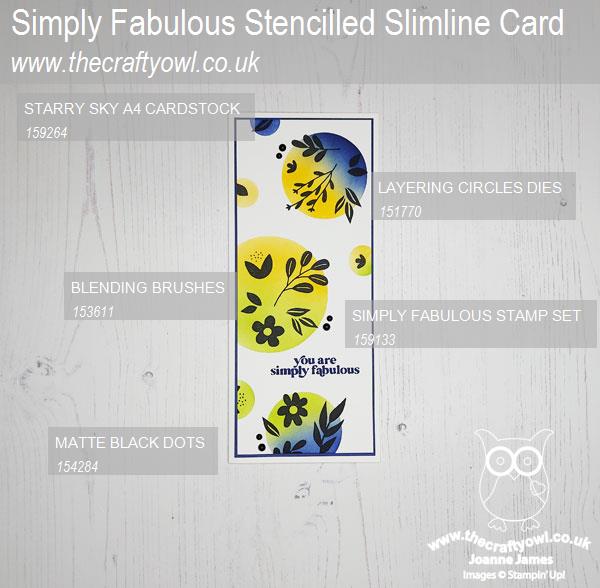
 

You can see all of my 'How To' summaries on my 'How To - Tips and Techniques' Pinterest board in case you've missed any. 

Here's a summary of our challenge rules:

  • Create any card, scrapbooking page, 3D project or packaging project that fits the challenge.
  • Please include the challenge graphic and link back to the challenge in your blog post. Turn off word verification so we can leave you lots of lovely comments. Make sure you link the post not the whole blog to the Linky. Use #AYSIXXX when uploading to a public gallery.
  • If you’re unsure about ‘the rules’, check the details under the Challenge Guidelines tab on the As You See It Challenge homepage.
  • In a colour challenge, black or other neutral can be used in outlines and sentiments but no other colours should be included. Stampin’ Up colours are used for reference but colours that are a close match are welcome.
We look forward to seeing your creations in the AYSI gallery.

Enjoy your day. Mine will be filled with laundry and housework and maybe a little crafting! I am on late pickup this evening, as one of the James Juniors has a social evening and quiz night at school, which after this morning's rush hour I am particularly thankful for: a beer tanker had overturned and completely blocked the dual carriageway that is only minutes into our journey, necessitating a massive diversion and delay - not what you need when you have a 60 mile round trip to embark on at 7.15am! Still, everyone got to school on time and I'm thankful we weren't involved in the incident itself, so all good. I'll be back tomorrow with another project. Until then, happy stampin'!


Stampin' Up! Supplies Used:
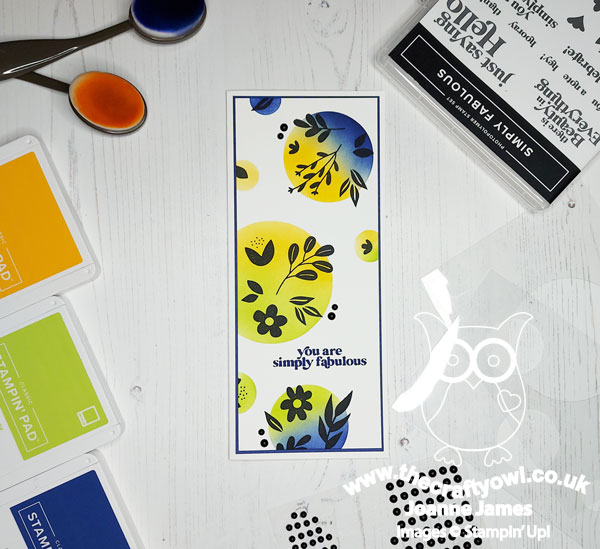
Table built using Product Table Builder by The Crafty Owl - Independent Stampin' Up! Demonstrator.

Just Saying Hello with Simply Fabulous CCS 490

by Joanne James4. October 2022 12:00

It's Tuesday and time for a new challenge over at CAS Colours & Sketches. We are starting a new month and the lovely Michal is our host for October. We are starting the month with a colour challenge: 


For my card today I decided to use the sketch design (but not the colours/inspo photo) over at Fusion for a bright and cheery card that has a distinctly summery feel - take a look:


Here's the low-down on today's card:

I thought Michal's colour choices were perfect for a bold flower and sentiment, courtesy of my favourite 'Simply Fabulous' stamp set. I stamped them onto a diecut circle and used a sunny Daffodil Delight card base, with a piece of 'Celebrate Everything' gingham paper across the top of the panel. I resisted the urge to add some white baker's twine and finished my flower centre with nothing more than an enamel dot embellishment:


A co-ordinating flower on my envelope and inside complete this easy card. 

Here is the visual summary of the key products used on today's project for you to pin for easy reference:


You can see all of my 'How To' summaries on my 'How To - Tips and Techniques' Pinterest board in case you've missed any. 

As a reminder, for our colour challenges, you must use all of the stated challenge colours. You may also use neutral colours; however, the challenge colours should be the most noticeable ones featured on your card. We use Stampin' Up! color names for reference, but you are welcome to use any other companies' products as long as you match the challenge colours as closely as possible.

Enjoy your day; I'm having a desk day as there is lots of Stampin' Up! news to impart so I've quite a few posts to write - and of course there's shopping to take advantage of today's free shipping offer - yay! I'll be back on Thursday with another project. Until then, happy stampin'!


Stampin' Up! Supplies Used:

Table built using Product Table Builder by The Crafty Owl - Independent Stampin' Up! Demonstrator.

Celebrate Everything With Autumn Leaves For The Paper Players PP607

by Joanne James4. September 2022 08:00

Today it's Sunday and time for this week's new challenge over at The Paper Players! It's the turn of the fabulous Ann to host this week and she has a seasonal theme for us to work with:


I'm back following my week off last week; I've been enjoying a well-earned break in the Florida sunshine so Ann's theme this week of 'Fall Fun' brought me back down to earth with a bump! I'm not ready for pumpkins and spiced lattes just yet though; I took my inspiration from the bright autumn leaves in our challenge badge and paired them with the lovely Kim's fantastic sketch over at Freshly Made Sketches to come up with this colourful creation - take a look:


Here's the low-down on today's card:

Celebrate Everything - Kim's sketch features a trio of stripes - perfect to feature a trio of designer papers. A great sketch if you have some co-ordinating scraps to use up: I paired a scrap of yellow gingham with two new papers cut from the Celebrate Everything designer series paper stack; this is a hostess reward and contains 48 sheets of 12" x 12", so is such great value for many and has a range of fabulous seasonal patterns and designs. I love the colourful autumn leaves, so used a stip of this paper in the centre and built the rest of my card around it.

Simply Fabulous - I chose a sentiment from one of my most favourite stamp sets, 'Simply Fabulous', that works perfectly for a seasonal card - I think the changing colours of the autumn leaves is one of the true beauties of nature, don't you agree?

Country Wreaths Diecut Leaves - I accented my sentiment with some matte enamel dots and a trio of diecut leaves from one of the leaves in the Country Wreaths Dies set - I thought they co-ordinated nicely with that central strip of paper. I stuck one on flat and popped the other two up on dimensionals to complete my card:

That's my card complete - a seasonal notecard for my stash.

Here is the visual summary of the key products used on today's project for you to pin for easy reference:


You can see all of my Product and 'How To' summaries on my 'How To - Tips and Techniques' Pinterest board in case you've missed any. 

Before you reach for your ink and papers, check out what our amazing team has created to inspire you this week:

Here's a quick recap of our challenge rules:
 
1.  Create a new paper project
2.  Upload your creation to your blog with a link back to us and provide a direct link to the post featuring your challenge submission.
3.  Please link your card to no more than four challenges, TOTAL.
4.  Have FUN!

Enjoy your day; we are getting ready for the James Juniors to return to school this week and finishing the last of the post-vacation ironing - joy! I'll be back tomorrow with another project. Until then, happy stampin'!


Stampin' Up! Supplies Used: 

Table built using Product Table Builder by The Crafty Owl - Independent Stampin' Up! Demonstrator.

Simply Fabulous Clean and Simple Hello CCS483

by Joanne James16. August 2022 13:00

It's Tuesday and time for a new challenge over at CAS Colours & Sketches. Nancy is hosting this month and I today it's her second a colour challenge: 


For my card today I went super clean and simple with this week's colours (love them!) and my favourite 'Simply Fabulous' stamp set - take a look:


Here's the low-down on today's card:

This really is a card that needs no explanation: I stamped the sentiment, popped in the flower and added a single matte dot to the centre:


#simplestamping at its best!

Here is the visual summary of the key products used on today's project for you to pin for easy reference:


You can see all of my 'How To' summaries on my 'How To - Tips and Techniques' Pinterest board in case you've missed any. 

As a reminder, for our colour challenges, you must use all of the stated challenge colours. You may also use neutral colours; however, the challenge colours should be the most noticeable ones featured on your card. We use Stampin' Up! color names for reference, but you are welcome to use any other companies' products as long as you match the challenge colours as closely as possible.

Enjoy your day and I'll be back at the weekend with my card for the new challenge over at The Paper Players. until then, happy stampin'!


Stampin' Up! Supplies Used:

Table built using Product Table Builder by The Crafty Owl - Independent Stampin' Up! Demonstrator.
 

New Online Exclusives

There are new products available exclusively in the online store from 5 November - check them out here.

Latest Kits!

Stampin Cut and Emboss

The Layered Landscapes Kit and Nature's Paintings Kit are the latest kits in the online store - get yours here!

Shop Online

Access my online shop 24 x 7, 365 days of the year:

Current November hostess code:

9NKXDTTR

Shop Online

Mini Catalogue

BROWSE THE CATALOGUE

'Tis The Season - the new Stampin' Up! Mini Catalogue is here! For more details and to download your copy click here

Scrapbooking

Stampin' Up! has introduced a new range of 12x12" scrapbooking product and kit - the full range is now available to purchase online. To download a copy of the new digital Scrapbooking Catalogue click here.

2024-25 Annual Catalogue

BROWSE THE CATALOGUE

Click on the image to download your copy of the 2024-25 annual catalogue. For a full list of current SU! supplies, go to my online store. If you would like any help or advice, please drop me a line at joanne@thecraftyowl.co.uk or give me a call on 07773 421446 - I'd be happy to help.

Join My Team

It's always a great time to join Stampin’ Up! New team members can get £130 worth of products for only £99 + free business supplies + free shipping + all the fun being a part of Stampin’ Up! Stampin' Up! has something for everyone: join my growing team and benefit from my support to enjoy Stampin' Up! however you choose.

If you're interested, call me for a chat to understand how I can help you realise your goals. Alternatively, if you have already decided to sign up and you just can't wait, please click here for the link to the online form where you can sign up and order your starter kit right away! 

About Me

Hi I'm Joanne and live in Northampton and when I'm not looking after my husband and two beautiful children, am an avid crafter with a passion for all things Stampin' Up!

I must confess that I have never been a big rubber stamper - until I discovered Stampin' Up! that is. I love the fact that I can get such great results with co-ordinating stamps, inks, papers and punches - the possibilities are endless! Join me on my stamping journey as I share the things I love and be inspired to create amazing things yourself!

Follow Me

Monthly Newsletter

Box Builder

Click the button above to use Box Buster to create your custom box design using the Envelope Punch Board!

Kits Collection Now Available!

Stampin Cut and Emboss

The new Kits Collection from Stampin' Up! is now available!

Click here to see the current kits available and order yours online today.

I Design For


Stampin' Up Stuff

This is my personal blog and is not endorsed by Stampin’ Up! I hope you find it a plentiful source of ideas and personal inspiration but please don't copy my designs for contest submission or use for classes, publication or sale without express permission.