by Joanne James19. August 2017 21:35
Today I'm popping by with a quick post and a card for this week's challenge over at CASology where they have a fun cue word:

Many of the designers over at CASology this week were inspired to use cacti or hedgehogs on their cards. Me? I have Christmas on the brain this week and I immediately thought 'holly' - take a look:
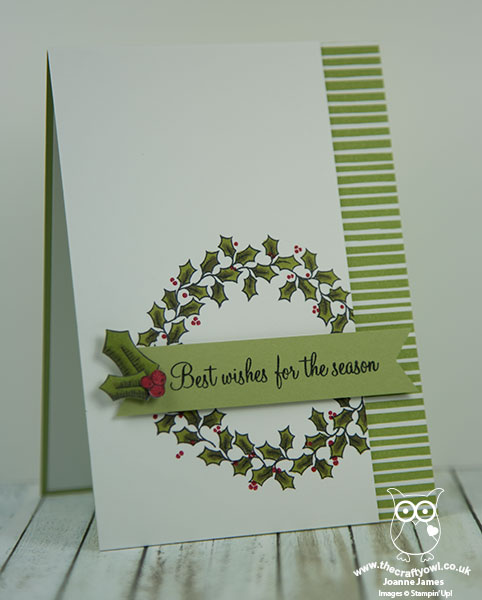
Here's the low-down on today's card:
I use the holly berry sprig from the 'Holly Berry Happiness' stamp set, on carryover from last year and now available all year round in the annual catalogue, to create a holly wreath that I coloured in with my Pear Pizzazz and Old Olive Stampin' Write markers. I used the same layout that I used for my recent quilted Christmas card, stamping my wreath off the page and adding a strip of Coffee Break DSP and a sentiment banner accented with a piece of punched holly, courtesy of the Holly Berry Builder Punch, to finish. I stamped this lovely verse onto the inside too:

It was fun to get this set out again and always worth remembering that the annual catalogue has some great Christmas sets - you don't have to wait until the release of the new Autumn-Winter seasonal catalogue if you want to start festive crafting in earnest.
Here is the visual summary of the key products used on today's project for you to pin for easy reference:
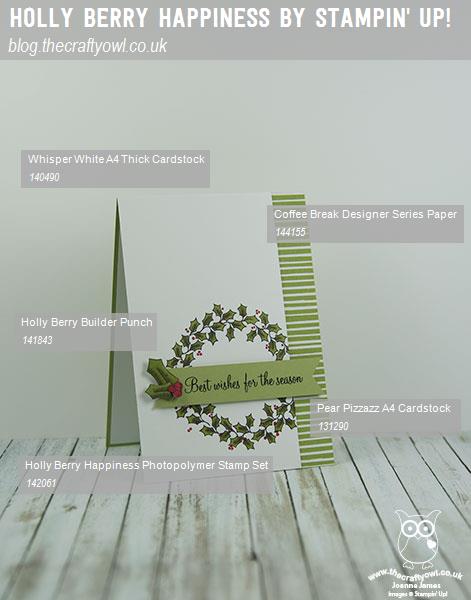
You can see all of my 'How To' summaries on my 'How To - Tips and Techniques' Pinterest board in case you've missed any.
I'll be back tomorrow with another project. Until then, happy stampin'!
Stampin' Up! Supplies Used:
f7fd4f2f-2a4f-487b-99ef-3af2034dc218|0|.0|96d5b379-7e1d-4dac-a6ba-1e50db561b04
Tags: Christmas, Holly Berry Builder Punch, Holly Berry Happiness, Coffee Break, Shop online, Shop Stampin' Up online, Shop Stampin' Up! Online, Stampin' Up, Stampin' Up Card, Stampin' Up Card ideas, Stampin' Up Supplies
Cards | Shop Online | Shop Stampin' Up! Online | Stamping
by Joanne James5. September 2016 20:55 
Happy Monday everyone! I've had the first of my monthly technique classes today, featuring the Holly Berry Happiness stamp set and co-ordinating Holly Berry Builder punch so thought I would share with you one of the cards we made, which is actually a CASE of one of the cards featured on page 27 of the new seasonal catalogue. I wanted to share with my ladies some hints and tips on creating a wreath with the holly bough stamp. Here's my card:
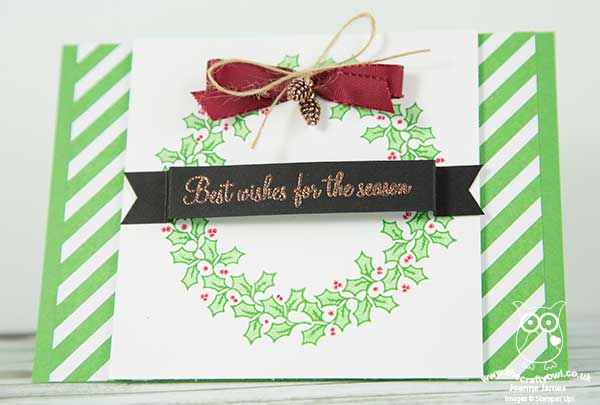
Here's the low-down on today's card:
Creating A Wreath - The holly bough in the Holly Berry Happiness stamp set can be used to create a beautiful circular wreath, but can be tricky to line up perfectly without practice. My top tips for getting a great result are:
- Draw around a punched circle or circle framelit in pencil to give you a guide - I used the fourth from largest circle framelit from the recently retired set, which sits just inside the outer edge of the holly bough.
- Don't bend the stamp if you want to be able to two-stamp stamp and infill easily; place the stamp on a flat surface and allow it to take its natural shape, then take your acrylic block to it.
- Tape your cardstock to the centre of your grid paper and use the intersecting lines to guide the alignment of your stamps - you should be able to fit one holly bough in each quarter circle.
Green As A Cucumber - Each of my class cards used a different shade of green to show how each of the main Stampin' Up! green inks can be used for different effects on Christmas cards. This card features Cucumber Crush, a really vibrant green - great for the holly and the striped in-colour DSP adds a strong graphic element to this card.
Copper Best Wishes - I heat embossed my sentiment in copper as opposed to white, as in the catalogue sample. I just love this copper embossed look against the black and it co-ordinates with and accentuates the colour of the fir cone embellishments too.
Here is the visual summary of the key products used on today's project for you to pin for easy reference:
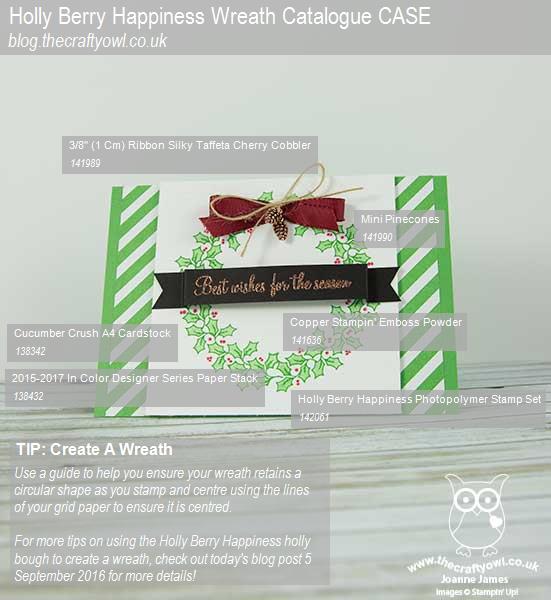
You can see all of my 'How To' summaries on my 'How To - Tips and Techniques' Pinterest board in case you've missed any.
I spent the rest of the day making jam and ensuring the first of my James Juniors is ready for the start of the new academic year tomorrow. This is even more of a big deal than usual for us, as both children are starting new schools and for the first time will be separated from each other. I'm hoping all goes well - wish me luck! James Junior number two starts school on Wednesday.
I'll be back tomorrow with another project; until then, happy stampin'!
Stampin' Up! Supplies Used: