Timeless Tulips Artistry Blooms Ombre Easter Card AYSI 248

by Joanne James16. April 2021 13:00

Today I'm sharing my design team card for our new challenge over at As you See It where it's time for my favourite, a sketch challenge:
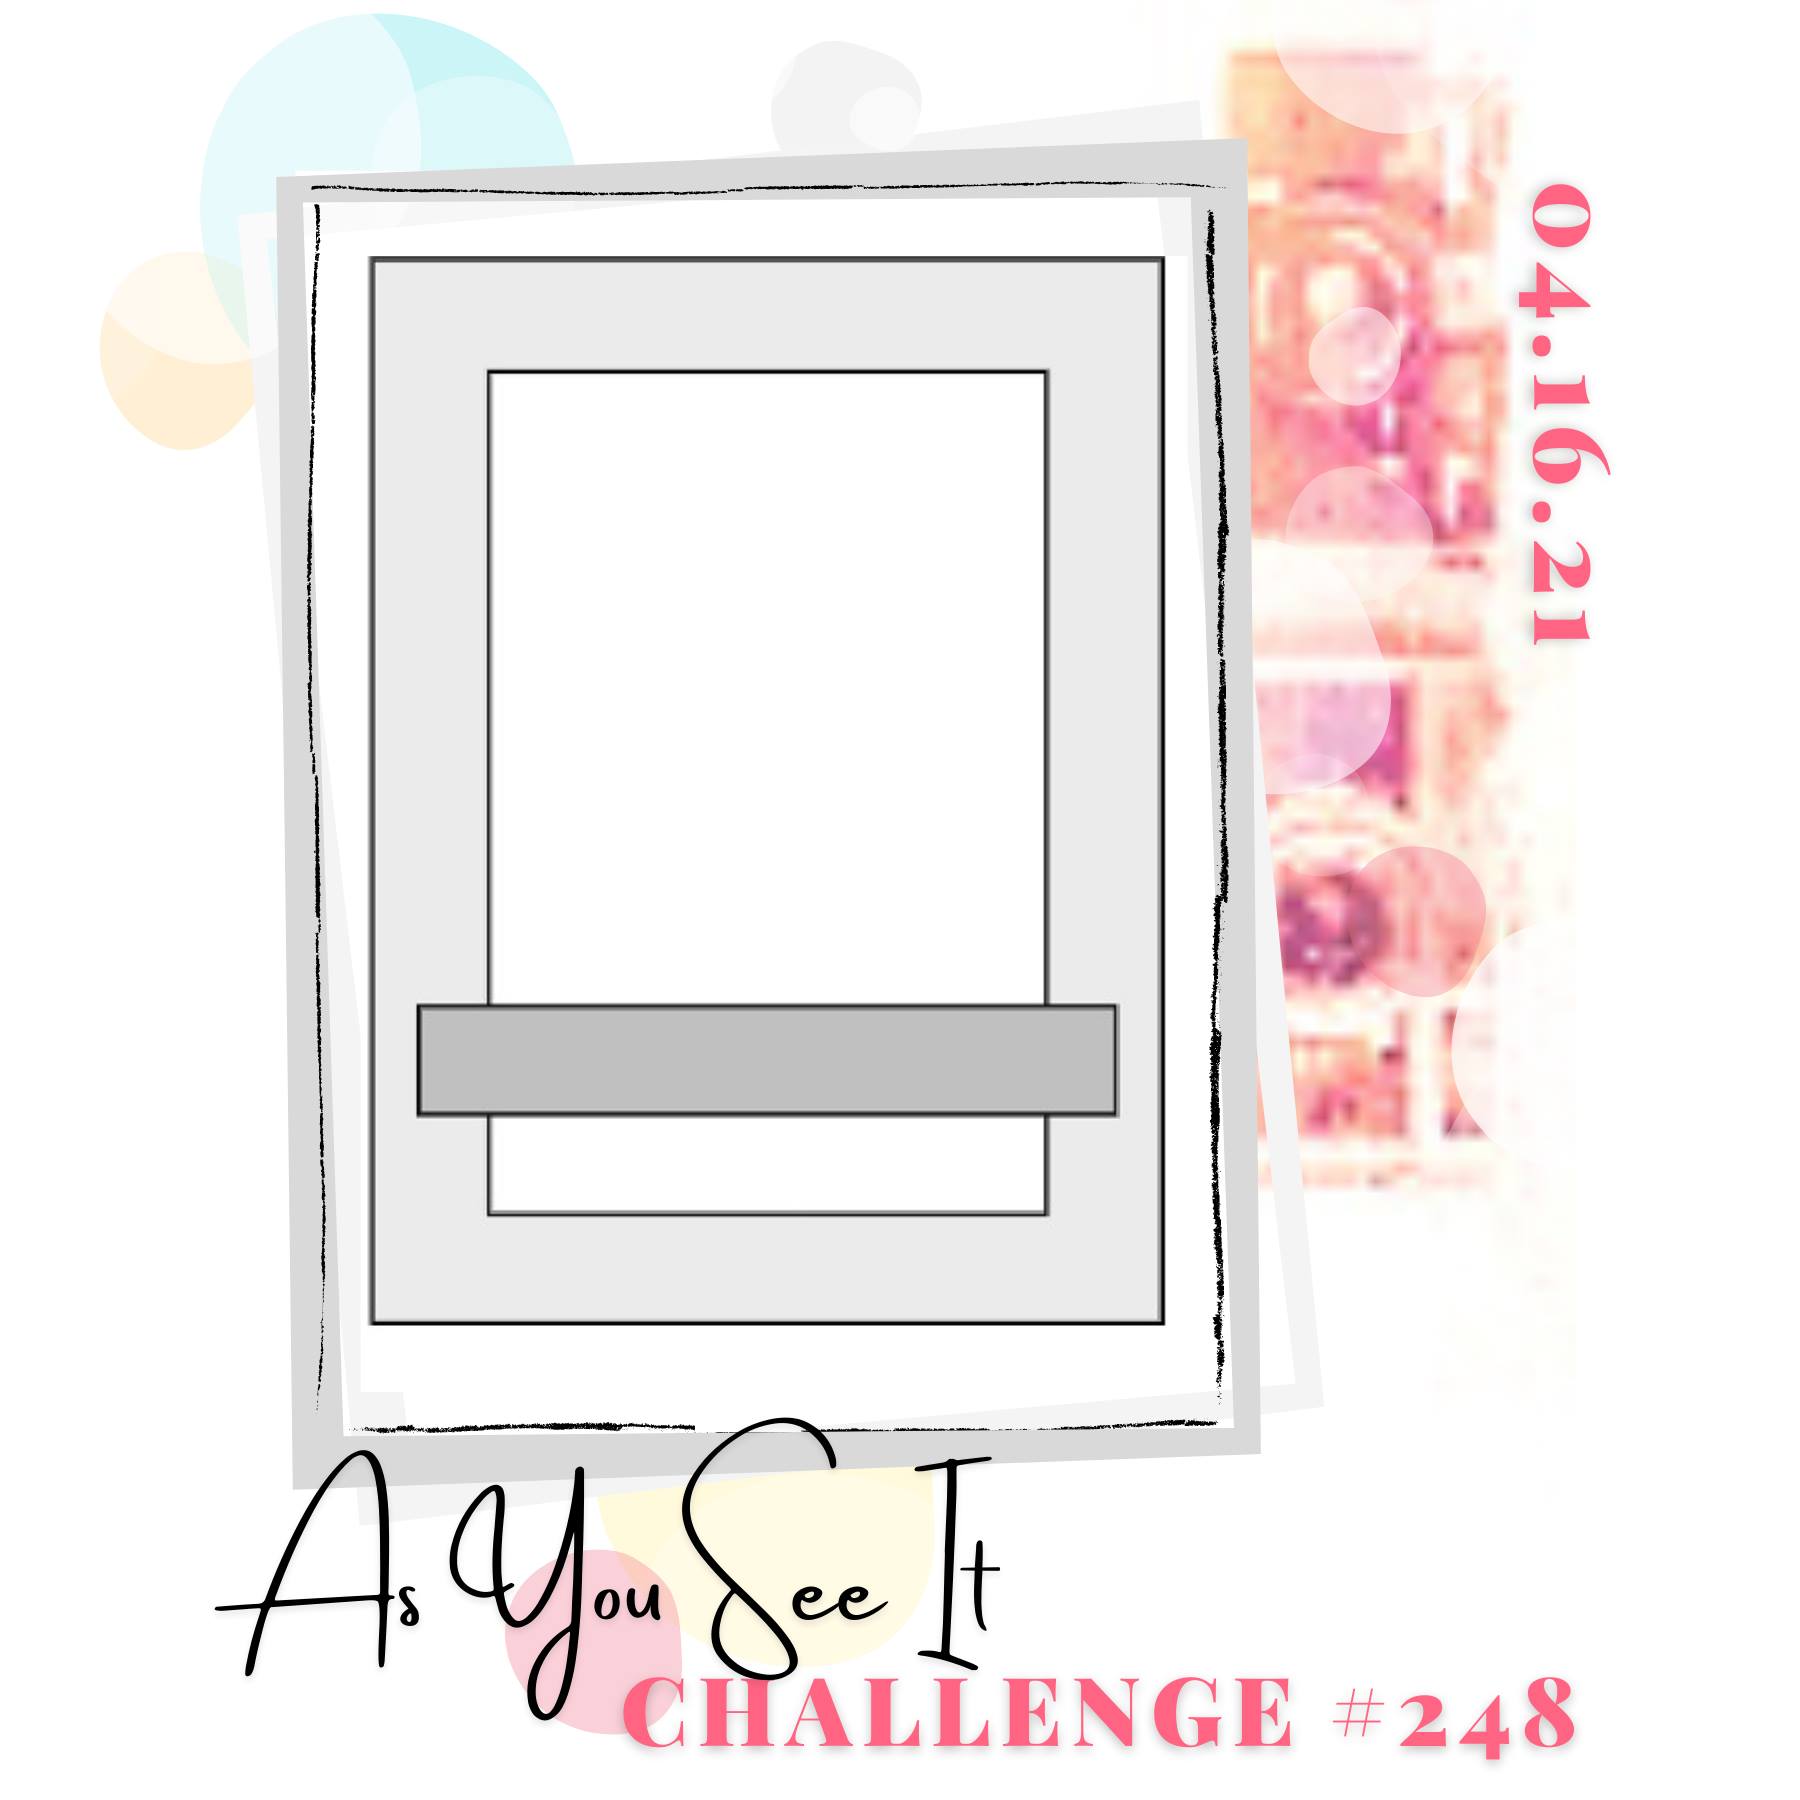
    

So many ways I could have gone with this one! I loved the row of brightly coloured tulips across the bottom of the current inspiration photo over at HandStampedSentiments and the bright green backgrounds on the two pictures above so I thought I would create another card full of spring blooms with this week's sketch - take a look:
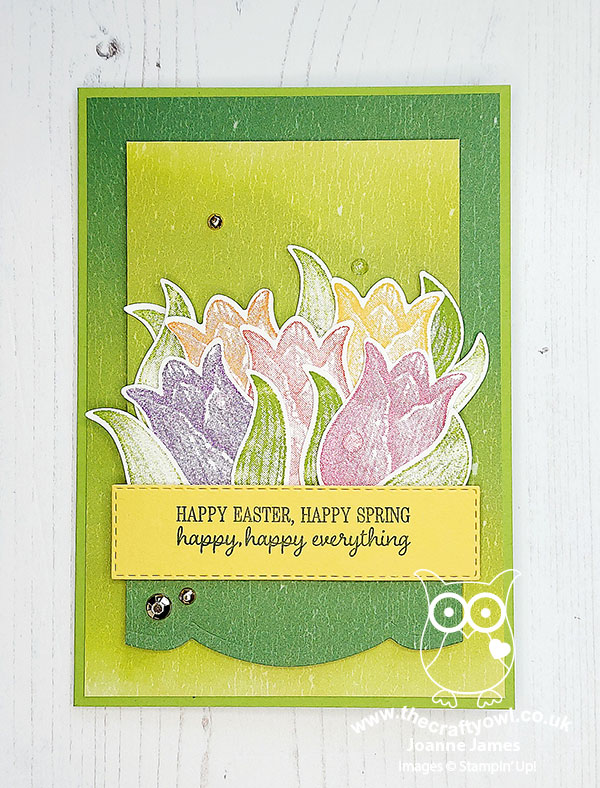
 

Here's the low-down on today's card:

Artistry Blooms - I saw this background on a card by Tami Hewlett recently (you can see Tami's card here) and I loved the effect so was keen to re-create it. I've played around with reverse ombre before, using the Sale-A-Bration Oh So Ombre papers but as today's card shows, the Artistry Blooms paper in the annual catalogue also has some great ombre patterns that you can have some fun with too. I've featured some of the other colour combinations from this pack previously, but this yellow through green piece is the perfect backdrop for some spring flowers I think. 

Timeless Tulips - I chose to feature brightly coloured spring tulips on my card; I simply stamped and punched a whole bunch of them, along with leaves, and built them up behind the cross panel, where I chose to feature my sentiment:
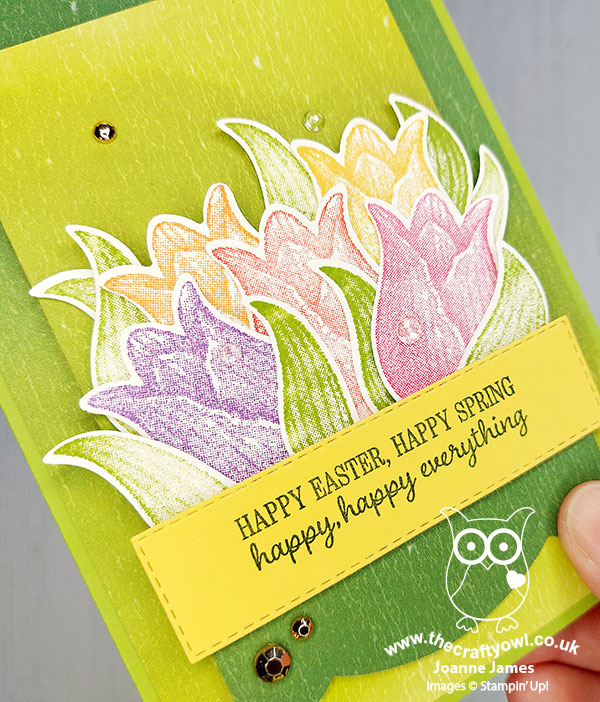
 

 I had a couple of leaves and tulips left over so I added those the the inside of my card too:
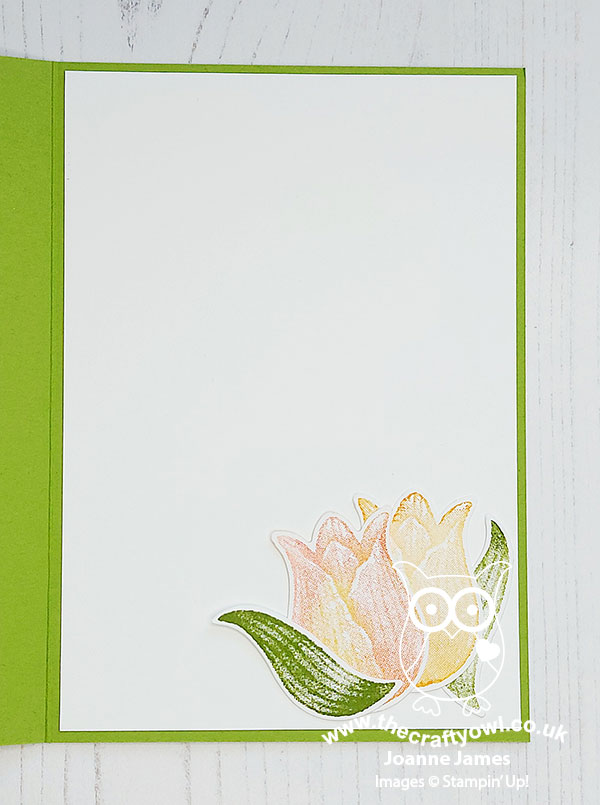
 

Magnolia Memory Border - Aside from adding a sprinkling of dew-like faceted gems and some gold sparklies too, the final detail on my card is the Magnolia Memory border die that I used along the base of my inner rectangle for added interest and detail.

I know this card has an Easter sentiment and this occasion has already passed this year, but it was the perfect fit for my rectangle and I figure it's one off my list for next year - you can never be too organised!

Here is the visual summary of the key products used on today's project for you to pin for easy reference:
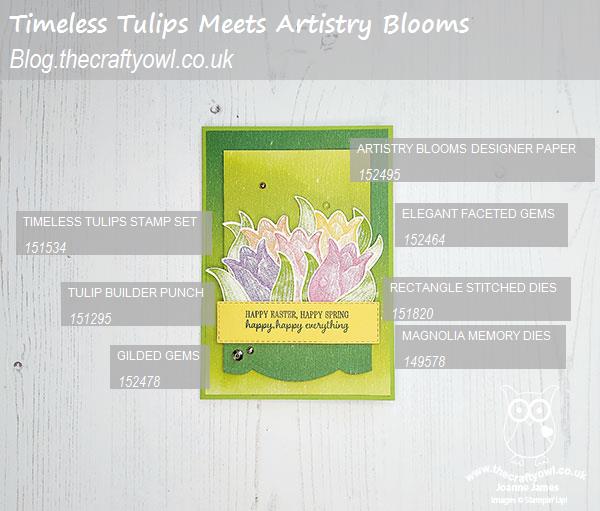
 

You can see all of my 'How To' summaries on my 'How To - Tips and Techniques' Pinterest board in case you've missed any. 

Here's a summary of our challenge rules:

  • Create any card, scrapbooking page, 3D project or packaging project that fits the challenge.
  • Please include the challenge graphic and link back to the challenge in your blog post. Turn off word verification so we can leave you lots of lovely comments. Make sure you link the post not the whole blog to the Linky. Use #AYSIXXX when uploading to a public gallery.
  • If you’re unsure about ‘the rules’, check the details under the Challenge Guidelines tab on the As You See It Challenge homepage.
  • In a sketch challenge, you are welcome to rotate or flip a sketch. You can replace shapes used such as substituting a circle panel for a square panel. However, we must be able to still see the basis of the original sketch in your finished product.
We look forward to seeing your creations in the AYSI gallery.

I am busy with laundry and household chores today. With one of the James Juniors back to school following the recent break, I have only one at home. Unfortunately today he is definitely behaving like 'Kevin the Teenager' from that infamous Harry Enfield sketch: as I move from room to room, he grunts then slopes off in search of peace elsewhere - he is clearly not in helpful mood today! So back to it - enjoy your day and I'll be back tomorrow with another project. Until then, happy stampin'!


Stampin' Up! Supplies Used:

Table built using Product Table Builder by The Crafty Owl - Independent Stampin' Up! Demonstrator.

Let Faith Be Your Biggest Fear Meets Artistry Blooms

by Joanne James12. October 2020 07:00

It's Monday and to start the week I have a short post to share a couple of cards I made with this week's Freshly Made Sketches layout:


They are both encouragement cards, this time with the optional addition of pink, perfect for the current Time Out challenge. One of my cards also features an ombre background which is the trend over at Just Us Girls this week. Here's the first one:


And here's the second one, featuring another of the papers in the Artistry Blooms paper pack: 


Both cards feature a wonderful encouraging sentiment from the 'Ridiculously Awesome' stamp set, that is rather appropriate today as I am headed off for shoulder surgery. I am putting all my faith on my surgeon, that's for sure!

So which one is your favourite? I love them both and will be making a few more with these papers this month whilst they are on offer in the DSP sale :-)

Here is the visual summary of the key products used on today's project for you to pin for easy reference:


You can see all of my 'How To' summaries on my 'How To - Tips and Techniques' Pinterest board in case you've missed any. 

Enjoy your day and I'll be back tomorrow with another project. Until then, happy stampin'!


Stampin' Up! Supplies Used:

Table built using Product Table Builder by The Crafty Owl - Independent Stampin' Up! Demonstrator.

Friendly Silhouettes Palm Beach Sunset

by Joanne James28. July 2020 10:00

As the winds howl and the storm clouds threaten here today in the UK for the second day running, I'm here with thoughts of sunnier days and tropical vacations for today's card! My card was inspired by the following challenges:


That fabulous surfboard in the Inspired By photo is so eye-catching that it totally got me thing of tropical summer beaches and sunsets, so armed with the Inspired by sketch too and the Festive Friday inspo list (I used pink, circles, diecut and summer fun from the inspo list) - I created my dream summer landscape - take a look:


Here's the low-down on today's card:

Friendly Silhouettes - The palm tree dies form the Friendly Silhouettes dies gave me the perfect palm tree pair for my card. These are actually the negative space of the die, so I carefully kept the diecut and used it as a template to piece my palm branches into the correct place to make my scene.

Artistry Blooms - I decided to reach for my designer series papers for my sunset and chose one of the patterns from the Artistry Blooms stamp set. I chose my piece carefully and I can't quite believe how much like a sunset it looks; just what I had in mind and so much easier than creating one with a brayer! 

A Little Added Sparkle - After adding my sentiment to a couple of layered punched circles and popping it up on a dimensional, I looked at my card and felt like it needed a little something more. I reached for a few pots of sequins and carefully went through and chose a few in co-ordinating pinks and oranges and added them randomly across my card, for a little tone-on-tone sparkle. I love the finished result - you can see it better here:

Here is the visual summary of the key products used on today's project for you to pin for easy reference:


You can see all of my 'How To' summaries on my 'How To - Tips and Techniques' Pinterest board in case you've missed any. 

Enjoy your day. We have a day of tasks and errands today, nothing too exciting. I'll be back tomorrow with another project. Until then, happy stampin'!


Stampin' Up! Supplies Used:

Table built using Product Table Builder by The Crafty Owl - Independent Stampin' Up! Demonstrator.

Rainbow Glimmer Balloons for an Amazing Daughter Birthday Card

by Joanne James4. July 2020 20:00

Today I'm sharing a card that is totally fitting for the current Color My Heart Color Dare colour combo - this challenge is celebrating it's 400th challenge, although this is a new-to-me challenge and this is only the second time I've played along (the first time was #399!)

   RRCB 138

My card is for a special celebration too - a certain member of the James household recently celebrated her 15th birthday and as anyone who has been reading my blog for a long time knows, she usually has some exacting requirements as far as her birthday card is concerned! Here is my finished card:


Here's the low-down on today's card:

Rainbow Glimmer and Artistry Blooms - Like me, the minute Miss Rebecca saw the rainbow glimmer paper she fell in love with it - and wanted me to use the green, blue and purple hues for her card. I punched a whole bunch of balloons from this glittery paper, added an epoxy dot to highlight each one and tied each one with some silver thread tied with some retired two-tone ribbon to create my bunch. They really are so pretty and sparkly in real life! I paired them with a co-ordinating ombre paper from the Artistry Blooms pack for the perfect backdrop.Check out all that sparkle and dimension:

Everything Amazing - I'll be honest, I wasn't sure what to combine my glimmer paper with; Master James came to the rescue with his '3 word' game. He suggested we choose 3 words that describe Rebecca that we should then try to incorporate into her card. One of his words was 'amazing' - which led me to the now retired 'Everything Amazing' stamp set. This set dates back to June 2019 and is now but is one I never got to use whilst it was current, so it was good to be able to give it an airing. It's also perfect for Retro Rubber this week since anything goes! I heat embossed the main sentiment in silver then infilled the words in Night of Navy.

And For The Inside - I created a customised inside with the super-useful Family Party set and perfect for special, personalised greetings:


I'm glad to report Rebecca loved her card so another successful birthday card challenge achieved!

Here is the visual summary of the key products used on today's project for you to pin for easy reference:


You can see all of my 'How To' summaries on my 'How To - Tips and Techniques' Pinterest board in case you've missed any. 

Enjoy your evening and I'll be back tomorrow with another project. Until then, happy stampin'!


Stampin' Up! Supplies Used:

Table built using Product Table Builder by The Crafty Owl - Independent Stampin' Up! Demonstrator.

New Online Exclusives

There are new products available exclusively in the online store from 5 November - check them out here.

Latest Kits!

Stampin Cut and Emboss

The Layered Landscapes Kit and Nature's Paintings Kit are the latest kits in the online store - get yours here!

Shop Online

Access my online shop 24 x 7, 365 days of the year:

Current November hostess code:

9NKXDTTR

Shop Online

Mini Catalogue

BROWSE THE CATALOGUE

'Tis The Season - the new Stampin' Up! Mini Catalogue is here! For more details and to download your copy click here

Scrapbooking

Stampin' Up! has introduced a new range of 12x12" scrapbooking product and kit - the full range is now available to purchase online. To download a copy of the new digital Scrapbooking Catalogue click here.

2024-25 Annual Catalogue

BROWSE THE CATALOGUE

Click on the image to download your copy of the 2024-25 annual catalogue. For a full list of current SU! supplies, go to my online store. If you would like any help or advice, please drop me a line at joanne@thecraftyowl.co.uk or give me a call on 07773 421446 - I'd be happy to help.

Join My Team

It's always a great time to join Stampin’ Up! New team members can get £130 worth of products for only £99 + free business supplies + free shipping + all the fun being a part of Stampin’ Up! Stampin' Up! has something for everyone: join my growing team and benefit from my support to enjoy Stampin' Up! however you choose.

If you're interested, call me for a chat to understand how I can help you realise your goals. Alternatively, if you have already decided to sign up and you just can't wait, please click here for the link to the online form where you can sign up and order your starter kit right away! 

About Me

Hi I'm Joanne and live in Northampton and when I'm not looking after my husband and two beautiful children, am an avid crafter with a passion for all things Stampin' Up!

I must confess that I have never been a big rubber stamper - until I discovered Stampin' Up! that is. I love the fact that I can get such great results with co-ordinating stamps, inks, papers and punches - the possibilities are endless! Join me on my stamping journey as I share the things I love and be inspired to create amazing things yourself!

Follow Me

Monthly Newsletter

Box Builder

Click the button above to use Box Buster to create your custom box design using the Envelope Punch Board!

Kits Collection Now Available!

Stampin Cut and Emboss

The new Kits Collection from Stampin' Up! is now available!

Click here to see the current kits available and order yours online today.

I Design For


Stampin' Up Stuff

This is my personal blog and is not endorsed by Stampin’ Up! I hope you find it a plentiful source of ideas and personal inspiration but please don't copy my designs for contest submission or use for classes, publication or sale without express permission.