Today it's Sunday and time for this week's new challenge over at The Paper Players! It's the fabulous LeAnne's turn to host this week and she has a fun challenge for us to work with:


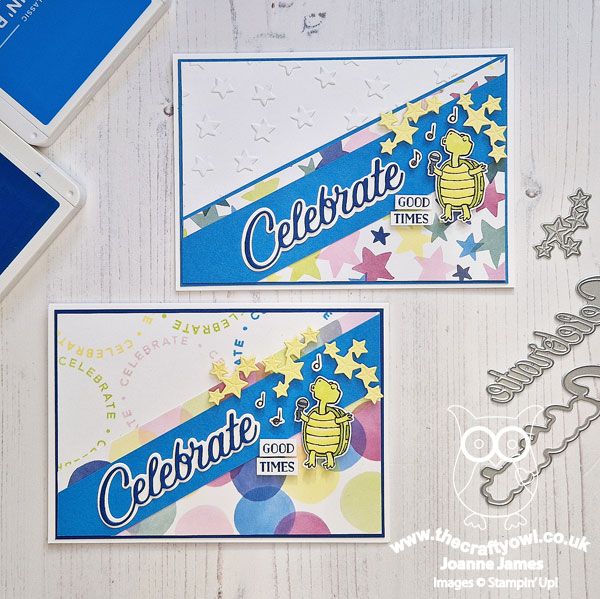
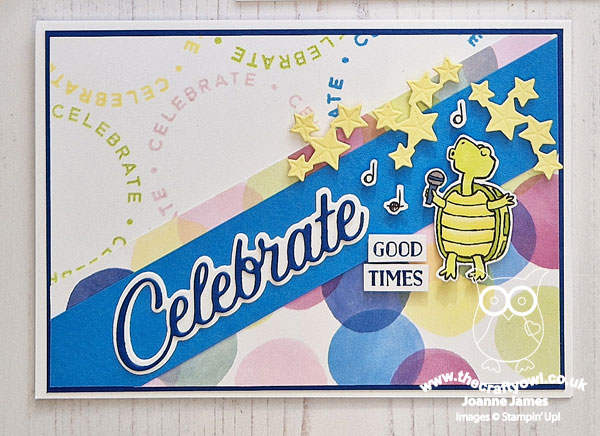
Animal antics - what fun! I decided to embrace the diagonal of Kim's layout over at Freshly Made Sketches this week - I usually shy away from diagonals, but since I hadn't had the opportunity to play along for a couple of weeks and the Design Team had produced such beautiful cards as always, I thought it was time to remedy that - and also played along with the 'music' theme over at Global Design Project #GDP443 this week. I have two things I need to say upfront: today's card does feature a whole bunch of recently retired product (I'm still trying to use up some favourites!) and secondly, I apologise now if today's card leaves you with an earworm you can't stop singing! Time to share my card - take a look:
Here's the low-down on today's card:
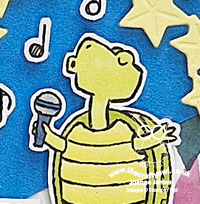
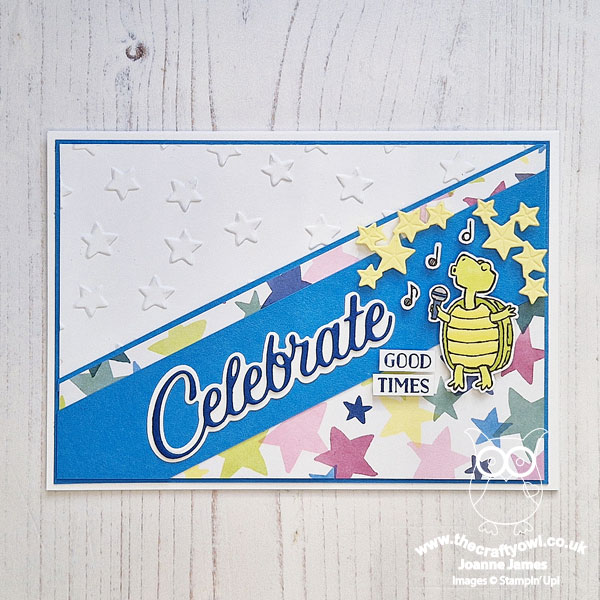
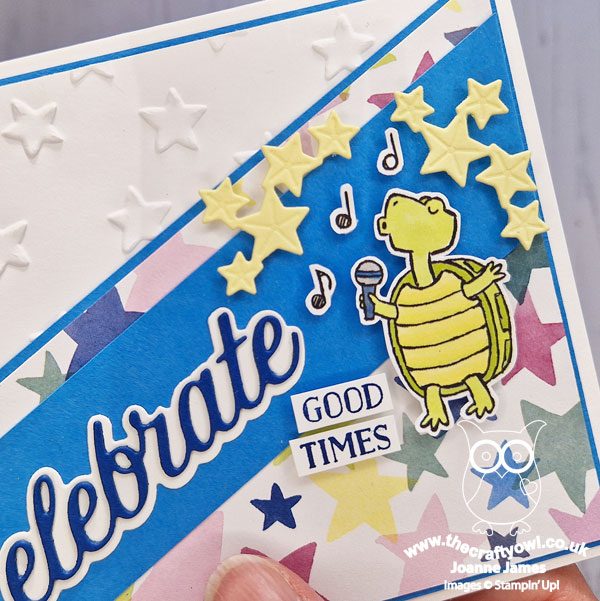
Celebrate Good Times Come On - Yes - who else is now singing along to that classic 80s hit by Kool and the Gang?! Kim envisaged a large sentiment along her diagonal, so I decided to feature the 'celebrate' diecut from the Wanted to Say Dies. I paired it with the words 'good times' stamped from the retired set 'Let The Good Times Roll' to complete my greeting and of course I needed a singer for my song; enter in the singing tortoise from the retired Zoo Crew designer paper - the perfect pop star!
A Star Is Born - I used three different starry elements on my card to create a cohesive design: a panel embossed with the retired Lucky Stars Embossing Folder, a piece of star-patterned designer paper from the retired Bright & Beautiful paper pack and finally some Lemon Lolly stars diecut using another of the dies in the Wanted To Say Dies set. I think it's fair to say that my singing tortoise, just like the intended recipient of my card, has 'star' quality:
Take Two - I originally wanted to use a piece of circle patterned paper for my card, but only had a few scraps left. Once I'd made my starry version, I decided I would go back and make another one using my originally chosen paper. I had to alter the angle of the diagonal slightly in order to make it work. Instead of the embossed panel, I stamped some circles using the retired 'Circle Sayings' stamp set in coordinating colours. Here's my second card:
I thought I would prefer this card, but actually ended up liking my starry version better - go figure! Which one do you prefer? Do leave me a comment below - I'd love to hear your thoughts.
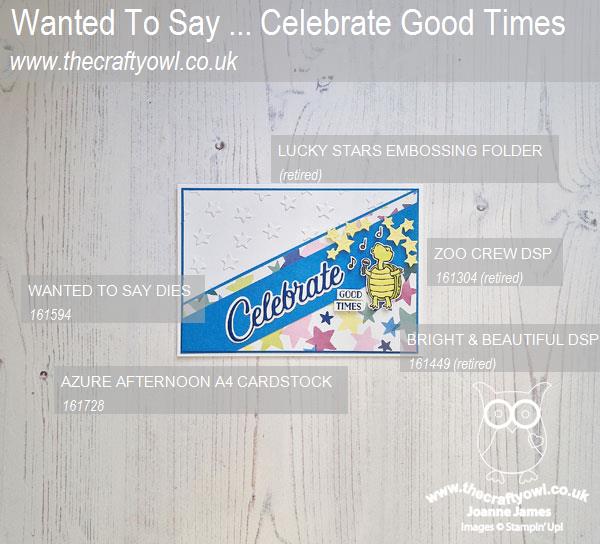
Here is the visual summary of the key products used on today's project for you to pin for easy reference:
You can see all of my Product and 'How To' summaries on my 'How To - Tips and Techniques' Pinterest board in case you've missed any.
Before you reach for your ink and papers, check out what our amazing team has created to inspire you this week:
The Paper Players Design Team
Here's a quick recap of our challenge rules:
1. Create a new paper project
2. Upload your creation to your blog with a link back to us and provide a direct link to the post featuring your challenge submission.
3. Please link your card to no more than four challenges, TOTAL.
4. Have FUN!
Enjoy your day; it was a beautiful day yesterday, which is just as well since the youngest of the James Juniors had his first cricket match of the season with his new club. He received his cap, did some great bowling and fielding and came home happy as the team won their game too. I'm hoping for another warm day today, but we do have a Bank Holiday long weekend here in the UK this weekend, so that usually means rain! I'll be back tomorrow with another project. Until then, happy stampin'!
Stampin' Up! Supplies Used: