Farewell to Hand Penned Petals And More PP635

by Joanne James9. April 2023 08:00

Today it's Sunday and time for this week's new challenge over at The Paper Players! It's my turn to host this week and I've a colour challenge for you to work with:
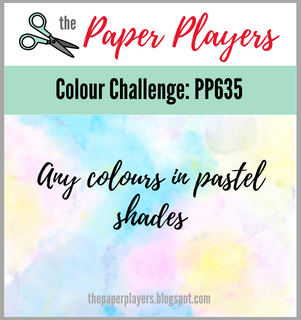
    

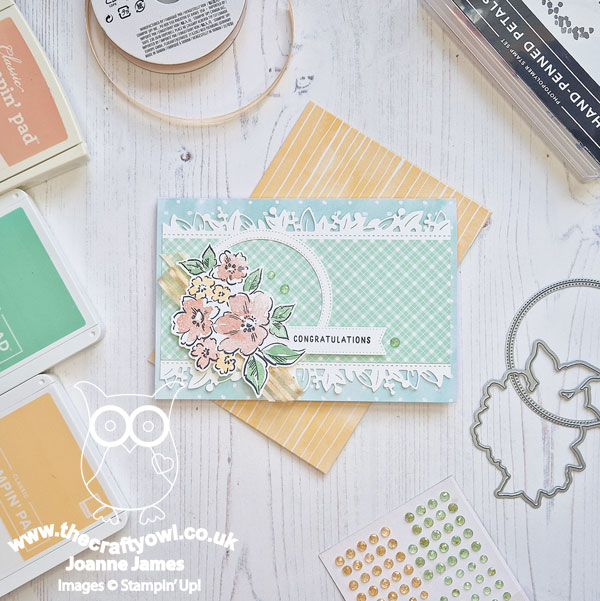
I chose pastel colours for this week's challenge; I rarely choose pastels as a starting point, much preferring brights, so I thought this would both challenge me and also give me a gallery full of pastel design inspiration - a win-win I'd say! With the recent Stampin' Up! announcement of a full colour refresh, we are saying goodbye to not only the outgoing 2021-23 in-colours, but several from across the colour families too. I've used one of the retiring in-colours and three of the four retiring pastels from the subtles family on my cards today along with the layout over at Try Stamping on Tuesday - take a look at the first one:
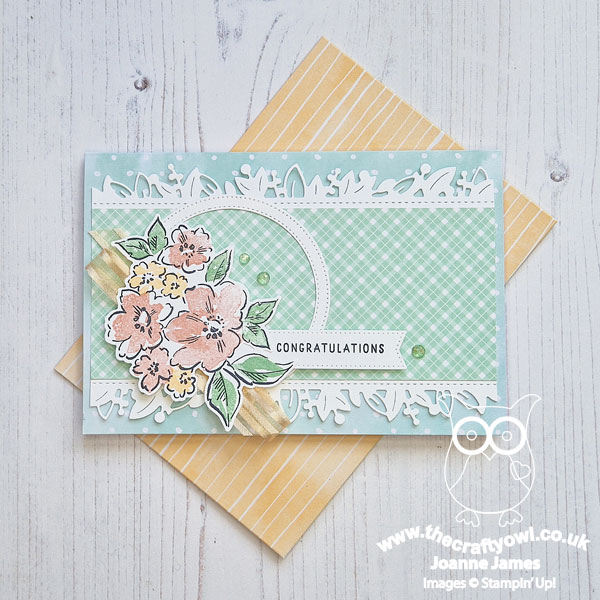
 

Here's the low-down on today's card:

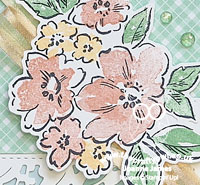
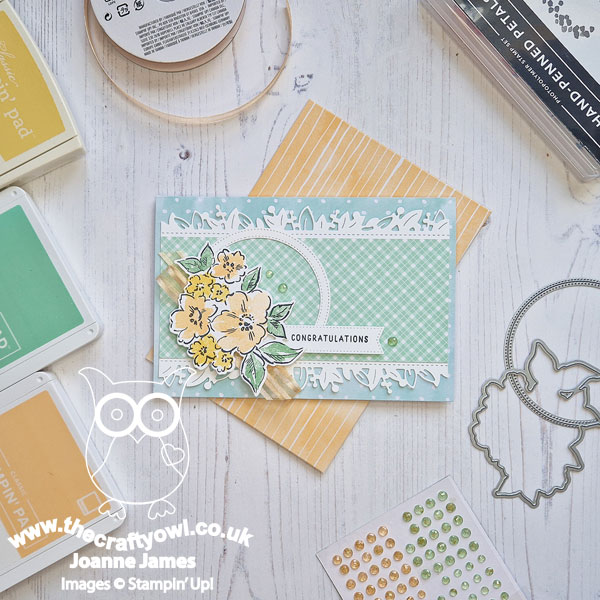
Farewell Hand Penned Petals - I used the retiring 'Hand Painted Petals' stamp set and coordinating Penned Flowers Dies on my car today, along with the border dies from the Eden Dies set, also retiring, to pick out the border edge of my Country Gingham panel. This is a great stamp set if you're new to stamping - it has both outline stamps and individual pieces to infill the various flowers and leaves with colour, but they intentionally don't line up with each other exactly. The easy, artsy look means that you don't have to align the stamps perfectly - yet they still look great, perfect for a beginner! Get your stamp set and dies from my online store here whilst stocks last. 

Bye, Bye Blushing Bride - This card features Blushing Bride and Mint Macaron, retiring pastels from the Subtles family, along with Pale Papaya, a retiring in-colour. I've never been a big fan of Blushing Bride (I find it a 'muddy' pink) but I do think it can be enhanced when paired with other colours. Paired with the peachy tones of Pale Papaya and the fresh green of Mint Macaron and some ribbon and gems in those colours too, it does look quite pretty - what do you think?
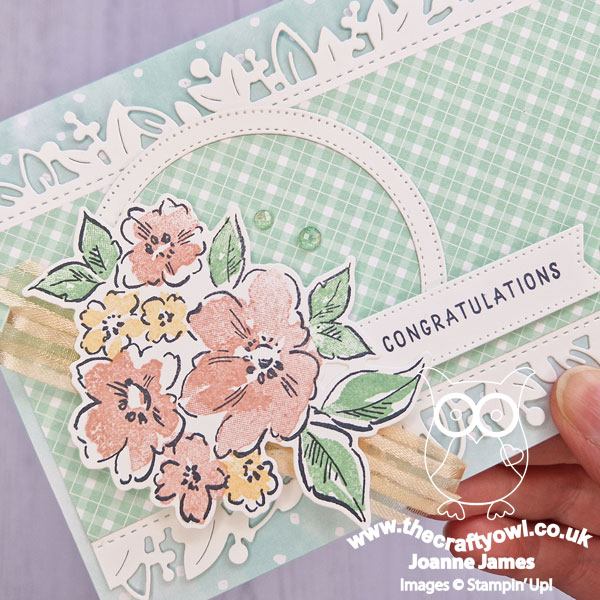
 

So Long, So Saffron - So Saffron is another of the departing Subtles, so I decided to make a variation on my first card using Pale Papaya for the larger flowers and the pale yellow of So Saffron for the smaller ones; all other details were the same.
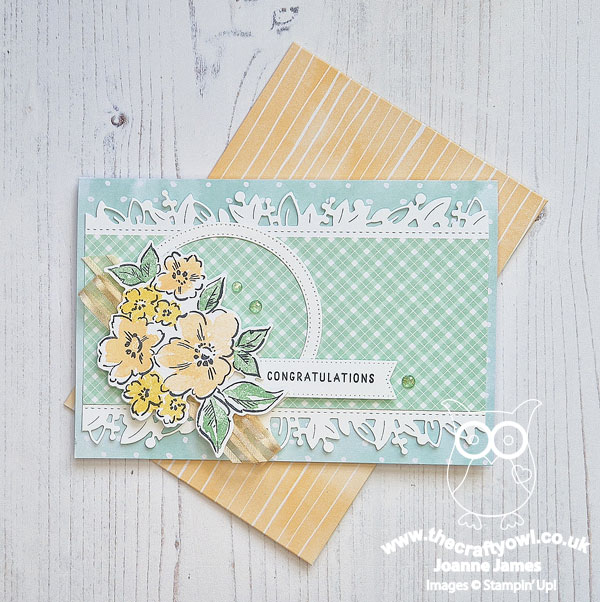
I think I prefer this version, but I'll leave it for you to decide if you have a favourite!
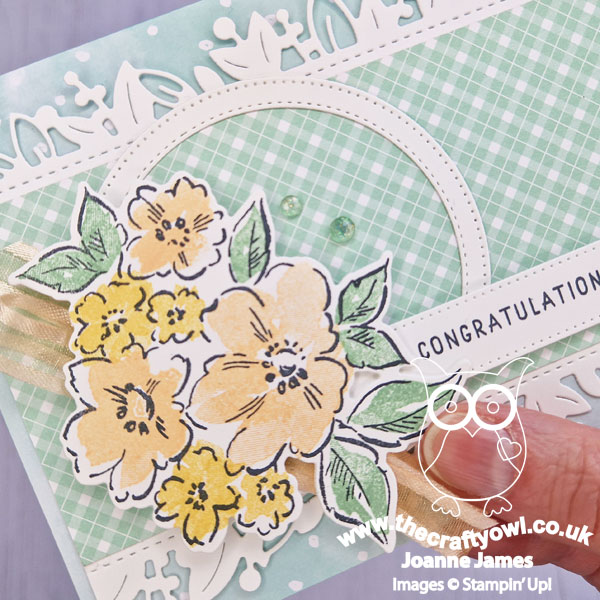
 

So are you a fan of the Subtles colour family and pastel shades? If so, you should definitely consider entering our challenge this week!

Here is the visual summary of the key products used on today's projects for you to pin for easy reference:
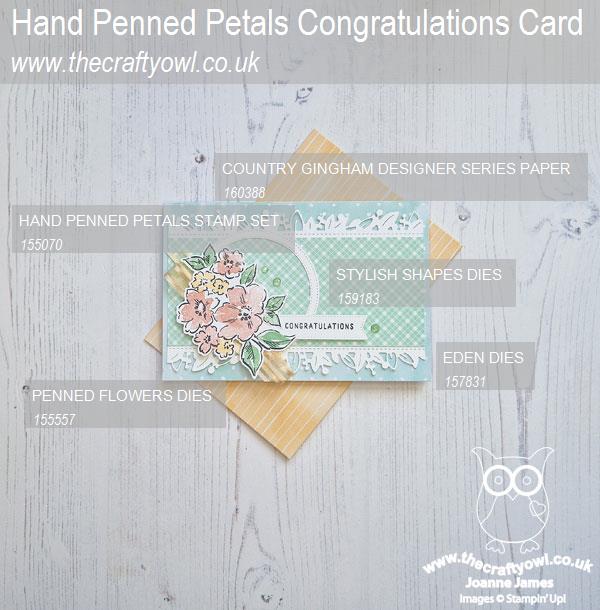
 

And the second one:
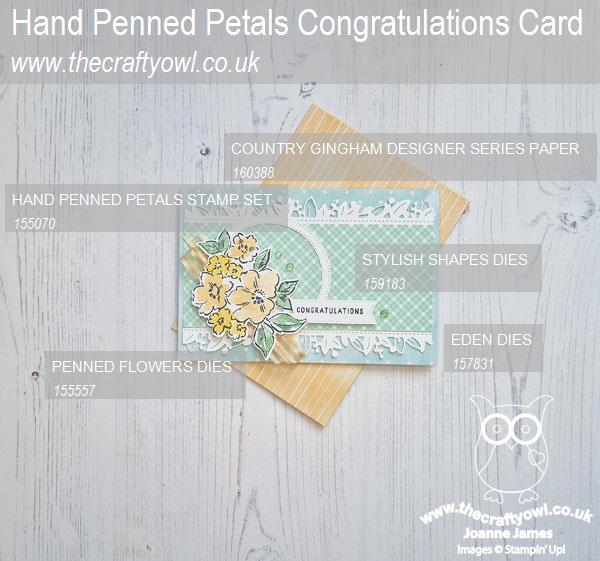
You can see all of my Product and 'How To' summaries on my 'How To - Tips and Techniques' Pinterest board in case you've missed any. 

Before you reach for your ink and papers, check out what our amazing team has created to inspire you this week:

Here's a quick recap of our challenge rules:
 
1.  Create a new paper project
2.  Upload your creation to your blog with a link back to us and provide a direct link to the post featuring your challenge submission.
3.  Please link your card to no more than four challenges, TOTAL.
4.  Have FUN!

Enjoy your day; I'm off to set up my Easter egg hunt for the James Juniors - they might be in their teens now, but they still like to hunt for their chocolate, they are nothing if not sticklers for tradition! We have a roast turkey lunch planned then this afternoon will be spent consuming the fruit of their spoils and if the sun continues to shine, walking it off! I'll be back tomorrow with another project. Until then, happy stampin'!


Easter Bunnies Are Not Just For Easter PP634

by Joanne James2. April 2023 08:00

Today it's Sunday and time for this week's new challenge over at The Paper Players! It's the turn of the fabulous Jaydee to host this week and she has a theme challenge for us to work with:


The animals came in two by two - feature two animals on your card, how fun! I actually have two cards to share with you today: I made my Paper Players card after I made the first one, so I'll share that one first so that the second one makes a bit more sense! My first card is an Easter card using Jen T's layout over at Freshly Made Sketches and the current Colour Inkspiration colour palette:

    May be an image of text

I thought the oval layout would be perfect for two bunnies and the colour palette would be just the ticket for a dark chocolate brown bunny and some floral decoration courtesy of the Dainty Delight Dies - take a look:


Whilst the layout worked beautifully for one bunny, two were definitely a squeeze, so having added some soft clouds and grass to surround my single bunny, I decided to add an Easter sentiment from the retired set 'Crazy About You'. This is such a pretty colour combo and I love the embossed detail on the Dainty Delight flowers and leaves too:


I then moved on to card two. I punched another bunny so that I had another pair and also had the country gingham oval left over from my first card that I still wanted to use up, so this time I switched to the current Sketch Saturday layout and decided to play along with the challenge over at TGIF Challenges and look at what other scraps and offcuts I had that would co-ordinate with my gingham oval.


I actually had quite a few! A strip of Country Floral designer paper leftover from a previous project, an offcut of Mint Macaron and some offcut strips of Wisper White that were just wide enough to cut a couple of borders with my Penned Flowers Dies and a scrap of Poppy Parade. This is what I came up with:


I used a Petal Pink card base and this time positioned my bunnies mirroring each other, with a punched heart between them. I really wanted a 'Some bunny loves you' sentiment but alas, I don't have one in my collection so went with this one from the retired Sale-A-Bration set 'Thanks A Bunch' instead:


I think this would make a sweet anniversary card;. It actually came together quite quickly by collecting up a bunch of leftover bits and pieces and more importantly - I managed to accommodate my two bunnies this time!

Here is the visual summary of the key products used on today's projects for you to pin for easy reference:


You can see all of my Product and 'How To' summaries on my 'How To - Tips and Techniques' Pinterest board in case you've missed any. 

Before you reach for your ink and papers, check out what our amazing team has created to inspire you this week:

Here's a quick recap of our challenge rules:
 
1.  Create a new paper project
2.  Upload your creation to your blog with a link back to us and provide a direct link to the post featuring your challenge submission.
3.  Please link your card to no more than four challenges, TOTAL.
4.  Have FUN!

Enjoy your day; I am off to an extra hockey game today and then we have the start of the Easter holidays, which for us means the start of serious revision season in the James household - not much in the way of excitement here! I'll be back tomorrow with another project. Until then, happy stampin'!


Stampin' Up! Supplies Used: 

Table built using Product Table Builder by The Crafty Owl - Independent Stampin' Up! Demonstrator.


Ink Blended Penned Flowers Easter Card TTT202

by Joanne James30. March 2023 15:00

It's Thursday and time for a new challenge over at TicTacToe! It's the turn of Team X to host this week and the lovely Betty is our featured designer this week. This is the fun board that we are playing along with: 


I took the third column of diecuts, pastel colours and Easter and using the colour palette over at Hand Stamped Sentiments I created an Easter card for the theme at Global Design Project #GDP387 - take a look:


Here's the low-down on today's card:

The design of my card was inspired by a summer-themed card I'd seen on Pinterest that featured a modern block sentiment when I was looking for ink blending inspiration. I wanted my sentiment to fit inside a square, so used my (retired) Playful Alphabet Dies as they were just the right shape and size. I blended all three colours using blending brushes onto a sheet of white cardstock - once in defined rows (I cut my sentiment square from this piece) and then on randomly on a larger area; I used this piece to diecut my two flower elements using the Penned Flowers Dies. I recommend you colour your cardstock before you diecut the pieces rather than afterwards, as this helps you avoid dark edges. Once I'd coloured my square and cut it out using the Stylish Shapes Dies, I diecut out the letters, then cut the same letters again in white and inset them into the negative space:


 I backed the whole thing onto a panel of neutral Smoky Slate grey and added a few iridescent rhinestones for a little extra sparkle. The letters I diecut from the outside square panel didn't go to waste; I used them for the sentiment on the inside of my card, with an extra diecut piece for decoration:


I also decorated the envelope with the stamp from the Hand Painted Petals stamp set for a little extra detail. Not a bunny, chick or Easter egg in sight, but I think this is a pretty Easter card nonetheless and I'm really pleased with the way it turned out. It just goes to show you don't always need to have themed supplies in order to make a card for a particular occasion - you just have to get creative with what you have in your stash!

Here is the visual summary of the key products used on today's project for you to pin for easy reference:


You can see all of my Product and 'How To' summaries on my 'How To - Tips and Techniques' Pinterest board in case you've missed any. 

A tictactoe board offers so many creative possibilities - how does this week's board inspire you? Why not have a go? We would love to see you in the gallery and who knows - you might be selected for Designer's Choice and be eligible to be a guest designer on a future challenge. 

Apologies that it's been a little quiet around here; I've been single parenting this week and so have had very little opportunity to get in my craft room and when I have, my creative mojo has been struggling to craft under pressure! I still feel like I'm catching up on that lost hour from the clocks going back on Sunday; the James Juniors break up for the Easter holidays tomorrow and I have to say, the end of term can't come soon enough! I'll be back tomorrow with another project for our new challenge over at Festive Friday. Until then, happy stampin'!


Stampin' Up! Supplies Used: 

Table built using Product Table Builder by The Crafty Owl - Independent Stampin' Up! Demonstrator.

Penned Flowers Thank You in Pretty Peacock and Gold

by Joanne James16. February 2023 14:00

Today I'm sharing a card I made to squeak in an entry for this week's Just Us Girls Challenge using the colour combo over at AAA Cards and the Paper Craft Crew layout:


So the best thing to add sparkle to a card? Glimmer paper, of course! No shed, no mess - it's the best! I chose some gold glimmer paper (sadly now retired again, but every time it comes back I grab some to keep me going!) and paired it with some (retired) Pretty Peacock ink and cardstock for a clean an simple card using a bundle I haven't used in ages - take a look:


Here's the low-down on today's card:

I stamped the posy image from the 'Hand Penned Petals' stamp set directly onto my cardfront for a tone-on-tone effect, then added a strip of (retired) designer paper that I sponged in ink to dull the white pattern and trimmed this with a border cut from distressed gold paper. I then diecut the same posy image from gold glimmer paper and popped it on dimensionals, slightly offset from the stamped image:

I heat embossed my sentiment in gold and added a trio of gold enamel dots for a final touch of sparkle.

Were you a fan of Pretty Peacock when it was an in-colour a few years ago? If so, I have some news for you! This colour, along with one other previous retired in-colour, Lost Lagoon, are returning with the launch of some Online Exclusives on 1st March - this will be a rolling collection of products that will only be available online. I'll have more on that at the start of March - if you can't wait that long, do get in touch; for those who join Stampin' Up! before the end of this month, there is the opportunity to order these items that are currently on pre-order as part of your starter kit - another reason to join Stampin' Up! sooner rather than later!

Here is the visual summary of the key products used on today's project for you to pin for easy reference:


You can see all of my 'How To' summaries on my 'How To - Tips and Techniques' Pinterest board in case you've missed any. 

Enjoy your day and I'll be back tomorrow with another project. Until then, happy stampin'!


Stampin' Up! Supplies Used:

Table built using Product Table Builder by The Crafty Owl - Independent Stampin' Up! Demonstrator.

Santa Express Memories and More Card PP613 CAS

by Joanne James16. October 2022 08:00

Today it's Sunday and time for this week's new challenge over at The Paper Players! It's the turn of the fabulous LeAnne to host this week and she has a fun clean and simple challenge for us to work with:


I used Judy's great sketch over at Freshly Made Sketches this week for my layout and found some wheels on Santa's Express train for my no-stamping clean and simple card - take a look:


Here's the low-down on today's card:

Today's card really is so simple! I used a pair of Santa Express Memories & More cards to create my fun scene: I trimmed one down for the background then fussy cut my santa express train from another to create my snowy scene. I added a couple of borders, some (retired) Petal Pink ribbon to the bottom border and a few (retired) adhesive snowflakes to complete my scene:

I didn't even have to stamp a sentiment as there was already one printed onto the Memories & More card! These are great for quick cards and the acetates and wooden diecut words that are also included in the pack make this set great value for Christmas crafting. 

Here is the visual summary of the key products used on today's project for you to pin for easy reference:


You can see all of my Product and 'How To' summaries on my 'How To - Tips and Techniques' Pinterest board in case you've missed any. 

Before you reach for your ink and papers, check out what our amazing team has created to inspire you this week:

Here's a quick recap of our challenge rules:
 
1.  Create a new paper project
2.  Upload your creation to your blog with a link back to us and provide a direct link to the post featuring your challenge submission.
3.  Please link your card to no more than four challenges, TOTAL.
4.  Have FUN!

Enjoy your day; we will be catching up on homework following another university open day visit yesterday for one of the James Juniors, whilst the other will be recovering from an army cadet sleepout under an improvised shelter and looking forward to a few home comforts! I'll be back tomorrow with another project. Until then, happy stampin'!


Stampin' Up! Supplies Used: 

Table built using Product Table Builder by The Crafty Owl - Independent Stampin' Up! Demonstrator.

Pierced Blooms And A Hippo Birthday PP586

by Joanne James10. April 2022 08:00

Today it's Sunday and time for this week's new challenge over at The Paper Players! It's the turn of the fabulous Anne Marie to host this week and she has a bright colour challenge for us to work with:


I love Anne Marie's bright and sunny colours this week and ended up making a couple of cards. First up I used this week's layout over at Hand Stamped Sentiments and went with some florals, care of my Pierced Blooms Dies - take a look:


Here's the low-down on today's card:

I diecut a trio of layered flowers and leaves and paired them with a piece of Daffodil Delight coloured Hand Penned designer series paper and used white as my neutral. A few polished pink gems add a touch of sparkle to the front of my card:


And a little extra stamping inside completes my card:


I wanted to try and use these colours on something other than flowers, so made a second card using the retiring 'Hippo Happiness' stamp set and co-ordinating Hippo & Friends Dies:


Some simple stamping and diecutting is all there is to it. The best part about this card is definitely the punny sentiment though - Hippo birthday...


... 2 ewe! Isn't that just so sweet?!


I used the sketch over at TGIF Challenges this week for the layout for this card and I am also linking up over at SUO Challenges where they are all about 'animals and critters' for their current challenge.

Two very different cards but I think both work with these colours. Which one do you prefer? Do leave me a comment below - I'd love to hear your thoughts.

Here is the visual summary of the key products used on today's projects for you to pin for easy reference:


You can see all of my Product and 'How To' summaries on my 'How To - Tips and Techniques' Pinterest board in case you've missed any. 

Before you reach for your ink and papers, check out what our amazing team has created to inspire you this week:

Here's a quick recap of our challenge rules:
 
1.  Create a new paper project
2.  Upload your creation to your blog with a link back to us and provide a direct link to the post featuring your challenge submission.
3.  Please link your card to no more than four challenges, TOTAL.
4.  Have FUN!

Enjoy your day; we have some chores to take care of and we are out to lunch - should be a good day! I'll be back tomorrow with another project. Until then, happy stampin'!


Stampin' Up! Supplies Used (where still available): 

Table built using Product Table Builder by The Crafty Owl - Independent Stampin' Up! Demonstrator.


Merry and Bright Evening Evergreen Shimmer Delicate Bauble Card

by Joanne James10. November 2021 20:30

Today I'm sharing a card that uses the current sketch over at Try Stamping on Tuesday that I designed with Nancy's word prompt at Just Us Girls in mind:


I had the perfect focal point to encompass Nancy's 'merry' theme - take a look:


Here's the low-down on today's card:

Delicate Baubles Dies - You know how much I love the Christmas tree die in this set; I thought it was time to show you one of the two dies that featured a sentiment (the other is 'Joy' - I'll share that another time). I cut out the 'Merry and Bright' detailed layer in gold foil and backed it with a piece of Evening Evergreen shimmer vellum for some subtle festive shimmer and sparkle.


Ever Eden - I added a panel of foiled green Ever Eden specialty designer series paper to my card base and bordered it with some gold foil stitched scalloped edging cut with one of the Hand Penned Dies. And since 'P is for Patterned Paper' I'm also linking today's card up with the team over at The Alphabet Challenge.

Finishing Touches - Some gold gilded gems and an in-colour gem was all that was needed to complete today's card. 

I love the soothing greens of the Eden's Garden Suite; I love how the foil and the addition of some shimmer makes them perfectively festive too.

Here is the visual summary of the key products used on today's project for you to pin for easy reference:


You can see all of my 'How To' summaries on my 'How To - Tips and Techniques' Pinterest board in case you've missed any. 

I've had a full-on day today, culminating in Parents' Evening for one of the James Juniors. It's amazing how focused teachers can be when each appointment lasts only 5 minutes! Enjoy your day and I'll be back tomorrow with another project. Until then, happy stampin'!


Stampin' Up! Supplies Used:

Table built using Product Table Builder by The Crafty Owl - Independent Stampin' Up! Demonstrator.

New Online Exclusives

There are new products available exclusively in the online store from 5 November - check them out here.

Latest Kits!

Stampin Cut and Emboss

The Layered Landscapes Kit and Nature's Paintings Kit are the latest kits in the online store - get yours here!

Shop Online

Access my online shop 24 x 7, 365 days of the year:

Current November hostess code:

9NKXDTTR

Shop Online

Mini Catalogue

BROWSE THE CATALOGUE

'Tis The Season - the new Stampin' Up! Mini Catalogue is here! For more details and to download your copy click here

Scrapbooking

Stampin' Up! has introduced a new range of 12x12" scrapbooking product and kit - the full range is now available to purchase online. To download a copy of the new digital Scrapbooking Catalogue click here.

2024-25 Annual Catalogue

BROWSE THE CATALOGUE

Click on the image to download your copy of the 2024-25 annual catalogue. For a full list of current SU! supplies, go to my online store. If you would like any help or advice, please drop me a line at joanne@thecraftyowl.co.uk or give me a call on 07773 421446 - I'd be happy to help.

Join My Team

It's always a great time to join Stampin’ Up! New team members can get £130 worth of products for only £99 + free business supplies + free shipping + all the fun being a part of Stampin’ Up! Stampin' Up! has something for everyone: join my growing team and benefit from my support to enjoy Stampin' Up! however you choose.

If you're interested, call me for a chat to understand how I can help you realise your goals. Alternatively, if you have already decided to sign up and you just can't wait, please click here for the link to the online form where you can sign up and order your starter kit right away! 

About Me

Hi I'm Joanne and live in Northampton and when I'm not looking after my husband and two beautiful children, am an avid crafter with a passion for all things Stampin' Up!

I must confess that I have never been a big rubber stamper - until I discovered Stampin' Up! that is. I love the fact that I can get such great results with co-ordinating stamps, inks, papers and punches - the possibilities are endless! Join me on my stamping journey as I share the things I love and be inspired to create amazing things yourself!

Follow Me

Monthly Newsletter

Box Builder

Click the button above to use Box Buster to create your custom box design using the Envelope Punch Board!

Kits Collection Now Available!

Stampin Cut and Emboss

The new Kits Collection from Stampin' Up! is now available!

Click here to see the current kits available and order yours online today.

I Design For


Stampin' Up Stuff

This is my personal blog and is not endorsed by Stampin’ Up! I hope you find it a plentiful source of ideas and personal inspiration but please don't copy my designs for contest submission or use for classes, publication or sale without express permission.