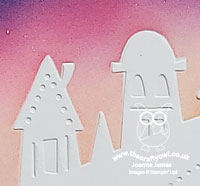
Iconic Imagery Charming Landscapes Christmas Card

by Joanne James29. September 2024 11:10

Today I've another quick post that I meant to share yesterday, but didn't get around to it! I finally managed to create a card for the Color Hues Challenge that is almost over that is also perfect for stencil week over at Just Us Girlstake a look:


I had a little 'something old, something new' in mind for today's card - another Christmas card - take a look:


Here's the low-down on today's card:

Charming Landscapes - This card features a panel embossed with one of the retired Charming Landscapes embossing folders that is still a favourite of mine. These folders are great for adding embossed background layers to your cards, but I love pairing them with blended sky and making them the main feature. The village scene is my favourite of the two, so that's what I used for my card. 

Stencilled Sky - In order to keep my blended colour to the sky portion of my scene only, I created stencil masks for each embossing folder, by running it through my Big Shot with some acetate window sheet and using a scissors and craft knife to cut around the mountains/houses. I attached each to my white embossed cardstock and held in place before adding my ink colours, then removed when complete. I think the fresh blue and pink works really well, even if it makes for a slightly less conventional festive colour scheme. Once my blended sky was complete, I went over the star and snowflake details with a white gel pen and added a couple of rhinestones for a subtle sparkle. 

Iconic Imagery - I wanted to bring my embossing folder up to date by pairing with a new sentiment set, and the bold script of the online exclusive 'Iconic Imagery' stamp set was just the thing. I stamped one part in pink directly onto the embossed panel, then fussy cut the word 'celebrate' stamped in blue for a little extra impact:

I matted my decorated panel with each of the challenge colours too to complete my card.

Here is the visual summary of the key products used on today's project for you to pin for easy reference:


You can see all of my 'How To' summaries on my 'How To - Tips and Techniques' Pinterest board in case you've missed any. 

Enjoy your day and I'll be back tomorrow with another project. Until then, happy stampin'!


Stampin' Up! Supplies Used:

Table built using Product Table Builder by The Crafty Owl - Independent Stampin' Up! Demonstrator.

Penguin Place Meets Charming Landscapes PP619

by Joanne James27. November 2022 08:00

Today it's Sunday and time for this week's new challenge over at The Paper Players! It's the turn of the fabulous Laurie to host this week and she has my favourite, a sketch, for us to work with:


I decided to use a little 'something old(er), something new' on my card this week - take a look:


Here's the low-down on today's card:

I almost used the returning favourite 'Penguin Place' stamp set on my card for last week's challenge, but went in a different direction so decided to use it this week instead. This is one of the sets that carried over from last year, but I haven't used much this time around so thought it was time to remedy that. I paired the sliding penguin with an embossed background courtesy of one of the new Charming Landscapes embossing folders - I just love these and the one with the mountains has perfectly embossed curved lines that suited the contours of the penguin. I masked off the mountains and inked in the sky using my beldning brushes as I've done on previous cards using this set and used some (retired) white frosted shimmer paint to paint back in the snowflakes. You can see that more closely, as well as some of the embossed detail, more clearly below:

I stamped and fussy cut a few trees in blue to co-ordinate with my scene (which I painted with clear Wink of Stella for added sparkle) and the snowflake-patterned Storybook Gnomes paper I used for my outer frame. I added a simple sentiment to the front which I paired with this one on the inside:


I'm clearly entering my 'blue' phase as far as Christmas cards are concerned - it was fun to play with this cute penguin again though!

Here is the visual summary of the key products used on today's project for you to pin for easy reference:


You can see all of my Product and 'How To' summaries on my 'How To - Tips and Techniques' Pinterest board in case you've missed any. 

Before you reach for your ink and papers, check out what our amazing team has created to inspire you this week:

Here's a quick recap of our challenge rules:
 
1.  Create a new paper project
2.  Upload your creation to your blog with a link back to us and provide a direct link to the post featuring your challenge submission.
3.  Please link your card to no more than four challenges, TOTAL.
4.  Have FUN!

Enjoy your day; we are off to the cinema this afternoon to watch a streamed theatre production of Charles Dickens' 'A Christmas Carol' - nothing like a GCSE English Literature course to lead to a fun family afternoon out! I'll be back tomorrow with another project. Until then, happy stampin'!


Stampin' Up! Supplies Used: 

Table built using Product Table Builder by The Crafty Owl - Independent Stampin' Up! Demonstrator.

Charming Landscapes Magic Is In The Air Christmas Pair AYSI 279

by Joanne James15. July 2022 12:00

Today I'm sharing my design team card for our new challenge over at As you See It where it's time for a colour challenge, with this week's colour palette chosen by me:
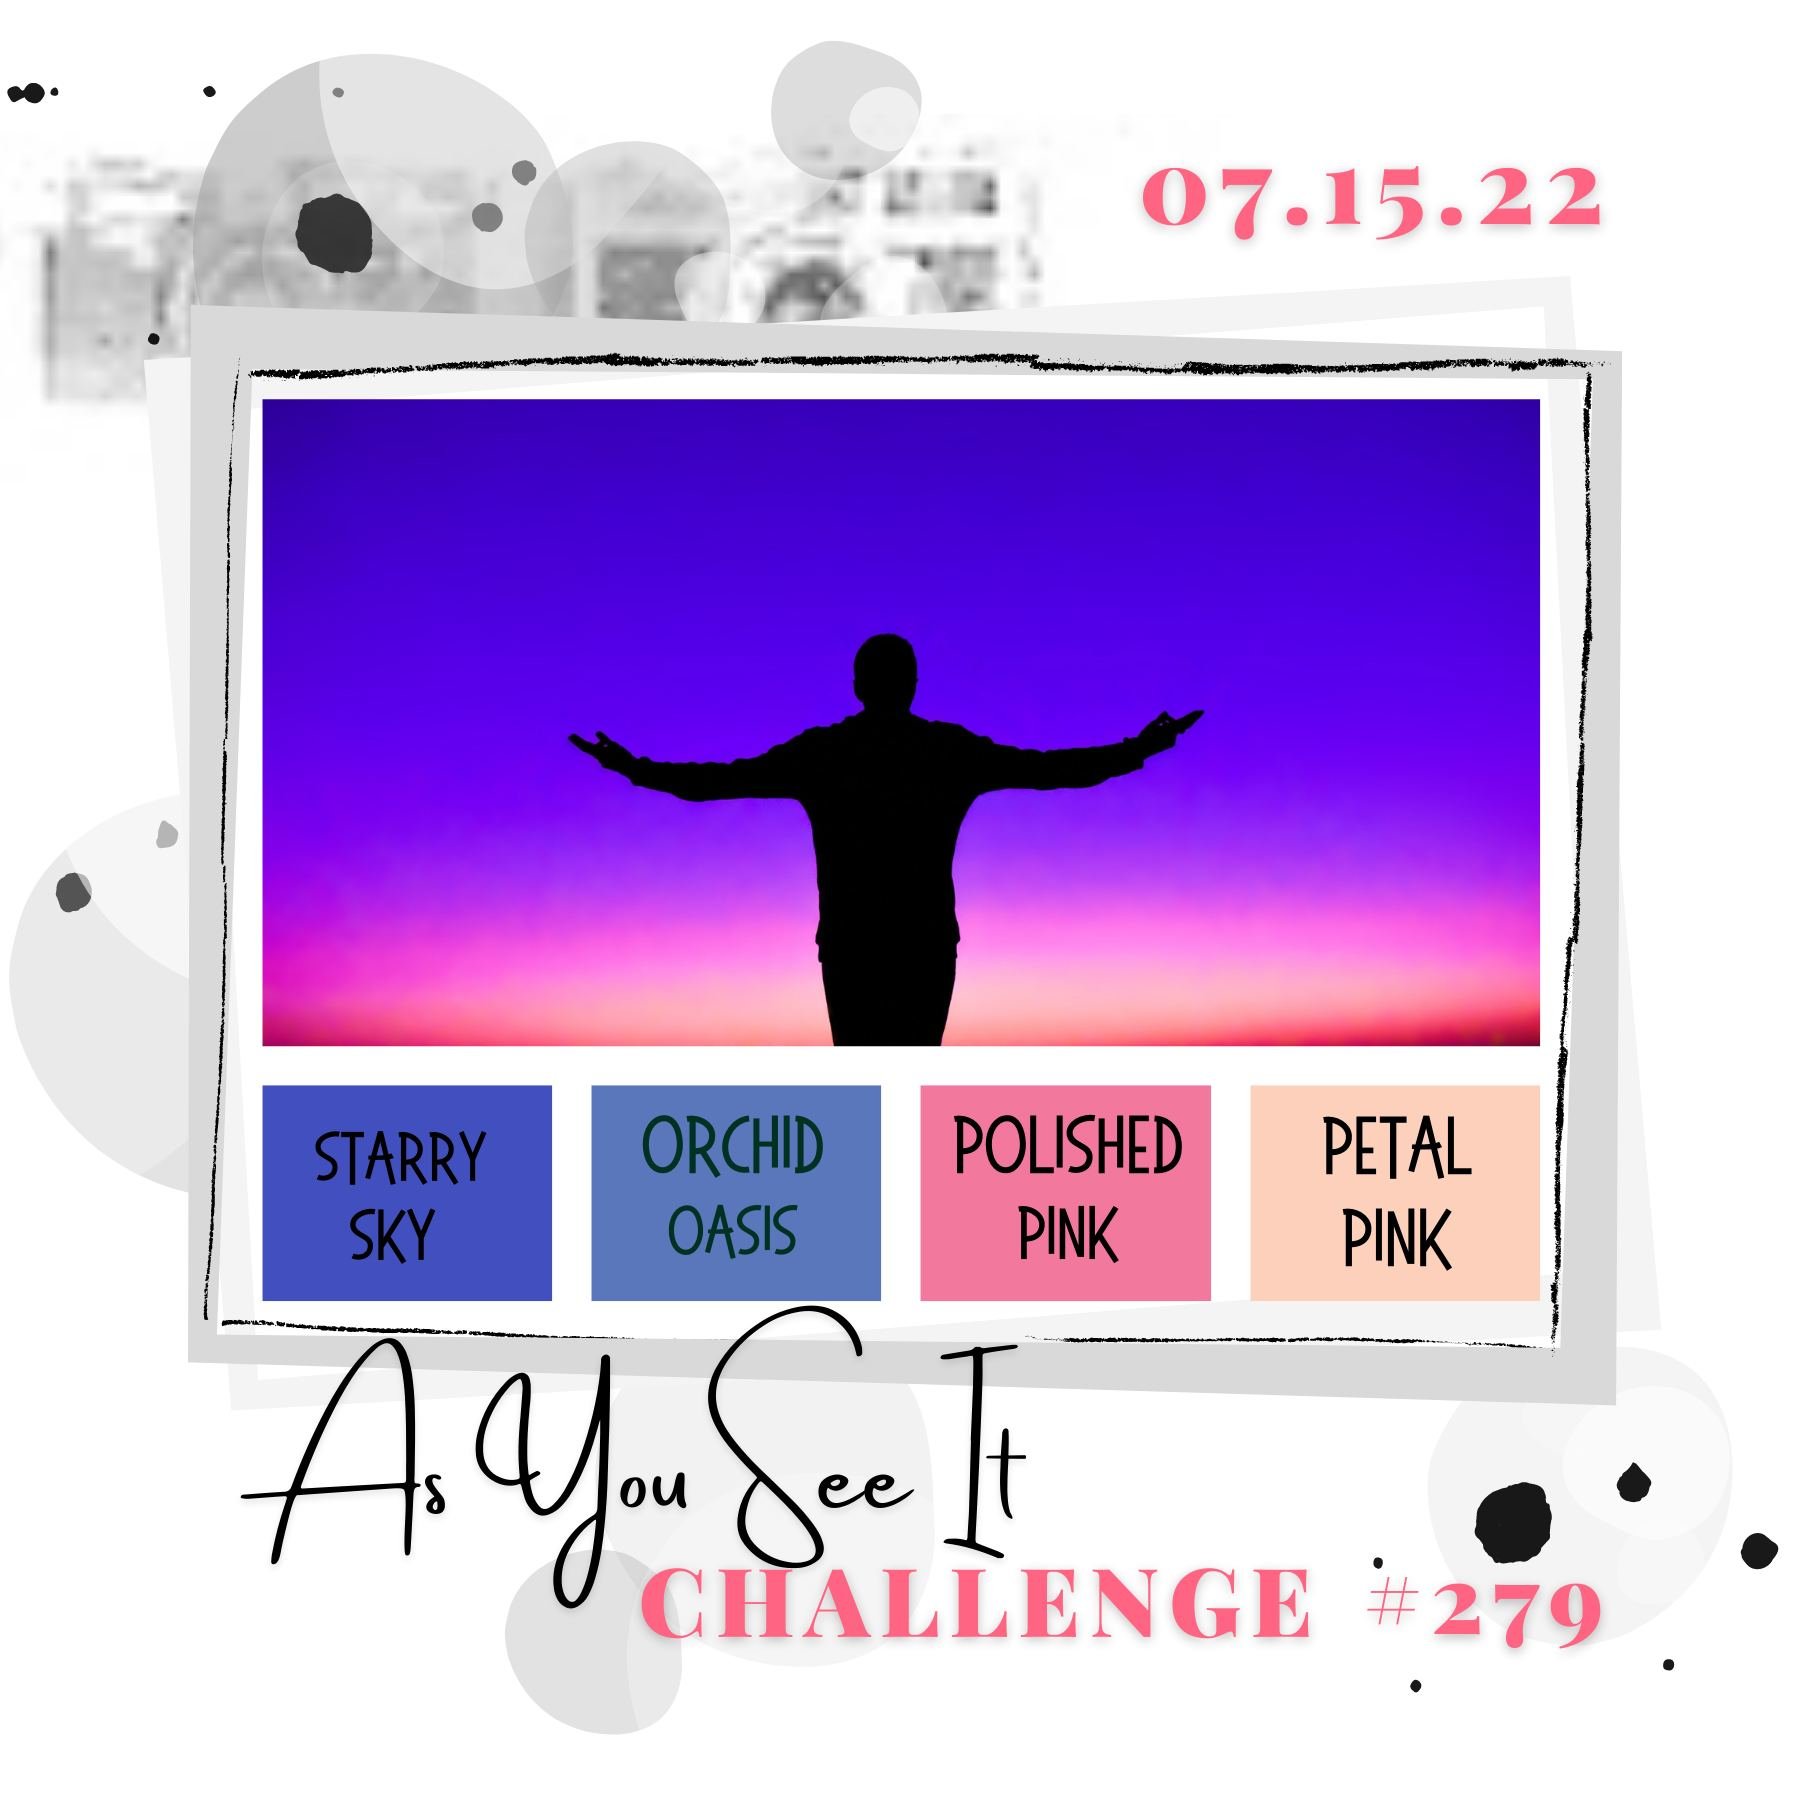
 

I loved the sky in the inspiration photo, so thought I would try and recreate it on a couple of Christmas cards. I grabbed my ink pads and blending brushes, along with some new embossing folders and this is what I came up with - take a look:
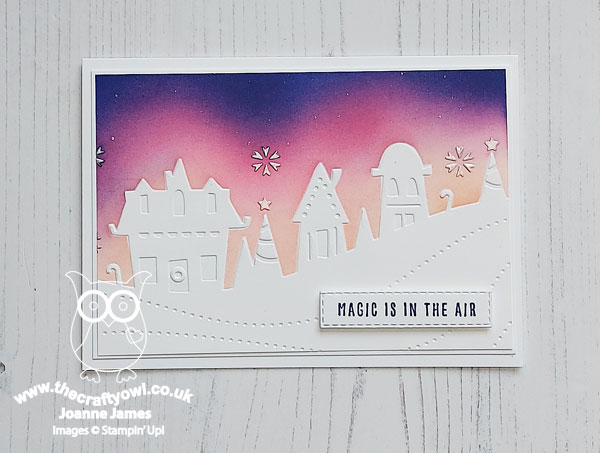
 

Here's the low-down on today's card:

Charming Landscapes - Both of today's cards feature a panel embossed with each of the new Charming Landscapes embossing folders. These folders are great for adding embossed background layers to your cards, but I wanted to pair them with a bold, blended sky and make them the main feature. One includes a mountain scene, the other a village scene - I couldn't decided which one to use so having started with the village scene, I decided to create a second one using the mountain scene too:
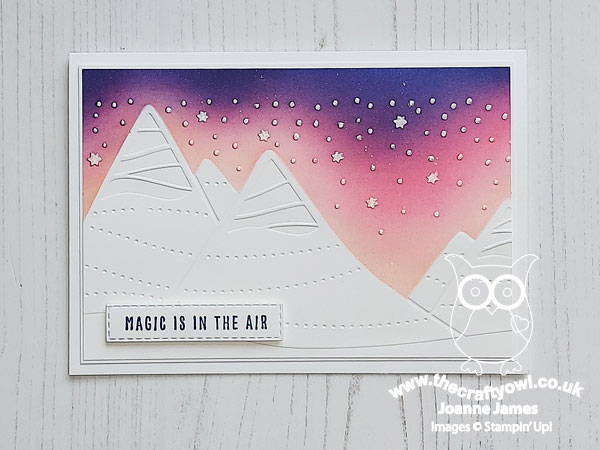
 

Blended Sky - I used all four of the challenge colours to create my blended sky, starting with the lightest colour pink then progressing to the darkest blues. To pick out the snowy/starry details of the embossing across the sky, I them too a dry aquapainter and painted each of the embossed elements with some (retired) Frost White shimmer paint; if you don't have any of this, you could use a white craft re-inker or even the new pearlised enamel effects on page 59 of the seasonal catalogue. This was a time-consuming process, but so worth it to pick out the detail. I also flicked the sky with my clear Wink of Stella pen for a subtle extra sparkle:
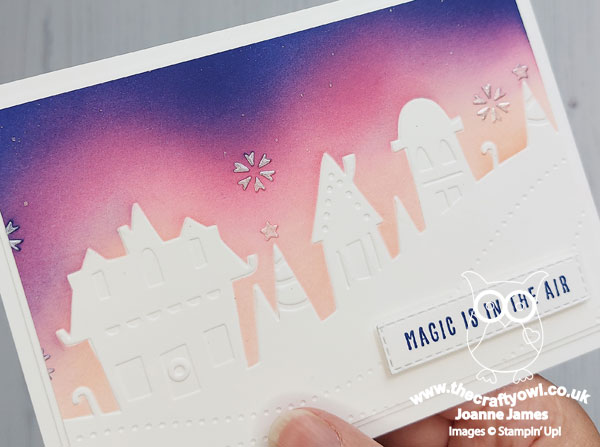
 

Aren't these skies just so pretty?
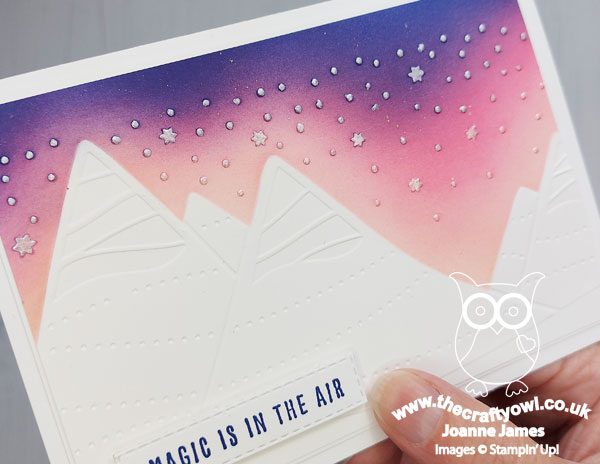
 

Masking Magic - In order to keep my blended colour to the sky portion of my scene only, I created masks for each embossing folder, by running it through my Big Shot with some acetate window sheet and using a scissors to cut around the mountains/houses. I attached each to my white embossed cardstock and held in place before adding my ink colours, then removed when complete. These can be easily cleaned and re-used, which is a good job; I like these cards so much I can't wait to create more using different colour combinations. I added a simple sentiment from the 'Christmas To Remember' stamp set and another to the inside of my card to finish. Here are both of my cards together - which one do you prefer?
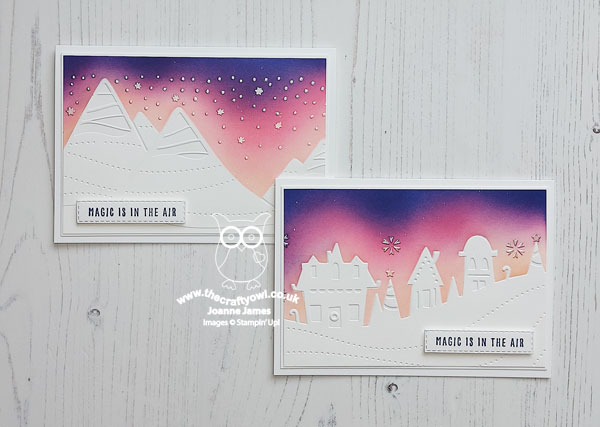
 

Do leave me a comment below - I'd love to hear your thoughts.

Here is the visual summaries of the key products used on today's projects for you to pin for easy reference:
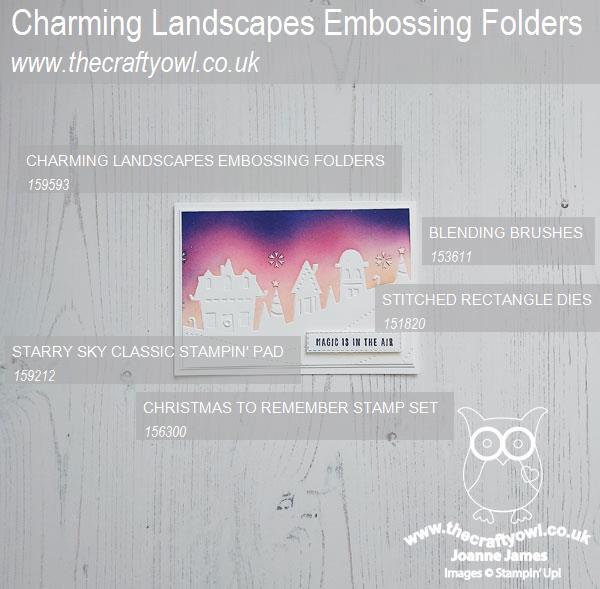
 

And the second one:
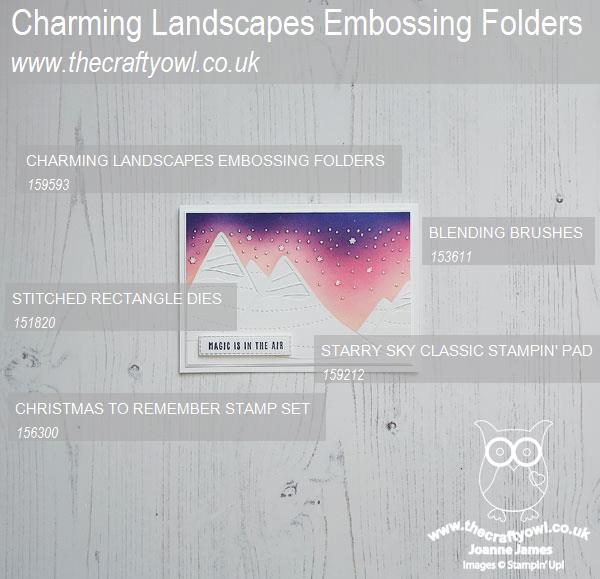
 

You can see all of my 'How To' summaries on my 'How To - Tips and Techniques' Pinterest board in case you've missed any. 

I was a little concerned that the team wouldn't take to my choice of colours this week, but I can honestly say they've outdone themselves - you should definitely check out their cards this week. 

Here's a summary of our challenge rules:

  • Create any card, scrapbooking page, 3D project or packaging project that fits the challenge.
  • Please include the challenge graphic and link back to the challenge in your blog post. Turn off word verification so we can leave you lots of lovely comments. Make sure you link the post not the whole blog to the Linky. Use #AYSIXXX when uploading to a public gallery.
  • If you’re unsure about ‘the rules’, check the details under the Challenge Guidelines tab on the As You See It Challenge homepage.
  • In a colour challenge, black or other neutral can be used in outlines and sentiments but no other colours should be included. Stampin’ Up colours are used for reference but colours that are a close match are welcome.
We look forward to seeing your creations in the AYSI gallery.

Enjoy your day and I'll be back tomorrow with another project. Until then, happy stampin'!


Stampin' Up! Supplies Used:
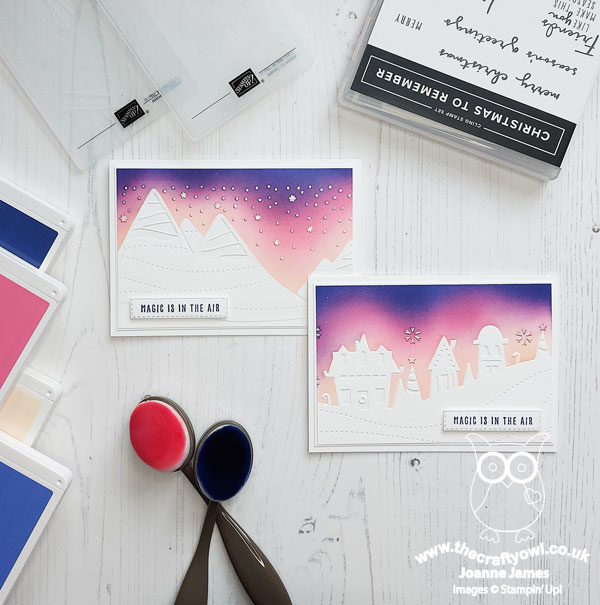
Table built using Product Table Builder by The Crafty Owl - Independent Stampin' Up! Demonstrator.

New Online Exclusives

There are new products available exclusively in the online store from 5 November - check them out here.

Latest Kits!

Stampin Cut and Emboss

The Layered Landscapes Kit and Nature's Paintings Kit are the latest kits in the online store - get yours here!

Shop Online

Access my online shop 24 x 7, 365 days of the year:

Current November hostess code:

9NKXDTTR

Shop Online

Mini Catalogue

BROWSE THE CATALOGUE

'Tis The Season - the new Stampin' Up! Mini Catalogue is here! For more details and to download your copy click here

Scrapbooking

Stampin' Up! has introduced a new range of 12x12" scrapbooking product and kit - the full range is now available to purchase online. To download a copy of the new digital Scrapbooking Catalogue click here.

2024-25 Annual Catalogue

BROWSE THE CATALOGUE

Click on the image to download your copy of the 2024-25 annual catalogue. For a full list of current SU! supplies, go to my online store. If you would like any help or advice, please drop me a line at joanne@thecraftyowl.co.uk or give me a call on 07773 421446 - I'd be happy to help.

Join My Team

It's always a great time to join Stampin’ Up! New team members can get £130 worth of products for only £99 + free business supplies + free shipping + all the fun being a part of Stampin’ Up! Stampin' Up! has something for everyone: join my growing team and benefit from my support to enjoy Stampin' Up! however you choose.

If you're interested, call me for a chat to understand how I can help you realise your goals. Alternatively, if you have already decided to sign up and you just can't wait, please click here for the link to the online form where you can sign up and order your starter kit right away! 

About Me

Hi I'm Joanne and live in Northampton and when I'm not looking after my husband and two beautiful children, am an avid crafter with a passion for all things Stampin' Up!

I must confess that I have never been a big rubber stamper - until I discovered Stampin' Up! that is. I love the fact that I can get such great results with co-ordinating stamps, inks, papers and punches - the possibilities are endless! Join me on my stamping journey as I share the things I love and be inspired to create amazing things yourself!

Follow Me

Monthly Newsletter

Box Builder

Click the button above to use Box Buster to create your custom box design using the Envelope Punch Board!

Kits Collection Now Available!

Stampin Cut and Emboss

The new Kits Collection from Stampin' Up! is now available!

Click here to see the current kits available and order yours online today.

I Design For


Stampin' Up Stuff

This is my personal blog and is not endorsed by Stampin’ Up! I hope you find it a plentiful source of ideas and personal inspiration but please don't copy my designs for contest submission or use for classes, publication or sale without express permission.