Today it's Sunday and time for this week's new challenge over at The Paper Players! It's the turn of the amazing Claire to host this week and she has a seasonal theme challenge for you to work with:

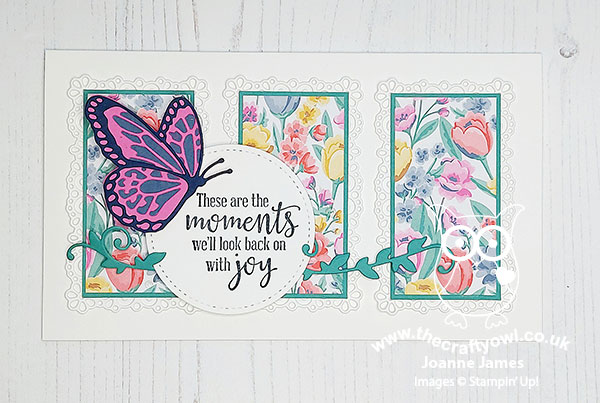
Whilst it has been a little chillier again here in the UK this week, there are still so many wonderful signs that spring is in the air. The daffodils are starting to open, the first lambs have been born on a neighbouring farm so today's card is full of spring colour - take a look:
Here's the low-down on today's card:
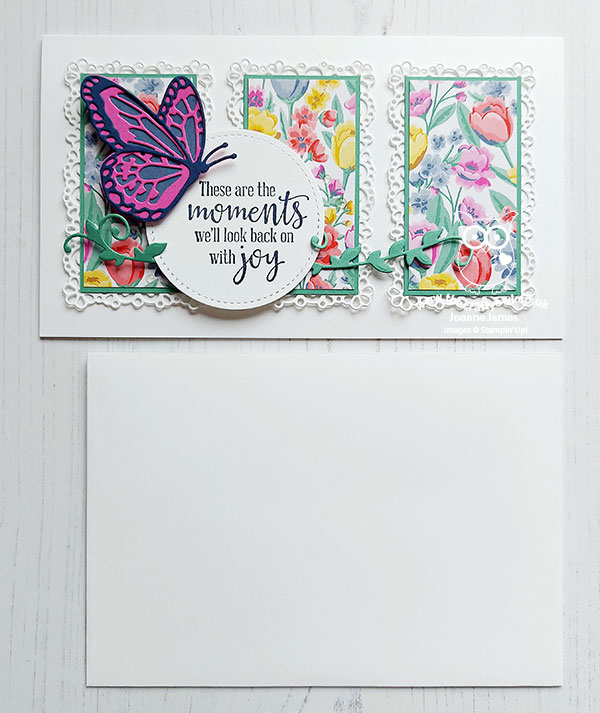
Flowers For Every Season - I decided that for today's card I wanted to see an injection of spring colour, so reached for the Flowers For Every Season designer paper pack. This pack contains some very bold, bright florals and the one I chose, with its tulips amongst other flowers, is just perfect for spring. I used the three panel layout over at Paper Craft Crew so that the pattern didn't become too overwhelming, and backed each one with a thin border of Just Jade and a fancy frame diecut with the Ornate Layers Dies in Whisper White.
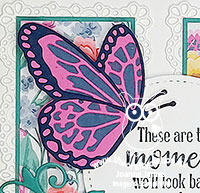
Butterfly Beauty - I chose a sentiment that I thought reflects the optimism that comes with the spring season, and embellished it with a layered butterfly cut using the Butterfly Beauty dies (I snipped this one away from the larger die):
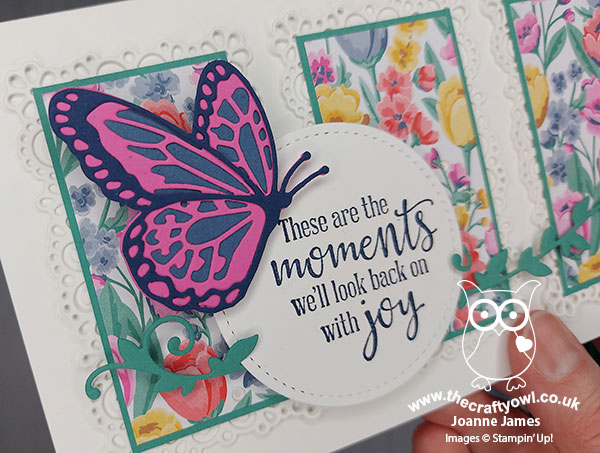
I also used another of the dies in the same set to create my horizontal pieces of greenery.
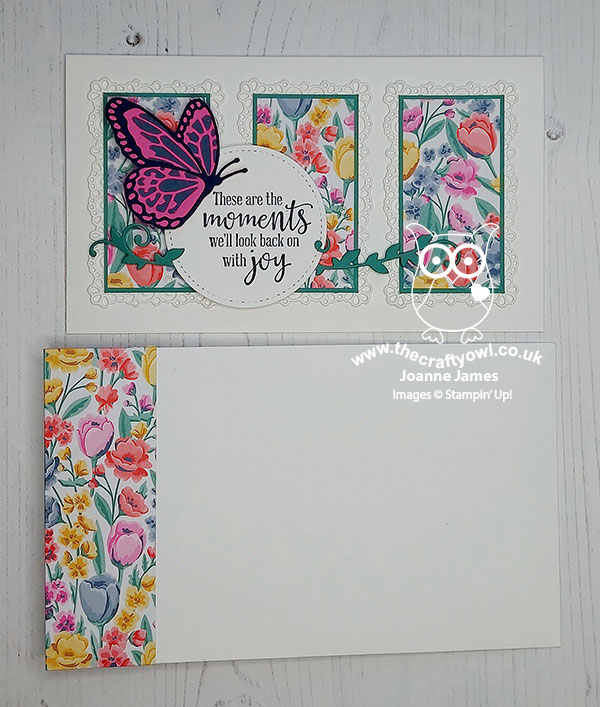
Elongated Envelope - In order to comfortably accommodate my three panels, I made my card slightly longer than a standard card front (it measures 18cm instead of 14.9cm). The photo below shows the difference in sizes:
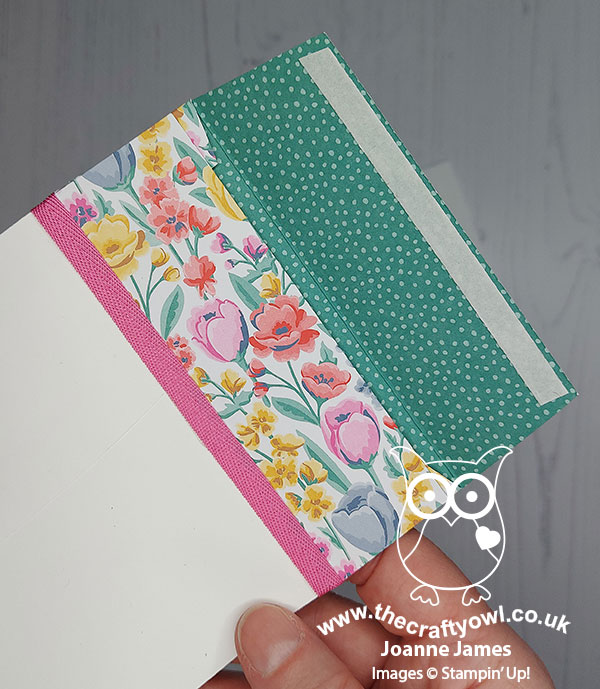
This meant I needed to create a custom envelope. Rather than start from scratch though, I thought I'd share with you a quick trick that you can use to convert a standard envelope to fit a larger card. All you need to do is glue the envelope closed, then slice off the end on the short side and add some some designer paper to create a new closure:
It's really straightforward: Take two strips of coordinating DSP, one measuring 4cm x 30.5cm (1 1/2" x 6") and one 4cm x 10.5cm and attach the longer one to the cut edge of the front of the envelope, with an even overhang top and bottom. Measure 18cm from the end of the envelope and score a line along your DSP, cut away the corners to create your flap then flip your envelope over to the reverse. Fold over the overhangs and glue those in place then align the shorter piece across the back of the envelope and glue to the base. Add tear and tape to the envelope flap and you're done. Here's a photo of the reverse of the envelope extension which hopefully makes some sense of my instructions above:
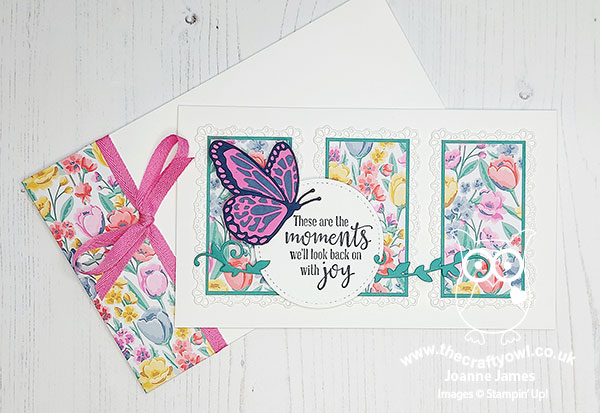
I also added some Magenta Madness ribbon to cover my seam as my card will be hand delvered rather than posted - you can always leave this off if you need to be able to post your card.
What do you think? I hope you found the envelope instructions useful and you like my card full of spring colour and flowers. I'm also linking up today over at SUO Challenges, where the theme is 'things that fly' - I think my butterfly qualifies on that front!
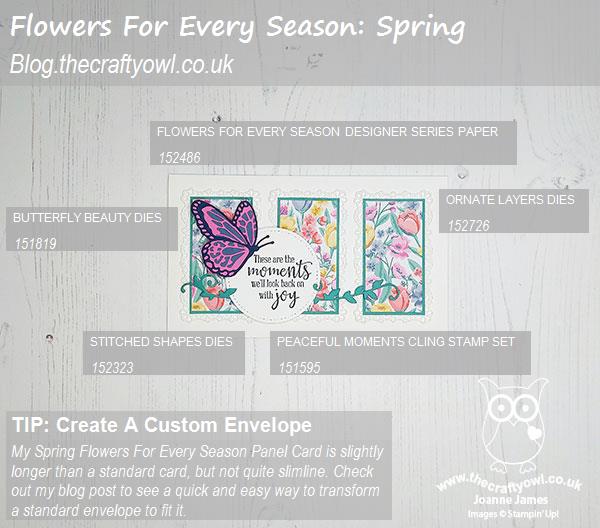
Here is the visual summary of the key products used on today's project for you to pin for easy reference:
You can see all of my Product and 'How To' summaries on my 'How To - Tips and Techniques' Pinterest board in case you've missed any.
Before you reach for your ink and papers, check out what our amazing team has created to inspire you this week:
The Paper Players Design Team
Here's a quick recap of our challenge rules:
1. Create a new paper project
2. Upload your creation to your blog with a link back to us and provide a direct link to the post featuring your challenge submission.
3. Please link your card to no more than four challenges, TOTAL.
4. Have FUN!
You can see all of my 'How To' summaries on my 'How To - Tips and Techniques' Pinterest board in case you've missed any.
Enjoy your day; I am hoping to spend some time in the garden today and will be making the most of my last day at home with the James Juniors before they head back to school next week on Monday and Tuesday respectively. I'll be back tomorrow with another project. Until then, happy stampin'!
Stampin' Up! Supplies Used: